
Related Manuals for Insignia NS-STVGN555


Summary of Contents for Insignia NS-STVGN555
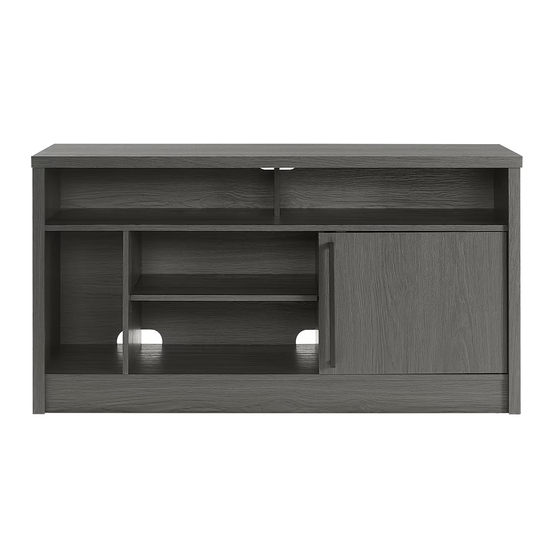
- Page 1 ASSEMBLY GUIDE 47.5 in. TV Stand with Gaming Nook NS-STVGN555 Before using your new product, please read these instructions to prevent any damage.
-
Page 2: Table Of Contents
Contents IMPORTANT SAFEGUARDS ................3 Features . -
Page 3: Important Safeguards
47.5 in. TV Stand with Gaming Nook IMPORTANT SAFEGUARDS WARNING Some steps are more easily handled with two adults. CAUTION The top surface of this TV stand is designed for use with a product weighing no more than 70 lbs. (31.75 kg) and having a width that permits it to sit evenly on the TV stand with no more than a one-inch overhang on each side of the shelf. -
Page 4: Features
Features • 47.5 in. (120.6 cm) tabletop holds most TVs up to 55 in. (139.7 cm) and 70 lbs. (31.75 kg) • Multiple storage spaces accommodate your DVD player, gaming console, cable box and more • Cabinet with door keeps spare accessories out of sight •... -
Page 5: Package Contents
47.5 in. TV Stand with Gaming Nook Package contents Parts A Top panel (1) B Media shelf (1) C Bottom panel (1) Note: Keep the stopper template attached. D Skirting board (2) E Left side panel (1) F Right side panel (1) G Left partition (1) H Right partition (1) I Upper partition (1) -
Page 6: Hardware
Hardware LABEL TV STAND PART QTY. LABEL TV STAND PART QTY. Wood dowel M8 x 30 mm Flat head screw M3.5 x 12 mm Pan head screw Cam pin M3 x 15 mm Cam lock Magnetic catch Shelf pin Washer head screw M3.5 x 15 mm Pan head screw M4 x 50 mm 5/32”... -
Page 7: Tools Needed (Not Provided)
47.5 in. TV Stand with Gaming Nook Tools needed (not provided) For assembling the TV stand: Phillips screwdriver Rubber mallet Pliers For installing the tipping restraint: Phillips screwdriver 1/8” drill bit Edge-to-edge stud finder Power drill Note: DO NOT USE power tools unless it is explicitly identified in this manual as required for use during assembly. Power tools can damage the fasteners, hardware and/or components. -
Page 8: Assembling Your Tv Stand
Assembling your TV stand Tip: Assemble your TV stand on a carpeted floor or the empty TV stand carton to avoid scratching it. Note: Do not fully tighten all bolts until you finish assembling all of the parts. After assembly, go back and fully tighten all bolts. - Page 9 47.5 in. TV Stand with Gaming Nook STEP 2: Preparing the media shelf and bottom panel (continued) You need: C Bottom panel (1) B Media shelf (1) P Wood dowel (8) EE Glue (1) • Glue wood dowels (P) into the drilled inner holes on the ends of the panels (B and C). CORRECT INCORRECT www.insigniaproducts.com...
- Page 10 STEP 3: Installing the magnetic catch on the media shelf You need: AA Magnetic catch (1) B Media shelf (1) Z M3 x 15 mm screw (2) Phillips screwdriver • Align and attach the magnetic catch (AA) to the media shelf (B) using two M3 x 15 mm screws (Z) with the Phillips screwdriver.
- Page 11 47.5 in. TV Stand with Gaming Nook STEP 4: Preparing the partitions You need: G Left partition (1) H Right partition (1) P Wood dowel (8) EE Glue (1) • Glue the wood dowels (P) into the inner holes pre-drilled on both ends of the partitions (G and H). CORRECT INCORRECT www.insigniaproducts.com...
- Page 12 STEP 5: Installing the right partition to the media shelf You need: B Media shelf (1) H Right partition (1) R Cam lock (2) Phillips screwdriver • Align and attach the right partition (H) to the media shelf (B) by engaging and tightening two cam locks (R) with a Phillips screwdriver.
- Page 13 47.5 in. TV Stand with Gaming Nook STEP 6: Installing the left partition to the media shelf You need: B Media shelf (1) G Left partition (1) R Cam lock (2) Phillips screwdriver • Align and attach the left partition (G) to the media shelf (B) by engaging and tightening two cam locks (R) with a Phillips screwdriver.
- Page 14 STEP 7: Attaching the bottom panel to the partitions You need: T M4 x 50 mm screw (4) C Bottom panel (1) Phillips screwdriver • Align and attach the bottom panel (C) to both partitions (G and H) with four M4 x 50 mm screws (T) using a Phillips screwdriver.
- Page 15 47.5 in. TV Stand with Gaming Nook STEP 8: Preparing the side panels You need: E Left side panel (1) F Right side panel (1) Q Cam pins (12) Phillips screwdriver • Securely screw the cam pins (Q) into the indicated holes in the side panels (E and F) using a Phillips screwdriver. www.insigniaproducts.com...
- Page 16 STEP 9: Preparing the skirting boards and side panels You need: E Left side panel (1) F Right side panel (1) P Wood dowel (12) EE Glue (1) D Skirting board (2) • Glue wood dowels (P) into the inner holes drilled in the ends of both skirting boards (D) and side panels (E and F). CORRECT INCORRECT www.insigniaproducts.com...
- Page 17 47.5 in. TV Stand with Gaming Nook STEP 10: Installing the skirting boards on the bottom panel You need: D Skirting board (2) R Cam lock (6) Phillips screwdriver • Align and attach both skirting boards (D) to the bottom panel (C) by engaging six cam locks (R) using a Phillips screwdriver.
- Page 18 STEP 11: Installing the side panels on the unit You need: E Left side panel (1) F Right side panel (1) R Cam lock (12) Phillips screwdriver • Align and attach both side panels (E and F) to the previously assembled unit by engaging twelve cam locks (R) using a Phillips screwdriver.
- Page 19 47.5 in. TV Stand with Gaming Nook STEP 12: Preparing the top panel and media shelf assembly You need: Q Cam pin (8) Phillips screwdriver A Top panel (1) 1 With assistance, turn the unit upright and position it near the final desired location. 2 Securely screw cam pins (Q) into the indicated holes in the top panel (A) and media shelf (B), using a Phillips screwdriver.
- Page 20 STEP 13: Preparing the upper partition You need: I Upper partition (1) P Wood dowel (4) EE Glue (1) • Glue two wood dowels (P) into the pre-drilled inner holes in both ends of the upper partition (I). CORRECT INCORRECT www.insigniaproducts.com...
- Page 21 47.5 in. TV Stand with Gaming Nook STEP 14: Attaching the upper partition to the media shelf You need: I Upper partition (1) R Cam lock (2) Phillips screwdriver • Align and attach the upper partition (I) to the media shelf (B) by engaging two cam locks (R) with a Phillips screwdriver. www.insigniaproducts.com...
-
Page 22: Step 15: Installing The Back Panel
STEP 15: Installing the back panel You need: M Back panel (1) • Unfold the back panel (M) and slide it into the grooves on both side panels (E and F) until the bottom edge is fully inserted into the bottom panel (C). Make sure that the two cutouts on the back panel align with the partition panels (G and H) so that the openings are accessible from both sides of the panels. -
Page 23: Step 16: Installing The Top Panel
47.5 in. TV Stand with Gaming Nook STEP 16: Installing the top panel You need: A Top panel (1) R Cam lock (6) Phillips screwdriver • Align and attach the top panel (A) to both side panels (E and F) and the upper partition (I) with six cam locks (R), using a Phillips screwdriver. - Page 24 STEP 17: Fastening the back panel to the media shelf You need: Phillips screwdriver S M3.5 x 15 mm screw (4) • Insert four M3.5 x 15 mm screws (S) through the holes in the back panel (M) and secure it to the media shelf (B) with a Phillips screwdriver.
- Page 25 47.5 in. TV Stand with Gaming Nook STEP 18: Fastening the back panel to the assembled unit You need: Phillips screwdriver W M3 x 17 mm screw (10) V Plastic holders (10) 1 Insert ten plastic holders (V) evenly into the gaps between the back panel (M) and the panels (A, C, E, and F) as indicated in the illustration.
- Page 26 STEP 19: Installing the metal strike plate and handle to the door You need: L Door (1) X Strike plate (1) Y M3.5 x 12 mm screw (2) N Handle (1) CC 5/32” x 22mm bolt (2) Phillips screwdriver 1 Using the pilot holes in the door as a guide, fasten the strike plate (X) to the door (L) with two M3.5 x 12 mm screws (Y), using a Phillips screwdriver.
-
Page 27: Step 20: Installing The Door
47.5 in. TV Stand with Gaming Nook STEP 20: Installing the door You need: L Door (1) 1 Tilt and slip the non-removable pin on the top of door (L) into the metal bracket on the bottom of the media shelf (B). 2 Push the release lever on the inside bottom of the door all the way up so that the pin is retracted and flush with the bottom edge of the door (L). - Page 28 STEP 21: Installing the adjustable shelves You need: BB Shelf pins (8) K Right adjustable shelf (1) J Left adjustable shelf (1) 1 Insert four shelf pins (BB) into the holes in the partitions at the desired height inside the bottom middle and right compartments.
- Page 29 47.5 in. TV Stand with Gaming Nook STEP 22: Installing the cam lock covers and adjusting the magnetic catch You need: AA Magnetic catch (1) Phillips screwdriver U Cam lock cover (20) 1 Install the cam lock covers (U) by placing them onto the visible cam locks to conceal them. 2 Loosen the screws holding the magnetic catch (AA) and adjust the catch so that it holds the door closed properly, then tighten the screws.
- Page 30 STEP 23: Attaching the stopper to the top panel You need: DD Acrylic stopper (2) Pliers If you place your TV on top of your TV stand, you must follow these instructions to prevent your TV from tipping. Otherwise, skip to STEP 24: Positioning the TV stand and installing the tipping restraints on page 31. If your TV has one leg 1 Remove the paper backing from the bottom of the stopper (DD), then place it in the stopper cut-out of the template on the top panel (A).
- Page 31 47.5 in. TV Stand with Gaming Nook STEP 24: Positioning the TV stand and installing the tipping restraints You need: GG Tipping restraint (2) Phillips screwdriver 1/8” drill bit Edge-to-edge stud finder Power drill 1 Position the assembled TV stand against the wall where you plan to use it. 2 Adjust the leveling feet to level the TV stand.
-
Page 32: Maintaining Your Tv Stand
Maintaining your TV stand Wood/Laminate • Use your favorite type of furniture polish. • Do not spray polish directly onto the TV stand. Spray onto a soft cloth, then wipe the TV stand. • Always test any polish in a discrete location first, such as the back of the TV stand, to make sure that there is no adverse reaction. -
Page 33: One-Year Limited Warranty
During the Warranty Period, if the original manufacture of the material or workmanship of the Product is determined to be defective by an authorized Insignia repair center or store personnel, Insignia will (at its sole option): (1) repair the Product with new or rebuilt parts; or (2) replace the Product at no charge with new or rebuilt comparable products or parts. - Page 34 1-877-467-4289 (U.S. and Canada) or 01-800-926-3000 (Mexico) INSIGNIA is a trademark of Best Buy and its affiliated companies. Distributed by Best Buy Purchasing, LLC 7601 Penn Ave South, Richfield, MN 55423 U.S.A. V2 ENGLISH ©2024 Best Buy. All rights reserved.
Need help?
Do you have a question about the NS-STVGN555 and is the answer not in the manual?
Questions and answers
Are the cam screws (R) removable? I need to remove a few to fix a panel that I installed backwards, but they won't loosen.
Yes, the cam screws (cam pins) on the Insignia NS-STVGN555 are removable. They are threaded on one end, meaning they can be unscrewed from their position if needed.
This answer is automatically generated