Advertisement
Quick Links
Advertisement

Subscribe to Our Youtube Channel
Related Manuals for Showven SPARKULAR II


Summary of Contents for Showven SPARKULAR II
- Page 1 USER MANUAL SPARKULAR ® V1.0 2022/07/28 Showven Technologies Co., Ltd.
- Page 3 ® Thanks for choosing SPARKULAR II , we wish it will sparks up your show. Please read the following manual carefully before operating this product. Safety Instructions Δ Unauthorized repair are prohibited, it may cause serious incident. ® Keep SPARKULAR II dry.
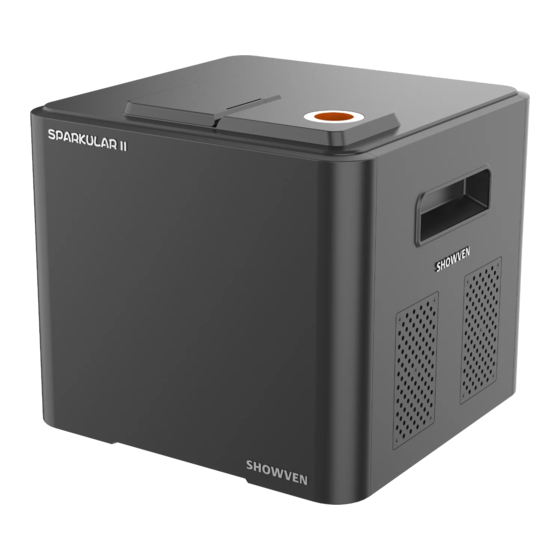
- Page 4 Description Δ SPARKULAR® II is a brand new upgrade based on patented SPARKULAR® platform combined with our experience, latest technologies and valuable feedbacks from our customers. Comparing with the first version of SPARKULAR® , SPARKULAR® II with effect up to 6m, much lower noisy, more powerful feeding structure and real time motor status monitoring ensure less stuck and safer firing.
- Page 5 Structure of SPARKULAR ® Δ 1. Output Nozzle 2. Feeding Hopper Lid 3. LCD Screen 4. 3-PIN DMX IN 5. 3-PIN DMX OUT 6. 5-PIN DMX IN 7. 5-PIN DMX OUT 8. Fuse 9. Power Switch 10. Power IN 11. Power OUT Diagram of Bottom Panel...
- Page 6 Operation Panel Δ 1. Keypad area: MENU: Press enter setting interface Parameter up DOWN: Parameter down MONI: Status monitoring of main part inside machine 2. RFID area: RFID card come with consumable HC8200 bags, swiping card to identify parameters and types of granules.
- Page 7 Display Interface Δ 1. Main Interface: Background color of DMX area: red means DMX connected. Background color of TEMP area: red means heating chamber temp. reached setting temp. machine is ready for firing. Indicator light status on power switch: flash means machine is heating up, long on means machine is ready for firing.
- Page 8 3. Menu Press “MENU” enter setup menu. MAIN: main menu ADVANCED: advanced menu FACTORY: factory menu (for manufacturer use only). BACK: back to main interface LEFT: switch to left option RIGHT: switch to right option EDIT: edit the selected item 4.
- Page 9 *For better performance of SPARKULAR II, please don’t change the default value without ® permission from SHOWVEN 6. Monitor Interface Show the parameters of motor etc. main part inside machine. If there is any error it will show on main interface.
-
Page 10: Emergency Stop
7. DMX Channel Mode 2CH-N mode. First Channel Function 0-15 Fountain Off Fountain Height 1 16-39 Fountain Height 2 40-63 Fountain Height 3 64-87 Fountain Height 4 88-111 Fountain Height 5 112-135 136-159 Fountain Height 6 Fountain Height 7 160-183 Fountain Height 8 184-207 Fountain Height 9... - Page 11 8. Wireless Control Mode: When use remote controller, please disconnect DMX cable connection, set machine to Wireless Control ON status. Match machine with remote controller by Press “A” on remote controller when machine at Wireless Control interface. A: OFF / SET, Firing OFF, SET means match machine with remote controller. B: High Effect C: Low Effect D: Clear Material.
- Page 12 ® d) Power ON all SPARKULAR ® e) Assign DMX address for each unit of SPARKULAR II. If use SHOWVEN host controller or FXcommander to control the machine please allocate a unique DMX address for each unit of machine. ®...
- Page 13 b) Heating up, it takes around 5min, it varies according to the voltage and environment temperature. c) Make sure the prescribed safety zone is clear. d) Suggest to clear material before firing. e) Firing. In order to prevent overheat in the heating chamber and protect machine, the ®...
- Page 14 (except for the instrument damage caused by human factors) in warranty period. Please don't repair machine without factory permission Below situations NOT included in warranty service: ® Damage caused by use other type of consumable which is not from SHOWVEN ® SHOWVEN authorized distributor.
- Page 16 Showven Technologies Co., Ltd. Tel: +86-731-83833068 Web: www.showven.cn E-mail: info@showven.cn Add: No.1 Tengda Road, Liuyang Economic & Technical Development Zone, 410300, Changsha, Hunan, P.R.China...
Need help?
Do you have a question about the SPARKULAR II and is the answer not in the manual?
Questions and answers