
Related Manuals for Qualitrol INFORMA PMD-A


Summary of Contents for Qualitrol INFORMA PMD-A
- Page 1 User Manual INFORMA PMD-A Data Acquisition Unit Document ID: 40-08557-01 www.qualitrolcorp.com...
- Page 2 ® or implied, is provided. QUALITROL disclaims any responsibility or liability for any direct or indirect damages resulting from the use of the information in this manual or products described in it. Mention of any product or brand does not ®...
- Page 3 Certificate Note Please contact Qualitrol for detailed test report for Class A certification. www.qualitrolcorp.com...
-
Page 4: Table Of Contents
Physical Details ...................13 3.4. Front Panel Description ................14 3.5. Rear Panel Description ................16 3.5.1. Rear Panel of the INFORMA PMD-A 3U Device ..........16 3.5.2. Rear Panel of the INFORMA PMD-A 6U Device ..........17 3.6. Standard MMI ....................18 3.6.1. - Page 5 7.2.1. Storage......................122 7.2.2. Transport......................122 7.2.3. Routine Maintenance ..................122 7.2.4. UPS Maintenance ..................... 123 7.3. Firmware Upgrade ..................124 7.3.1. INFORMA PMD-A Firmware Upgrade Procedure ........... 124 7.3.2. During File Upload to INFORMA PMD-A ............129 Contents ii www.qualitrolcorp.com...
- Page 6 Appendix D – License Updates ..............193 Modifying an Existing License................194 Appendix E – Battery Replacement Procedure ........198 Battery Replacement Procedure for an INFORMA PMD-A 3U Device....198 Appendix F – On-Board LED Functionalities........... 200 Appendix F – On-Board LED Functionalities........... 201 LED Functions on the Motherboard ..............201...
- Page 7 Contents References ....................240 Contents iv www.qualitrolcorp.com...
- Page 8 About This Manual Chapter 1 About This Manual www.qualitrolcorp.com...
-
Page 9: About This Manual
About This Manual About This Manual The manual assumes that the user has minimum operational knowledge of this type of monitoring equipment. This manual provides instructions to help the user to: • Install the device and connect its accessories. • Configure the device. -
Page 10: Abbreviations And Acronyms
About This Manual 1.2. Abbreviations and Acronyms The following table lists the various abbreviations and acronyms used in this manual. INFORMA PMD-A Data Acquisition Unit Name Alternating Current American Wire Gauge Binary Coded Decimal Control Function CPU/Motherboard Processor Card Clear To Send... -
Page 11: Standards And References
About This Manual INFORMA PMD-A Data Acquisition Unit Name Time Of the Day TX-AFE Transformer - Analog Front End Uninterrupted Power Supply R.M.S. voltage refreshed each half-cycle. rms (1/2) WEEE Waste Electrical and Electronic Equipment 1.3. Standards and References The following table lists the different standards followed in this document. - Page 12 Overview Chapter 2 Overview www.qualitrolcorp.com...
-
Page 13: Overview Of Informa Pmd-A
Refer to Appendix B for details about INFORMA PMD-A functions. 2.1. INFORMA PMD-A License The INFORMA PMD-A device is a licensed product. Consequently, some features of this multifunctional device may not be available as described in this manual. Additional licenses may be purchased to activate the required functionalities. -
Page 14: Customer Helpline Information
Refer the equipment to the authorized service personnel if any damage or defect is found. 2.3. Customer Helpline Information For any customer or technical support, contact: Qualitrol Corporation-Instrumentation Division 15 Wildflower Way, Belfast, BT12 6TA, Northern Ireland Telephone: +44 28 9022 5200... - Page 15 Components and Specifications Chapter 3 Components and Specifications www.qualitrolcorp.com...
-
Page 16: Components And Specifications
Components and Specifications Components and Specifications This chapter describes the different components of the INFORMA PMD-A device and its specifications. 3.1. Environmental Requirements The following table lists the environmental requirements for the device. Parameters Requirements Operating Temperature -5°C to +50°C (irrespective of the UPS... -
Page 17: Ups
3.2.2. UPS The UPS card provides power supply to the INFORMA PMD-A device for a minimum of 15 minutes. In normal operating conditions, the user can expect battery backup for 30 minutes with a new and fully charged battery. The battery must be charged for 12 hours to provide a minimum backup of 15 minutes. - Page 18 Components and Specifications The following table describes the details of the two batteries that are used in the INFORMA PMD-A device. Details 4S2P5SWB-SB NH2054 Manufacturer Rajamane Telectric INSPIRED ENERGY, Inc. Private Limited Part Number/Reference 4S2P5SWB-SB-002 NH2054HD24 Battery Specifications 3.9 Ah with 0.5 C Rated Capacity (minimum) 4.8 Ah Charging and 0.5 C...
-
Page 19: Vdc External Power Supply
Components and Specifications The Rajamane battery is the default battery. The Qualitrol reference number for this battery is 3601-0087. Note Refer to Section 7.2.5 for further information about UPS maintenance. 3.2.3. +12 VDC External Power Supply TB2 provides an auxiliary DC output for external devices. -
Page 20: Physical Details
Components and Specifications 3.3. Physical Details The following table provides the mechanical dimensions for the INFORMA PMD-A 3U and INFORMA PMD-A 6U devices. Devices Physical Net Weight Gross Weight Dimensions (Approx.) (Approx.) • • INFORMA 487 mm wide, 132.5 15 kg without... -
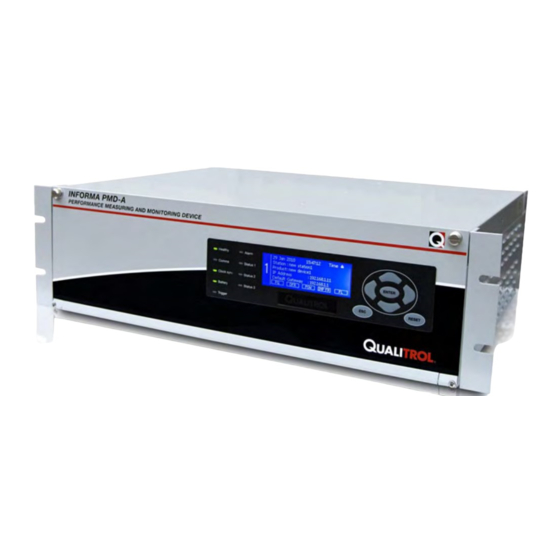
Page 21: Front Panel Description
This section provides a description of the different components on the front panel of the INFORMA PMD-A 3U and INFORMA PMD-A 6U devices. The following table lists the labels for the front panel of the INFORMA PMD-A 3U and INFORMA PMD-A 6U devices. - Page 22 Components and Specifications A picture of the front panel of the INFORMA PMD-A 6U device is shown below. Figure 3.4 – INFORMA PMD-A 6U Front View www.qualitrolcorp.com...
-
Page 23: Rear Panel Description
A picture of the rear panel of INFORMA PMD-A 3U device is shown below. Figure 3.5 – INFORMA PMD-A 3U Rear View The following table lists the different components on the rear panel of the INFORMA PMD-A 3U device. Label... -
Page 24: Rear Panel Of The Informa Pmd-A 6U Device
A picture of the rear panel of INFORMA PMD-A 6U device is shown below. Figure 3.6 – INFORMA PMD-A 6U Rear View The following table lists the different components on the rear panel of the INFORMA PMD-A 6U device. Label... -
Page 25: Standard Mmi
MMI operates in the following modes: • 2 CPU mode (INFORMA PMD-A 6U device) • 1 CPU mode with LCD (INFORMA PMD-A 3U device/INFORMA PMD-A 6U device) • 1 CPU mode without LCD (INFORMA PMD-A 3U device) Refer to Appendix F for MMI CPU modes. - Page 26 Components and Specifications MMI communicates with CPU to obtain the status and other information. The Overview screen on the LCD reflects the status of the device. Using the left or right arrow key, the user can view detailed information of the device. The following flowchart illustrates the MMI LCD navigation.
-
Page 27: Mmi Overview Screen
Components and Specifications 3.6.3. MMI Overview Screen The default screen displayed on the LCD interface is the Overview screen of the device. It shows the CPU's overview status. The following screen is displayed if there are two CPUs. To display details about CPU 1, the user must press the left arrow key, and for details about CPU 2, the user must press the right arrow key. -
Page 28: Cpu Overview Screen
Components and Specifications Icons Description Indicates that the status is unhealthy. Indicates that the clock is locked. Any number next to this icon represents the number of times the clock has been locked since the device was switched on (refer to Figure 3.11). -
Page 29: Cpu Main Menu Screen
Components and Specifications 3.6.5. CPU Main Menu Screen If the enter key is pressed on the CPU Overview screen, the CPU Main Menu screen is displayed. The Main menu displays the following options. The user can use the up and down arrow keys to scroll through the options. - Page 30 Components and Specifications Alarms/Logs – This menu provides the options for viewing various logs. This menu displays the following: Figure 3.14 – Alarms/Logs • Sys.Diag. Log – Displays the system diagnostic log. • Reboot History – Displays the last five reboot conditions. •...
- Page 31 Components and Specifications Communication – This menu provides the communication status. It displays the serial communication and Ethernet communication status. This menu displays the following options: Figure 3.16 – Communication • RS232-1 • RS232-2 • RS232-3 • RS485 • Ethernet-1 •...
- Page 32 Components and Specifications Data Download – This menu provides the option for user to download the data from the device to the USB. This menu will display the submenus to download the log, DFR record, CSS record, PQ Continuous record, PQ reports, RMS record and FL/TR record respectively. USB should be connected to the device in order to download logs and records.
- Page 33 Components and Specifications Clock Synchronization: This menu provides the CPU clock source information. This menu displays the Time mode of CPU, Source of clock, status of synchronization, and additional information based on source. Figure 3.18 – Clock Synchronization Manual Trigger: This menu provides options for the user to give a manual trigger. This menu displays the following options: Figure 3.19 –...
- Page 34 Components and Specifications Channel Check: This menu provides the user with the option to test the analog, digital channels and FL channels. This menu displays the following options: Figure 3.20 – Channel Check • Analog Inputs - Navigates the screen to the Analog Inputs Check screen. This screen displays the selected analog channel status.
-
Page 35: Led Functions
3.6.6. LED Functions Normal Run Time Mode There are nine tri-colored (green, red, and amber) LEDs on the INFORMA PMD-A front panel. When the device is on, all nine LEDs keep flashing (anti-clock wise direction) in green for a maximum of 3 minutes. This indicates that the LCD interface is booting up. If the firmware is upgrading, then the right side LEDs scroll from top to bottom and the left side LEDs scroll from bottom to top in green. - Page 36 Sl. No. Feature Purpose LED Color LED Status LED 3 Clock To check the Green INFORMA PMD-A is locked (The Sync clock internal clock is synchronized with synchronization the external clock). INFORMA PMD-A is unlocked. LED 4 Battery To check...
- Page 37 On/Flashing – User-configured Configurable: event occurred. Default event is On/Flashing – Maintenance Mode Maintenance started/user-configured event Mode start occurred. INFORMA PMD-A is in Normal Mode/No user-configured event. User can configure for any event. LED 9 Status 3 User Green Flashing – Firmware updating/...
-
Page 38: Shutdown And Reset
3.7.1. Shutdown Switch The INFORMA PMD-A device can be shut down gracefully by pressing the shutdown switch for more than 3 seconds. After the device shuts down, the Healthy LED (on the front panel of the device) stops glowing, indicating a successful shutdown. Now, the user can switch off the power supply to the device. -
Page 39: Reset Switch
A suitable 75 to 120 Ohm terminator similar to L-Com part number ACC 8060 is required. 3.8.2. Fiber/Differential PPS Figure 3.24 – INFORMA PMD-A Fiber/Differential PPS The master INFORMA PMD-A sends PPS signals to the slave INFORMA PMD-A by using either a differential PPS (TB8) or a fiber PPS. www.qualitrolcorp.com... -
Page 40: Ethernet Connections
(192.168.1.11) to any other IP address. In addition, INFORMA PMD-A has the capability to act as a DHCP server (by setting “DHCP status” as “DHCP Server”), in which the user can assign a range of IP addresses that can be allocated to other devices connected to the network. -
Page 41: Serial Ports
Network Services Provided by INFORMA PMD-A Through Ethernet Telnet: Telnet is a network protocol that allows users to connect to an INFORMA PMD-A device over a TCP/IP network. It provides access to a command-line interface, allowing a trained technician to analyze or debug problems. - Page 42 60870/IEC 61850) *: Optional PPPD on SERIAL: This service is enabled or used when the INFORMA PMD-A device needs to be connected directly to a computer without a modem. PPPD on MODEM: This service is enabled or used when the INFORMA PMD-A device needs to be accessed through a modem.
-
Page 43: Usb
3.9. USB 3.9.1. USB Functionality When a user plugs in a USB storage device to INFORMA PMD-A, the device checks for a specific folder and validates the unique serial number and digital signature available in the script file inside the folder. Once the digital signature is verified, the INFORMA PMD-A device parses the script file to perform any of the following operations: www.qualitrolcorp.com... -
Page 44: Usb Functions With Or Without Script And Mmi-Lcd
Components and Specifications • Upload and download configuration • Firmware upload • Data download In addition, the user can select and download data to the USB through the MMI. 3.9.2. USB Functions with or Without Script and MMI-LCD The following table lists the different scenarios of the USB script file and the LCD interface. Scenarios USB Operation Script file is available but the LCD... -
Page 45: Clock Synchronization
This clock can be synchronized to an external GPS, internal RTC, IRIG-B, or IRIG-J. When multiple INFORMA PMD-A devices are installed at any one site, any one device (the time master) can be used to synchronize the other devices (time slaves) by using a PPS signal (Refer to Figure 4.2). - Page 46 RTC time. If the PPH signal is received beyond this ±5-minute time window, it is rejected and no actions are performed. Therefore, a user must initially set the time on the INFORMA PMD-A device to an accuracy of 5 minutes while using the external PPH.
-
Page 47: Informa Pmd-A As Slave
BCD (does not include year information), CF (includes year information). The INFORMA PMD-A device to which the IRIG-B time source is connected will be the time master. This time master INFORMA PMD-A device may now be used to provide time synchronization to other slave INFORMA PMD-A devices, using the differential or Fiber connection for PPS synchronization. -
Page 48: Informa Pmd-A Time Accuracy
Figure 3.30 - INFORMA PMD-A Time Accuracy 3.10.4. PPS Detection, Stability, and Lock Mechanism INFORMA PMD-A can be configured with any one of the external PPS sources for time reference. Once the edge of the external PPS is detected, the “ON” duration of the PPS pulse is checked, and it must exceed a minimum of 100 ms for the PPS to be validated. - Page 49 When multiple INFORMA PMD-A devices are in the locked state, ADC sampling is synchronized. INFORMA PMD-A is said to be “locked to External time source” when the internal time is synchronized with the external time source within an acceptable band of time accuracy.
-
Page 50: Analog Inputs
Components and Specifications 3.11. Analog Inputs The INFORMA PMD-A 3U device supports 9 analog channels and the INFORMA PMD-A 6U device supports 9/18/27/36 analog channels. INFORMA PMD-A has the following types of analog inputs: • TX-AFE • HIA-AFE 3.11.1. TX-AFE TX-AFE analog channels have the following characteristics: •... -
Page 51: Digital Inputs
TR analog channels have a 12-bit resolution. 3.12. Digital Inputs The INFORMA PMD-A 3U device supports 32 digital inputs and the INFORMA PMD-A 6U device supports 32/64/96/128 digital inputs. All the input channels are bi-directional. INFORMA PMD-A supports two voltage levels configured at the factory as per the customer order as shown below. - Page 52 The debounce time of digital inputs ranges from 0 to 1000 ms in 1 ms steps. The purpose of digital inputs is to monitor the state of external contacts normally associated with protection relays and circuit breakers. < Figure 3.31 – INFORMA PMD-A Digital Inputs www.qualitrolcorp.com...
-
Page 53: Alarm Output
Digital inputs are in groups of 8 and each group is galvonically isolated from the other group. The digital input connections are done through terminal blocks that plug into TB10 for an INFORMA PMD-A 3U device, and TB10 and TB12 for an INFORMA PMD-A 6U device. •... - Page 54 Components and Specifications INFORMA PMD-A supports alarm outputs 1 to 4 on the TB3 terminal block. Note Relay 1 is not configurable. However, relays 2, 3, and 4 are configurable. iQ+ does not support. Figure 3.32 – INFORMA PMD-A Alarm Outputs...
- Page 55 Components and Specifications The following pin out table lists the different alarm configurations. Alarm Indication Pulse Default Configuration Width State (ms) System Healthy Normally Pin 1 Relay1 Out + Closed (NC) Pin 2 Relay1 Out - DHCP configuration changed Normally Pin 3 Relay2 Out + Memory threshold crossed for...
- Page 56 Components and Specifications Alarm Indication Pulse Default Configuration Width State (ms) Device shutdown Pin 5 Relay3 Out + Normally Manual Time set by user Open (NO) Memory full for linear mode of recordings • RMS envelope recording • PQP 10 Min record Pin 6 Relay3 Out - threshold recording...
- Page 57 Components and Specifications The relay default settings are done at the factory as per the customer order. Note Wire gauge to be used for Alarm outputs: 14-26 AWG. www.qualitrolcorp.com...
- Page 58 Installation Chapter 4 Installation www.qualitrolcorp.com...
-
Page 59: Installation
Installation Installation This chapter describes the installation procedure of the INFORMA PMD-A device. 4.1. Unpacking Procedure Verify the package is not damaged if so contact courier. Remove and verify contents from package. 4.2. Accessories Following accessories are provided: • Serial port cable •... -
Page 60: Informa Pmd-A Installation Specifications
Installation 4.3. INFORMA PMD-A Installation Specifications The following figure shows a single INFORMA PMD-A communication to a computer through Ethernet or Modem. Figure 4.1 – Standalone INFORMA PMD-A www.qualitrolcorp.com... - Page 61 Ethernet as shown in the following figure. Figure 4.2 – Networked INFORMA PMD-A In Figure 4.2, INFORMA PMD-A #1 is configured as the time master and INFORMA PMD-A #2, #3, and #4 are configured as time slaves. •...
-
Page 62: Device Communication Settings
To ensure that the device has been installed correctly, the following needs to be checked. When the INFORMA PMD-A device is powered ON, all the LEDs on the front panel must flash in green (in anti-clock wise direction). This indicates that the device is booting up. -
Page 63: Checking For Correct Operation
If the user has upgraded the firmware for standard MMI, then during the next boot up of INFORMA PMD-A, the LEDs on the right flash from top to bottom, and the LEDs on the left flash from bottom to top in green. This is in addition to the normal boot up mode. - Page 64 Serial Connection to Informa PMD-A Chapter 5 Serial Connection to INFORMA PMD-A www.qualitrolcorp.com...
-
Page 65: Serial Ports
5.1. Functionality/Service 5.1.1. PPPD on Serial User has to enable/ use this service, when the INFORMA PMD-A device is connected directly to a PC without a modem. The type of cable need to be used for this service is Null Modem with loop back handshaking. - Page 66 Serial Connection to Informa PMD-A Figure 5.2 – Network Connection Type 4. Select the radio button “Set up an advanced connection” and click on ‘Next>’ button. Figure 5.3 – Advanced Connection Options 5. Select the radio button “Connect directly to another computer” and click on ‘Next>’...
- Page 67 Serial Connection to Informa PMD-A Figure 5.4 – Host or Guest Page 6. Select the radio button “Guest” and then click on ‘Next>’button. Figure 5.5 – Connection Name 7. Mention any name say ‘LnT’ and click on ‘Next>’ button. www.qualitrolcorp.com...
- Page 68 Serial Connection to Informa PMD-A Figure 5.6 – Select a Device 8. Select ‘Communications Port (COM x)’ and then click on ‘Next>’ button. Figure 5.7 – Connection Availability 9. Select the radio button ‘Anyone’s use’ and then click on ‘Next>’ button.
- Page 69 Serial Connection to Informa PMD-A Figure 5.8 – Completing the New Connection 10. Check on ‘ Add a shortcut to this connection to my desktop’ and then click on ‘Finish’ button. A shortcut icon for serial connectivity is created on the desktop of the PC.
- Page 70 Serial Connection to Informa PMD-A 12. Click on “Properties” then the below wizard appears Figure 5.10 – LnT Properties 13. Click on “Configure”, then the below wizard appears Figure 5.11 – Modem Configuration www.qualitrolcorp.com...
- Page 71 Serial Connection to Informa PMD-A 14. From the Maximum speed (bps) drop down list provided user has to select the speed as “38400”. (The default baud rate of serial port on INFORMA PMD-A device is set to 38400). 15. User has to de-select the “Enable hardware flow control”.
- Page 72 Serial Connection to Informa PMD-A Figure 5.12 – Verifying and Completing Registration 19. This implies the connection is formed. To check the status of connection: 1. Go to Start->Control Panel-> Network and Internet Connections -> Network Connections Figure 5.13 – Status-General 2.
- Page 73 INFORMA PMD-A device via PPPD serial link. PPPD ON MODEM: User can enable/ use this service, when the INFORMA PMD-A device need to be accessed via modem. User has to use Standard Modem cable type for this service.
- Page 74 Serial Connection to Informa PMD-A In the PC, go to Start->Control Panel-> Printers and Other Hardware->Phone and Modem Options. Figure 5.15 – Phone and Modem Options Under the tab ”Modems” user can observe the installed modems as shown below. www.qualitrolcorp.com...
- Page 75 Serial Connection to Informa PMD-A Figure 5.16 – Modems Ex: In the above screen the modem detected is “Conexant ACF External PnP …..Modem”. Steps to establish a PPPD connection over Modem Once the Pre-requisites are met, user has to follow the below steps for establishing the PPPD connection over Modem.
- Page 76 Serial Connection to Informa PMD-A The following wizard will appear for creating the new connection. Figure 5.17 – New Connection Wizard 3. Click on ‘Next’ button. Figure 5.18 – Network Connection Type www.qualitrolcorp.com...
- Page 77 Serial Connection to Informa PMD-A 4. Select the radio button “Connect to the network at my workplace” and click on ‘Next>’ button Figure 5.19 – Network Connection 5. Select the radio button “Dial-up connection” and click on ‘Next>’ button Figure 5.20 – Connection Name...
- Page 78 Serial Connection to Informa PMD-A 6. Enter the name on your choice under the Company Name (In this case it is LnT ) and click on ‘Next>’ button. The below wizard appears. Figure 5.21 – Phone Number to Dial 7. User has to enter the phone number (which user wishes to dial) under Phone Number and click on ‘Next>’...
- Page 79 Serial Connection to Informa PMD-A Figure 5.22 – Connection Availability 9. User can select either “Anyone’s use / My use” and then click ‘Next>’ button Figure 5.23 – Completing the New Connection Wizard 10. Click on Finish by selecting the option “Add a Shortcut to this connection to my desktop”...
- Page 80 Serial Connection to Informa PMD-A Now, user will be able to see a connection formed with LnT (in this example) short cut in the desktop as well as in the Network connections (in control panel) Figure 5.24 – Network Connections 11.
- Page 81 Serial Connection to Informa PMD-A 12. For setting the Baud rate user has to click on “Properties” .A window appears as shown below Figure 5.26 – Lnt Properties 13. Click on “Configure” Figure 5.27 – Modem Configuration www.qualitrolcorp.com...
- Page 82 Serial Connection to Informa PMD-A 14. Change the “Maximum Speed” to “38400” 15. Ensure that all ‘Hardware Features’ are enabled. 16. Click on OK. The below mentioned wizard appears. Figure 5.28 – Connect LnT If user wishes to change the number, then edit in the click on ‘Dial’ column Note provided.
- Page 83 Serial Connection to Informa PMD-A Figure 5.29 – Verifying and Completing Registration 19. This implies the connection is formed. To check the status of connection: 1. Go to Start->Control Panel-> Network and Internet Connections -> Network Connections www.qualitrolcorp.com...
- Page 84 Serial Connection to Informa PMD-A Figure 5.30 – LnT Status 2. Double Click on Direct ->LnT to know the status of connection. 3. A popup screen “LnT Status” will be displayed 4. In the ‘General’ tab the status should be connected.
- Page 85 • Server IP address: It is the new / temporary IP address assigned Note to INFORMA PMD-A device and meant only for the PPPD on modem link. • Client IP address: It is the new / temporary IP address assigned to PC and meant only for the PPPD on modem link.
- Page 86 Configuration Chapter 6 Configuration www.qualitrolcorp.com...
-
Page 87: Configuration
Configuration Configuration This chapter provides instructions to configure the INFORMA PMD-A device and the iQ+ software. 6.1. Hardware Configuration INFORMA PMD-A supports the following cabling configuration: 6.1.1. Connection Diagrams Single Phase Network Single-phase, 2-conductor network connections are shown in Figure 5.1. - Page 88 Configuration 3-Wire Network – 2 Current Sensors L1, L3 (Aron Method/Two Wattmeter Method) The connections to the channels must be made as per the labels on the analog channel port as shown in Section 3.5. • Observe the polarity of voltage connection V1 (V1+ and V1-) and Note current sensor I1 (I1+ and I1-).
- Page 89 Configuration 3-Wire Network (3U3I) 3-wire network (3U3I–Three Wattmeter method) connections are shown below. The connections to the channels must be made as per the labels on the analog channel port shown in Section 3.5. Figure 6.3 – 3-Wire Network (3U3I) Note Refer to iQ+ Help for associated software settings.
- Page 90 Configuration 4-Wire Network (4U4I) 4-wire network (4U4I) connections are shown below. The connections to the channels must be made as per the labels on the analog channel port shown in Section 3.5. Figure 6.4 – 4-Wire Network (4U4I) Note Refer to iQ+ Help for associated software settings. www.qualitrolcorp.com...
- Page 91 Configuration Two 4-Wire Networks (2M4U) in Star Configuration With this method, 3 phase voltages and the respective N conductor voltages can be determined in two star connected three-phase systems. Two 4-wire network (2M4U) connections are shown below. The connections to the channels must be made as per the labels on the analog channel port shown in Section 3.5.
- Page 92 Configuration Two 3-Wire Networks (2M3U) in Delta Configuration This method is used to measure 3 phase-to-phase voltages in two delta configured three- phase systems. Two 3-wire network (2M3U) connections are shown below. The connections to the channels must be made as per the labels on the analog channel port shown in Section 3.5.
- Page 93 Configuration 3U (Star configuration) connections are shown below. The connections to the channels must be made as per the labels on the analog channel port shown in Section 3.5. Figure 6.7 – 3U Configuration Refer to iQ+ Help for associated software settings. Note www.qualitrolcorp.com...
- Page 94 Configuration 4U (Star configuration) connections are shown below. The connections to the channels must be made as per the labels on the analog channel port shown in Section 3.5. Figure 6.8 – 4U Configuration Note Refer to iQ+ Help for associated software settings. www.qualitrolcorp.com...
- Page 95 Configuration 3U6I 3U6I (Star configuration) connections are shown below. The connections to the channels must be made as per the labels on the analog channel port shown in Section 3.5. Figure 6.9 – 3U6I Configuration Note Refer to iQ+ Help for associated software settings. www.qualitrolcorp.com...
- Page 96 Configuration 6U3I 6U3I (Star configuration) connections are shown below. The connections to the channels must be made as per the labels on the analog channel port shown in Section 3.5. Figure 6.10 – 6U3I Configuration Note Refer to iQ+ Help for associated software settings. www.qualitrolcorp.com...
-
Page 97: Software Configuration
Configuration 6.2. Software Configuration To establish the communication using iQ+, the following steps must be performed: 1. Start iQ+. Figure 6.11 – Starting iQ+ www.qualitrolcorp.com... - Page 98 Configuration 2. To create a new device, right click All Devices as shown below: Figure 6.12 – Creating a New Device www.qualitrolcorp.com...
- Page 99 Configuration 3. Select INFORMA PMD-A from the device list. Figure 6.13 – Selecting INFORMA PMD-A Device www.qualitrolcorp.com...
- Page 100 Figure 6.14 – Creating a Device 5. A new device is created. 6. Right click the INFORMA PMD-A device and select Retrieve Configuration. The previously configured settings are loaded. (Factory default settings are loaded when the INFORMA PMD-A device is initialized for the first time.)
-
Page 101: Configuration Overview
• Send To Device: To convert the configuration to XML and send it to the server. The file is saved in the database and also sent to the INFORMA PMD-A device for measurements. www.qualitrolcorp.com... -
Page 102: Communications
(the user needs to select the Modem Type). RS232-2 is the configuration editor for INFORMA PMD-A device in iQ+. If the user selects the Modem Type as None, then the modem service will not run in INFORMA PMD-A. - Page 103 Configuration Figure 6.17 – RS232-2 • Internal modem is optional. Note • For more information about configuration, refer to iQ+ Help. www.qualitrolcorp.com...
- Page 104 Configuration Figure 6.18 – RS232-3 Note For more information about configuration, refer to iQ+ Help. www.qualitrolcorp.com...
-
Page 105: Pq Overview
Configuration 6.2.3. PQ Overview Figure 6.19 – PQ Overview Flow Chart Note Each record and report can be enabled or disabled. www.qualitrolcorp.com... -
Page 106: Pq Configuration
Configuration 6.2.4. PQ Configuration Figure 6.20 – PQ Configuration The user can enable or disable any of the PQ records and report generating functions. Figure 6.30 shows the options for disabling and enabling PQ records and report generating functions. The user can also configure the power and energy window and reference channel for system frequency. - Page 107 Configuration Figure 6.21 – PQ 10-Minute Continuous Recording Free Interval Recordings • Minimum, Maximum, and Average values are calculated using data as per the aggregation interval configured. • The user can configure the aggregation interval as 200 ms, 1 second, 2 seconds, 3 seconds, 6 seconds, 15 seconds, 30 seconds, and 1 minute to 1440 minutes.
- Page 108 Configuration Figure 6.22 – PQ Free Interval Continuous Recording www.qualitrolcorp.com...
-
Page 109: 50160 Reports (Standard Threshold And User Threshold)
Configuration 6.2.6. EN 50160 reports (standard threshold and user threshold) EN 50160 Report with Standard Limits (For Busbar 1) The EN 50160 report is based on 10-minute average values (except for frequencies that use 10-second values). Each parameter value is checked against its limits and is used to increment the ‘total’... -
Page 110: Iec 61000-3-6/7 Report
Configuration Figure 6.24 – EN 50160 User Report – User-defined Limits (Busbar 1) 6.2.7. IEC 61000-3-6/7 Report Figure 6.25 - IEC 61000-3-6/7 Report www.qualitrolcorp.com... -
Page 111: Histograms
Configuration This creates a compliance report according to the IEC 61000 3-6/7 standards. This report contains the histogram of the selected parameter and also the minimum and maximum values of the selected parameter for the report duration. 6.2.8. Histograms Ten Minute Histogram Report This is a histogram report of the selected parameters derived from 10-minute data. - Page 112 Configuration Free interval histogram can be configured from 1 minute to 24 hours. Aggregation interval should be less than the report duration. However, it should be a proper fraction of the report duration for proper data points. The user can configure the number of bins and their sizes. The user can also select the minimum, maximum, or average values of the parameter for the histogram plot.
-
Page 113: Rms Envelope
Configuration 6.2.9. RMS Envelope Figure 6.28 - RMS Envelope The user can set the values of Pre-trigger time, Voltage Dead band, and Current Dead band as required. Dead band is a non-sensitive band that is used to avoid the recording of multiple half-cycle data with minor variations, and to save the storage memory. -
Page 114: Dsi - Dip/Sag, Swell, And Interruption
Configuration 6.2.10. DSI – Dip/Sag, Swell, and Interruption The user must select the Apply default values option to set the default values of Dip, Swell, and Interruptions as per the IEC 61000-4-30 standard. Alarm1 and Alarm2 configurations are applicable for UA- Under, UA-Over, and UA-Both sensor types. -
Page 115: Rapid Voltage Change
Configuration 6.2.11. Rapid Voltage Change An RVC-PQ sensor operation is detected when the magnitude and the rate of change of voltage between two steady state averages exceeds the user settings. The user must select the Apply default values option to set the default values. When the user selects this option, all user entries are disabled. - Page 116 Configuration Power Quality (PQ) Sensor Channels Figure 6.31 - PQ Sensor Channels • For details about PQ Sensor Channels, refer to PQ Sensor Note Types in Appendix B. • For more information about configuration, refer to iQ+ Help. www.qualitrolcorp.com...
-
Page 117: General
Configuration 6.2.12. FR General The user must select the reference channel for FR frequency. In addition, the user can specify the following settings: • Pre-fault time between 10 ms and 10000 ms • Sample rate as 32, 64, 128, 256, or 512 samples per cycle •... -
Page 118: Sensor Channels
Configuration 6.2.13. FR Sensor Channels The user can select the FR parameter, sensor type, threshold limits, nominal value, and other specifications for each sensor channel, as required. Figure 6.33 - FR Sensor Channels • For details about FR Sensor, refer to DFR Sensor Types in Note Appendix B. -
Page 119: Data Storage
Configuration 6.2.14. Data Storage Figure 6.34 – Data Storage The memory configuration for various records and reports are configured here. Recorded data is stored into the memory allocated to each recording. The user has an option of configuring in linear or circular mode. Recording is stopped if configured in the linear mode and the memory limit has been reached. - Page 120 Maintenance Chapter 7 Maintenance www.qualitrolcorp.com...
-
Page 121: Maintenance
Maintenance Maintenance 7.1. Calibration INFORMA PMD-A is shipped after calibration. However, if the user has changed the FSD jumper setting or the nominal frequency, then the device shall be re-calibrated as per the following procedure. 7.1.1. Calibration Procedure Calibration source details are as follows: •... - Page 122 Maintenance 3. Identify the analog channel types (voltage/current) that physically exist on the acquisition board. Select the channel types based on the jumper/tap settings of analog channels and group similar channel types. Once the grouping is done, click Calibrate System. Consider the following example: The acquisition unit has 3 current and 3 voltage channels in the following manner: •...
- Page 123 Maintenance 4. Select the group that needs to be calibrated, and then click Continue. The device performs offset calibration. Figure 7.3 – Offset Calibration www.qualitrolcorp.com...
- Page 124 Maintenance 5. The following Web page allows the user to short the input channels under calibration. After shorting all the channels displayed, click Continue to proceed further. When calibrating with Relay Test Set, apply Zero current/voltage to channels under calibration. Figure 7.4 Shorting the Channels www.qualitrolcorp.com...
- Page 125 Maintenance 6. The calibration command is sent to the device after a delay of 10 seconds. The delay is introduced by the GUI to allow the device to settle with the specified input. During offset calibration, the device enters the Calibration mode in which all sensors are disabled, and the data recording is paused.
- Page 126 Maintenance Figure 7.7 - Voltage Calibration www.qualitrolcorp.com...
- Page 127 Maintenance Figure 7.8 Current Low Calibration 8. Click Continue to allow the device to perform low gain calibration. The utility sends the command to the device after a 10 second delay. For normal TX-AFE current calibration, the device performs a high gain calibration. The same process is followed as mentioned earlier for the high gain factor of the channels under calibration.
-
Page 128: Points To Remember
Maintenance Figure 7.9 – High Gain Calibration 7.1.2. Points to Remember • The voltage/current source channels must be connected properly. • To ensure if the calibration is done properly, the user has to form a DFR and check whether the values are proper with respect to the applied values to the device. •... -
Page 129: General Maintenance
• The default frequency setting of the INFORMA PMD-A device is 50 Hz. If the user wants to operate the device at 60 Hz, the device must be re-calibrated with a 60 Hz frequency setting. -
Page 130: Ups Maintenance
Maintenance 7.2.4. UPS Maintenance Precautions for Handling and Use of Battery: • Avoid shorting the battery. • Do not immerse in water. • Do not disassemble or deform the battery. • Do not expose to, or dispose the battery in fire. •... -
Page 131: Firmware Upgrade
7.3.1. INFORMA PMD-A Firmware Upgrade Procedure Perform the following tasks to upgrade the firmware: 1. Contact Qualitrol for the latest versions of firmware. 2. Create a new folder on the computer to store the firmware files. 3. Save the initrd_CMxx.yy_Azz_with_crc.bin file in this folder. - Page 132 URL (the default IP is directed to either <http://192.168.1.11/tabindex.html> when the communication is through RJ45, or to <http://10.38.0.2/tabindex.html> when the communication is through a modem). Default user and password (mfgindex/tabindex): Username: qualitrol Password: qualcorp_techSupport10 For changing password go to: http://<ip address of device>/tabindex_password The following Web page is displayed.
- Page 133 "1%", we shall proceed with next step. 10. Open a Web browser and enter the following URL: <http://192.168.1.11/upgrade.html> (RJ45) <http://10.38.0.2/upgrade.html> (modem) Default user and password for upgrade: Username: qualitrol Password: qualcorp_Upgrade10 For changing password go to: http://<ip address of device>/upgrade_password The following Web page is displayed.
- Page 134 Maintenance Figure 7.13 – PMD-A Upgrade Page (Bottom) The PMD-A Upgrade page allows the user to upgrade the following: • CPU_Application • • FPGA • FPGA_HI_A • PICFirmWare • MMIFirmware • All of the above The PMD-A Upgrade page also allows the user to upgrade the CPU-Kernel. Note The CPU-Kernel should only be sent along with the latest CPU_Application.
- Page 135 Maintenance The following table lists the files which can be upgraded for INFORMA PMD-A. Application File to be Selected Check Box CPU_Application initrd_CMxx.yy_Azz_with_crc.bin CPU_APP dsp_bank1.bin FPGA fpga_bank1.bin FPGA FPGA_HI_A fpgaHiAfe_bank1.bin FPGA_HI_A pic_bank1.bin mmi_bank1.bin b. After browsing the appropriate file, click on “Send” button. When the file is sent successfully, a success message error_string=SUCCESS is displayed.
-
Page 136: During File Upload To Informa Pmd-A
For the purpose of this manual, the URL shown here has a device with the IP address 192.168.35.242. When the file has been uploaded and stored into the INFORMA PMD-A device, a success message error_string=SUCCESS is displayed. Figure 7.14 – String Success... -
Page 137: During Cpu File Upload To Informa Pmd-A
Maintenance 7.3.3. During CPU File Upload to INFORMA PMD-A During the upload process, a progress bar is displayed that signifies that communications and re-programming are in progress, similar to other file uploads. Figure 7.15 – Uploading the File www.qualitrolcorp.com... -
Page 138: System And Diagnostic Information
When re-programming is completed, a success message error_string=SUCCESS is displayed. Figure 7.16 – File upgrade status 7.3.4. System and Diagnostic Information After the INFORMA PMD-A device has restarted and the Healthy LED is on, open a Web page and enter the URL as: <http://board_ip address/mfgindex.html> For example, <http://192.168.33.114/mfgindex.html>... - Page 139 The following page is displayed. Figure 7.17 - System Information Ensure that the newly installed firmware versions displayed in the page are correct. Consult Qualitrol for the latest versions. Note The Firmware versions shown in the Figure 6.19 may have been updated after this manual is written.
- Page 140 Maintenance Click the Diagnostic Information tab and the following page is displayed. Ensure that the DSP, FPGA, and PIC are programmed successfully, and Power Health, PIC, and CPU are “working”. Figure 7.18 - Diagnostic Information Page (Top) www.qualitrolcorp.com...
-
Page 141: Troubleshooting
7.4. Troubleshooting No part of the equipment is serviceable by the user. Always follow the safety instructions and safety precautions mentioned in SAFETY SUMMARY. Before attempting to troubleshoot a defective INFORMA PMD-A device, contact Qualitrol for help at csc@qualitrolcorp.com . www.qualitrolcorp.com... - Page 142 If any one or all three LEDs (Power healthy, Communication, and Clock Sync) on the front panel of the INFORMA PMD-A device are not working, perform the steps mentioned in the following table for finding the fault in the device and rectification.
-
Page 143: Power Healthy Led On The Front Panel Is Off
Reboot the system by pressing the RESET switch that is present on Are Voltages the Mother Board. Refer section correct? 6.4.4 Is Healthy Contact Qualitrol Support for further LED ON? help with Model and Serial Number. Figure 7.20 – Power Failure Causes www.qualitrolcorp.com... -
Page 144: Communication Led Is Off
Maintenance 7.4.2. Communication LED is Off To find the cause for the communication failure, follow the steps mentioned below: Figure 7.21 - Communication Failure www.qualitrolcorp.com... -
Page 145: Clock Sync Led Is Off
Make proper connection it ok? Check the voltages at the If problem persists, contact respective test points on the Qualitrol for further help motherboard. Refer section 6.4.4 for details. Figure 7.22 - Clock Synchronization Failure 7.4.4. Test Points to Verify the Supply Voltages Supply voltage test points are available on the motherboard. Test points are located between the connector CN19 and the connector CN8 on the motherboard. - Page 146 Maintenance Shutdown Reset switch switch Figure 7.23 – Location of Reset and Shutdown Switches and Supply Voltage Test Points on the Motherboard www.qualitrolcorp.com...
- Page 147 Appendix A – Technical Specifications Appendix A Technical Specifications www.qualitrolcorp.com...
-
Page 148: Appendix A - Technical Specifications
Appendix A – Technical Specifications Appendix A – Technical Specifications The following table lists the technical specifications for the INFORMA PMD-A device. Category Parameters Specifications General Processor 32 bit, 400 MHz processor 9 configurable analog channels for INFORMA PMD-A 3U device , 9/18/27/36 configurable analog channels for INFORMA PMD-A 6U device. - Page 149 Appendix A – Technical Specifications Category Parameters Specifications Typical Load 25 VA for 3U INFORMA PMD-A device and 50 VA for 6U INFORMA PMD-A device Auxiliary Output DC output 12 VDC at 750 mA Analog Inputs - Input Range Nominal (full scale) in VAC: Voltage AC 63.5 (140)
- Page 150 H x W x D: 265.8 mm 487 mm x 362.2 mm for INFORMA PMD-A 6U device Weight 15 kg without battery and 15.5 kg with battery for INFORMA PMD-A 3U device 23 kg without any external battery and 4 kg with two external batteries for INFORMA PMD- A 6U device Housing/Mounting Metal 19”...
-
Page 151: Emc Standards
Appendix A – Technical Specifications Category Parameters Specifications Communication Ports Four Serial (of these, three are RS232 ports with male DB-9 connectors, and one is RS485 with 1*5 pin connector.) Internal PSTN (V.90) modem (optional on RS232-2) Two 100 Mb Ethernet ports with RJ45 connectors Optional Fiber optic Ethernet (on rear port) Differential (RS485 levels) for 1 PPS for time... - Page 152 Appendix A – Technical Specifications Standards References/Test criteria IEC 60255-22-4 / IEC 61000-4-4 & Tested to IEC 61000-4-4, Tested for : 4 kV, ANSI C37.90.1.2002 Electrical fast 5KHz/100KHz/2.5KHz transient burst test Tested on Power-line, RS232-1, Ethernet port 1, Analog inputs (V & I), Digital Inputs, Relay outputs.
- Page 153 Appendix A – Technical Specifications Standards References/Test criteria inputs( V ), Relay Passed with : Criteria A IEC 61000-4-12 Ring wave test Tested to IEC 61000-4-12, Tested for Level 3,+/- 2 kV Common Mode, 1 kV Differential Mode, 100KHz Tested on Power-line, Digital, Analog inputs( V ), Relay Passed with : Criteria A IEC 61000-4-5 Surge test...
- Page 154 Appendix A – Technical Specifications Standards References/Test criteria and Interruptions Tested on Power-port. Passed with : Dips - Criteria A Interruptions - Criteria B IEC 60255-22-2 / IEC 61000-4-2 Tested to IEC 61000-4-2,Tested for : 8 kV Electro static discharge tests contact, 15 kV air Tested on Enclosure, all accessible I/O lines and ports.
- Page 155 Appendix A – Technical Specifications IEC 61000-4-30 Class A The following table summarizes the INFORMA PMD-A accuracy and range specification of IEC 61000-4-30 Class A parameters. The INFORMA PMD-A is specified for Udin = 230V, 50/60 Hz. Accuracy Measuring Parameter...
- Page 156 Appendix B – INFORMA PMD-A Functions Appendix B INFORMA PMD-A Functions www.qualitrolcorp.com...
-
Page 157: Appendix B - Informa Pmd-A Functions
Power quality parameters can be distinguished between steady state phenomena and non- steady state phenomena. Steady State Phenomena In these phenomena, INFORMA PMD-A records PQ parameters continuously at 10-minute intervals and/or a user-defined time interval. Steady state phenomena = continuous recording (10-minute recording and or user-defined time interval) •... -
Page 158: Magnitude Of Supply Voltage
Appendix B – INFORMA PMD-A Functions Figure B.1 – 10-Second Frequency Record • Applied Frequency = 50 Hz Note • Measured Frequency = 50 Hz Magnitude of Supply Voltage The RMS value of the voltage at a given time at the supply terminals, measured over a given interval. -
Page 159: Flicker
Appendix B – INFORMA PMD-A Functions Figure B.2 - Magnitude of Supply Voltage Record Note The device is connected to the main supply. The voltage fluctuates between 235 V to 250 V. Flicker Flicker is a slow cyclical variation of the amplitude of the RMS voltage envelope. It is the impression of unsteadiness of visual sensation induced by a light stimulus whose luminance or spectral distribution fluctuates with time. -
Page 160: Voltage Unbalance
The level of unbalance is typically monitored from 10-minute average intervals and is expressed in %. Unbalance recording complies with the IEC 61000-4-30 standard. The INFORMA PMD-A device records the unbalance at 10-minute intervals and/or user-defined time intervals. Unbalance data can be stored in the recorder memory where it can be retrieved using the iQ+ Master Station software. -
Page 161: Harmonics
Harmonics are systematic distortions of the waveform resulting from the super imposition of secondary signals having frequencies of a multiple of the fundamental frequency. The power quality recording function in the INFORMA PMD-A provides a comprehensive harmonic recording function comply with IEC 61000-4-7. The user can select up to the 50th harmonic quantity for each three-phase group of analog channels to be recorded at 10- minute intervals and/or user-defined time intervals. -
Page 162: Inter-Harmonics
Appendix B – INFORMA PMD-A Functions Figure B.5 – Harmonics Record • Harmonics applied to the device is 6% of nominal voltage 230 Note VAC. • The green line indicates the voltage RMS value and the other 3 lines indicate the voltage harmonic (% of fundamental) values on all the three phases. -
Page 163: Mains Signaling Voltage
Appendix B – INFORMA PMD-A Functions Figure B.6 - Inter-Harmonics Record • Voltage inter-harmonics applied to the device is 10% and then Note 5% of nominal voltage 230V AC. • The green line indicates the voltage RMS value and the blue line indicates the voltage inter-harmonic (% of fundamental) value on a single phase. -
Page 164: Dips, Swells, And Interruptions (Dsi)
Appendix B – INFORMA PMD-A Functions Figure B.7 - Signaling Voltage Record • Mains signaling voltage applied to the device is 5% of nominal Note voltage 230 VAC. • The green line indicates the voltage RMS value and the other 3 lines indicate the signaling voltage values on all the three phases. -
Page 165: Rapid Voltage Change (Rvc)
Appendix B – INFORMA PMD-A Functions Figure B.8 – RMS Envelope Swell Rapid Voltage Change (RVC) A rapid voltage change is a quick transition in the RMS voltage between two steady-state conditions. To measure rapid voltage changes, thresholds are defined for each of the following: •... - Page 166 Appendix B – INFORMA PMD-A Functions Figure B.9 - RMS Envelope PQRVC www.qualitrolcorp.com...
-
Page 167: Power Quality Sensors
Appendix B – INFORMA PMD-A Functions Power Quality Sensors PQ Sensor Functionality Resulting Record Envelope Record Interval of PQ PQ Calculated Over Under Both Calculation Quantity Under Over RMS Voltage rms (1/2) RMS Current 200 ms RMS voltage / (10/12 Cycle) -
Page 168: Pq Sensor Types
Sensors are programmed to look for various types of PQ thresholds on calculated quantities and digital input changes, if they are configured as PQ sensors. INFORMA PMD-A sensors are completely adjustable either on site, or remotely, to meet user requirements. Prefault, postfault, and Oplimit (operational limit time) logic are fully adjustable. - Page 169 Appendix B – INFORMA PMD-A Functions parameter exceeds the “Under_Stop -threshold calculated” value later, then the event is de- triggered. Corresponding logs and records are generated. Both: Applied on 200 ms data, 10-second frequency, and 10-minute flicker. If the computed value of the configured parameters reduces below the “Under_Start -threshold calculated”...
-
Page 170: Handling Time Changes
Appendix B – INFORMA PMD-A Functions Note that the sensors of the UA-Under, UA-Over, and UA-Both types will not trigger an RMS Envelope, although these sensors use an algorithm identical to that of DSI. Handling Time Changes When the user is setting the device time, it can be shifted forward or backward from the current set time using the iQ+ software. - Page 171 Appendix B – INFORMA PMD-A Functions o No impact on 10-minute permanent recording and all other reports. • Backward time shift of more than 1 minute and less than 10 minutes: o No impact on 10-minute permanent recording and all other reports except for free interval histogram.
- Page 172 Appendix B – INFORMA PMD-A Functions Figure B.10 – Deleting Records Note The user may be prompted for a password to access this Web page. 3. Select all records by clicking on the individual check boxes and then click the Delete selected data from system button.
-
Page 173: Pq Calculated Quantities
Appendix B – INFORMA PMD-A Functions PQ Calculated Quantities Following are the possible calculations recorded for PQ parameters. • Star and delta are types of topology. Note • 3U, 3U3I, etc. are types of cabling. STAR Topology The following calculations are possible for 3U-star cabling (Ph-N type). - Page 174 Appendix B – INFORMA PMD-A Functions The following calculations are possible for 3U-star cabling (Ph-Ph type). Parameters Total Nos. 10 seconds Frequency Zero Sequence Positive Sequence Negative Sequence Unbalance and Zero Unbalance Harmonics (up to 50th order) Inter-harmonics (up to 50...
- Page 175 Appendix B – INFORMA PMD-A Functions Parameters Total Nos. Frequency (10 minutes) Signaling Voltages (3) Crest Factor Under and Over Deviation Calculation rms (1/2) The following calculations are possible for 4U-star cabling (Ph-Ph type). Parameters Total Nos. 10 seconds Frequency...
- Page 176 Appendix B – INFORMA PMD-A Functions The following calculations are possible for 3U+3I-star cabling (Ph-N type). Parameters Total Nos. 10 seconds Frequency Zero Sequence Positive Sequence Negative Sequence Unbalance and Zero Unbalance Harmonics (up to 50th order) Inter-harmonics (up to 50...
- Page 177 Appendix B – INFORMA PMD-A Functions Parameters Total Nos. Three Phase Distorted Power Single phase power factor Three phase power factor cos phi Harmonic Power Crest Factor Energy The following calculations are possible for 3U+3I-star cabling (Ph-Ph type). Parameters Total Nos.
- Page 178 Appendix B – INFORMA PMD-A Functions Parameters Total Nos. Calculation rms (1/2) Single Phase Active Power Three Phase Active Power Single Phase Reactive Power Three Phase Reactive Power Single Phase Apparent Power Three Phase Apparent Power Power Single Phase Distorted...
- Page 179 Appendix B – INFORMA PMD-A Functions Parameters Total Nos. Zero Sequence Positive Sequence Negative Sequence Unbalance and Zero Unbalance 10/12 cycle Current calculation Harmonic (up to order) Inter-harmonics k-Factor Calculation rms (1/2) Single Phase Active Power Three Phase Active Power...
- Page 180 Appendix B – INFORMA PMD-A Functions Parameters Total Nos. Inter-harmonics (up to 50 order) THD(THD, THD Odd, THD Even) Flicker instantaneous(Pinst) Flicker short term (10 minutes)-Pst Frequency (10 minutes) Signaling Voltages (3) Under and Over Deviation Calculation rms (1/2) Zero Sequence...
- Page 181 Appendix B – INFORMA PMD-A Functions The following calculations are possible for 4U+3I-star cabling (Ph-N type). Parameters Total Nos. Voltage 10 seconds Frequency 10/12 cycle calculation Zero Sequence Positive Sequence Negative Sequence Unbalance and Zero Unbalance Harmonics (up to 50th...
- Page 182 Appendix B – INFORMA PMD-A Functions Parameters Total Nos. Power Three Phase Distorted Power Single phase power factor Three phase power factor cos phi Harmonic Power Crest Factor Energy The following calculations are possible for 4U+3I-star cabling (Ph-Ph type). Parameters Total Nos.
-
Page 183: Delta Topology
Appendix B – INFORMA PMD-A Functions Parameters Total Nos. k-Factor Calculation rms (1/2) Power Single Phase Active Power Three Phase Active Power Single Phase Reactive Power Three Phase Reactive Power Single Phase Apparent Power Three Phase Apparent Power Single Phase Distorted... - Page 184 Appendix B – INFORMA PMD-A Functions Parameters Total Nos. minutes)-Pst Frequency (10 minutes) Signaling Voltages (3) Crest Factor Under and Over Deviation Calculation rms (1/2) The following calculations are possible for 3U+3I-delta cabling. Parameters Total Nos. 10 seconds Frequency Zero Sequence...
- Page 185 Appendix B – INFORMA PMD-A Functions Single Phase Active Power Three Phase Active Power Single Phase Reactive Power Three Phase Reactive Power Single Phase Apparent Power Three Phase Apparent Power Power Single Phase Distorted Power Three Phase Distorted Power Single phase power factor...
- Page 186 Appendix B – INFORMA PMD-A Functions The following calculations are possible for 2U+2I-delta cabling (Aron). Parameters Total Nos. Frequency 10 seconds Voltage 10/12 cycle calculation Zero Sequence Positive Sequence Negative Sequence Unbalance and Zero Unbalance Harmonics (up to 50th order)
-
Page 187: Types Of Fault Recording
Appendix B – INFORMA PMD-A Functions Parameters Total Nos. Harmonic Power Crest Factor Energy Types of Fault Recording DFR provides high speed monitoring and recording of the power system and equipment. The recording is carried out when a system fault occurs, which is user configurable. The following types of sources can initiate a DFR recording: •... -
Page 188: Dfr Sensor Types
Sensor Inhibit Using Software Configuration: Each FR sensor can be individually enabled/disabled by user configuration. Sensor Inhibit Using Digital Input Configuration: Each FR sensor can be inhibited by the state of a single specified digital input. A total of 32 FR sensors are available in INFORMA PMD-A. www.qualitrolcorp.com... - Page 189 Appendix B – INFORMA PMD-A Functions INFORMA PMD-A provides the following FR data types on which different types of sensors can be configured. FR Calculated Over Under BOTH Power ROC (dx/dt) Quantity Swing Frequency Fundamental/Full Power Sequence components amplitude AC RMS /DC...
- Page 190 Appendix B – INFORMA PMD-A Functions The following tables list the possible calculations recorded for DFR parameters. The following calculations are possible for 3U+3I cabling. Parameters Total Nos. Frequency RMS Magnitude, fundamental Phase Angle, fundamental RMS Magnitude, full Positive Sequence, amplitude...
- Page 191 Appendix B – INFORMA PMD-A Functions The following calculations are possible for 3U+3I+3I cabling. Parameters Total Nos. Frequency RMS Magnitude, fundamental Phase Angle, fundamental RMS Magnitude, full Positive Sequence, amplitude Voltage Positive Sequence, angle Negative Sequence, amplitude Negative Sequence, angle...
- Page 192 Appendix B – INFORMA PMD-A Functions The following calculations are possible for 3U+3I+3I+3I cabling. Parameters Total Nos. Frequency RMS Magnitude, fundamental Phase Angle, fundamental RMS Magnitude, full Positive Sequence, amplitude Voltage Positive Sequence, angle Negative Sequence, amplitude Negative Sequence, angle...
- Page 193 Appendix B – INFORMA PMD-A Functions The following calculations are possible for NO circuit cabling. Parameters Total Nos. Stand alone channel 1 (AC/DC) Stand alone Channel1 angle(if channel is A/C) Stand alone channel 2 (AC/DC) Stand alone Channel2 angle(if channel is A/C)
- Page 194 Appendix C – Recording Data Rates and Memory Consumtion Rates Appendix C Recording Data Rates and Memory Consumption Rates www.qualitrolcorp.com...
-
Page 195: Appendix C - Recording Data Rates And Memory Consumption Rates188
Appendix C – Recording Data Rates and Memory Consumtion Rates Appendix C – Recording Data Rates and Memory Consumption Rates The following table lists the data rates and memory consumption rates. Functionality Default Number Record Total Mode of Alarm Memory Duration Time Operation... - Page 196 Appendix C – Recording Data Rates and Memory Consumtion Rates Functionality Default Number Record Total Mode of Alarm Memory Duration Time Operation Level Assigned Parame Duration (in MB) ters minutes) Taken to Fill Assigned Memory minutes) Embedded recordings / Linear/ %x alarm Histograms - 2000...
- Page 197 Appendix C – Recording Data Rates and Memory Consumtion Rates Functionality Default Number Record Total Mode of Alarm Memory Duration Time Operation Level Assigned Parame Duration (in MB) ters minutes) Taken to Fill Assigned Memory minutes) Memory Record Total Assigned (in Duration Time Duration...
- Page 198 Appendix C – Recording Data Rates and Memory Consumtion Rates Functionality Default Number Record Total Mode of Alarm Memory Duration Time Operation Level Assigned Parame Duration (in MB) ters minutes) Taken to Fill Assigned Memory minutes) Compact Flash Size in Free Space Available in 0.894522...
- Page 199 Appendix D – License Information Appendix D License Information www.qualitrolcorp.com...
-
Page 200: Appendix D - License Updates
Appendix D – License Information Appendix D – License Updates If the user wants to request for a license update, Qualitrol must be provided with access to the device. Else, Qualitrol must be provided with the <serial_number.req> file generated by the device. -
Page 201: Modifying An Existing License
Appendix D – License Information Modifying an Existing License If a license already exists, then the System Information Web page is displayed. The Web page shows the existing license information, such as the device serial number, customer ID, order number, features included in the current license, and so on. To modify an existing license: 1. - Page 202 4. A new <serial_number.req> file is generated on the device’s file system. Save the <serial_number.req> file on the computer and send it to the appropriate sales representative or the Qualitrol licensing authority. Figure D.3 – Saving the Serial Number www.qualitrolcorp.com...
- Page 203 6. Using the Browse button, locate the file, and click Install license. Figure D.4 – Installing the License 7. The license is transferred to the INFORMA PMD-A device’s file system and the device restarts. To return to the main System Information page, refresh the Web page.
- Page 204 Appendix E – Battery Replacement Procedure Appendix E Battery Replacement Procedure www.qualitrolcorp.com...
-
Page 205: Appendix E - Battery Replacement Procedure
Battery Replacement Procedure for an INFORMA PMD-A 3U Device To replace a battery, the following steps must be performed: 1. Switch off the main power supply to the INFORMA PMD-A 3U device and disconnect the input power cord. 2. Switch off the battery by using the switch provided on the UPS board. - Page 206 7. Connect the new battery to the CN5 connector. Figure E.3 – Rajamane Battery 8. Reconnect the UPS/power supply module to the INFORMA PMD-A 3U device. 9. Connect the power cord and switch on the INFORMA PMD-A 3U device. www.qualitrolcorp.com...
-
Page 207: Appendix F - On-Board Led Functionalities
Appendix F – On-Board LED Functionalities and CPU MMI Modes Appendix F On-Board LED Functionalities and CPU MMI Modes www.qualitrolcorp.com... -
Page 208: Appendix F - On-Board Led Functionalities
Appendix F – On-Board LED Functionalities and CPU MMI Modes Appendix F – On-Board LED Functionalities LED Functions on the Motherboard All LEDs are red in color. D38 (under D704 (under Internal Modem PCB) Relay PCB) D701, D703, D36, D34, D1 D35, D37, D21, D22 Figure F.1 –... -
Page 209: Led Functions On The Dsp Board
Appendix F – On-Board LED Functionalities and CPU MMI Modes The following table describes the LEDs on the motherboard. Description Reset status for the INFORMA PMD-A device. “ON” indicates that “Power On RESET” has occurred and is still in reset condition. Debug LED (Reserved for future use) CPU_DONE indicates that FPGA is programmed. -
Page 210: Cpu Mmi Modes
Appendix F – On-Board LED Functionalities and CPU MMI Modes The following table describes the LEDs on the DSP board. Description LED2 Voltage indicator for +3.3 V which is used for DSP I/O LED1 Voltage indicator for +1.2 V which is used for DSP core CPU MMI Modes Based on the Dip switch position, the MMI mode is decided. - Page 211 Appendix F – On-Board LED Functionalities and CPU MMI Modes In the 1 CPU mode, the CPU must be connected to the first UART port (refer to legend J1 on MMI card). Figure F.3 – MMI Card – Dip Switch (S1) and First UART Port (J1) If the CPU is connected to the second UART port (J2 on MMI card), then the connection will not be detected because the second UART port is not initialized in the 1 CPU mode.
- Page 212 Appendix G – On-Board Jumper Settings Appendix G On-Board Jumper Settings www.qualitrolcorp.com...
-
Page 213: Appendix G - On-Board Jumper Settings
Appendix G – On-Board Jumper Settings Appendix G – On-Board Jumper Settings The following table lists the TX-AFE jumper settings. TX-AFE Jumper Table Channel No Channel Jumper Position Selection Description Default /Purpose Type Legend When the Standalone TX-AFE/HIA- Mode AFE board is tested without Mode... - Page 214 Appendix G – On-Board Jumper Settings TX-AFE Jumper Table Channel No Channel Jumper Position Selection Description Default /Purpose Type Legend 50A FSD Mounted for Input 100A FSD Channel Configured Channel as Voltage For Channel Configuration Configuration Channel for CH2 Configured as Current Mounted for Input...
- Page 215 Appendix G – On-Board Jumper Settings TX-AFE Jumper Table Channel No Channel Jumper Position Selection Description Default /Purpose Type Legend Mounted for Input 270V FSD Mounted for Input 480V FSD Mounted for Input 800V FSD Mounted for Input 10A FSD Mounted for Input Current...
- Page 216 Appendix G – On-Board Jumper Settings TX-AFE Jumper Table Channel No Channel Jumper Position Selection Description Default /Purpose Type Legend 20A FSD Mounted for Input 50A FSD Mounted for Input 100A FSD Channel Configured Channel as Voltage For Channel Configuration Configuration Channel for CH5...
- Page 217 Appendix G – On-Board Jumper Settings TX-AFE Jumper Table Channel No Channel Jumper Position Selection Description Default /Purpose Type Legend Mounted for Input 140V FSD Mounted for Input Voltage 270V FSD Voltage Range Mounted Selection for Input 480V FSD Mounted for Input 800V FSD Mounted...
- Page 218 Appendix G – On-Board Jumper Settings TX-AFE Jumper Table Channel No Channel Jumper Position Selection Description Default /Purpose Type Legend 10A FSD Mounted for Input 20A FSD Mounted Selection for Input 50A FSD Mounted for Input 100A FSD Channel Configured Channel as Voltage For Channel...
- Page 219 Appendix G – On-Board Jumper Settings TX-AFE Jumper Table Channel No Channel Jumper Position Selection Description Default /Purpose Type Legend Channel Configured as Current Mounted for Input 140V FSD Mounted for Input Voltage 270V FSD Voltage Range Mounted Selection for Input 480V FSD Mounted for Input...
- Page 220 Appendix G – On-Board Jumper Settings The following table lists HIA-AFE jumper settings. HIA-AFE Jumper Table Channel Channel Jumper Position Selection Description No./Purpose Type Legend Channel Configured as J162 Voltage Channel Configured as Current J152 Channel J162 Configured as For Channel DC Voltage Channel Configuration...
- Page 221 Appendix G – On-Board Jumper Settings HIA-AFE Jumper Table Channel Channel Jumper Position Selection Description No./Purpose Type Legend Mounted for Input 10A FSD Mounted for Input 20A FSD Current Current Range Mounted for Selection Input 50A FSD Mounted for Input 100A Mounted for Input 12VDC Mounted for...
- Page 222 Appendix G – On-Board Jumper Settings HIA-AFE Jumper Table Channel Channel Jumper Position Selection Description No./Purpose Type Legend Channel Configured as J153 Mounted for Input 140V Mounted for Input 270V Voltage Voltage Range Mounted for Selection Input 480V Mounted for Input 800V Mounted for Input 10A FSD...
- Page 223 Appendix G – On-Board Jumper Settings HIA-AFE Jumper Table Channel Channel Jumper Position Selection Description No./Purpose Type Legend Channel Configured as Current J154 J164 Channel Configured as DC Voltage Channel Configured as J164 mA loop Channel Configured as J154 Mounted for Input 140V Mounted for Input 270V...
- Page 224 Appendix G – On-Board Jumper Settings HIA-AFE Jumper Table Channel Channel Jumper Position Selection Description No./Purpose Type Legend Mounted for Input 12VDC Mounted for Input 120VDC DC Voltage Range Voltage Mounted for Selection Input 240VDC Mounted for Input 480VDC Channel Configured as Voltage Channel...
- Page 225 Appendix G – On-Board Jumper Settings HIA-AFE Jumper Table Channel Channel Jumper Position Selection Description No./Purpose Type Legend Mounted for Input 270V Mounted for Selection Input 480V Mounted for Input 800V Mounted for Input 10A FSD Mounted for Input 20A FSD Current Current Range...
- Page 226 Appendix G – On-Board Jumper Settings HIA-AFE Jumper Table Channel Channel Jumper Position Selection Description No./Purpose Type Legend J103 J104 Channel Configured as mA loop J103 J104 Channel J156 Configured as J103 J104 CH5 Full Mounted for Scale Input 140V Selection Mounted for Input 270V...
- Page 227 Appendix G – On-Board Jumper Settings HIA-AFE Jumper Table Channel Channel Jumper Position Selection Description No./Purpose Type Legend Input 240VDC Mounted for Input 480VDC Channel Configured as Voltage J116 J117 J116 Channel Configured as J117 Current J157 Channel Configured as Channel For Channel DC Voltage...
- Page 228 Appendix G – On-Board Jumper Settings HIA-AFE Jumper Table Channel Channel Jumper Position Selection Description No./Purpose Type Legend Input 800V Mounted for Input 10A FSD Mounted for Input 20A FSD Current Current Range Mounted for Input 50A FSD Selection Mounted for Input 100A Mounted for Input 12VDC...
- Page 229 Appendix G – On-Board Jumper Settings HIA-AFE Jumper Table Channel Channel Jumper Position Selection Description No./Purpose Type Legend J161 J136 J137 Channel J136 Configured as J137 J158 Mounted for Input 140V Mounted for Input 270V Voltage Voltage Range Mounted for Selection Input 480V Mounted for...
- Page 230 Appendix G – On-Board Jumper Settings HIA-AFE Jumper Table Channel Channel Jumper Position Selection Description No./Purpose Type Legend for CH8 Voltage J138 J139 J138 Channel Configured as J139 Current J159 J109 Channel J110 Configured as J107 DC Voltage J138 J139 J109 J110 Channel...
- Page 231 Appendix G – On-Board Jumper Settings HIA-AFE Jumper Table Channel Channel Jumper Position Selection Description No./Purpose Type Legend Mounted for Input 100A Mounted for Input 12VDC J105 Mounted for Input 120VDC DC Voltage Range Voltage Mounted for Selection Input 240VDC J106 Mounted for Input 480VDC...
- Page 232 User can configure the TX-AFE/ HIA-AFE board as TX-AFE/ HIA-AFE 1 or TX- Note AFE/ HIA-AFE 2 for INFORMA PMD-A 6U device, which means TX-AFE/ HIA- AFE 1 relates to analog channels 1-9 and TX-AFE/ HIA-AFE 2 relates to analog channels 10-18.
- Page 233 Appendix G – On-Board Jumper Settings Jumper Legend TX-AFE1 /HIA-AFE 1 TX-AFE2 /HIA-AFE 2 J132 J130 J133 J135 J134 J129 J128 J147 J131 J149 J127 J148 J143 J144 J145 J146 J142 Changes in the jumper on TX-AFE/ HIA-AFE board affects the calibration, hence device needs to be re-calibrated.
- Page 234 Appendix G – On-Board Jumper Settings The following table lists the AFE child card jumper settings. AFE Child Card Jumper selection Table DC Inputs/mA JUMPER SELECTION Current Loop 12 V Unmount Unmount 120V Unmount Unmount 240V Unmount Unmount 480V Unmount Unmount Mounted Unmount...
- Page 235 Appendix G – On-Board Jumper Settings CPU/Mother Board Jumper Table Purpose Jumper Position Selection Description Default Legend jumper setting 3--> DGND ) IRIG-TTL JPR701 PPM/PPH/TTL Selection of IRIG- PPM/PPH TTL/PPM/PPH Selection Source. GPS PPS J704 Mount GPS PPS Used for GPS- Unmount Debug TEST...
- Page 236 Appendix G – On-Board Jumper Settings CPU/Mother Board Jumper Table Purpose Jumper Position Selection Description Default Legend jumper setting Unmount Disable the termination for differential RS485 signals Termination Isolated Mount Enable the For enabling or Unmount RS485 differential disabling termination differential termination for Unmount Disable the...
- Page 237 Appendix G – On-Board Jumper Settings Relay Jumper Table Jumper Default Sl No. Purpose Position Description Legend Selection Relay Contact 2 Mount Output contacts Unmount open Unmount Output Unmount contacts Mount Mount closed Relay Contact 3 Mount Output contacts Unmount open Unmount Output...
- Page 238 Appendix H – Linearity Report of TX-AFE and HIA-AFE Appendix H Linearity Report of TX-AFE and HIA-AFE www.qualitrolcorp.com...
-
Page 239: Appendix H - Linearity Report Of Tx-Afe And Hia-Afe
Appendix H – Linearity Report of TX-AFE and HIA-AFE Appendix H – Linearity Report of TX-AFE and HIA-AFE TX-AFE Linearity Report For Voltage Channel: Potential Transformer, tap setting 270 V FSD Frequency : 50 Hz Nominal Voltage : 120 V Input voltage Voltage measured Error in terms of %... - Page 240 Appendix H – Linearity Report of TX-AFE and HIA-AFE Figure H.2 – % Error in Terms of Fed Input for Voltage Channel For Current Channel: Current Transformer, tap setting 100 A FSD Frequency : 50 Hz Nominal Voltage : 10 A Input current Current measured Error in terms of %...
- Page 241 Appendix H – Linearity Report of TX-AFE and HIA-AFE Figure H.3 – % Error in Terms of FSD for Current Channel Figure H.4 -- % Error in Terms of Fed Input for Current Channel www.qualitrolcorp.com...
- Page 242 Appendix H – Linearity Report of TX-AFE and HIA-AFE HIA-AFE Linearity Report: For Voltage Channel: Potential Transformer, tap setting 270 V FSD Frequency : 50 Hz Nominal Voltage : 120 V Input Voltage Error in terms Error in terms of Error in terms voltage measured by the...
- Page 243 Appendix H – Linearity Report of TX-AFE and HIA-AFE Figure H.6 -- % Error in Terms of FED Input (120 VAC nominal) Figure H.6 -- % Error in Terms of % Udin (120 VAC) www.qualitrolcorp.com...
- Page 244 Appendix H – Linearity Report of TX-AFE and HIA-AFE For Current Channel: Current Transformer, tap setting 100 A FSD Frequency : 50 Hz Nominal Voltage : 10 A Input current Current observed in Error in terms of % Error in terms of % applied in Amps Input...
- Page 245 Appendix H – Linearity Report of TX-AFE and HIA-AFE Figure H.8 -- % Error in Terms of FED Input for Current Channel (10 AAC nominal) www.qualitrolcorp.com...
- Page 246 References References www.qualitrolcorp.com...
- Page 247 References References For Configuration forms, refer to the document 36-8218-xx. For details of error log messages/codes and their meanings, refer to the document 40-08576-01. www.qualitrolcorp.com...
- Page 248 ® QUALITROL Educational Services ® QUALITROL professional training (designed to achieve hands-on performance based objectives) prepares operations, ® maintenance, and engineering personnel to install, test, configure, operate and maintain QUALITROL products. ® QUALITROL Accelerated Delivery ® QUALITROL provides accelerated delivery on many products and services including replacements, spare parts and repairs.
Need help?
Do you have a question about the INFORMA PMD-A and is the answer not in the manual?
Questions and answers