Table of Contents
Advertisement
Quick Links
proform.com
Model No. PFBE25020.0
Serial No.
Write the serial number in the space
above for reference.
REGISTER YOUR
PRODUCT
To register your product and
activate your warranty today,
go to my.proform.com.
MEMBER CARE
For service at any time, go to
my.iFIT.com.
Or call 1-833-680-IFIT
(1-833-680-4348)
Mon.–Fri. 6 a.m.–6 p.m. MT
Sat. 8 a.m.–12 p.m. MT
Please do not contact the store.
CAUTION
Read all precautions and
instructions in this manual before
using this equipment. Keep this
manual for future reference.
Serial
Number
Decal
USER'S MANUAL
Advertisement
Table of Contents

Subscribe to Our Youtube Channel
Related Manuals for Pro-Form PFBE25020.0


Summary of Contents for Pro-Form PFBE25020.0
- Page 1 USER’S MANUAL Model No. PFBE25020.0 Serial No. Write the serial number in the space above for reference. Serial Number Decal REGISTER YOUR PRODUCT To register your product and activate your warranty today, go to my.proform.com. MEMBER CARE For service at any time, go to my.iFIT.com.
-
Page 2: Table Of Contents
TABLE OF CONTENTS WARNING DECAL PLACEMENT ............. . .2 IMPORTANT PRECAUTIONS . -
Page 3: Important Precautions
IMPORTANT PRECAUTIONS WARNING: To reduce the risk of serious injury, read all important precautions and instructions in this manual and all warnings on the rack before using the rack. iFIT assumes no responsibility for personal injury or property damage sustained by or through the use of this product. - Page 4 STANDARD SERVICE PLANS...
-
Page 5: Before You Begin
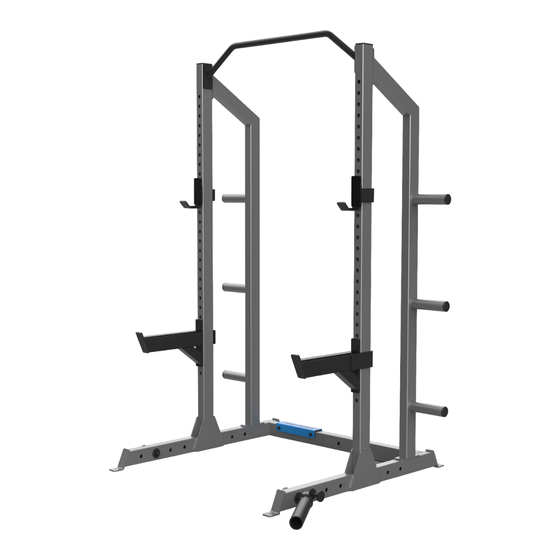
BEFORE YOU BEGIN Thank you for selecting the versatile PROFORM manual, please see the front cover of this manual. To ® CARBON STRENGTH POWER RACK. The rack offers help us assist you, note the product model number and a selection of exercise stations designed to develop serial number before contacting us. -
Page 6: Part Identification Chart
PART IDENTIFICATION CHART Use the drawings below to identify the small parts needed for assembly. The number in parentheses below each drawing is the key number of the part, from the PART LIST near the end of this manual. The number following the key number is the quantity needed for assembly. -
Page 7: Assembly
ASSEMBLY • To hire an authorized service technician to • For help identifying small parts, see page 6. assemble the rack, call 1-800-445-2480. • In addition to the included tool(s), assembly • Assembly requires two persons. requires the following tool(s): one adjustable wrench •... - Page 8 2. Identify the Left Support (11). Attach the Left Support (11) to an Upright (8) with two M10 x 95mm Bolts (26) and two M10 Locknuts (24); do not tighten the Locknuts yet. Attach the Right Support (17) to the other Upright (8) in the same way.
- Page 9 4. Orient the Crossbar (14) so that the small holes (A) are in the position shown. Attach the Crossbar (14) to the Left Base (33) with two M10 x 70mm Screws (23) and two M10 Washers (22); do not tighten the Screws yet. Attach the Crossbar (14) to the Right Base (10) in the same way.
- Page 10 6. Finish attaching the Pull-up Bar (6) to the left Upright (8) with two M10 x 70mm Bolts (23), two M10 Washers (22), and two M10 Locknuts (24); do not tighten the Locknuts yet. Finish attaching the Pull-up Bar (6) to the right Upright (8) in the same way.
- Page 11 9. Attach a Weight Tube (13) to the Left Support (11) with an M10 x 25mm Screw (27), an M10 Split Washer (32), and an M10 Washer (22). Attach two more Weight Tubes (13) to the Left Support (11) in the same way. Attach the other three Weight Tubes (13) to the Right Support (17) in the same way.
-
Page 12: Adjustment
ADJUSTMENT This section explains how to adjust the rack. See the EXERCISE GUIDELINES on page 13 for important information about how to get the most benefit from your exercise program. Make sure that all parts are properly tightened each time you use the rack. Replace any worn parts immediately. Use only manufacturer- supplied parts. -
Page 13: Exercise Guidelines
STORING YOUR WEIGHT PLATES To store your weight plates (not included), slide them onto the Weight Tubes (13). WARNING: Do not place more than 150 lbs. (68 kg) of weight on each Weight Tube (13). EXERCISE GUIDELINES FOUR TYPES OF STRENGTH WORKOUTS Weight Loss—To lose weight, use a low amount of resistance and increase the number of repetitions in Note: A “repetition”... -
Page 14: Part List
To achieve good results, make exercise a tion should last about half as long as the return stage. regular and enjoyable part of your life. PART LIST Model No. PFBE25020.0 R1121A Key No. Qty. Description Key No. Qty. -
Page 15: Exploded Drawing
EXPLODED DRAWING Model No. PFBE25020.0 R1121A... -
Page 16: Ordering Replacement Parts
ORDERING REPLACEMENT PARTS To order replacement parts, please see the front cover of this manual. To help us assist you, be prepared to provide the following information when contacting us: • the model number and serial number of the product (see the front cover of this manual) •...
Need help?
Do you have a question about the PFBE25020.0 and is the answer not in the manual?
Questions and answers