Advertisement
Quick Links
Advertisement

Related Manuals for Cookology VISOR600SS


Summary of Contents for Cookology VISOR600SS
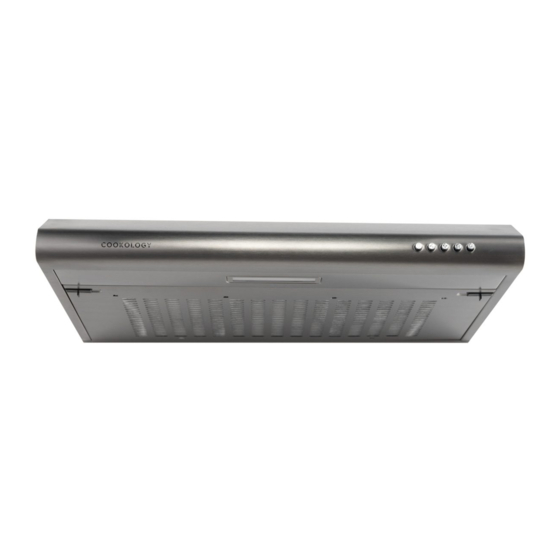
- Page 1 VISOR600SS VISOR600BK VISOR600WH Instruction manual...
-
Page 2: Table Of Contents
CONTENT 1………………………………………. General 2………………………………………. Safety precaution 3……………………………………….. Warning 4……………………………………….. Installation instructions 5……………………………………….. Operation 6…………………………………………Air ventilation setting 7…………………………………………Use and maintenance 8…………………………………………..Trouble shooting... -
Page 3: General
1. General Carefully read the following important information regarding installation, safety and maintenance. Keep this information booklet accessible for further consultations. The appliance has been designed as a exhausting version (external exhaust ) or as a filter version (internal air recycle) cooker hood. 2. - Page 4 and above and persons with reduced physical, sensory or mental capabilities or lack of experience and knowledge if they have been given supervision or instruction concerning use of the appliance in a safe way and understand the hazards involved. Children shall not play with the appliance.
- Page 5 – do not flambé under the range hood; – CAUTION: Accessible parts may become hot when used with cooking appliances. The installation instructions shall include the substance of the following: – the air must not be discharged into a flue that is used for exhausting fumes from appliances burning gas or other fuels (not applicable to appliances that only discharge the air back into the room);...
-
Page 6: Installation Instructions
include details that indicate the location and maximum permitted lengths for any fixing or mounting screw or other fixing device that penetrates into the range hood to attach an accessory such as a facia or duct fitting. Where fixing or mounting screws, or other fixing devices are used, that penetrate into the range hood with an accessible metallic enclosure of class II construction, to attach an accessory, the instructions shall indicate the... - Page 7 4.2 To install onto the wall drill 2 holes of Ø8mm on a suitable place according with the centre distance of hole in the back of the cooker hood. 4.3 Insert the plug into the holes. 4.4 Insert the screws into the plugs and tight. Put the cooker hood onto the tighten screws See Pic.
- Page 8 on the bottom of the cupboard, tighten the hood with enclosed material (4 screws, 8 flat gaskets and 4 nuts). Note: 1.The extensible pipe are optional accessory, not supplied. 2.Take off protection film before installation. 3.There are 2 methods for ventilation , including ' horizontal ventilation' and ' vertical ventilation'.
-
Page 9: Operation
5. Operation Push botton 1. Connect the appliance to the mains. 2. Press the button “Stop”, the motor is stopped then 3. Press the button “Low”, the motor is running at low speed. Press the button “Mid”, the motor is running at medium speed. Press the button “High”, the motor is running at high speed. -
Page 10: Use And Maintenance
the outside outlet. See pic 7C 6.2 Recycling: the recycling mode with carbon filter ,Turn the adjuster to indoor position (pic.7B), install the outlet cover, turn on the cooker hood, then the air can be vented from the inside outlet. See Pic 7D Note: The charcoal filter is mounted on the back of the grill and must be changed once three month. - Page 11 vapours and odours. 7.3The proper function of the cooker hood is conditioned by the regularity of the maintenance operations, in particular, the active carbon filter. 7.4The auti-grease filters capture the grease particles suspended in the air, and are therefore subject to clogging according to the frequency of the use of the appliance.
- Page 12 7.6 The cooker hood must regularly cleaned on both the inside and outside with hot water plus non corrosive detergent (AT LEAST ONCE A MONTH) To protect the main body from corrosion over a long period of time Attention! Please do not use abrasive detergent or alcohol as it will damage the body.
- Page 13 • Loosen the 2pcs ST4*8mm self-tapping screw from the lighting panel, take out the lighting fixture. • Disassembly the 3pcs ST3*12mm screws on the terminal box cover and take down the wire cover. • Pull out the terminal from the PCB terminal block, disconnect the wire connector and replace the lamp.
-
Page 15: Trouble Shooting
8. Trouble shooting Symptom Solution ● Check that the hood is connected to The cooker hood does not start. the electricity supply. ● Check that the fan speed control is set properly. ● The fan speed is not set high enough. The cooker hood is not working ●... - Page 16 This product is marked with the symbol on the selective sorting of waste electronic equipment. This means that this product must not be disposed of with household waste but must be supported by a system of selective collection in accordance with Directive 2002/96/EC. It will then be recycled or dismantled to minimize impacts on the environment, electrical and electronic products are potentially dangerous for the environment and human health due to the presence of hazardous...
Need help?
Do you have a question about the VISOR600SS and is the answer not in the manual?
Questions and answers