Table of Contents
Advertisement
Quick Links
Advertisement
Table of Contents

Related Manuals for PowerMax TDA-360-10.1


Summary of Contents for PowerMax TDA-360-10.1
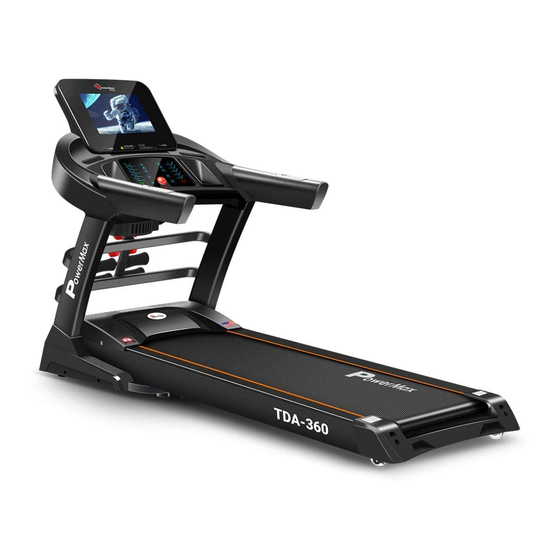
- Page 1 TDA-360-10.1 Multi-Function Treadmill User Manual OWNER’S MANUAL Read all instructions carefully before using this product. Retain this owner's manual for the future's reference. Product may be slightly different with photos, it is subject to actual product. Thank you for purchasing the product.
-
Page 2: Table Of Contents
ROUTINE MAINTENANCE AND INSTRUCTIONS 1 YEAR LIMITED WARRANTY PowerMax Fitness warrants to the original purchaser that this product is free from defects in material and workmanship when used for the purpose intended, under the conditions that it has been installed and operated in accordance with PowerMax Fitness's Owner's Manual. PowerMax Fitness's obligation under this warranty is limited to replacing or repairing, free of charge, any parts which may prove to be defective under normal home use. -
Page 3: Product Brief
Note: Following the principles of sustainable development, we may modify machines when necessary and will not notify again. It all depends on the actual product. 1. PRODUCT BRIEF A. Multifunctional Motorized Treadmill MAIN PARAMETERS AND PARTS LIST MAIN TECHNICAL PARAMETERS Parameters Names Description Input power voltage... - Page 4 Rated Frequency 50/60Hz Speed 1.0-18 km/h Running surface 480*1350 mm Expand dimensions 1930*830*1430 mm Multifunction (Option) Running (Sit up, massager, dumbbells) PACKING LIST Name Units Complete machine Dumbbell/Massager (Option) Accessory Bag Multifunction frame (Option) ACCESSORY BAG LIST Name Qty. Name Qty.
-
Page 5: Exploded View
EXPLODED VIEW PARTS LIST No. Name Qty. Name Qty. Underframe Console core Main frame End cap Upright column Side siderail Incline frame assembly Left protective cover Console frame Right protective cover Oil tank assembly Shocking reducing frame Front motor cover Rubber pad Phillips pan head screw Motor cover... - Page 6 Cross head tapping screw Cushioning pad Cross head tapping screw Running belt Phillips head self-tapping Running board self-drilling screw Phillips head self-tapping Multi wedged belt self-drilling screw Cross head three Shock reducing pad combination screw Pan head inner hexagon Power wire buckle tapping screw Pan head inner hexagon Power switch...
-
Page 7: Security Precautions And Warning
Locknut Safety key Locknut incline motor Handle pulse Cylindrical head three combination High cap screw Adjusting footpad Pan head inner hexagon screw Adjusting footpad Front roller Upper cover of display Rear caller Lower cover of display Pan head inner hexagon screw 2. -
Page 8: Forbidden
FORBIDDEN Don't use the machine in the status of the shell break in or break off (the internal structure ◆ exposed)or under the condition of welding-parts may fall off. ---- Otherwise an accident or injury may happen. Don't jump up and down in the process of movement. ◆... -
Page 9: Installation Instructions
This appliance is not intended for use by persons (including children) with reduced physical, ◆ sensory or mental capabilities, or lack of experience and knowledge, unless they have been given supervision or instruction concerning use of the appliance by a person responsible for their safety. - Page 10 2. Use 5# inner hexagon spanner, screw M8*50 and screw M8*20 to lock the columns on the base, as shown in the picture bellow: M8*20 M8*50 3. Use 5# inner hexagon spanner and screw M8*22 to lock the console on the columns. M8*20 4.
- Page 11 Connect the corresponding lines Console Slot M8*20 6. Silicon oil needs to be added before using the treadmill, method is as follow: A. Open the cover of the silicon oil tube on the front motor cover. B. Cut the upper part of the silicon oil bottle. C.
- Page 12 Above are steps of single function installation, multifunctional machines need to be installed after you complete the steps above and then continue with the following installation: 7. Use 5# inner hexagon spanner and screw M8*20 to lock the massager pipes on the columns. 8.
- Page 13 M8*50 9. Remove the three screw M8*15, spring cushion and washer, use M8*15, spring cushion and washer to lock the massager on the massager frame. M8*15 10. Put the foams through the massager frames and put the dumbbells on the frame. 11.
-
Page 14: Using Instructions
Note: please confirm that all screws are locked uniformly according to the requirements after installation, and check no part is left out before plugging electricity. 4. USING INSTRUCTIONS Using treadmill 1. Insert the power plug properly and turn on the switch (in red colour) (1). When the light is on, there will be a beep sound, and then the screen will be light up (Systems of TFT screen takes more time to enter the start interface). - Page 15 4. Mode In standby mode, press this button to cycle by the order of Time countdown→Distance countdown→Calorie countdown→Standby. In FAT mode, press this button to set the value of gender, height and weight (please refer to FAT instructions for details). 5.
-
Page 16: Programs
2. F1--Gender, screen displays 01 stand for male, 02 stand for female. Press SPEED+ or Speed- to select gender. Press MODE to confirm. 3. F2--Age, the value range for age is 10-99 years, Press SPEED+ or Speed- to select age, Press MODE to confirm. -
Page 17: Translation Of Error Codes
Speed Incline Speed Incline Speed Incline Speed Incline Speed Incline Speed Incline Speed Incline TRANSLATION OF ERROR CODES Error code Description Solution Communication Abnormal: when the Possible Cause: the communication between the power on, the lower controller and console is blocked, check each connection between joint between the controller and console, ensure that lower controller and... -
Page 18: Routine Maintenance And Instructions
Possible Cause: Check the cable between the motor and drive board to see whether it is connected well or not, if not, No signal from motor. connect it well. Check the motor cable to see whether it is damaged or has a burnt smell, if yes, replace the motor. Possible Cause: Overloading leads to excessive current, and the system stop for self-protection, or some part of... - Page 19 Warning: Make sure power plug disconnect before moving motor cover away, clean the motor at least once a year. Running belt specialized lubricant This electric treadmill’s running board and running belt has been lubricated in factory. Friction between the running belt and running board has a great influence to the using life and the performance of the electric treadmill, therefore regular applying of lubricant is needed.
- Page 20 Picture A Picture B Multi-wedge Belt Tension Adjusting When you use the treadmill for a long time, the multi-wedge belt becomes loose because of the abrasion, then you have to do some appropriate adjustment to facilitate the safe use. Judgment: the feeling of running with the occasional pause phenomenon, which indicating that the treadmill belt or multi-wedge belt are a little loose and further affirmation need to be made.
Need help?
Do you have a question about the TDA-360-10.1 and is the answer not in the manual?
Questions and answers