
Subscribe to Our Youtube Channel
Related Manuals for PowerMax TDM-105S


Summary of Contents for PowerMax TDM-105S
- Page 1 TDM-105S MOTORIZED TREADMILL OWNER’S MANUAL Retain this owner’s manual for future reference. Read and follow all instructions in this owner’s manual.
-
Page 2: Table Of Contents
PARTS LIST 1 YEAR LIMITED WARRANTY PowerMax Fitness warrants to the original purchaser that this product is free from defects in material and workmanship when used for the purpose intended, under the conditions that it has been installed and operated in accordance with PowerMax Fitness's Owner's Manual. PowerMax Fitness's obligation under this warranty is limited to replacing or repairing, free of charge, any parts which may prove to be defective under normal home use. -
Page 3: Product Brief Introduction
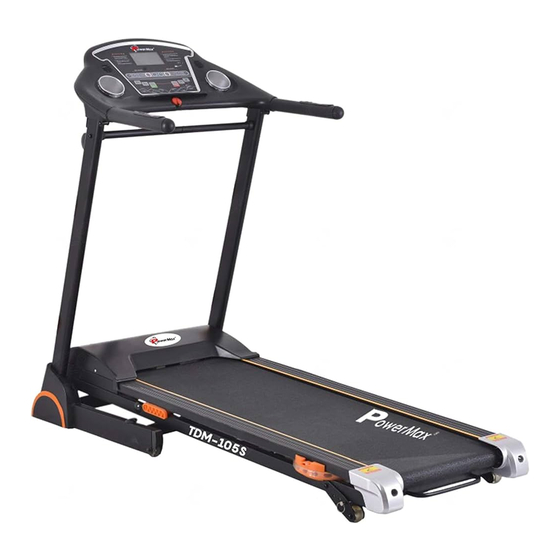
PRODUCT BRIEF INTRODUCTION Product Name: Motorized Treadmill Model Number: TDM-105S Electronics Safety Key Upright Run Platform www.powermaxfitness.net... - Page 4 Technical Parameters No. Parameters Name Running Area 1260mm×420mm Max Allowable weight 115KG Expand Size 1770*800*1380mm Voltage/Frequency AC220V (50~60Hz) Speed 1.0-14KM/H Function Run /Audio/ /HR Parts number list 6 mm Internal Hexagonal Nut M8*50 Up Horizontal Pipe 6 mm Internal Hexagonal Nut M8*35 U Pipe Fix 6 mm Internal Hexagonal Nut sM8*55 Upright fixed...
-
Page 5: Security Notice And Warnings
SECURITY NOTICE AND WARNINGS Note: Please carefully read the instruction book before using and notice the following safety matters. ♦ Treadmill is suitable to be placed in the room so as to avoid dampness. It can’t be splashed by water and can’t prevent any foreign materials. ♦... - Page 6 Warnings! Compulsion! 1. For people who are undertaking medical treatment or the following patients, please discuss with special doctors before use. 2. People who are suffering back pain or who suffered leg, waist, neck injuries. People who suffer leg, waist, neck and hand numbness (people who have inveterate diseases such as slipped disc, spine slipped disease, cervical protruding, etc.) 3.
- Page 7 Bans! ♦ Don’t use when the shell cracks and falls apart (inner structure is exposed) or welding parts fall off. ----Otherwise, it may cause accidents or injuries. ♦ During exercising, don’t jump up or down. ----Otherwise, injuries may be caused by falling down. ♦...
-
Page 8: Installing Steps
♦ when not use, pull out the plug from plug base. ----Otherwise, dust and dampness will make insulation degrade, and then leakage of electricity and fire will be caused. Ground connection instrument! ♦ This product must be grounded. If the machine occurs malfunction, the ground will provide a path of least resistance for the current in order to reduce the danger of electric shock. - Page 9 Step 2 Electronic watch and hand grip tighten up the hand grips on both sides with M8*20 screw separately by making them pass through handgrip hole and connected with the uprights. Step 3 (only for multifunction) up and down U-shaped tube first place the rubber protection sleeve at each side of U-shaped tube, assembly 2 ends of U-shaped tube to iron plate of left and right stand column with M8*40 screws, lock with...
- Page 10 Step 5 (only for multifunction) Massage 1. First, screw off the three M8*16 screws below the massage machine head, (include flat washers and spring washers), and then place the massage machine head on the functional frame, and tighten up with the above unloaded screws.
-
Page 11: Sport Suggestions And Guiding Principle
SPORT SUGGESTIONS AND GUIDING PRINCIPLE Warm-up Take warm-up exercise for 5 to 10 minutes before using this machine each time. Breathing When exercising, you can’t hold your breath, usually inhale with nose when intending to release actions, and exhale with mouth. Inhaling should be coordinated with exhaling. If breathing too fast, you should stop exercising immediately. - Page 12 Stretching exercise Whatever your running speed is, you’d better do stretch exercise first. Warn muscles are easier to stretch, so walk for 5 to 10 minutes to warn up. Next, stop to do stretching exercise for five times according to the following methods, 10 seconds or more for each leg, and do again after exercising.
-
Page 13: Product Instructions
PRODUCT INSTRUCTIONS 1. CONSOLE 2. SPEED: Rang 1.0-14.0KM/H. The LCD will show numbers 3,2,1, then, Starting treadmill. The setting and data show in LCD display during fat measurement. 3. TIME: A. Manual Model: Setting time 0-100 minutes or ‘end’ shows in LCD display, the speed of treadmill will be slow stably and standby time after 5 minutes. - Page 14 SPEED: ‘+’ this sign to be increase the speed. ‘-’ this sign to be decrease the speed. If you press it over o.5 continues + or - sign, the speed will be automatic increasing or decreasing. 3. FAST STARTING (MANUAL MODEL) Pls following operation step by step.
-
Page 15: Product Maintenance
7. Attachment: P1-P12 Program Sports Diagram PRODUCT MAINTENANCE Lubricating The running belt must be lubricated with specially configured methyl silicone oil after used for a period of time. 1. Advice: When use time a week is less than 3 hours, it should be lubricated once in five months. When use time a week is between 4-7 hours, it should be lubricated once in two months. - Page 16 3. Running belt tension adjustment All treadmills’ belts should be adjusted before leaving the factory and after the installation, however, after it is used for a period, looseness may occur. For example: when users are running, it may occur pause and slip, if which happens, adjust the belt and bolts synchronously from both the left and right side in a clockwise direction and with semicircle as the unit;...
-
Page 17: Frequently Asked Questions
5. DRIVING BELT ADJUSTMENT All the treadmills’ driving belts are adjusted before leaving the factory, but after using for a period, it may still occur slip, which is mainly adjusted by users. Adjustment steps (see the picture): 1. Clockwise rotate adjustment screw with spanner. 2. -
Page 18: Exploded Pictures
EXPLODED PICTURES www.powermaxfitness.net... -
Page 19: Parts List
PARTS LIST No. Item Specification Base Frame Main Frame Right Upright Left Upright Motor Bracket Motor Adjuster Computer Bracket Affixed to the rod Transport Wheel Cap Transport Wheel Affixed to the pole piece Adjustable Leveller 28*11*M8*20 PU Wheel Ball latch Foot Lock Latch Tube Φ22*Outside tube*Φ28*685*410*180N Computer Cover... - Page 20 Hexagon Socket Oval Head Bolt M8*45 Bolt M4x12 M4*12 Belt PJ-180*6 Side Rail Front Roller 32L Left End Cover 32R Right End Cover Rear Roller Deck Bumper Φ25*25*M8*12 35L Left Anti Slip Pad 76*585*T1 35R Right Anti Slip Pad 76*585*T1 Motor Auto lubrication shock absorption Shock Absorption Elastomer...
- Page 21 Running Belt Washer T5.0xØ25xØ15 T5.0*Φ25*Φ15 Countersunk Head Bolt M8x25 M8*25 Countersunk Head Bolt M8x30 M8*30 Running Deck T15*572*1110 Handlebar Foam Grip Hand Pulse Sensor and Control Buttons with Wire Oil filler Pipe Hexagon Socket Oval Head Bolt M10*40 Brown AC Connect Wire L=250 mm Safety Tether Key ST4*35 Screw...
- Page 22 Latch Handlebar End Cap Plastic soft mat φ10.5*φ23*T2 Plastic soft mat φ10.5*φ23*T2 Multifunction Pillow Type Foam Massage belt Dumbbell U tube Shield U tube Foam Function Frame tube plug Twist Function Frame Pillow Type Foam Hexagon Bolt M8*20 M8*20 Hexagon Socket Oval Head Bolt M10*65 U Tube Massager...
- Page 23 flat washer φ8.5*φ16*T1.5 Nut M8 Hexagon Socket Oval Head Bolt M8*45 Safety Tether Key Silicon Oil 5mm Allen Wrench 6mm Allen Wrench Screw driver Φ15*Φ5*115 Open Spanner 13-15 Open Spanner 14-17 Single function Tool Bag Self-Drilling Screw ST4*16 Hexagon Socket Oval Head Bolt M8*20 flat washer φ8.5*φ16*T1.5...
Need help?
Do you have a question about the TDM-105S and is the answer not in the manual?
Questions and answers