Table of Contents
Advertisement
©2022 Dorel Juvenile Group, Inc. (800) 951-4113 www.maxicosi.com. Styles and colors
may vary. Les styles et les couleurs peuvent varier. Made in China from American
and imported parts (including seat pad). Fabriqué aux ÉTATS-UNIS. Distributed by (distribué
par) Dorel Juvenile Group, Inc., 2525 State St., Columbus, IN 47201-7494.
Dorel Juvenile Canada, 2233 Argentia Road, Suite 110, Mississauga, ON L5N 2X7.
Importado y Distribuido en Chile por: Comercial e Industrial Silfa S.A. - San Ignacio
0201 / Parque Industrial Portezuelo Quilicura, Santiago Chile. Fono (562) 2339 9000. En
Perú por: Comexa S.A. - Los Libertadores 455 – San Isidro, Lima – Perú. Fono
(511) 4469014. En Centro América, Caribe y Ecuador por: Best Brands Group S.A. – Av.
Balboa, Bay Mall Plaza, Planta Baja, local 9, Panamá. - Fono: (507) 300 2884.
En Colombia por: Baby Universe S.A.S. Vía 40 No. 77-29, Barranquilla, Colombia - Fono:
(575) 353 1110 Importador: DJGM, S.A. DE C.V. Gabriel Mancera No. 1041 Col. Del Valle,
Benito Juárez C.P. 03100 México, Ciudad de México R.F.C. DJG140305GN9 Tel. (55)
67199202
5/22
4358-8093A
Magellan
All-in-One Car Seat
4358-8093A 6.24.22
Read all instructions before using this product.
KEEP INSTRUCTIONS FOR FUTURE USE.
Failure to follow the warnings on the labels and in the
instruction manual can result in serious injury or death to
your child.
®
LiftFit
Advertisement
Table of Contents

Subscribe to Our Youtube Channel
Related Manuals for Maxi-Cosi Magellan LiftFit


Summary of Contents for Maxi-Cosi Magellan LiftFit
- Page 1 Magellan ® LiftFit All-in-One Car Seat ©2022 Dorel Juvenile Group, Inc. (800) 951-4113 www.maxicosi.com. Styles and colors may vary. Les styles et les couleurs peuvent varier. Made in China from American and imported parts (including seat pad). Fabriqué aux ÉTATS-UNIS. Distributed by (distribué par) Dorel Juvenile Group, Inc., 2525 State St., Columbus, IN 47201-7494.
- Page 2 Overview Quick Navigation Welcome to the Maxi-Cosi family and thank you for choosing this car seat, also known as a child restraint! To help you get started using your child’s new car seat, here are the 4 REAR-FACING FORWARD-FACING BOOSTER SEAT main tasks you’ll need to complete.
-
Page 3: Table Of Contents
Contents Securing Child in Car Seat ..........Getting Started Parts of Car Seat ................1 Booster Seat Use Accessory Use ................3 Booster Seat Mode ..............56 Choosing Car Seat Mode ............7 Storing Harness System .............57 Preparing Car Seat for Child Fit ............9 Booster Seat Child Fit ..............61 Rear-Facing Child Fit... -
Page 4: Parts Of Car Seat
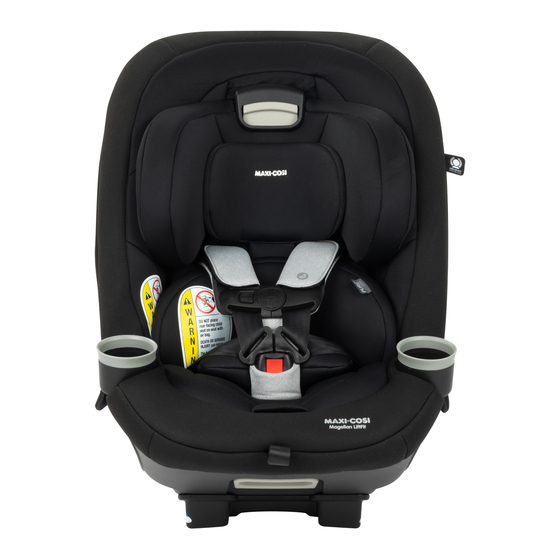
Parts of Car Seat Headrest Adjustable Adjustable Adjustment Headrest Torso Handle Rear- Head Torso Spring Facing Adjustment Pillow* Assist Out- Level Line Button of-the-Way Back Harness Forward- Pillow* Removable Covers* Facing Cup Holder* Small Infant AutoLock ® Harness Positioning Rear-Facing Release Pillow AutoLock... -
Page 5: Accessory Use
Accessory Use Only For Use in Rear-Facing Mode For Use in Rear-Facing Mode Small Infant Positioning Pillow Forward-Facing Mode When used, the small infant positioning Spring Assist Out-of-the-Way Harness Covers pillow MUST be used with the back pillow. Harness covers help provide comfort to your child’s neck. If the This pillow helps position your infant in the harness covers will not allow proper positioning of the chest clip or seat to achieve proper harness fit. - Page 6 Only For Use in Rear-Facing Mode For Use in All Modes Head & Back Pillow Removable Cup Holders The head and back pillow MUST be (on select models) used together. The cup holders are top-rack To remove head pillow, pull it out from dishwasher safe.
-
Page 7: Choosing Car Seat Mode
Choosing Car Seat Mode REAR-FACING MODE 5-40 lb (2.3-18 kg) and 40 in. (102 cm) or less in height WARNING: Children under 1 year of age MUST ride Rear-Facing. In this car seat, your child can remain Rear-Facing until Measure your child’s weight and height (DO NOT guess) they outgrow any one of the following: before choosing this car seat’s mode. -
Page 8: Preparing Car Seat For Child Fit
Preparing Car Seat for Child Fit Fully Loosen Harness Straps • Place your hand between the harness Release Chest Clip cover and the harness • Hold each side of the strap. chest clip. • You may need to undo • Press the release the harness cover or button with your move the chest clip... -
Page 9: Rear-Facing Child Fit
Rear-Facing Child Fit Forward-Facing Child Fit Head Position Head Position The top of your child’s head The tops of your child’s ears MUST be at least 1 in. (2.5 cm) MUST be below the top of the below the top of the car seat’s car seat’s headrest. -
Page 10: Changing Headrest/Harness Height
Changing Headrest/Harness Height Changing Buckle Position Changing Headrest/ Fully Loosen Harness Harness Height Straps Squeeze the headrest adjustment handle. Move the headrest up or down to the proper height for your child. Unbuckle Harness Release the headrest adjustment handle to lock the headrest in place. Make sure the headrest is locked securely in place. -
Page 11: Changing Buckle Position For Smaller Infants
Changing Buckle Position From Top of Car Seat, for Smaller Infants Pull Buckle and Buckle Cover Out of Car Seat & If you cannot achieve a snug harness fit for your infant, make these adjustments. Slide Buckle Cover into With Buckle in the 1st Slot Chosen Slot in Pad As Shown, Pull Up Front of Seat Pad... -
Page 12: Reclining Car Seat
Reclining Car Seat Changing Torso Position This car seat has multiple positions. This car seat has an adjustable torso. Rear-Facing Forward-Facing Booster Seat On the base, there are labels that show Mode Mode Mode the recline positions you will need to use to install this car seat in different modes. -
Page 13: Latch: Lower Anchor Belt
LATCH: Lower Anchor Belt Adjuster For Use in Rear-Facing Mode Forward-Facing Mode Lower Anchor Connectors Lower Anchor Belt Lower Anchor Storage Location Belt Parts To Remove Lower Anchor Belt from Storage Location on Car Seat: 1. Lift the front of the car seat pad up. 2. -
Page 14: Vehicle Belts
Vehicle Belts Check How This Car Seat Will Be Locked Into Place The vehicle belt MUST NOT loosen after tightening. This means there needs to be a way to lock the vehicle belt. The ways this can be done are: •... - Page 15 Types of Retractors Check Latch Plates Latch plates are the part of the seat belt that goes into the Switchable Retractor buckle. (most vehicles have this type) To see if the latch plate locks: This retractor can be switched to a locking mode. 1.
-
Page 16: Top Tether Use
Top Tether Use Storing Top Tether Strap The tether strap MUST be properly Forward-Facing Mode Only Strap stored in its storage location when: Adjuster • installing in Rear-Facing Mode; Hook Storage Location • using the Booster Seat Mode; OR • the car seat is not installed in a vehicle. -
Page 17: Rear-Facing Mode
Rear-Facing Mode Rear-Facing Vehicle Belt Install 5-40 lb (2.3-18 kg) and 40 in. (102 cm) or less in height Before you begin installing the car seat into your vehicle, did you check: Your child’s weight and height? See page 27. Your child’s fit? See page 11. - Page 18 Recline Car Seat Route Vehicle Belt Squeeze the recline handle • Thread the vehicle belt into and rotate the car seat to any Rear-Facing Belt Path blue position that will make opening. Level Line parallel with • You can locate the seat the ground.
- Page 19 Tighten Belt Check Belt Tightness • Place your hand in the car • Hold the car seat ONLY at the belt path with your seat. non-dominant hand. • Firmly push the car seat down and towards the • Push and pull the car seat vehicle seat back.
-
Page 20: Rear-Facing Vehicle Belt Install
Rear-Facing LATCH: Recheck Rear-Facing Level Line Lower Anchor Belt Install Redo the installation if the Level Line is not parallel with the ground. Before you begin installing the car seat Only if necessary, you may into your vehicle, did you check: place a tightly rolled towel(s) or foam pool noodle(s) under the front of the car seat to help get... - Page 21 Place Car Seat Rear- Facing in Back Seat Remove Connector with Adjuster from Storage • Press the red release button on the connector with the adjuster closest to it and pull it out of the storage location. • Press the adjuster’s button and pull the belt to loosen. •...
- Page 22 Attach Lower Anchor If it moves more than 1 in. (2.5 cm), you can try: Connectors to Vehicle’s • Tightening the belt more; OR Lower Anchors • Reinstalling the car seat; OR • Review your vehicle owner’s • Changing to a different seating location; OR manual for LATCH: lower anchor locations and lower •...
-
Page 23: Forward-Facing Mode
Forward-Facing Mode Forward-Facing Vehicle Belt Top Tether Install 22-65 lb (10-29 kg) and 29-49 in. (74-125 cm) and at least 1 year old Before you begin installing the car seat into your vehicle, did you check: Your child’s weight and height? See page 39. Lap/Shoulder Lap Belt LATCH: Lower Anchor Belt... - Page 24 Make Car Seat Flush Raise Headrest All the Against Vehicle Seat Way Up You MUST use the upright position. Push the car seat so that it will make the back of the car seat as flush against the vehicle seat back as possible. Undo All Headrest Pad Fasteners NOTE: If your vehicle...
- Page 25 IMPORTANT! Tighten Belt If you will be using the • Place your hand in the car AutoLock: seat. DO NOT pull the vehicle belt • Firmly push the car seat all the way out to lock it before down and towards the routing the belt.
-
Page 26: Forward-Facing Vehicle Belt + Top Tether Install
Tighten Top Tether Finished! Push firmly on the back of the Forward-Facing car seat and pull the free end of the tether strap to remove Vehicle Belt all slack. Top Tether Install When used correctly, the AutoLock will lock the vehicle belt in place. Check Belt Tightness After the car seat has been •... -
Page 27: Forward-Facing Latch: Lower Anchor + Top Tether Install
Forward-Facing LATCH: Lower Raise Headrest All the Way Up Anchor Belt Top Tether Install Before you begin installing the car seat into your vehicle, did you check: Undo All Headrest Pad Fasteners Your child’s weight and height? See page 39. Your child’s fit? See page 12. - Page 28 Thread Connectors Make Car Seat Flush Through the Forward- Against Vehicle Seat Facing Belt Path As You MUST use the upright Shown position. • Thread the connector with- Push the car seat so that it will out the adjuster through make the back of the car seat Forward-Facing Belt as flush against the vehicle...
- Page 29 Check Belt Tightness Attach Lower Anchor Connectors to Vehicle’s • Hold the car seat ONLY at Lower Anchors the belt path with your non-dominant hand. • Review your vehicle owner’s manual for LATCH: lower • Push and pull the car seat anchor locations and lower from side to side.
-
Page 30: Securing Child In Car Seat
Securing Child in Car Seat Tighten Harness Pull the harness adjustment strap to snugly tighten the Place Child in Car Seat harness straps. Your child’s bottom and back should be flat against the car seat. Position the harness straps over your child’s shoulders and upper thighs. -
Page 31: Booster Seat Use
Booster Seat Mode 40-100 lb (18-45 kg) and Finished! 43-57 in. (110-145 cm) Your child is now secured in the car seat. Keep the Check your child’s fit often Lap/Shoulder booster seat and make any needed Belt securely adjustments to the car seat belted even as they grow. -
Page 32: Storing Harness System
Storing Harness System Release Chest Clip You MUST store the harness system when using the • Hold each side of the chest Booster Seat Mode. To remove accessories, see pages 3-6. clip. • Press the release button Raise Headrest All the Way with your thumb. - Page 33 Undo Headrest Pad Lift Up Chest Clip Piece Fasteners As Shown and Buckle Tongue and Place in Storage Pocket • Push the pieces all the way down into the pocket. • Repeat for the other side. • Make sure the pieces lay flat inside the pockets.
-
Page 34: Booster Seat Child Fit
Booster Seat Child Fit Lap/Shoulder Belt Use You MUST store the harness system when Head Position using the Booster Seat Mode. See pages 57-60. The tops of your child’s ears should Raise Adjustable Torso to never be above the top of the headrest. -
Page 35: Removing Seat Pad Set For Cleaning
Removing Seat Pad Set for Cleaning Position Lap Belt on Child Route the lap belt portion of the vehicle belt through the booster To remove accessories, see pages 3-6. seat belt path as shown. The lap belt should lay snugly across your child’s hips;... -
Page 36: Cleaning Parts Of Car Seat
Cleaning Parts of Car Seat Removing Torso Pad Undo Torso Pad Tabs Cleaning Seat Pad Set, Harness Covers, Buckle Cover, On the sides of the car seat, Head & Back Pillows, Infant Positioning Pillow there are tabs that keep the torso pad in place. - Page 37 Pull Harness Adjustment Tuck Pad in Along Sides of Strap Through Pad Car Seat On both sides of the car seat, push the pad tabs into the keyholes in the car seat and pull the pad up to snap the tab into place.
-
Page 38: Aircraft Information
Some airlines may ask to see a label stating that If one or more of these criteria are not true or if you are uncertain this car seat is certified for aircraft use. Maxi-Cosi Car Seat 05/16/2015 of any of your answers, replace the car seat immediately. -
Page 39: Child Restraint Use
WARNING: WARNING: Vehicle Seating Position Child Restraint Use NEVER place a child rear-facing in a seating position with an active frontal NEVER take your child out of the child restraint while the air bag. vehicle is moving. Check the vehicle owner’s manual for more information NEVER leave child unattended. -
Page 40: Installation In Vehicle
For recall information, call the U.S. Government’s Vehicle Safety WARNING: Hotline at 1–888–327–4236 (TTY: 1–800–424–9153), or go to http://www.NHTSA.gov. Maxi-Cosi Car Seat 05/16/2015 Installation in Vehicle Check the vehicle belt or lower anchor belt before each use. Use only if the belt is tightened properly and locked securely in place. -
Page 41: Warranty
Warranty Please note: Our product warranty only applies when purchased from an authorized Maxi-Cosi retailer. The origin of products not purchased through these authorized retailers is unknown and Dorel Juvenile Group, Inc. (DJG) warrants this product to the could be counterfeit. -
Page 42: Replacement Parts List
Replacement Parts List Dorel Juvenile Group Information Thank you for choosing this car seat, also known as a child Buckle Assembly Removable Cup Holder(s) restraint. The DJG family is committed to creating car seats with the most comfort and convenience available today. Chest Clip Locking Clip Remember, parents are a child’s first teachers and...
Need help?
Do you have a question about the Magellan LiftFit and is the answer not in the manual?
Questions and answers