
Related Manuals for Webasto Unite


Summary of Contents for Webasto Unite
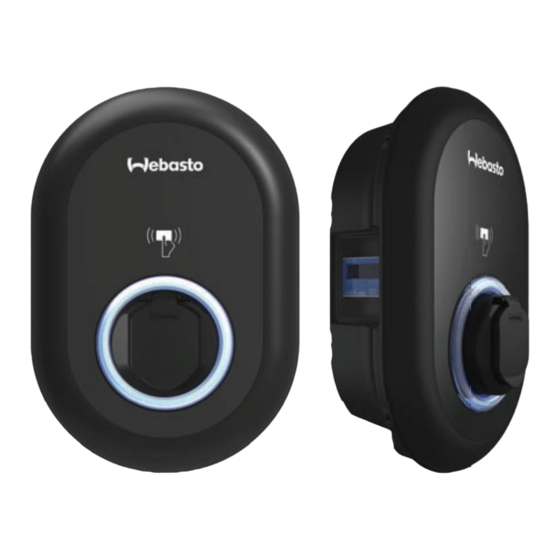
- Page 1 Webasto Unite Webasto Charging Solutions Important Information on Operating and Installation Instructions ........
-
Page 2: Table Of Contents
Reading the status information LED ...... 16 Standalone / Offline Usage modes ...... 16 OCPP Connected mode ........... 18 Troubleshooting ....... 20 Resetting to factory defaults ........ 20 Disposal .......... 21 10 Declaration of Conformity .... 21 5111966A ISI Webasto Unite (EN) -
Page 3: Quick Start Guide For App Solutions
Quick Start Guide for App Solutions | 1 Quick Start Guide for App Solutions The Webasto Unite must be installed Download the required Apps: Open the Webasto Charger Setup by a qualified electrician. app and configure your charging 1) For installation: station. -
Page 4: General Information
Disposal must be fol- of a professional installation, an installation log should lowed. be drawn up by the installer. We also request that you fill in our Check list for the installation of the Webasto Safety charging station. General information... -
Page 5: Safety Information For Installation
The charging cable must not be subjected to any strain l Do not put the Webasto Unite into operation if it has during use. been damaged during installation; a replacement will l Ensure only persons who have read these operating in- be required. -
Page 6: Scope Of Delivery
To start and stop charging. Master RFID Card To add and remove user RFID Cards to and from the local RFID list. These instructions To install the charging station safely and adequately. 6 / 26 5111966A ISI Webasto Unite (EN) -
Page 7: Required Tools
ATTENTION High voltages Danger of fatal electric shock. The Webasto Unite must be installed by a qualified elec- trician. Charging station installation steps l Installation and connection of the charging station must only be carried out by a qualified electrician. -
Page 8: Using A 1-Phase Ac Mains Connection
L1 and L3 on the grid side. For single-phase IT Grid installation, use the above wiring diagram. In the web user interface, set the grounding type to “IT Grid” using the ”Installation settings” menu 8 / 26 5111966A ISI Webasto Unite (EN) -
Page 9: Using A 3-Phase Ac Mains Connection
Insert the wires into the terminal block following the colour coding in the legend. Tighten the screws on the terminal block with a torque of 2.5 Nm. Pos. Description AC mains cable gland AC mains cable Wrench 5111966A ISI Webasto Unite (EN) 9 / 26... -
Page 10: Adjusting The Current Limiter
Setting the DIP switches DIP-switch settings are optional. All settings can be changed by using the Setup App, or the web configura- tion interface (see Unite Configuration Interface). The most recent made setting will always be ap- plied. The current setting is shown in the web configura- tion interface. - Page 11 NOTE DIP-switch settings DIP-switch settings are optional. All settings can be changed by using the Setup App, or the web configura- tion interface (see Unite Configuration Interface). The most recent made setting will always be ap- plied. Enabled Disabled...
- Page 12 DIP-switch settings DIP-switch settings are optional. All settings can be changed by using the Setup App, or the web configura- tion interface (see Unite Configuration Interface). The most recent made setting will always be ap- plied. The current setting is shown in the web configura- tion interface.
-
Page 13: Using The Mode Selection Switch
The mode selection switch must be in position 1. Setting up Load shedding / Potential-free contact The Webasto Unite supports load shedding. Load shedding provides immediate charging-current reduction in case of lim- ited supply. Load shedding can be used in any mode, including Standalone and OCPP-connected modes. -
Page 14: Monitoring Welded Relay Contact Failures
In accordance with IEC 61851-1 and EV/ZE Ready requirements, first RFID card to be registered within 60 second will be the Webasto Unite has a welded contactor sensing function. If a the new master RFID card. Follow the on-screen in-... -
Page 15: Enabling And Disabling The Web Configuration Interface
If the charger’s LAN (Local Area Network) interface has to be changed back to DHCP mode again, then you can do this from the web configuration interface (see Unite Configuration Inter- face). Pull the Ethernet cable through the cable clamps as shown NOTE by the arrows above. -
Page 16: Reading The Status Information Led
Charging station is waiting Insert the charging plug into the vehicle inlet and the charging for Eco Time interval. station socket outlet. Charging station is in Delay 1 sec Charge Mode. Constant green Firmware update 16 / 26 5111966A ISI Webasto Unite (EN) - Page 17 You must only use the following alternative methods to stop charging. Never attempt to unplug the charging cable from its charging station before stopping charging, otherwise the lock- ing mechanism may get damaged. Method 1 5111966A ISI Webasto Unite (EN) 17 / 26...
-
Page 18: Ocpp Connected Mode
Make sure that your vehicle and the charging station are ready Method 2 for charging. No LED Indication Insert the charging plug into the vehicle inlet and the charging station socket outlet. 18 / 26 5111966A ISI Webasto Unite (EN) - Page 19 Software or hardware reset may be selected. 7.4.3.3 Unlocking the socket If the charging cable is locked at the charging station, the ser- vice provider may unlock the cable via this feature. 5111966A ISI Webasto Unite (EN) 19 / 26...
-
Page 20: Troubleshooting
After a factory reset, all configuration settings must be set again. Press the button for 5 seconds to reset the user configuration to its factory default settings. The OCPP configuration and the network configuration will revert to the factory default settings. 20 / 26 5111966A ISI Webasto Unite (EN) -
Page 21: Disposal
The Webasto Unite was developed, manufactured, tested and supplied in accordance with the relevant directives, regulations and standards for safety, EMC and environmental compatibility. Webasto Thermo & Comfort SE hereby declares that the radio equipment type "Charging Station Webasto Unite" is in compli- ance with Directive 2014/53/EU. -
Page 22: Checklist For The Installation Of The Webasto Charging Station
The location of the charging station should be selected such that vehicles cannot inadvertently collide with it. The legal requirements for electrical installations, fire protection, safety regulations and escape routes have been met. The customer/user was informed how the Webasto Unite voltage is switched off with the installation-side protective devices. -
Page 23: Technical Data
Charging station supply inlet gland nut Type (Mode 3 Charging Station) Charging station communication cable gland nut Model Webasto Unite * * * * * Name Charging station communication cable gland nut 1st Asterisk (*) : Rated Power 12.4 Eichrecht model... -
Page 24: Technical Specifications
Plastic Product size 315 mm (Width) x 460 mm (Height) x 135 mm (Depth) Dimensions (with package) 400 mm (Width) x 530 mm (Height) x 240 mm (Depth) Product weight 5 kg 24 / 26 5111966A ISI Webasto Unite (EN) - Page 25 AC Mains / Ethernet / Modbus Environmental technical specifications Protection class IP54 Impact protection IK10 Usage conditions -35 °C to 55 °C (without direct sunlight) 5% - 95% (relative humidity, non-condensing) 0 - 4,000 m 5111966A ISI Webasto Unite (EN) 25 / 26...
- Page 26 To request this Installation Documentation in another language, please locate and contact your local Webasto dealer. You can find your nearest dealer at: https://dealerlocator.webasto.com/en-int. To provide feedback (in English or German) on this document, please email the Tech Doc and Translation team: feed- back2tdt@webasto.com...
Need help?
Do you have a question about the Unite and is the answer not in the manual?
Questions and answers