Table of Contents
Advertisement
Quick Links
Advertisement
Table of Contents

Subscribe to Our Youtube Channel
Related Manuals for Fri-Jado STG5-P


Summary of Contents for Fri-Jado STG5-P
- Page 1 INSTRUCTIONS Installation, operation and care of STG - ROTISSERIE OVEN MODELS STW - WARMER MODELS MODELS Prog. Controls STG5-P STG7-P STG7-P-GAS Intelligent STG5-i STG7-i Warmers STW5 STW7 Model STG7-P ● IMPORTANT ● READ BEFORE USING ROTISSERIE/WARMER www.frijado.com 912.3476 1112...
-
Page 2: Table Of Contents
TABLE OF CONTENTS MODELS ........................3 GENERAL ........................6 Features and options ....................6 Ovens ........................7 Warmers ......................... 7 Stacking ........................7 1. INSTALLATION ...................... 8 1.1 Location ......................8 1.2 Legs / casters ....................9 ... -
Page 3: Models
Model STW5 and STW7 Warmer Model STW5 and STW7 Warmer (STW7 displayed) (STW7 displayed) Model STG5-P Oven / STW5 Warmer and Model STG5-i Oven / STW5 Warmer and STG7-P Oven / STW7 Warmer (displayed) STG7-i Oven / STW7 Warmer (displayed) - Page 5 Please read the safety instructions in this manual carefully and use the ovens and warmers only as described in these instructions to avoid injury or damage. KEEP THESE INSTRUCTIONS FOR FUTURE REFERENCE! © 2008 Fri-Jado BV, Etten-Leur, The Netherlands Customers are permitted to copy these instructions for private use.
-
Page 6: General
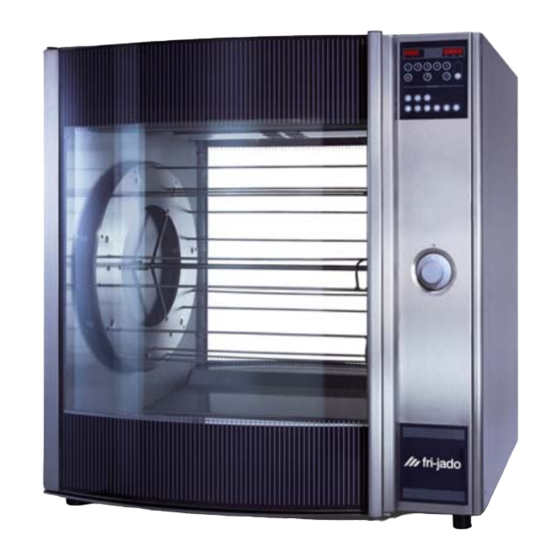
GENERAL The Fri-jado STG Series Rotisserie Ovens and STW Warmers feature model wide tempered glass doors, both front and back. On the ovens, however, the back door may be replaced by a closed insulated panel. Bright quartz lighting promotes visual appeal. -
Page 7: Ovens
The STW warming cabinets have three shelves. STACKING Units may, ex factory, be stacked in the following combination: Bottom STG7-P STG7-P STG7-I STG7-I STG7-P-GAS STW7 Same size wheeled base STG5-P STG5-P STG5-I STG5-I STW5 Same size wheeled base Stacked units each have their individual power supply. -
Page 8: Installation
1. INSTALLATION Immediately after unpacking the oven or warmer, check for possible shipping damage. If oven or warmer is found to be damaged after unpacking, save the packaging material and contact the carrier within 15 days of delivery. WARNING Prior to installation, test the electrical service to assure that it agrees with the specifications on the machine data plate located on the right side panel near the controls. -
Page 9: Legs / Casters
WARNING Do not store or use gasoline or other flammable vapors or liquids in the vincinity of this appliance 1.2 LEGS / CASTERS Each oven and warmer is furnished on 2” (50 mm) legs. Stacked units are provided with casters. 1.3 SUPPLEMENTAL INSTALLATION INSTRUCTIONS (For model STG(W) 5 and STG(W) 7 units for fixed wiring and stacked or placed on bases with casters) -
Page 10: Installation Codes And Standards
Following installation, check to confirm that, when the appliance is moved to the limits of the tether in each direction, no stress is transmitted to the electrical conduit. For STG7-P-GAS only:If the oven is to be installed with casters, the installation shall be made with a connector complying to the Standard for Connectors for Movable Gas Appliances ANSI-Z21.69 (latest edition), and a quick-disconnect device that complies with the Standard for Disconnect Devices for Use with Gas Fuel, ANSI-Z21.41 (latest... -
Page 11: Electrical Connections
CAN/CGA-B149.1, “Installation for Natural Gas Burning Appliances and Equipment” (latest edition) available from the Canadian Standard Association, 178 Rexdale Boulevard, Toronto, Ontario, CANADA, M9W 1R3. 1.5 ELECTRICAL CONNECTIONS WARNING Electrical and grounding connections must comply with the applicable portions of the national electrical code and / or other local electrical codes. WARNING Disconnect electrical power supply and place a tag at the disconnect switch indicating that you are working on the circuit. -
Page 12: Electrical Data
1.6 ELECTRICAL DATA MODEL VOLTS HERTZ PHASE CIRCUIT SIZE* (AMPS) STG5 STG7 STG7-P-GAS STW5 STW7 STACKED MODELS (2) STG5 (2) 35 (2) 20 (2) 35 (2) 20 (2) STG7 (2) 35 (2) 35 (2) STW5 (2) STW7 STG5 & STW5 35 + 30 35 + 35 STG7 &... -
Page 13: Stg7-P-Gas Only: Gas Connection
1.7 STG7-P-GAS only: Gas connection All gas supply connections and any pipe joint compound used must be resistant to the action of gases. Codes require that a gas shutoff valve be installed in the gas line ahead of the oven. The gas inlet is located on the rear panel near the bottom. -
Page 14: Before First Use
2. BEFORE FIRST USE WARNING Disconnect electrical power before cleaning. Oven must be "burned in" to release any odors that might result from heating the new oven surfaces. 1. Clean oven, accessories, and warmer (if present), both inside and outside, with warm soapy water. -
Page 15: Control Panels
3.1 CONTROL PANELS Programmable oven control panel Intelligent oven control panel (STG-i) (STG-P) Shows “Program 1” and “15Pr” when The STG control panel is equipped with first turned on. a large LCD display. Above and below Colon flashes, remaining cooking time this screen are touch sensitive keys shows. -
Page 16: Programmable Controls
3.2 PROGRAMMABLE CONTROLS All programming must be done with the Main Switch Dial in the "I" position. When the Main Switch Dial is in “I” position the right display will show the code “15Pr” to indicate that the unit is provided with an extended programming possibility. The left display will show “Program 1”. - Page 17 3.2.2 Programming Menu Buttons 1. Before entering the program mode, you must first press a Menu Button. Press desired Menu Button once to access Programs 1-5; twice for Programs 6-10; and three times for Programs 11- 15. The selected Menu Button's LED will light. MENU MENU MENU...
- Page 18 6. Press flashing Menu Button #1 to lock in the programmed settings. After programming, the display will show the time and temperature programmed for the Cook function. If you have programmed “0” time and minimum temperature (32°F (0°C]) for the Cook function, the displays will show the actual cavity temperature and actual time of day.
- Page 19 3.2.5 Displaying Time/Temperature During a Processing Cycle - If pressed during a processing cycle, probe icon under temperature display will light and probe temperature will be displayed for 20 seconds. You may press it again if you like. - Press and hold to display both Cook temperature and time programmed for the Menu Button you're using.
- Page 20 3.2.8 Changing a Programmed Setting You may modify temperature or time of a Cook or Grill function only on any Menu Button prior to starting processing, or during processing. Press (for temperature) or (for time) while pressing This will not change the temperature or time programmed in the memory for that Menu Button.
- Page 21 3.2.11 Setting an Early Warning Buzzer You can program an early warning buzzer for basting or whatever reason. This function is completely independent of any program, whether it is running or not. Buzzer always sounds for three minutes. 1.
-
Page 22: Intelligent Oven Control Panel
3.3 INTELLIGENT OVEN CONTROL PANEL WARNING Hot glass, grease, and parts can cause burns. Use care when operating and servicing the oven. Control panel The control panel is equipped with a large LCD display. Above and below this screen are touch sensitive keys that control the oven. There are two possible control panel lay outs, on which the text on the buttons may differ. - Page 23 Display Function Operate Select a program (see chapter 3) Program Compose programs (see chapter 5) Settings Changing the settings. (see chapter 4) 3.3.1 Switch the unit on and off Switch on 1. Press ON/OFF for 3 seconds. Switch off 1. Simultaneously press ON/OFF and the right-hand selection key for 3 seconds. 3.3.2 Start a program “timer:* off *”...
- Page 24 3.3.3 Pre-heat (option) When the pre-heating step has been activated in the manager menu and the oven temperature is to low, the oven will first warm up the grill to the correct temperature. The display will give the actual temperature (right) and the set pre-heating temperature (left).
- Page 25 It is possible to add extra time during the process. Follow the actions below to do so: 1. Press OK. 2. Adjust the amount of extra time with the turning knob. 3. With the right hand arrow choose “save”. 4. Press OK. 3.3.5 Cancel a program Temporarily cancel a program 1.
- Page 26 3.3.6 The timer function With this function it is possible to start a program automatically on a previously set day. The start of the program can be set up to 14 days ahead. To use this function, the adjustment “timer function” must be set to yes in the menu manager.
- Page 27 3.3.7 Introduction menu settings The setting values of the unit can be changed through the control panel. There are three kinds of settings: Unprotected settings (Information). Protected settings (Manager). Service settings (Service). The Service settings can only be accessed by a service mechanic. 1.
- Page 28 Overview A screen with pre-programmed setting appears. Press the STOP/CANCEL to return to the settings menu. 3.3.9 Manager Access 1. Select manager 2. Press OK. When a PIN code has been set: 3. Enter the PIN code using the turning knob. 4.
- Page 29 Overview Setting Function and values change pincode Set the pincode. This security feature is disabled when pincode “0000”is used. light Switches the lighting on or off on the customer side. This setting is only applicable when the Multisserie is standby. During the process the lights are always on and when the Multisserie has stopped, the lights are always off.
- Page 30 3.3.10 PROGRAM The dealer has programs that are installed in the grill through the computer. These programs are dependent on the requirements and the composition of the product and may vary per supplier. This tab is used for programming programs yourself. Such a program contains a maximum of nine steps.
- Page 31 Program grilling steps The table on the display contains 2 columns: duration temperature Row 1 displays grilling step 1, row 2 grilling step 2, etc. The maximum number of steps is nine. The orange frame in a cell indicates that this cell has been selected.
- Page 32 Save a program 1. Select save program. 2. Press OK. 3.3.12 Edit programs Select edit program. Press OK. Select the program. Press OK. Edit a program name 1. Select the position of the character. 2. Change the character using the turning knob. 3.
- Page 33 Edit grilling steps 1. Select the cell. 2. Press OK. The background of the cell turns orange. 3. Set the value using the turning knob. 4. Press OK to close the cell and save the setting. 5. Repeat steps 1 – 4 if required. 6.
- Page 34 All grilling programs from the control can be tested in a test mode. In the test mode the program is performed as usual, but the settings can be adjusted during the process. The changes that are made are saved in the test mode.
- Page 35 3.3.16 Delete all programs This function deletes all programs. 1. Select Delete all programs. 2. Press OK. 3. Select yes. 4. Press OK. It is not possible to restore deleted programs. 3.3.17 Power down When there is no active program and no key has ben touched for over 60 minutes, the STG will automatically switch off.
-
Page 36: Preparing The Product
3.4 PREPARING THE PRODUCT WARNING The Oven is not designed to roast frozen foods. Use only fresh or previously thawed product. Clean hands, all work areas and tools before and after preparing poultry to avoid cross-contamination. Maintain proper sanitation at all times. 3.5 LOADING PRODUCTS ONTO ACCESSORIES Make sure the product weight is evenly balanced on the accessory. - Page 37 Loading Products onto Spits WARNING Skewers are sharp. Be very careful when loading the product. V Spit (Optional) Skewer spit into the whole poultry so that the point goes through the rear then the head (see fig. below). Leave approximately 1/2" (1.2 cm) between each chicken to permit proper browning.
- Page 38 Turkey spit (optional) You must remove the rotor assembly from the oven. (see fig. below, model STG7 is shown). First remove the left end bushing and the left turkey fork from the spit. Apply the turkey ...
-
Page 39: Loading Accessories Into The Oven
3.6 LOADING ACCESSORIES INTO THE OVEN If you are loading a STG5, skip steps 2-7 1. Turn the Main Switch Dial to “I” 2. Press to rotate rotor 3. Press to stop rotation when the hole pattern is located at the bottom of the oven as shown in the left figure below. - Page 40 WARNING When you load any accessory with product into the oven, make sure the product clears the top of the oven and no part of the product is sticking out. Check this by allowing the rotor to make one entire rotation. Do not mix accessories on the rotor.
-
Page 41: Unloading Accessories From The Oven
Loading Racks or Baskets into Oven A Chicken Rack or Basket all load the same. Loading a basket is shown (see fig. below). 1. Place one end of the accessory on the bolt on the rotor end plate. 2. Place the other end of the accessory on the corresponding bolt on the other rotor end plate. -
Page 42: Suggested Roasting Guidelines
3.8 SUGGESTED ROASTING GUIDELINES The chart indicates suggested cooking times and temperatures. Initial product temperature, size, shape, and other factors may require adjustment to suit your operation. Product Thermostat Time Internal Temperature Capacity (ºF) (ºC) (HH:MM) (ºF) (ºC) STG5 STG7 Chicken, Whole 15-20 350-275... -
Page 43: Emptying Grease Drawer
3.9 EMPTYING GREASE DRAWER WARNING Check the grease drawer after each cooking process and empty already when about half full to avoid overflowing. Push the grease drawer completely into the oven after placing it back to prevent damage to the window. WARNING Grease will be hot immediately after cooking. -
Page 44: Warmer Controls
3.10 WARMER CONTROLS THERMOMETER THERMOSTAT DIAL Thermometer - Displays temperature in degrees Fahrenheit. Thermostat - 0 is OFF. Turn dial to desired setting. 3.11 USING WARMERS (MODELS STW5 AND STW7) Fill warmer drawer with cold water about three-quarters full to minimize steaming. ... -
Page 45: Cleaning
4. CLEANING WARNING Disconnect electrical power before cleaning. Do not clean with a low or high pressure water hose. WARNING Allow the oven and warmer to cool until they are lukewarm. When the oven and warmer are lukewarm, any product residues and grease will be more easily removed. -
Page 46: Cleaning Non-Stick Coated Surfaces
4.2 CLEANING NON-STICK COATED SURFACES Several parts of your rotisserie may have a non-stick coating surface. Abrasion reduces the life of the coating. With proper care, the non-stick coating surface should provide a long life of easy-to-clean service. WARNING Do not do the following: ... -
Page 47: Cleaning Probe
3. Thoroughly rinse with clean water and let dry. 4. Wipe a light vegetable oil into the surface to condition the surface. Do not use "Pam" or similar spray on non-stick coatings. 4.3 CLEANING PROBE Clean after every use. 1. Remove the probe from the probe holder located on the side of the oven. Unplug probe cord from the bottom of the probe holder, if needed. -
Page 48: Cleaning Quartz Lamps
Service Parts and Service Calls Contact our service office for any repairs or adjustments needed on this equipment. National Service Cooperative 866 – 208 – 1486 (toll free) Fri-Jado Parts Hot Line 877 – 392 – 7851 (toll free)
Need help?
Do you have a question about the STG5-P and is the answer not in the manual?
Questions and answers