
Related Manuals for Fri-Jado STO 6 - I


Summary of Contents for Fri-Jado STO 6 - I
- Page 1 STO 6 - I GEBRUIKSAANWIJZING USER MANUAL GEBRAUCHSANWEISUNG MODE D’EMPLOI INSTRUCCIONES DE MANEJO WWW.FRIJADO.COM 2-EN-1 9123580 rev. 04 / 2009...
- Page 2 STO 6 - I KEEP THIS USER MANUAL FOR FUTURE USE © 2009 Fri-Jado BV, Etten-Leur, The Netherlands We advise you to contact your supplier for the guarantee period and conditions. Further we refer to our General Terms and Conditions for Sales and Delivery that are available upon request.
-
Page 3: Table Of Contents
STO 6 - I Table of contents 1. Safety, hygiene and environment ..................... 4 1.1. General ..........................4 1.2. CE Mark ..........................4 1.3. Identification ........................4 1.4. Icons and symbols......................... 5 1.5. Safety measures........................6 1.6. Hygiene ..........................6 1.7. -
Page 4: Safety, Hygiene And Environment
STO 6 - I Safety, hygiene and environment 1.1. General The manufacturer accepts no liability whatsoever for loss or injury caused by failing to strictly adhere to the safety guidelines and instructions in this manual or due to carelessness during installation, use, maintenance and repair of the unit referred to in this manual and any of its accessories. -
Page 5: Icons And Symbols
STO 6 - I 1.4. Icons and symbols 1.4.1. Manual In this manual the following icons and symbols are used: Danger of personal injury or serious damage to the unit Electric voltage Hot surfaces Danger of fire Additional information Environmental aspects 1.4.2. -
Page 6: Safety Measures
1.8.2. Disposal If required, the Fri-Jado supplier can advise on how to dispose of the unit. The Fri-Jado supplier can also indi- cate which parts contain valuable substances and materials. Handle the materials in accordance with the current local environmental regulations. -
Page 7: Guarantee
STO 6 - I 1.9. Guarantee Unauthorised modifications in or on the unit shall make any liability on the part of the manufacturer null and void. For contact data see the back of this manual. 1.10. Accessories and options The following accessories are available for the models described in this manual: •... -
Page 8: Description Of The Unit
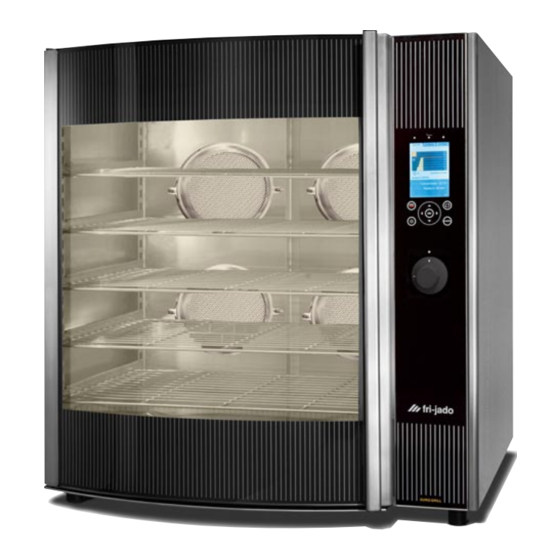
STO 6 - I Description of the unit 2.1. Operation The oven contains infrared elements that heat the air in the oven. s spread the hot air evenly across the entire chamber. The s are placed in pairs next to each other of which both s rotate in opposite directions. This results in an even temperature all across the oven, ensuring nicely and evenly baking of the products. - Page 9 STO 6 - I 2.3.2. Control panel The control panel comes in two versions with different texts at the operating buttons. However, the functions of the buttons are the same. Selection key Display Start / pause no function Start / pause...
-
Page 10: Technical Specifications
STO 6 - I 2.4. Technical specifications WARNING Refer to the identification plate for the correct specifications of the unit. The electrical installa- tion data may vary between countries. STO 6-i Dimensions Width Depth Height 1025 Weight Frequency 50…60 Voltage 3N~ 400 / 230 Max. -
Page 11: Installation
STO 6 - I Installation WARNING Have an authorised installer position and install the unit. 3.1. Unpacking 1. Check the contents and the volume of the delivery. Contact the dealer if the contents are incomplete. The contents include the following parts: • Oven... -
Page 12: Cleaning
STO 6 - I • The products in the unit must be clearly visible. • Do not allow children within reach of the operator side. • The environmental temperature must be between 10 and 30 °C. The unit is not suitable for outside use. -
Page 13: Warm Through
STO 6 - I 3.5. Warm through Warm through the unit to remove the metal odour. Warming through takes 30 minutes. 1. First read the entire manual. 2. Insert the plug into the socket. 3. Set the on/off switch to 1. -
Page 14: Operation
STO 6 - I Operation WARNING • Regularly empty the grease tray to avoid overflow. • Do not grill frozen products. • Slide the grease tray completely into the unit after putting it back to avoid damage to the window. -
Page 15: Switch The Unit On And Off
Guidelines for seasoning are: • Preferably use the special chicken and meat seasonings of the supplier of the Fri-Jado Grill. There are special seasoning mixtures for poultry, lamb, pork, large meat, game and fish. • Season the products to be grilled when dry. - Page 16 STO 6 - I 4.3.2. Pre-heat (option) When the pre-heating step has been activated in the manager menu and the grilling temperature is too low, the control will first warm up the unit to the cor- rect temperature. The display will give the actual temperature (right) and the set pre-heating temperature (left).
- Page 17 STO 6 - I It is possible to add extra time during the process; follow these steps: Press OK. Set extra time with the turning knob. Select ‘save’ using the arrow to the right. Press OK. The extra time is now displayed. This will be added to the last step 4.3.5.
-
Page 18: The Timer Function
STO 6 - I 4.3.6. Unload product WARNING • Never touch the interior of the oven when it is hot without protecting your hands. Use oven gloves. • Hold the grip with both hands when opening and closing the door. -
Page 19: Set
STO 6 - I 5.1. Introduction The settings of the unit can be changed using the control panel. There are three kinds of settings: • Information • Manager • Service The service settings can only be accessed by a service mechanic. -
Page 20: Manager
STO 6 - I 5.2.2. Overview A list of some pre-programmed settings will appear. Press the STOP/CANCEL key to return to the access menu. 5.3. Manager 5.3.1. Access 1. Select manager. 2. Press OK. When a PIN code has been set: 3. - Page 21 STO 6 - I 5.3.2. Overview Setting Function and values Change the PIN code Setting the PIN code Light Switches the lamp on the customer side on and off. This only ap- plies when standing still. During the grilling the lamp is always on.
-
Page 22: Program
STO 6 - I Program WARNING Set a minimum (heating) temperature of 75 °C to ensure a core temperature of 65 °C. The dealer has programs that are programmed via the computer in the unit. These programs are dependent on the requirements and the composition of the product and may vary per supplier. -
Page 23: Add Programs
STO 6 - I 6.1. Add programs 1. Select ‘add program’. 2. Press OK. Enter the program name 1. Enter the first character of the name using the turning knob. The name can consist of: A - Z 0 - 9 and - The combination is free. -
Page 24: Edit Programs
STO 6 - I Set the grilling temperature 6. Select the middle cell of the same grilling step using the arrow to the right. 7. Press OK. 8. Set the grilling temperature. 9. Press OK to close the cell and save the setting. -
Page 25: Delete Programs
STO 6 - I 6.3. Delete programs 1. Select ‘delete program’. 2. Press OK. 3. Select the program. 4. Press OK. 5. Check whether the program name corresponds with the program to be deleted. 6. Select ‘yes’. 7. Press OK. -
Page 26: Sort Programs
STO 6 - I 6.5. Sort programs With this function you can alphabetically order the programs. 1. Select ‘order alphabetically’. 2. Press OK. 3. Select YES using the arrow keys. 4. Press OK. 6.6. Delete all programmes This function allows you to delete all programmes at once. -
Page 27: Maintenance And Cleaning
Fri-Jado Clean is a special cleaning agent for cleaning the unit. 7.1. Daily maintenance WARNING • Preferably use no other cleaning agent than “Fri-Jado Clean”. Fri-Jado has carefully selected and tested the cleaning agent. • Prepare the cleaning agent in the proper proportions; see the package. Part... -
Page 28: Periodic Maintenance
4. Clean the space behind the fan plate using a soft brush or hot water and Fri-Jado clean. 5. Carefully clean the fan blades with hot water and Fri-Jado clean. 6. Clean the fan plate with hot water and Fri-Jado clean. In case of heavy contamination, spray with Fri-Jado clean, let it soak and rinse thoroughly. -
Page 29: Problems
STO 6 - I Problems WARNING • If the problem is not solved by consulting the table below, proceed as follows: 1. Switch off the unit. 2. Remove the plug from the outlet. 3. Contact your supplier/service agency. Make sure you have the following data at hand: model and serial number. -
Page 30: Adjust The Door
STO 6 - I 8.2. Adjust the door 1. Remove the plug from the wall socket. 2. Close the door. 3. Remove the side panel on the hinge side. 4. Support the door on the bottom side and loosen the nuts (A) of the upper hinge plate half a turn. - Page 31 STO 6 - I WWW.FRIJADO.COM 2-EN-31 9123580 rev. 04 / 2009...
- Page 32 STO 6 - I Uw leverancier Your supplier Ihr Fachhändler Votre revendeur Su suministrador Leverandøren Leverantör Fri-Jado BV Oude Kerkstraat 2 4878 AA Etten-Leur The Netherlands Tel: +31 (0) 76 50 85 400 Fax: +31 (0) 76 50 85 444 WWW.FRIJADO.COM 2-EN-32 9123580 rev.
Need help?
Do you have a question about the STO 6 - I and is the answer not in the manual?
Questions and answers