Advertisement
Quick Links
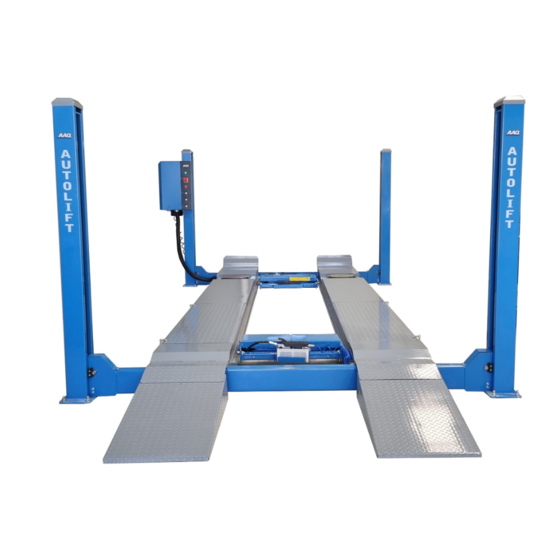
4 Post Vehicle Hoist
AutoLift AL-6000S2
AutoLift AL-6000A
6000Kg Maximum Lifting Capacity
Design Registration Approval Number:
Design Code: AS1418.9-1996
Note: While all due care and attention has been taken in the preparation of this document, Advance AutoQuip shall not be liable for any inaccuracies or omissions
INSTALLATION MANUAL & OPERATION
INSTRUCTIONS
- READ THE ENTIRE CONTENTS OF THIS MANUAL BEFORE
INSTALLATION AND OPERATION. BY PROCEEDING YOU AGREE THAT
YOU FULLY UNDERSTAND AND COMPREHEND THE FULL CONTENTS
OF THIS MANUAL. FORWARD THIS MANUAL TO ALL OPERATORS.
FAILURE TO OPERATE THIS EQUIPMENT AS DIRECTED MAY CAUSE
Specifications subject to change without notice.
2 McDonald Crescent | Bassendean WA 6054
Ph: 08 9279 1663 | Fax: 08 9279 1667 | E: sales@aaq.net.au | W: www.aaq.net.au
WAH22165
INJURY OR DEATH.
which may occur therein
Advance AutoQuip
READ FIRST
DO NOT use the
machine until you read
and understand all the
dangers, warnings and
cautions in this manual.
Advertisement

Subscribe to Our Youtube Channel
Related Manuals for AAQ AutoLift AL-6000S2


Summary of Contents for AAQ AutoLift AL-6000S2
- Page 1 Note: While all due care and attention has been taken in the preparation of this document, Advance AutoQuip shall not be liable for any inaccuracies or omissions which may occur therein Advance AutoQuip 2 McDonald Crescent | Bassendean WA 6054 Ph: 08 9279 1663 | Fax: 08 9279 1667 | E: sales@aaq.net.au | W: www.aaq.net.au...
- Page 2 IMPORTANT INFORMATION THIS MANUAL MUST BE READ & UNDERSTOOD ENTIRELY BEFORE THE INSTALLATION & OPERATION OF THE HOIST. ASSEMBLY & INSTALLATION MUST ONLY BE PERFORMED BY COMPETENT PERSONNEL. OPERATION OF THE HOIST MUST ONLY BE PERFORMED BY TRAINED PERSONNEL. THIS HOIST MUST ONLY BE USED FOR THE PURPOSE OF LIFTING MOTOR VEHICLES WITH A WEIGHT OF NO MORE THAN 6000KG.
- Page 3 It is important that the following information is fully understood by the operator. Failure to read & follow these instructions may result in serious injury to personnel. 1. DO NOT operate the hoist if damaged. In the event of the hoist being damaged consult a competent service technician to determine the hoists safe operation.
- Page 4 The following warnings on the hoist are provided as a guide for the safe operation of the hoist. PLEASE OBSERVE THEM! The hoist must be Only authorised used by trained & personnel may be authorised present around the personnel only. hoist.
- Page 5 SAFETY OF THE HOIST SAFETY OF LIFTED VEHICLES AAQ Australia is not liable for possible problems, damages, accidents, etc. resulting from failure to follow the instructions contained in this manual. Only skilled technicians of AUTHORISED DEALERS or SERVICE CENTERS AUTHORISED by...
- Page 6 Cautions for the safety of the operator Operators must not be under the influence of sedatives, drugs or alcohol when operating the machine. Before operating the hoist, operators must be familiar with the position and function of all controls, as well as with the machine features shown in the chapter “Operation and use”...
-
Page 7: Product Identification
Product identification The identification data of the machine are shown in the label placed on the control unit. Four Post Vehicle Hoist AL-6000A 240V/50HZ/1PH, Model No. Power Supply /AL-6000S2 415V/50HZ/3PH Lift Height(mm) 1750/1700 Power(Kw) 6000 Kg Capacity(Kg) / Tonne Air Pressure(Mpa) 0.6-0.8 6 Tonne 1820Kg /... -
Page 8: Product Description
ATTENTION: moving and positioning operations can be very dangerous if not performed with the utmost caution. Send bystanders away; clear the installation site; check the integrity and suitability of the tools and equipment; do not touch the suspended loads and stay at a safe distance from them;... - Page 9 Forbidden to use for washing and spraying vehicles Forbidden to lift vehicle which weight is over 6000kg Any other use not described is to be considered as improper and irrational, and thus it will be under the whole responsibility of the operator. Follow the instructions given by this guide carefully to grant the machine a correct function, efficiency and a long working life.
- Page 10 Dimensions / AL-6000S2...
-
Page 11: Installation
Installation Only skilled technicians, appointed by the manufacturer, or by authorized dealers, must be allowed to carry out installation. Serious damage to people and to the hoist can be caused if installations are made by unskilled personnel. Before carrying out any operations, remember to insert the safety piece of wood between the lower booms and the base frame. - Page 12 INSTALLATION Please ensure that the hoist is installed in compliance to relevant state requirements regarding positioning in the workshop. Installation must be performed by Competent Personnel Only. The Hoist must be installed in a suitable environment for the safe repair of motor vehicles.
- Page 13 INSTALLATION Assembly All Assembly, Connections & Installation must be performed by Competent Personnel Only. Please note: In reference to the following instructions, when mentioned, the Left & Right Hand Platforms and Front & Rear Transverse Beams are viewed from the drive on perspective. Proceed with the following: 1.
- Page 14 INSTALLATION Assembly (Continued) 11. Before bolting the rear transverse beam into position fit the Jacking Bridges in the centre of the platforms. Please note that there is a Front & Rear Jacking Bridge, these are marked on the packaging. The control switches on the jacking bridges must be facing each other.
- Page 15 INSTALLATION Assembly (Continued) Prior to commencing the next stages it is important that the utmost care is taken with operating the hoist until all posts are safely secured to the concrete. 21. With the power connected to the hoist, press the up button to raise the hoist approximately 300mm.
- Page 16 INSTALLATION Assembly (Continued) 34. Once the install and cable adjustment has been completed, check the synchronisation of the locks with a vehicle on the hoist. If necessary re- adjust the cables. 35. Place the post caps on top of all posts. Assembly Pictures Chamfer Picture 1...
- Page 17 INSTALLATION Cam Lock Test Procedure 1. Raise the hoist 1 metre from the ground. 2. Starting at the front of the hoist, position a raised floor jack under the centre of the transverse beam. 3. With the raised floor jack in position, lower the hoist onto the floor jack until the wire cables have gone slack.
- Page 18 Parts List...
- Page 20 HYDRAULIC UNIT 1. MOTOR 2. RELIEF VALVE 3. SUPPORT 4. SUPPORT BOLT 5. HYDRAULIC HOSE 6. BREATHER CAP 7. DRAIN CAP 8. SOLENOID VALVE SET...
- Page 21 JACKING BRIDGE 1. MAIN BOARD 12. STOPPER PIN 2. LINK 1 13. MIDDLE LINK PIN 3. SLIDE TABLE 14. ROD 4. RAIL GUIDE 15. ROD COVER 5. LINK 2 16. HEAD SEAL KIT 6. BASE 17. PISTON 7. RAIL 18. PISTON SEAL KIT 10.
-
Page 22: Technical Specifications
Wire Cable Diagram Technical specifications AL-6000A/6000S2 Model type FOUR POST HOIST WITH Type ALIGNMENT/WITHOUT ALIGNMENT 6000kgs Capacity <55s Lifting time >25s Descent time Max. lifting height 1750mm/1700mm Min. lifting height 268mm Overall width 3303mm 2164mm Overall height Drive through 2993mm 240V/50/Hz/1PH, 415V/50HZ/3PH Power supply Motor... -
Page 23: Operation And Use
Operation and use ATTENTION: Read the instructions "GENERAL SAFETY RULES” with the utmost attention. ATTENTION: Before operating on the control board, make sure that there are no bystanders and around the hoist. Part No. Part Name Control Panel Power Lamp Power Switch Up Button Lock Button... - Page 24 Hydraulic system diagram 1. Motor 2. Parachute Valve 3. Unloading valve 4. Descend speed regulating valve 5. Relief valve 6. Gear pump 7. Check valve...
- Page 25 Air Line Diagram...
- Page 26 Electric motor jumper pins...
- Page 28 How to operate Jack...
- Page 29 Maintenance The several maintenance operations to be carried out are described below. A low operation cost and a long life of the machine depends from constant observation of the operations. CAUTION: The listed intervention times are given for information and they refer to normal operating conditions.
-
Page 30: Troubleshooting
Trouble shooting A list of possible troubles and solutions is given below TROUBLE POSSIBLE CAUSE SOLUTION The main switch is not turned Turn the switch on There is no power Check Power on to the restore if The hoist does not work necessary electrical wires... - Page 31 Emergency Decending CIRCUMSTANCES ELECTRICAL FAILURE OR ANY HYDRAULIC LINE FAILURE PREPARATION BEFORE PROCEEDING CLEAR OBSTACLES UNDERNEATH OF HOIST. TURN THE POWER SWITCH OFF. NEVER ENTER UNDER THE HOIST DURING THE PROCEDURE. MAKE SURE SAFETY DEVICE ON 4 POSTS IS DISABLED. IF THE SAFETY DEVICE IS ON LOCKED POSITION, USE JACK TO LIFT THE PLATFORM AND DISABLE THE DEVICE.
- Page 32 3. Check for any obstructions under the hoist when lowering and all personnel are clear of the area. 4. When the hoist has been lowered to the ground, remove the wheel chocks. 5. Switch off power to the hoist. SERIAL NO.: APPROVALS: MODEL: WAH22165 AutoLift AL-6000S2 Design Code: AS1418.9 -1996...
- Page 33 SAFETY OPERATING PROCEDURES Vehicle Hoist DO NOT use this machine unless the operator has been thoroughly instructed in its safe use and operation. Safety glasses must be worn at all Long and loose hair must be times in work areas. contained.
- Page 34 THIS WARRANTY SUPERSEDES ALL OTHER WARRANTY POLICIES PREVIOUSLY STATED AND IN ALL OTHER ADVANCE AUTOQUIP’s PRODUCT SPECIFIC LITERATURE. Advance AutoQuip 2 McDonald Crescent | Bassendean WA 6054 Ph: 08 9279 1663 | Fax: 08 9279 1667 | E: sales@aaq.net.au | W: www.aaq.net.au...
- Page 35 COMMISSIONING REPORT 1. Details of Customer Customer Name: Installation Address: 2. Hoist Details Model No: 2 McDonald Crescent Hoist Type: Bassendean WA 6054 Installation Date: P: 08 9279 1663 | E: sales@aaq.net.au 3. Commissioning Report Comments Safety Devices Safety devices incorporated into the design of the vehicle to AS/NZS 1418.9 Welds Visual check all welds completed and comply to requirement of AS/NZS 1554 Hydraulic Equipment and Controls Visual check carried out for leaks Pneumatic Equipment and Controls Visual check carried out for leaks Safety Locks Safety locks tested for correct operation Support Pads Checked for good working order Wheel Stops Supplied with the hoist and in good working order Hoist Motion Limits Checked for correct operation Load Test and Speed Check Hoist checked with load for correct operation and speed control tested Wire Ropes Checked wire ropes for correct installation and tension Concrete Floor Concrete floor is a suitable depth for installation...
- Page 36 COMMISSIONING REPORT Location of Vehicle Hoist & Vehicle Clearances Vehicle hoist or any part of the load is positioned no less than 600mm away from any fixed structure Provisions have been made for effective clearances above the vehicle when the hoist is in its fully raised position. Markings ‐ Hoist Checked for Relevant Marking Including: Make & Model Number Serial number Rated Capacity Reference to maintenance Operation instructions Screw and Nut Gaps Hoist compliance plate showing design registration Functional Test Vehicle hoist has been tested and all safety devices, limit switches and control function interlocks have been tested for correct operation. Demonstration The installer has demonstrated the operation of the vehicle hoist to the owner or operator Electrical Equipment and Controls Lock off isolating switch installed Emergency stop button installed 3. Details of Electrical Contractor Trading Name: EC Licence Number: Address: Telephone Number: 4. Signature Name: ___________________________________________________________ Date: I, being the person responsible for completing the commissioning report have exercised reasonable skill and competency when completing the report and herby certify that the vehicle hoist has been commissioned fit for use as per the Australian / New Zealand Standard 1418.9:1996 Vehicle Hoists.
Need help?
Do you have a question about the AutoLift AL-6000S2 and is the answer not in the manual?
Questions and answers