Table of Contents
Advertisement
Quick Links
Advertisement
Table of Contents

Subscribe to Our Youtube Channel
Related Manuals for Insinger CLIPPER RC


Summary of Contents for Insinger CLIPPER RC
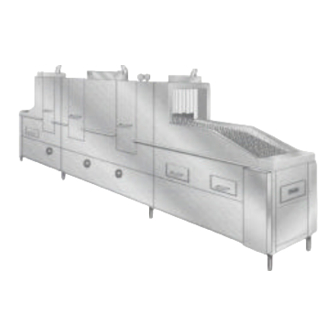
- Page 1 TECHNICAL MANUAL FLIGHT-TYPE DISHMACHINES Master/Clipper RC Includes Installation, Operation, and Maintenance Instructions Insinger Machine Company 6245 State Road Philadelphia, PA 19135-2996 800.344.4802 Fax 215.624.6966 www.insingermachine.com...
-
Page 2: Table Of Contents
Start-Up Date:____________________________ When referring to this equipment please have this information available. Each piece of equipment at Insinger is carefully tested before shipment for proper operation. If the need for service should arise please contact your local Authorized Insinger Service Company. - Page 3 Clipper/Master RC DOC FLT-CLPMST 1.0 04 www.insingermachine.com 800-344-4802...
- Page 4 Clipper/Master RC DOC FLT-CLPMST 1.0 04 www.insingermachine.com 800-344-4802...
- Page 5 Clipper/Master RC DOC FLT-CLPMST 1.0 04 www.insingermachine.com 800-344-4802...
- Page 6 Clipper/Master RC DOC FLT-CLPMST 1.0 04 www.insingermachine.com 800-344-4802...
- Page 7 Clipper/Master RC DOC FLT-CLPMST 1.0 04 www.insingermachine.com 800-344-4802...
- Page 8 Clipper/Master RC DOC FLT-CLPMST 1.0 04 www.insingermachine.com 800-344-4802...
- Page 9 Clipper/Master RC DOC FLT-CLPMST 1.0 04 www.insingermachine.com 800-344-4802...
- Page 10 Clipper/Master RC DOC FLT-CLPMST 1.0 04 www.insingermachine.com 800-344-4802...
-
Page 11: Technical Information
Replacement parts may be ordered directly from our factory or from your local Insinger Authorized Service Agency. You can speak to the Insinger Technical Services Department, 800/344-4802, or e-mail us at service@insingermachine.com. When calling for warranty information or replacement parts please provide the model and serial number of your Insinger Equipment. - Page 12 15 months from the date of shipment from Insinger or 1 year (12 months) from the date of installation, that said Insinger product shall be free from defects in material and workmanship. Which-...
- Page 13 INSINGER MACHINE COMPANY LIMITED WARRANTY COMMERCIAL MARINE USE Insinger Machine Company, Inc. (Insinger) hereby warrants to the original retail purchaser of this Insinger Machine Company, Inc. product, that if it is assembled and operated in accordance with the printed instructions...
-
Page 14: Installation Instructions
INSTALLATION INSTRUCTIONS Placement Carefully uncrate machine. Bolt the three sections together. þ NOTE: Use a silicone caulking between the sections in addition to the gasketing material provided. This will minimize the possibility of leaks. Electrical Connections Connect electrical lines sized for the correct voltage, current and phase of the machine. - Page 15 Chemicals Upon completed installation of the dishwasher contact a local detergent/chemical supplier for the correct chemicals for your area. Electrical connection points for the detergent dispenser and rinse injector are located inside the control panel.
-
Page 16: Operating & Cleaning Instructions
Insinger dishwashers are user-friendly, making them the easiest dishwashers on the market to operate and maintain. By following the operation procedure and general cleaning procedures your Insinger dishwasher will give you years of trouble free service. OPERATION INSTRUCTIONS 1. Ensure drain overflow tube is in place. Close all tank drain valves. -
Page 17: Cleaning Procedures
CLEANING PROCEDURES The following cleaning procedures should be done daily, at the end of the shift. Daily 1. Remove all internal removable parts including spray manifolds, scrap screens, drain overflow tubes, suction strainers and curtains. 2. Remove the end caps from the spray manifolds and clean with the brush provided. -
Page 18: Maintenance & Repair Procedures
The following is a basic guide for the repair and replacement of common dishwasher parts. Refer to the Basic Service Guide for troubleshooting tips. MAINTENANCE REQUIREMENTS Daily 1. Refer to the operation and cleaning instructions provided in this manual for daily cleaning proce- dures. -
Page 19: Steam Heat
2. Verify steam pressure per machine specifications. 3. Verify steam trap is not clogged. If so, replace. Motor Overloads 1. All motors used on Insinger Machines are pro- vided with motor overloads. Motor overloads are adjusted when the machines are factory tested. - Page 20 Level System 1. The level control system consists of a level board (P/N DE7-35) for both the wash and rinse tank and a level float (P/N DE5-60) per tank. 2. The level float will not allow the tank heat to energize without water in the tank.
-
Page 21: Electrical Schematics & Replacement Parts
PART 5 ELECTRICAL SCHEMATICS & REPLACEMENT PARTS Clipper/Master RC DOC FLT-CLPMST 1.0 04 www.insingermachine.com 800-344-4802... - Page 22 PART 5 ELECTRICAL SCHEMATICS & REPLACEMENT PARTS Clipper/Master RC DOC FLT-CLPMST 1.0 04 www.insingermachine.com 800-344-4802...
- Page 23 PART 5 ELECTRICAL SCHEMATICS & REPLACEMENT PARTS Clipper/Master RC DOC FLT-CLPMST 1.0 04 www.insingermachine.com 800-344-4802...
- Page 24 PART 5 ELECTRICAL SCHEMATICS & REPLACEMENT PARTS Clipper/Master RC DOC FLT-CLPMST 1.0 04 www.insingermachine.com 800-344-4802...
- Page 25 PART 5 ELECTRICAL SCHEMATICS & REPLACEMENT PARTS Clipper/Master RC DOC FLT-CLPMST 1.0 04 www.insingermachine.com 800-344-4802...
- Page 26 PART 5 ELECTRICAL SCHEMATICS & REPLACEMENT PARTS Clipper/Master RC DOC FLT-CLPMST 1.0 04 www.insingermachine.com 800-344-4802...
- Page 27 PART 5 ELECTRICAL SCHEMATICS & REPLACEMENT PARTS Clipper/Master RC DOC FLT-CLPMST 1.0 04 www.insingermachine.com 800-344-4802...
- Page 28 PART 5 ELECTRICAL SCHEMATICS & REPLACEMENT PARTS Clipper/Master RC DOC FLT-CLPMST 1.0 04 www.insingermachine.com 800-344-4802...
- Page 29 PART 5 ELECTRICAL SCHEMATICS & REPLACEMENT PARTS Clipper/Master RC DOC FLT-CLPMST 1.0 04 www.insingermachine.com 800-344-4802...
- Page 30 PART 5 ELECTRICAL SCHEMATICS & REPLACEMENT PARTS Clipper/Master RC DOC FLT-CLPMST 1.0 04 www.insingermachine.com 800-344-4802...
- Page 31 PART 5 ELECTRICAL SCHEMATICS & REPLACEMENT PARTS Clipper/Master RC DOC FLT-CLPMST 1.0 04 www.insingermachine.com 800-344-4802...
-
Page 32: Spare Parts List
RECOMMENDED MASTER/CLIPPER SPARE PARTS LIST Part Number Mechanical Parts D2-554-1 D2-554-2 D2-541 D2099 D2349 D2-522S D2286 D2701 D2390 954-50 D2-594 RC15-226 D582 D2160 SK1115 D2930RK D2242 Electrical Components DE7-28 DE7-35 DE5-60 DE9-251 DE5-37 DE5-4 For Steam Tank Heat Add: 1 Each Solenoid Valve Repair Kits: D2947RK D2946RK D2475... -
Page 33: Replacement Parts
PART 7 REPLACEMENT PARTS Clipper/Master RC DOC FLT-CLPMST 1.0 04 www.insingermachine.com 800-344-4802... - Page 34 PART 7 REPLACEMENT PARTS Clipper/Master RC DOC FLT-CLPMST 1.0 04 www.insingermachine.com 800-344-4802...
- Page 35 PART 7 REPLACEMENT PARTS Clipper/Master RC DOC FLT-CLPMST 1.0 04 www.insingermachine.com 800-344-4802...
- Page 36 PART 7 REPLACEMENT PARTS Clipper/Master RC DOC FLT-CLPMST 1.0 04 www.insingermachine.com 800-344-4802...
- Page 37 PART 7 REPLACEMENT PARTS Clipper/Master RC DOC FLT-CLPMST 1.0 04 www.insingermachine.com 800-344-4802...
- Page 38 PART 7 REPLACEMENT PARTS Clipper/Master RC DOC FLT-CLPMST 1.0 04 www.insingermachine.com 800-344-4802...
- Page 39 PART 7 REPLACEMENT PARTS Clipper/Master RC DOC FLT-CLPMST 1.0 04 www.insingermachine.com 800-344-4802...
- Page 40 PART 7 REPLACEMENT PARTS Clipper/Master RC DOC FLT-CLPMST 1.0 04 www.insingermachine.com 800-344-4802...
- Page 41 PART 7 REPLACEMENT PARTS Clipper/Master RC DOC FLT-CLPMST 1.0 04 www.insingermachine.com 800-344-4802...
- Page 42 PART 7 REPLACEMENT PARTS Clipper/Master RC DOC FLT-CLPMST 1.0 04 www.insingermachine.com 800-344-4802...
- Page 43 PART 7 REPLACEMENT PARTS Clipper/Master RC DOC FLT-CLPMST 1.0 04 www.insingermachine.com 800-344-4802...
- Page 44 PART 7 REPLACEMENT PARTS Clipper/Master RC DOC FLT-CLPMST 1.0 04 www.insingermachine.com 800-344-4802...
- Page 45 PART 7 REPLACEMENT PARTS Clipper/Master RC DOC FLT-CLPMST 1.0 04 www.insingermachine.com 800-344-4802...
- Page 46 PART 7 REPLACEMENT PARTS Clipper/Master RC DOC FLT-CLPMST 1.0 04 www.insingermachine.com 800-344-4802...
- Page 47 PART 7 REPLACEMENT PARTS Clipper/Master RC DOC FLT-CLPMST 1.0 04 www.insingermachine.com 800-344-4802...
- Page 48 PART 7 REPLACEMENT PARTS Clipper/Master RC DOC FLT-CLPMST 1.0 04 www.insingermachine.com 800-344-4802...
- Page 49 PART 7 REPLACEMENT PARTS Clipper/Master RC DOC FLT-CLPMST 1.0 04 www.insingermachine.com 800-344-4802...
- Page 50 PART 7 REPLACEMENT PARTS Clipper/Master RC DOC FLT-CLPMST 1.0 04 www.insingermachine.com 800-344-4802...
- Page 51 PART 7 REPLACEMENT PARTS Clipper/Master RC DOC FLT-CLPMST 1.0 04 www.insingermachine.com 800-344-4802...
- Page 52 PART 7 REPLACEMENT PARTS Clipper/Master RC DOC FLT-CLPMST 1.0 04 www.insingermachine.com 800-344-4802...
- Page 53 PART 7 REPLACEMENT PARTS Clipper/Master RC DOC FLT-CLPMST 1.0 04 www.insingermachine.com 800-344-4802...
- Page 54 PART 7 REPLACEMENT PARTS Clipper/Master RC DOC FLT-CLPMST 1.0 04 www.insingermachine.com 800-344-4802...
- Page 55 PART 7 REPLACEMENT PARTS Clipper/Master RC DOC FLT-CLPMST 1.0 04 www.insingermachine.com 800-344-4802...
- Page 56 PART 7 REPLACEMENT PARTS Clipper/Master RC DOC FLT-CLPMST 1.0 04 www.insingermachine.com 800-344-4802...
- Page 57 PART 7 REPLACEMENT PARTS Clipper/Master RC DOC FLT-CLPMST 1.0 04 www.insingermachine.com 800-344-4802...
- Page 58 PART 7 REPLACEMENT PARTS Clipper/Master RC DOC FLT-CLPMST 1.0 04 www.insingermachine.com 800-344-4802...
- Page 59 PART 7 REPLACEMENT PARTS Clipper/Master RC DOC FLT-CLPMST 1.0 04 www.insingermachine.com 800-344-4802...
- Page 60 PART 7 REPLACEMENT PARTS Clipper/Master RC DOC FLT-CLPMST 1.0 04 www.insingermachine.com 800-344-4802...
- Page 61 PART 7 REPLACEMENT PARTS Clipper/Master RC DOC FLT-CLPMST 1.0 04 www.insingermachine.com 800-344-4802...
- Page 62 PART 7 REPLACEMENT PARTS Clipper/Master RC DOC FLT-CLPMST 1.0 04 www.insingermachine.com 800-344-4802...
- Page 63 PART 7 REPLACEMENT PARTS Clipper/Master RC DOC FLT-CLPMST 1.0 04 www.insingermachine.com 800-344-4802...
- Page 64 PART 7 REPLACEMENT PARTS Clipper/Master RC DOC FLT-CLPMST 1.0 04 www.insingermachine.com 800-344-4802...
- Page 65 PART 7 REPLACEMENT PARTS Clipper/Master RC DOC FLT-CLPMST 1.0 04 www.insingermachine.com 800-344-4802...
- Page 66 PART 7 REPLACEMENT PARTS Clipper/Master RC DOC FLT-CLPMST 1.0 04 www.insingermachine.com 800-344-4802...
- Page 67 PART 7 REPLACEMENT PARTS Clipper/Master RC DOC FLT-CLPMST 1.0 04 www.insingermachine.com 800-344-4802...
- Page 68 PART 7 REPLACEMENT PARTS Clipper/Master RC DOC FLT-CLPMST 1.0 04 www.insingermachine.com 800-344-4802...
- Page 69 PART 7 REPLACEMENT PARTS Clipper/Master RC DOC FLT-CLPMST 1.0 04 www.insingermachine.com 800-344-4802...
- Page 70 PART 7 REPLACEMENT PARTS Clipper/Master RC DOC FLT-CLPMST 1.0 04 www.insingermachine.com 800-344-4802...
- Page 71 PART 7 REPLACEMENT PARTS Clipper/Master RC DOC FLT-CLPMST 1.0 04 www.insingermachine.com 800-344-4802...
- Page 72 PART 7 REPLACEMENT PARTS Clipper/Master RC DOC FLT-CLPMST 1.0 04 www.insingermachine.com 800-344-4802...
- Page 73 PART 7 REPLACEMENT PARTS Clipper/Master RC DOC FLT-CLPMST 1.0 04 www.insingermachine.com 800-344-4802...
- Page 74 6245 State Road Philadelphia, PA 19135-2996 800.344.4802 215.624.4800 Fax 215.624.6966...
Need help?
Do you have a question about the CLIPPER RC and is the answer not in the manual?
Questions and answers