Pyronix STERLING 10 Installation Instructions
Hide thumbs
Also See for STERLING 10:
- Installation manual (48 pages) ,
- Installation instructions manual (34 pages) ,
- User manual (24 pages)
Advertisement
Quick Links
WIRING FOR STERLING 10
Wiring to single remote Keypad
PANEL
Wiring to multiple remote Keypads (daisy chain)
PANEL
RKP1
Wiring to multiple remote Keypads (star configuration)
PANEL
PANEL
SPECIFICATIONS
Electrical
Supply Voltage
Consumption
RKP1
Tamper loop
Mechanical
Dimensions
Weight
Colour
Environmental
Operating temperature
Storage temperature
Volume Control
This is accessible when the rear cover has been removed. The
Volume Control is adjustable via a potentiometer. Refer to PCB
layout for location.
NOTE:
Control Panel volume refer to the Control Panel Manual.
Contrast Control
RKP 2
This is accessible when the rear cover has been removed. The
keypad Contrast Control is adjusted via a potentiometer. Refer
to PCB layout for location. Adjust the potentiometer until the
display is clear and easy to read.
Cleaning
Do Not use strong detergents to clean the remote keypad. To
remove any dirt or grime, wipe clean with a damp cloth only.
RKP1
RKP2
WARRANTY
:9-16V dc Current
:8mA (Backlight off)
:100mA (Backlight full)
:Normally closed
voltage free contacts.
:12Volts, 50mA max
:130x 140 x 25mm
:0.23kg
:White
:0 to 50°C (+14 to 122°F)
:-20 to +60°C (-4 to +140°F)
This refers to the Keypad ONLY. For information on the
Pyronix Limited
Pyronix House
Braithwell Way
Hellaby, Rotherham
S66 8QY, UK
Customer Support line (UK only): 0870 122 3360
This is a national rate line
email: customer.support@pyronix.com
website: www.pyronix.com
THIS PRODUCT IS SOLD SUBJECT TO OUR STANDARD WARRANTY
CONDITIONS AND IS WARRANTED AGAINST DEFECTS IN
WORKMANSHIP FOR A PERIOD OF 2 YEARS.
IN THE INTEREST OF CONTINUING IMPROVEMENT OF QUALITY,
CUSTOMER CARE AND DESIGN, PYRONIX LTD RESERVE THE RIGHT TO
AMEND SPECIFICATIONS WITHOUT GIVING PRIOR NOTICE.
R
TM
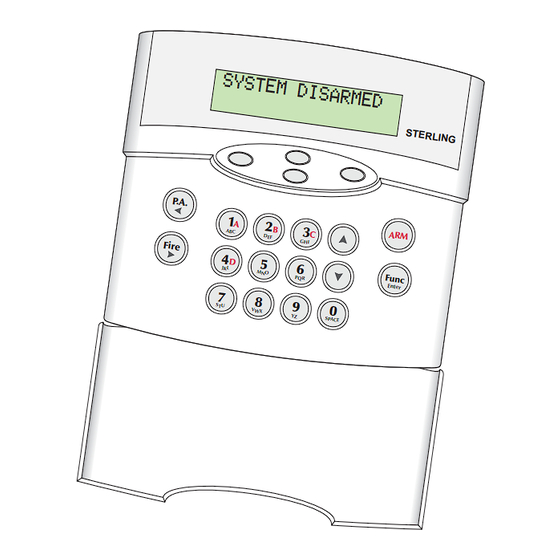
STERLING 10
Remote Keypad
Remote Keypad
Installation Instructions
Installation Instructions
THIS REMOTE KEYPAD
SHOULD ONLY BE USED WITH
STERLING CONTROL PANELS.
PANELS WITH RED OR PURPLE DOTS
ON THE CPU ARE NOT COMPATIBLE
WITH THIS KEYPAD. CONTACT TECHNICAL
SUPPORT FOR UPGRADE DETAILS.
This product is approved for use in the
Residential, Commercial and Light Industrial Environment.
RINS210-2
R
Advertisement

Related Manuals for Pyronix STERLING 10


Summary of Contents for Pyronix STERLING 10
- Page 1 CONDITIONS AND IS WARRANTED AGAINST DEFECTS IN WORKMANSHIP FOR A PERIOD OF 2 YEARS. IN THE INTEREST OF CONTINUING IMPROVEMENT OF QUALITY, CUSTOMER CARE AND DESIGN, PYRONIX LTD RESERVE THE RIGHT TO AMEND SPECIFICATIONS WITHOUT GIVING PRIOR NOTICE. This product is approved for use in the Residential, Commercial and Light Industrial Environment.
- Page 2 Set Backlight Entering Engineer Mode STERLING 10 To set the keypad backlight. ‚ )llll Enter ‚ ƒ SET BACKLIGHT Press and use the key to select ‘ ’. The engineer has the following keypad functions available: ‚ ƒ „ Press...
Need help?
Do you have a question about the STERLING 10 and is the answer not in the manual?
Questions and answers