
Related Manuals for Leica CM1510


Summary of Contents for Leica CM1510
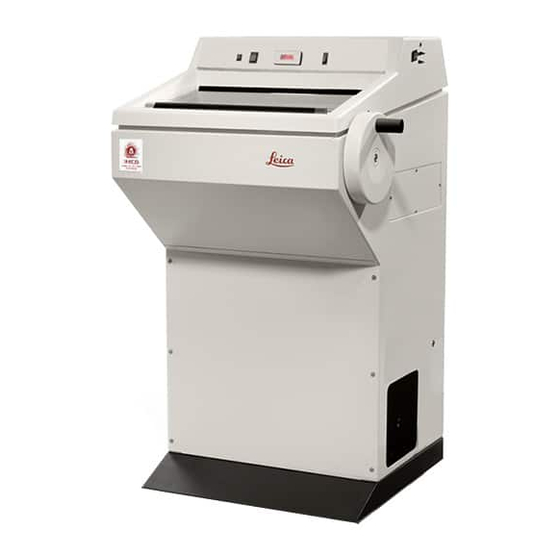
- Page 1 Leica CM1510 Cryostat Instruction Manual Leica CM 1510 V2.1 English – 12/2001 Always keep this manual near the instrument! Read carefully prior to operating the instrument!
-
Page 3: Important Information
These are determined only by the contract provisions agreed between our- selves and our customers. Leica reserves the right to change technical specifi- cations as well as manufacturing processes without prior notice. Only in this way is it possible to continu- ously improve the technology and manufacturing tech- niques used in our products. -
Page 4: Table Of Contents
Defrosting ................................21 Trouble shooting ..........................22 Cleaning and disinfection ....................... 25 10.1 Cleaning ................................25 10.2 Spray disinfection with Leica Cryofect ......................25 10.3 Removal of the microtome ..........................26 10.4 Reassembly of the microtome ......................... 27 Maintenance ............................28 11.1 General maintenance ............................ -
Page 5: Safety Instructions For Handling The Instrument
• The sectioning of infectious and/or radioactive ma- tioned in the upper turning point. terials represents a hazard. • To lock, push the lever (2) to the right. • To unlock, push the lever (2) to the left. Fig. 5 Leica CM1510 – Cryostat... - Page 6 Safety instructions for handling the instrument Operating conditions Sectioning Transport and installation • Take care when handling microtome knives and disposable blades. • The instrument must be transported in an The cutting edge is extremely sharp and upright position only, or at an angle of max. can cause severe injury! 30 °! •...
- Page 7 We strongly recommend the use of Leica pair. Cryofect disinfectant spray! Only use al- cohol or common disinfectants based on •...
-
Page 8: Technical Data
Technical data Operating temperature range: 18 °C to 40 °C. All specifications related to temperature are valid only for an ambient temperature up to 22 °C and for an air humidity lower than 60%! Type CM 1510 CM 1510 Nominal voltage 120 V AC ±10% 230 V AC ±10% Nominal frequency... -
Page 9: General Description
5. General description Leica CM 1510 and components Specimen Waste tray disc Brush shelf Knife holder CN Knife holder CE Knife holder base Heat extractor (optional accessory) Quick-freeze shelf Thermal block (optional accessory) Fig. 9 Leica CM1510 – Cryostat... -
Page 10: Product Description
1 Cryostat oil no. 407, 50 ml, 1 Set of replacement fuses, 1 Instruction manual. Fig. 10 The Leica CM 1510 is a compact open-top cryostat in a Optional accessories space-saving design for rapid freezing and manual sec- tioning of tissue specimens. -
Page 11: Unpacking And Installation
(2) and rear rollers (3). • At the installation site unscrew the adjustable feet (1) with a fork wrench (size 16) to ensure stability. • Align the adjustable feet to level the instrument. Leica CM1510 – Cryostat... -
Page 12: Assembly Of The Handwheel
Unpacking and installation Assembly of the handwheel The handwheel including the fixing compo- nents are packed in the cardboard box for the accessories. • Insert the pin (1) of the handwheel shaft in to the hole (2) of the handwheel. •... -
Page 13: Setup And Operation
• Connect the mains plug to the mains power outlet at the wall. For installation of the knife holder base and knife holder, please refer to the instruction manual of the knife holder. Leica CM1510 – Cryostat... -
Page 14: Switches And Controls
Setup and operation Switches and controls 7.3.1 Mains switch The mains switch (green) is located in a recess on the right side of the cryocabinet. In the OFF position it is on 'O‘; in the ON position it is on 'I‘ and illuminated. •... - Page 15 • To adjust the set temperature, press 'P' and modify the value via arrow key. • To set the defrost time, press 'P' again and modify the value via arrow key. The first two digits are used Leica CM1510 – Cryostat...
-
Page 16: Temperature Selection Chart (In Minus °C)
Setup and operation Temperature selection chart (in minus °C) Tissue 10 - 15 15 - 25 25 - 30 ❉ ❉ Adrenals ❉ Bone marrow ❉ Brain ❉ Bladder ❉ Breast- fatty ❉ Breast - little fat ❉ ❉ Cartilage ❉... -
Page 17: Daily Operation
(see Chapter 12. ‘Optional acces- sories‘). • Once the specimen is frozen, insert the specimen disc in the specimen head (see Fig. 18.2) and start sectioning. Leica CM1510 – Cryostat... -
Page 18: Mounting Of Specimen Discs
Daily operation Mounting of specimen discs 8.2.1 Specimen discs Specimen discs are available in three sizes of 20, 25 and 30 mm in diameter. The design of the surface en- sures firm contact with the specimen. 8.2.2 Fixing the specimen disc in the specimen head Fig. -
Page 19: Inserting The Knife Or Blade In The Knife Holder
• To trim the specimen, select a section thickness of approximately 30 µm with the section thickness selection knob on the front of the microtome. • Trim the specimen to the desired sectioning plane by gradually decreasing the section thickness. Leica CM1510 – Cryostat... -
Page 20: Adjusting The Anti-Roll Guide
Daily operation Adjusting the anti-roll guide Sectioning and section transfer • Place the anti-roll guide on the knife holder during • Decrease the section thickness continually to the trimming. required value. The anti-roll guide is correctly adjusted when After changing from one section thickness to the section smoothly slides down between the another, the first two or three sections should anti-roll plate and the knife (see illustration... -
Page 21: Defrosting
8. Daily operation Defrosting 8.8.1 Programming an automatic defrost cycle The Leica CM 1510 provides both programmable auto- An automatic defrost cycle is programmed via the con- matic and manual defrosting. trol unit. During a defrost cycle, whether automatic or manual,... -
Page 22: Trouble Shooting
Trouble shooting Problem Causes Remedies Frost on chamber walls and - Cryostat is exposed to air cur- Change place of installation for microtome rents (open windows and doors, the cryostat. air conditioning). - Sliding window was open and exposed to air currents too long. - Frost built up by breathing into the cryochamber. - Page 23 - Blunt cutting edge. - Use different part of the cutting edge or replace the knife/blade. - Incorrect clearance angle. - Set correct angle. - Microtome not properly dried - Dry microtome thoroughly. before reinstallation. Leica CM1510 – Cryostat...
- Page 24 Trouble shooting Problem Causes Remedies Tissue sticks or crumbles on the - Anti-roll plate is too warm or - Cool down anti-roll plate or anti-roll plate incorrectly positioned. reposition plate. - Static electricity. - Remove static electricity. - Fat on the corner or edge of the - Remove fat with alcohol/ anti-roll plate.
-
Page 25: Cleaning And Disinfection
Effectiveness of the disinfectant down to -20 gressive substances for cleaning and disin- °C experimentally tested. fection! We strongly recommend the use of Leica 1. Select a cryochamber temperature value down to - Cryofect disinfectant spray! Only use alcohol or common disinfectants 20 °C. -
Page 26: Removal Of The Microtome
Cleaning and disinfection 10.3 Removal of the microtome • Pull the stopper at the bottom of the cryochamber to drain any condensate, waste or cleaning liquid that may have collected in the cryochamber. For extensive cleaning and disinfection, or for thorough drying of the microtome after a long •... -
Page 27: Reassembly Of The Microtome
• Slightly lift the microtome, pull it to the left. Thus the plastic coupling (5) connecting the two axles will disengage and the handle of the handwheel will swing to the top. • Take the microtome out of the cryochamber. Leica CM1510 – Cryostat... -
Page 28: Maintenance
Automatic eral years, we recommend the following: cutouts • Have the instrument inspected by a qualified ser- vice engineer authorized by Leica at least once a year; Fig. 28.1 • Enter into a service contract after the warranty pe- • After an automatic cutout has operated, the fuse riod;... -
Page 29: Replacement Of The Lamp
(Fig. 29.3) and push it to the right until it en- gages in the lamp holder. • Lightly push the fluorescent tube upward to engage in the clip. • Replace the sliding window. • Reconnect the instrument to mains and turn it on. Fig. 29.3 Leica CM1510 – Cryostat... -
Page 30: Optional Accessories
Optional accessories 12.1 Heat extractors 12.2 Thermal block Specimen freezing on the quick-freeze shelf can be ac- The thermal block (8) facilitates the removal of the fro- celerated by the additional use of a heat extractor. zen specimen from the specimen disc. Keep the thermal block outside the cryocham- 12.1.1 Mobile heat extractor ber at room temperature. -
Page 31: Appendix
Leica in-house testing standards, and that the 13.4 Technical service information product is faultless and complies with all technical specifications and/or characteristics warranted. -
Page 32: Notizen
Notes Instruction Manual V2.1 – 12/2001...
Need help?
Do you have a question about the CM1510 and is the answer not in the manual?
Questions and answers