Leica CV5030 Instructions For Use Manual
Robotic coverslipper
Hide thumbs
Also See for CV5030:
- Instructions for use manual (116 pages) ,
- Operating manual (76 pages) ,
- Instruction manual (44 pages)
Table of Contents
Troubleshooting

Related Manuals for Leica CV5030


Summary of Contents for Leica CV5030
- Page 1 Instructions for Use Leica CV5030 Robotic Coverslipper Leica CV5030 V 3.3, English 04/2019 Order No.: 14 0478 80101 RevK Always keep this manual with the instrument. Read carefully before working with the instrument.
- Page 3 Leica reserves the right to change technical following thorough investigation in this field. specifications as well as manufacturing process- We are under no obligation to update the present es without prior notice.
-
Page 4: Table Of Contents
Instrument Setup ......................17 Installation site requirements ....................17 Unpacking the CV5030 ....................... 18 4.2.1 Setting up the CV5030 ........................ 20 Preparing and adjusting the instrument ................. 20 4.3.1 Removing or installing the transport anchors................ 21 Leveling the instrument ......................22 Exhaust system ........................... - Page 5 5.13 Determining the optimum parameter setting (menu A+B) ........... 66 5.13.1 Procedure ............................ 66 Workstation operation ....................72 Operation as ST5010 – CV5030 workstation ................72 Operation as ST5020 – CV5030 workstation ................74 Important instructions for operation as workstation ............76 Interrupting workstation operation..................
- Page 6 Decontamination Certificate (master) ..............107 Appendix A Application-related notes and recommendations ........109 A1.1 Leica specimen slide holders, output and coverslip magazines made of plastic ..109 A1.2 Specimen slide holders from other manufacturers ............110 A1.3 Specimen slides and gripper mechanism ................111 A1.4 CV5030 –...
-
Page 7: Important Information
Section 7 of the German Electrical and Electronic Equipment Act (ElektroG). Ele- ktroG is the law regarding the sale, re- Manufacturer turn and environmentally sound disposal of electrical and electronic equipment. Date of Manufacture Leica CV5030 – Robotic Coverslipper... - Page 8 Important Information Symbols and their meanings Example of labeling in accordance with Order No. IPPC Serial number • IPPC symbol Observe the Instructions for Use • Country code in accordance with ISO 3166, e.g. DE for Germany • Regional identifier, e.g. HE for Hessen The package contents are fragile and • Producer/treatment provider code, unique must be handled with care.
-
Page 9: User Group
Intended use of instrument The Leica CV5030 is a robotic coverslipper for coverslipping tissue sections, cells or swabs mounted on specimen slides with cover slips made out of glass using a wide variety of differ- ent cover slip mountants. -
Page 10: Safety
To ensure trouble-free operation of the instrument, make sure to comply with the following instructions and warnings. Please note that electrostatic charge may result through direct or indirect contact with the Leica CV5030. Instructions for Use V 3.3 RevK – 04/2019... - Page 11 • The installation location must be well ventilated, and must contain no sources of ignition of any kind. The chemicals to be used in the Leica CV5030 are highly flammable as well as hazardous to health.
- Page 12 • Before each maintenance task, remove the loading bath and the specimen slide holder from the instrument, switch the instrument off and unplug it from the power supply. • Only Leica service technicians are authorized to open the instrument for maintenance and repair work.
-
Page 13: Instrument Components And Specifications
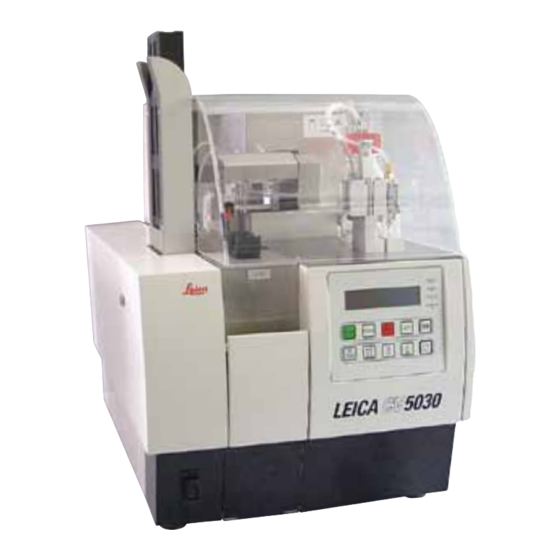
Output magazines Maintenance Bottle for cover- door slip mountant Cover slip magazine Dispenser group Dispenser rest (park) position (prime position) Control panel Main switch Loading bath Height-adjustable instrument feet Loading drawer Input door Fig. 2 Leica CV5030 – Robotic Coverslipper... -
Page 14: Technical Data
Instrument Components and Specifications Technical data Nominal supply voltages: 100 - 240 V AC, ± 10 % Nominal frequency: 50 - 60 Hz Approvals CE, CSA C/US Fuse: Automatic fuseT5A Nominal power: 100 VA Dimensions (W x H x D): Hood closed: 420 x 600 x 550 mm Hood opened: 420 x 980 x 550 mm Width (from the left to the right base):... -
Page 15: Standard Delivery-Packing List
Output magazines: Capacity of 20 or 30 specimen slides (up to 60 specimen slides) Standard delivery—packing list The standard equipment for the Leica CV5030 includes the following parts: Order number 1 Basic instrument 14 0478 39700 1 Dispenser group, consisting of:... - Page 16 1 Glass vial, 12 ml 14 0478 39789 1 Exhaust hose, 3 m 14 0478 39820 1 Instructions for Use, printed (English), for Leica CV5030 14 0478 80001 1 Language CD-ROM 14 0478 80200 The country specific power cord needs to be ordered separately. Please find a list of all power cords available for your device on our website www.LeicaBiosystems.com within the product section.
-
Page 17: Instrument Setup
• The installation location must be well ventilated, and must contain no sources of ignition of any kind. • The chemicals used in the Leica CV5030 are easily inflammable and pose a health hazard. • Never operate the instrument in rooms with an explosion hazard. -
Page 18: Unpacking The Cv5030
Note this on the shipping documents and check the shipment for possible damage. Only personnel authorized by Leica may unpack and install the instrument. Opening the package (Fig. - Page 19 • Unscrew 2 x 8 screws (front and rear on the instrument, (8) in Fig. 5), loosen and remove the retaining clips (9) from the baseplate. • Remove the dust cover from the instrument. For setting up the instrument, refer to Chapter 4.2.1 - Setting up the CV5030. Fig. 5 Leica CV5030 – Robotic Coverslipper...
-
Page 20: Setting Up The Cv5030
Instrument Setup 4.2.1 Setting up the CV5030 • Grab hold of bottom of the instrument from the front and rear (with at least 2 people; the instrument weighs approx. 57 kg) and place it on a stable laboratory table. • When doing so, ensure that the instrument is standing on all four feet. -
Page 21: Removing Or Installing The Transport Anchors
Transport anchor (24) for the Pick & Place module Transport anchor for the gripper (25) Fig. 8 • To transport the instrument, reinstall the transport anchors in the opposite order. We recommend keeping the transport anchors and screws close to the instrument in the provided clear plastic bag. Leica CV5030 – Robotic Coverslipper... -
Page 22: Leveling The Instrument
Instrument Setup Leveling the instrument • Move the instrument to its final location on the work surface. When doing so, ensure that all four feet are on the work surface. • Open the hood and place a suitable spirit level (26) onto the work surface as shown in Fig. • The instrument can be leveled in both direc- tions by screwing or unscrewing the instru- ment feet (27) (detail 2 in Fig. - Page 23 (28). Note: Fig. 10 detail: Assembly of the exhaust hose (70). The filter cover (30) and filter (32) have been removed to show the connecting piece (33). Filter label Fig. 10 Leica CV5030 – Robotic Coverslipper...
-
Page 24: Installing The Dispenser Group
Instrument Setup Installing the dispenser group • Take the dispenser group (Fig. 11) out of the Dispenser group packaging. • Insert the dispenser (35) into the holder (39) for the prime position (refer to Fig. 12). • Insert the pressure hose (36) from the cover of the mountant bottle (40) into the compressed air output (41) up to the stop inside. - Page 25 Ensure correct positioning for the dis- penser needle, since the dispenser needle can loosen during the cover- slipping operation. Leaks can create 21 G 20 G 18 G 16 G bubbles during coverslipping. Fig. 15 Leica CV5030 – Robotic Coverslipper...
-
Page 26: Aligning The Dispenser Needle Height Relative To The Specimen Slide Outfeed
Instrument Setup 4.7 Aligning the dispenser needle height relative to the specimen slide outfeed 4.7.1 Checking needle height The height of the dispenser needle must be aligned to the specimen slide correctly so that no air bubbles are generated while the mountant Detail: is applied. - Page 27 • Keep rotating the screw clockwise until the dispenser needle is touching the highest point of the specimen slide outfeed (see Fig. 17, (distance = 0 mm). This can be checked by putting the dispenser into the working position. Fig. 19 Leica CV5030 – Robotic Coverslipper...
- Page 28 Instrument Setup 4.7.2 Setting the needle height (continued) • The dispenser is reset into the rest position if the 0 mm distance is set correctly. • Now carry out a three-quarters counterclock- wise revolution using the No. 3 Allen key. • This achieves the optimum distance of 0.75 - 0.8 mm. • The set height of the dispenser needle can be inspected again by a visual inspection from the front (see Fig.
-
Page 29: Dispenser Needle Cleaner (Nozzle Cleaner)
• Now, attach the lid (10) and push it down until • Insert the brush (2) into the container so that it clicks into place. the lateral guides (15) (2 each on the left and right) fit into the notches (16) provided. Leica CV5030 – Robotic Coverslipper... - Page 30 Instrument Setup Dispenser needle cleaner (nozzle cleaner) (continued) Assembly To install the holder for the dispenser needle cleaner, you must first remove the transport anchors for the Pick & Place module (see Chap. 4.3.1, Fig. For installation, use the thread- ed holes (11) of the transport anchor (see Fig.
- Page 31 Fill the container with 5 ml of solvent using the provided plastic pipette (Fig. 20, 5). Regularly check the level of Fig. 25 the container. The solvent being used must be compatible with the coverslip mountant. Leica CV5030 – Robotic Coverslipper...
-
Page 32: Connecting The Power Supply
"0"= OFF position. • Insert a suitable power cable into the power input socket (58). • The serial interface (59) is intended for con- necting to a Leica ST5020 (multistainer) if both instruments are being operated together as a Fig. 26 workstation (refer to Chapter 4.10 Installing the accessories... - Page 33 (Fig. 30, 67). • The standard scope of delivery includes the bath insert for the Leica 30 specimen slide holder. The respective associated insert must be used when using other specimen slide holders (Leica metal 20 specimen slide holder, Leica Sakura-type plastic 20 specimen slide...
-
Page 34: Refilling Consumables
Instrument Setup 4.11 Refilling consumables Fig. 31 • Fill the loading bath (Fig. 30, 68) with a solvent In order to be able to degas air compatible with the coverslip mountant. The bubbles generated while filling the level should reach up to the specimen slide's mountant bottle (44), the coverslip label field. - Page 35 While doing so, ensure that the black O-ring is present and positioned correctly on the dispensing group and the moun- tant bottle's blue shutter ring. Only glass bottles provided by Leica may be used (see opt. accessories and Standard delivery—packing list).
-
Page 36: Operation
Operation Control panel functions The control panel Fig. 32 is provided as an example only and shows a valid start display for this in- strument. Fig. 32 The control panel field consists of a membrane keyboard with ten pushbuttons, four LED indica- tors and a two-line LCD display. -
Page 37: Key Functions For Instrument Operation
After the output magazine reaches the output position, all spec- imen slides must be removed before the coverslipping opera- tion can be resumed. Non-observance can lead to damage of the specimen slide. A signal tone can be acknowledged using the RESPOND button. Leica CV5030 – Robotic Coverslipper... - Page 38 Operation Key functions for instrument operation (continued) RELEASE COVER SLIP RELEASE COVER SLIP ventilates the Pick & Place module's suction cups. The cover slip is released. The function is disabled while the BUSY LED is illuminated in green. RELEASE SLIDE Pressing RELEASE SLIDE opens the gripper jaws as long as the button is held down.
-
Page 39: Switching The Instrument On Or Off
Only reinsert the loading bath AFTER the in- strument is switched back on and initialized to avoid changes to settings and damage to the gripper. Leica CV5030 – Robotic Coverslipper... - Page 40 Operation Switching the instrument on or off (continued) A loaded specimen slide holder can now be inserted into the loading bath. After inserting it, push the loading drawer back and close the loading door. The message "PRIME POSITION" appears. Take the dispenser out of the rest position;...
-
Page 41: Brief Inspection Before Starting The Coverslipping Operation
(74) is inserted. • When inserting the loaded specimen slide holder, ensure that the specimen slide re- ceiving the cover slip has the side with the specimen pointing towards the user (instru- ment front). Leica CV5030 – Robotic Coverslipper... -
Page 42: The Coverslipping Operation
Operation The coverslipping operation After complete initialization, the prime cycle and carrying out preparations (refer to Chapter 5.3), the coverslipping operation can be started by pressing the START button ("READY" LED is illuminated in green). • The loading bath is transported into the position required for the cover- slipping operation and the output magazine moves into position. • The specimen slides are processed sequentially: They are coverslipped in sequence and then pushed into successive positions in the output magazine (from top to bottom). - Page 43 If just one 20-pack or 30-pack output magazine is inserted b) If just two 20-pack output magazines are inserted c) If only part of the output magazine is occupied after ending the coverslipping operation. The LIFT button must be pressed in these cases. Leica CV5030 – Robotic Coverslipper...
-
Page 44: Interrupting The Coverslipping Operation
Operation Interrupting the coverslipping operation Press PAUSE to interrupt the coverslipping operation. • The currently processed specimen slide is completely coverslipped and pushed into the output magazine, accompanied by the message ò "PAUSING". • If this step is ended, the message "PAUSED" is shown in the display. A signal tone is emitted at the same time. - Page 45 ò • The message "STOPPED" is displayed accompanied by a signal tone. • Confirm the signal tone with RESPOND. Remove all glass parts or other objects away from the CV5030 working area after pressing STOP. Only then may START be actuated. • Using the RELEASE COVER SLIP and RELEASE SLIDE buttons, you can release any cover slip that has been picked up or specimen slide that has been gripped.
- Page 46 Operation Interrupting the coverslipping operation (continued) Empty coverslip magazine If the number of cover slips falls below the limit, the message "COVERSLIPS LOW" appears on the display. The instrument continues to operate until there are no more cover slips in the cover slip magazine. In this case, the messages "PAUSED" and "CS EMPTY"...
- Page 47 • If everything is in good condition, work can be continued, as in normal PAUSE mode, by pressing START. Specimen slide that do not conform to ISO 8037/1 are not detected by the instrument and have to be coverslipped by hand. Leica CV5030 – Robotic Coverslipper...
- Page 48 Operation Interrupting the coverslipping operation (continued) Pressure or vacuum cannot be reached If the dispenser system cannot reach the intended pressure or vacuum after a certain time, the instrument automatically switches to PAUSE mode. • The READY LED is illuminated in red, the PAUSE LED is green. Depend- ing on the error that has occurred, the display reads "PAUSED BOTTLE VACUUM"...
- Page 49 • Check the suction cups of the Pick & Place module for adhesive residue and, if necessary, clean them using a lint-free cloth moistened with compatible solvent or replace them with new ones (see Chap. 7.5.9). • Re-insert the cover slip magazine. • Move the dispenser back into working position. • Press the START key to resume the coverslipping operation. Leica CV5030 – Robotic Coverslipper...
-
Page 50: Display Indicators And Instructions
Operation Display indicators and instructions The display of the Leica CV5030 is used to display status and error messages that provide in- formation about the current status of the instrument. Status messages always appear in the bottom line of the display. The top line displays the operating status of the instrument. The following table compiles all status messages. - Page 51 The instru- slipping and refill the cover slip ment continues to work until the magazine. Press START to con- PAUSE button is pressed or all tinue working. cover slips have been used up. Leica CV5030 – Robotic Coverslipper...
- Page 52 Operation Display indicators and instructions (continued) Display Explanation Action The instrument is in pause mode. Fill the cover slip magazine. The coverslipping process was Pressing START allows work to interrupted due to the empty continue. cover slip magazine. The instrument is in pause mode. Insert a loading bath into the There is no loading bath in the loading drawer.
- Page 53 The coverslipping operation Remove the cover slipped speci- was ended. The number after men slides. FINISHED corresponds to the selected SET 1-4 program. Leica CV5030 – Robotic Coverslipper...
- Page 54 Operation Display indicators and instructions (continued) Display Cause Action The Pick & Place module loses As soon as the display reads "CS DROPPED", the instrument goes the coverslip on the way to the automatically into PAUSE mode. coverslipping position. Notice: Move the dispenser into the park position, move the Pick &...
- Page 55 Operation Display indicators and instructions (continued) The following status messages are displayed only if the instrument is connected to a staining machine (Leica ST5010 or Leica ST5020) via a transfer station. Display Explanation Action Indicates that a specimen slide Wait for the specimen slide to holder that has been transferred finish processing.
-
Page 56: Button Functions For Programming
Operation Button functions for programming Press and hold RESPOND for approx. two seconds to set Press and hold the programs and parameter sets the instrument uses to for 2 s operate. The individual parameter sets are set using two sub- menus: Menu A (Fig. -
Page 57: Setting Parameter Sets
The START or PAUSE buttons can be used to increase or decrease the value of the parameter respectively. Press RESPOND as confirmation. The procedure for changing a value is identical for all parameters. ò Fig. 38 Leica CV5030 – Robotic Coverslipper... - Page 58 Operation 5.10 Menu A – parameter settings (continued) Mountant Stroke – stroke length of the coverslip mountant The quantity and stroke length of the coverslip ð mountant is adapted to the cover slip length. Mountant Stroke: 40 = 40 mm Label field Cover slip length Mountant Stroke: 50 = 50 mm...
- Page 59 STROKE LENGTH CORRECTION (length correction for the coverslip mountant application) MOUNTANT STROKE (length of the coverslip mountant application) STROKE POSITION CORRECTION (starting point of the coverslip mountant application) COVERSLIP POSITION CORRECTION (cover slip placement position) Fig. 40 Leica CV5030 – Robotic Coverslipper...
-
Page 60: Menu B - Parameter Settings
Operation 5.11 Menu B – parameter settings Coverslip Position Corr - correction of the cover slip placement position The cover slip placement position can be modi- ð fied using the CSP (91) (cover slip placement position) parameter (see Fig. 41). If the cover slip placement position is to be moved towards the edge of the specimen slide, then select a negative value between –5 and –30. - Page 61 This notifies the user of a critical (low) number of cover slips remaining in the magazine. The setting is made as follows: Place a cover slip stack (approx. 30 - 40 pieces) in the empty coverslip magazine. Then, press the START button. Leica CV5030 – Robotic Coverslipper...
-
Page 62: Leaving The Parameter And Submenu
Operation 5.11 Menu B – parameter settings (continued) Coverslip Limit Adjust - setting for the cover slip limit (continued) The Pick & Place module moves to the cover slip magazine and lowers itself down to the top cover slip. Then it returns to its origi- nal position. -
Page 63: Recommendation For Parameter Setting (Beginning With Firmware 3.01.04)
The following settings serve as recommendations and have to be adapted to the conditions in the respective lab. The parameter settings have been determined as follows under standardized condition in a Leica Biosystems Nussloch GmbH lab: • Use of tissue sections with a thickness of 3-5 µm. • Room temperature: 20-25 °C. - Page 64 CV Mount Leica Xylene 7 (8) 8 (10) 5 (6) 4 (5) -10/ CV Ultra Leica ST Ultra (reagent) Pertex Leica / Xylene Surgipath Micromount Leica / Xylene Surgipath MM 24 Leica / Xylene Surgipath Leica / Xylene Surgipath...
- Page 65 Formulation tific Consul-Mount/ Shandon/ Xylene Cytology Thermo Formulation Scientific Shandon Shandon/ Xylene Xylene Substi- Thermo tute Mountant Scientific Histokitt II Carl Roth Xylene GmbH Aquatex: Merck KGaA distilled water STP: (water based) 40/50 CSP: var- Leica CV5030 – Robotic Coverslipper...
-
Page 66: Determining The Optimum Parameter Setting (Menu A+B)
Operation 5.13 Determining the optimum parameter setting (menu A+B) The following procedure provides assistance for: 2. Selecting the suitable size or number of dispenser needles (nozzle) • Adjusting the previously listed parameter set- => The following are suitable for high-viscosity ting to onsite lab conditions. coverslip mountants: • Determining the optimum parameter settings •... - Page 67 • 24 - 48 hours after coverslipping. Should air pockets appear between the speci- men slide and cover slip after these checks, the settings must be corrected. If air pockets still occur despite suitable chang- Chapter 8.2 provides additional directions. Leica CV5030 – Robotic Coverslipper...
- Page 68 Operation 5.13.1 Procedure (continued): If artifacts become visible within the monitoring The parameters VOL and TYP are incrementally process (streaks, cloudiness, discoloration), the adjusted (increase or reduction) until a suitable involved reagents must be inspected for compat- application quantity on the specimen slide is at- ibility and storage life.
- Page 69 VOL VOL: 4 or 5 incremental increase/reduction, with parallel incremental increase/reduction of TYP If a suitable coverslip mountant application quantity cannot be attained, switch to a dispenser needle with a different diameter. Leica CV5030 – Robotic Coverslipper...
- Page 70 Operation 5.13.1 Procedure (continued): 8. Fine-tuning the adhesive and coverslip support positioning: • Here, the following parameters must be matched to each other: STP (Stroke position - starting point for the coverslip mountant stroke) CSP (Cover slip placement position) and LEN (Stroke length correction for the coverslip mountant stroke) Label field STROKE LENGTH CORRECTION (length correction for the coverslip mountant application)
- Page 71 "clipped corners" (i.e. all four corners are ground off or rounded), take care that the corners do not overlap the cover slip. If the coverslip placement is not optimal, air bubbles or glued-on material may result at the suction cups. Leica CV5030 – Robotic Coverslipper...
-
Page 72: Workstation Operation
Workstation operation You have the ability to connect the robotic coverslipper to a Leica ST5010 (Autostainer XL) or ST5020 (Multistainer) staining machine to create a workstation. Operation as ST5010 – CV5030 workstation Both instruments are connected to each other • Afterwards, the specimen slide holder is trans- via a TS5015 Transfer Station. - Page 73 Workstation operation Operation as ST5010 – CV5030 Workstation (continued): • All empty specimen slide holders must be removed from the discharge chute and the drawer of the transfer station must be closed. Then, press the START button so that the "READY"...
-
Page 74: Operation As St5020 - Cv5030 Workstation
Operation as ST5020 – CV5030 workstation In this case, both instruments are connected to each other by a TS5025 Transfer Station. Unlike the ST5010 workstation, both instruments - the ST5020 and CV5030 - communicate with each other. • For the communication between the... - Page 75 Workstation operation Operation as ST5020 – CV5030 workstation (continued): Detail: • After the coverslipping operation, the empty specimen slide holder is transferred back onto Transfer of the specimen slide holder to the the discharge chute (81) of the transfer station. transfer station The display shows "READY".
-
Page 76: Important Instructions For Operation As Workstation
Workstation operation Important instructions for operation as workstation • Specimen slide holders loaded man- ually into the CV5030 must always be removed immediately after process- ing. • The unloading chute (Fig. 47, 81) of the transfer stations should be emp- tied after the "TS FULL"... - Page 77 Leica plastic holders turers, or with other Leica specimen slide for 30 specimen slides (Order holders, with use of a compatible bath insert No. 14 0475 33643).
-
Page 78: Interrupting Workstation Operation
Workstation operation Interrupting workstation operation • The PAUSE and STOP buttons have mostly the same functions outlined in Chapter 5.6. • If the coverslipping operation is interrupted using the STOP button, the coverslipper must be initialized. To do so, press the START button. • After the coverslipping operation is interrupted using the STOP button, the specimen slide holder, which is still in the instrument, must... -
Page 79: Cleaning And Maintenance
• Before each maintenance task, remove the loading bath and the specimen slide holder from the instrument, switch the instrument off and unplug it from the power supply. Leica CV5030 – Robotic Coverslipper... -
Page 80: Daily Cleaning And Maintenance - Overview
Cleaning and Maintenance Notes on cleaning and maintenance (continued) Notes on cleaning agents • Clean the hoods and the housing with mild and pH-neutral commercial household cleaners. The finished surfaces have only limited resistance to solvents! • Clean the cover slip sensors, suction cups, skids of the Pick & Place module, transport chain, specimen slide holder and output magazines using a lint-free cloth soaked in com- patible solvent. -
Page 81: Weekly Cleaning And Maintenance
To open the gripper (for cleaning or to remove a gripped specimen slide), press the RELEASE SLIDE button. This is true for cleaning and maintenance work, after an emergency stop and while the instrument is in operation. Leica CV5030 – Robotic Coverslipper... -
Page 82: Cleaning And Maintenance As Necessary
Cleaning and Maintenance Cleaning and maintenance as necessary Filling the coverslipping mountant bottle: • If possible, top up the coverslip mountant at the end of the working day so that any air bubbles that arise during filling are degassed by the next working day. • The coverslip mountant needs between 6-12 hours of resting time to degas (time depends on the type of the coverslip mountant). • If necessary, clean the bottle neck and both O-rings (blue = bottle neck and black = dispenser group) to remove coverslip mountant residue. -
Page 83: Glass Vial In The Dispenser Rest Position
7.5.8 Skids of the Pick & Place module • Check the skids on the bottom of the Pick & Place module for glued-on material (coverslip mountant with glass shards and splinters) and, if necessary, carefully clean it with a lint-free cloth soaked in compatible solvent. Leica CV5030 – Robotic Coverslipper... -
Page 84: Cleaning And Replacing The Suction Cups
Cleaning and Maintenance Description of the required daily cleaning measures (continued) 7.5.9 Cleaning and replacing the suction cups 7.5.10 Cover slip sensor Fig. 50 Fig. 49 • Check the suction cups (Fig. 49, 88) for small Check the cover slip sensor (89) for glued-on glass shards and splinters (from glass break- material and ease of movement: ing) and adhesive residue. -
Page 85: Description Of The Required Weekly Cleaning Measures
• Wipe the coverslip mountant off of the hose end of the dispenser group. • Insert the replacement bottle filled with solvent into the instrument, screw on the lid to close it correctly (ensure that both O-rings are seated correctly), then switch the instrument back on. Leica CV5030 – Robotic Coverslipper... -
Page 86: Dispenser Needle Cleaner (Nozzle Cleaner)
Cleaning and Maintenance Description of the required weekly cleaning measures (continued) 7.6.2 Dispenser needle cleaner 7.6.3 Specimen slide holder, gripper and (nozzle cleaner) output magazines • Carefully clean the gripper using a lint-free cloth soaked in compatible solvent (if neces- sary, also daily if using labels that protrude or are sensitive to solvent). -
Page 87: Description For Cleaning And Maintenance As Necessary
7.7.2 Discharge chute of the TS5015 or TS5025 Transfer Station for workstation operation • Check the discharge chute (90) for dirt and, if necessary, clean it carefully using a lint-free cloth soaked in compatible solvent (Fig. 52). Fig. 53 Fig. 52 Leica CV5030 – Robotic Coverslipper... -
Page 88: Procedure For Changing The Cover Slip Mountant
Cleaning and Maintenance Procedure for changing the cover slip mountant • Remove the mountant bottle. Before switching the mountant, switch • Insert a second glass bottle with 150 ml of off the instrument and disconnect it from xylene substitute and rinse/prime it (see the power supply! Remove the loading Chap. -
Page 89: Malfunctions And Troubleshooting
If faults occur that cannot be corrected with the procedures recommended in the table, or if they occur again, contact the responsible Leica Service contact person. In case of errors, generally the user's first step is to secure the specimens located at different positions in the instrument/workstation while ensuring personal safety. - Page 90 CS SENSOR DEF. stuck or defective. a lint-free cloth soaked in compatible solvent as described in Chapter 7.5.10. Error 322 The reference values of the Contact Leica Service. CONFIG FAULT instrument are faulty. Instructions for Use V 3.3 RevK – 04/2019...
-
Page 91: Troubleshooting
100 ml of a compatible solvent. Do so in accordance with the instructions in Chapter 7 – Cleaning and Maintenance. Leica CV5030 – Robotic Coverslipper... - Page 92 Make sure that a solvent compatible with the coverslip specimen and cover slip). patible with the solvent used. mountant is used in the loading bath of the CV5030 as well as in the last steps of the preceding dyeing process. If commercially available coverslip mountant is diluted with a solvent that is incompatible, this can also cause small air bubbles.
- Page 93 Check whether dirt, such as broken glass, is on the floor collides with the coverslip incorrectly. and/or in the holder of the cover slip magazine; if neces- magazine or there is a sary, carefully remove them. scraping noise when lift- ing the cover slip. Leica CV5030 – Robotic Coverslipper...
- Page 94 Loading bath, deep – Order No.: 14 0478 39657 Notice! When using the deeper loading bath in work- stations (Leica ST5010 Autostainer XL or Leica ST5020 Multistainer), take into account that a corresponding technical modification is necessary when using older models or upgrading a workstation.
-
Page 95: Optional Accessories
Suction cup, 2 pieces 14 0478 39701 Specimen slide holder 20, Type Sakura, plastic 14 0474 33463 Specimen slide holder 30, Type Leica, metal, 1 piece 14 0456 33919 Specimen slide holder 20, Type Leica, metal, 1 piece 14 0474 32789... - Page 96 Baseplate for workstation 14 0475 37647 Leica provides no warranty for the function of specimen slide holders from other manufactur- ers or any warranty for their function in the instrument. The instrument operator bears respon- sibility for any use of specimen slide holders from other manufacturers!
- Page 97 Order No. 14 0464 30011 Leica ST Ultra Leica ST Ultra intermedium was developed as a xylene substitute for histological specimen mounting, removal of paraffin from specimens, and manual as well as automated specimen coverslipping. ST Ultra can be used for specimen coverslipping only together with Leica CV Ultra.
- Page 98 Optional Accessories Ordering information (continued): Standard active carbon filter, for working with xylene Order No. 14 0422 30673 Fig. 54 Cover slips, of pure white glass of hydrolytic class 1, thick- ness No. 1 (0.13 – 0.17 mm) Supply quantity: 1000 pieces –...
- Page 99 Order No. 14 0478 40941 Dispenser needle cleaner, small Set consisting of: • Container • Cover • Brush Order No. 14 0478 40559 Fig. 58 Dispenser brush, set of 5 Order No. 14 0478 41115 Fig. 59 Leica CV5030 – Robotic Coverslipper...
- Page 100 Optional Accessories Ordering information (continued): Cover slip catch tray Order No. 14 0478 39585 Fig. 60 Output magazine 30, for 30 specimen slides, 4 pcs. Order No. 14 0478 39586 Fig. 61 Output magazine 20, for 20 specimen slides, 6 pcs. Order No.
- Page 101 Order No. 14 0478 39584 Fig. 65 Cover with cutout, for loading bath, only together with bath insert for Leica specimen slide holder for 30 specimen slides - 14 0478 39593 Order No. 14 0478 40337 Fig. 66 Glass bottle with cover,...
- Page 102 Optional Accessories Ordering information (continued): Cover slip magazine, coverslip magazine Multi-size with inserts for holding various common coverslip sizes 40-60x22 mm Order No. 14 0478 39748 40-60x24 mm Order No. 14 0478 39749 Fig. 68 Exhaust hose, solvent-resistant, flexible, 3 m length, diameter 32 mm Order No.
- Page 103 14 0474 34969. Order No. 14 0474 33463 Fig. 72 Specimen slide holder 30, Plastic, pack of 5 Order No. 14 0475 33643 Plastic - 1 pc. Order No. 14 0475 33750 Fig. 73 Leica CV5030 – Robotic Coverslipper...
- Page 104 Order No. 14 0478 38029 Fig. 74 Varistain adapter, Adapter for Shandon Varistain 24-4, Note: For use with Leica specimen slide holder 30, modified, plastic 14 0478 38029, to combine Varistain 24-4 with CV5030. Order No. 14 0464 37659 Fig. 75...
- Page 105 Bath insert Shandon 20, for Shandon Gemini, specimen slide holder for 20 specimen slides Order No. 14 0478 36709 Fig. 78 O-ring for mountant bottle, 28x3 mm, pack of 5 Order No. 14 0253 45452 Fig. 79 Leica CV5030 – Robotic Coverslipper...
-
Page 106: Warranty And Service
Service information If you are in need of technical customer support or spare parts, please contact your Leica representative or the Leica dealer where you purchased the instrument. Please provide the following information: • Model name and serial number of the instrument. -
Page 107: Decontamination Certificate (Master)
Dear Customer, Any product that is to be returned to Leica Biosystems or serviced on site, must be cleaned and decontaminated in the appropriate manner. Since it is not possible to decontaminate for prion diseases, such as CJD, BSE, CWD etc., equipment exposed to specimens containing prion diseases cannot be returned to Leica Biosystems for repair. - Page 108 Such equipment must not be returned without the written agreement of Leica Biosystems. Decontamination Certificate (Master) The equipment has been prepared to ensure safe handling/transportation. Whenever possible, please use the original transportation case/box. Important - to avoid refusal of shipment: Place one copy in the unit prior to packaging, or hand it over to the service engineer.
-
Page 109: Appendix A Application-Related Notes And Recommendations
• Specimen slide holder for 30 specimen slides, Type Leica, plastic (14 0475 33750) • Specimen slide holder for 20 specimen slides, Type Sakura, plastic (14 0474 33463) • Specimen slide holder for 30 specimen slides, Type Leica, modified, plastic, for Varistain adapter (14 0478 38029) • Coverslip magazine for cover slips 40-60x24 mm (14 0478 39749) -
Page 110: A1.2 Specimen Slide Holders From Other Manufacturers
(e.g. overnight). A1.2 Specimen slide holders from other manufacturers Leica provides no warranty for the function of specimen slide holders from other manufacturers or any warranty for their function in the instrument. The instrument operator bears responsibility for any use of specimen slide holders from other manufacturers. -
Page 111: A1.3 Specimen Slides And Gripper Mechanism
The new gripper mechanism and the new specimen slide gripper can be identified by the red anodized gripper fingers. This change applies beginning with serial number 3000 for the CV5030. Notice! The gripper mechanism for the specimen slides is never allowed to be changed or manipulated during necessary cleaning measures within the instrument. - Page 112 The following specimen slides were validated for the specimen slide gripper starting with serial number 3000: Leica provides no warranty for the function of specimen slides from other manufacturers or any warranty for their function in the instrument. The instrument operator bears responsibility for any use of specimen slides from other manufacturers.
-
Page 113: A1.5 Cover Slips
Ground edges 45° Clipped corners A1.5 Cover slips The use of cover slips specially developed for automated coverslipping is recommended for the Leica CV5030 Robotic Coverslipper. These have been manufactured so as to hinder or prevent multiple cover slips from sticking together. We recommend: • Surgipath™ Premier Cover Glass... -
Page 114: A1.6 Labels For Specimen Slides
The Universal Label labels are optimized for use on the CV5030 coverslipper and provide a complete solution for printing and coverslipping in combined usage. To ensure the best print quality, Leica Universal Label labels have to be used on the Cognitive Label printer. This is available exclusively from Leica Biosystems. - Page 116 Leica Biosystems Nussloch GmbH Heidelberger Straße 17-19 D- 69226 Nussloch Phone: +49 6224 - 143 0 Fax: +49 6224 - 143 268 Internet: http://www.LeicaBiosystems.com...
Need help?
Do you have a question about the CV5030 and is the answer not in the manual?
Questions and answers