
Related Manuals for Leica CM1510S


Summary of Contents for Leica CM1510S
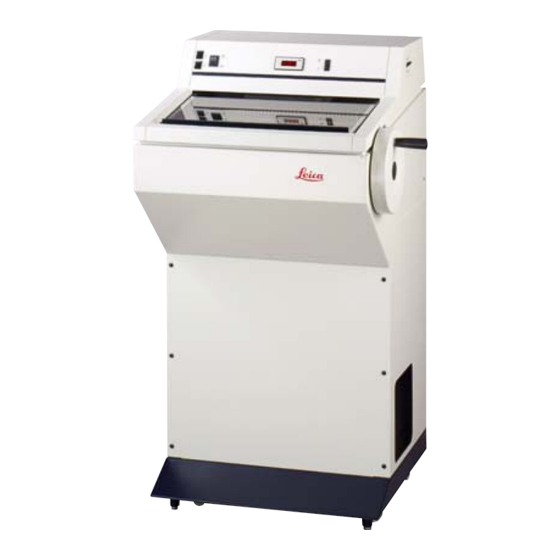
- Page 1 Cryostat Instruction manual Leica CM1510 S – Cryostat V1.4 English – 04/2010 Always keep this manual near the instrument. Read carefully prior to operating the instrument.
- Page 3 Leica reserves the right to change technical understand it following thorough investigation specifications as well as manufacturing pro- in this field.
-
Page 4: Table Of Contents
Table of contents Important information ........................ 6 Symbols used in the text and their meaning ..................6 Instrument type ............................. 6 Designated use ............................. 6 Qualification of personnel .......................... 6 Safety ............................7 Safety instructions ............................7 Dangers, warnings and cautions ......................7 Safety features ............................ - Page 5 Cleaning and maintenance ....................39 General maintenance instructions ..................... 39 Automatic circuit breaker ........................40 Cleaning ..............................41 8.3.1 Spray disinfection with Leica Cryofect ....................41 Removing the microtome ........................43 Removing the microtome housing ....................... 44 Reinstalling the microtome ........................45 Replacing the fuses ..........................
-
Page 6: Important Information
Important information Symbols used in the text and their Designated use meaning The Leica CM1510 S is a powerful cryostat for routine and research applications in biology, Dangers, warnings and cautions ap- pear in a gray box and are marked by... -
Page 7: Safety
The protective devices on both instrument and accessories must neither be removed nor modified. Only authorized and qualified service personnel may repair the instrument and access the instrument’s internal components. Leica CM1510 S – Cryostat... - Page 8 Safety Warnings - Transport and installation The instrument must be transported either in an upright position or, if inclined, at an angle of max. 30 degrees! Do not operate in rooms with explosion hazard! To ensure the instrument works trouble-free, the instrument must be set up with a least 10 cm distance from all walls and furniture.
- Page 9 Cleaning and disinfection Do not use organic solvents or any other aggressive substances for cleaning and disinfec- tion! The instrument is suitable for spray disinfection with Leica Cryofect! Only use alcohol or commercial disinfectants based on alcohol for disinfection! For spray disinfection follow the instructions for use supplied with the disinfectant! Do not use any external heaters for drying the cryochamber.
- Page 10 Safety Warnings - maintenance Only qualified and authorized service personnel may access the internal components of the instrument for service and repair. Clean the compressor ventilation grid at least once a year or more often if required! Replacing the fuses: Before replacing the fuses, turn off the instrument mains switch and pull the mains plug! Only use replacement fuses of the same specification.
-
Page 11: Safety Features
2.3.2 Knife guard Knife holder CN is equipped with a knife guard; on the knifeholder CE, the glass plate of the anti-roll guide constitutes the knife guard (see sepa- rate instruction manual for your knife holder). Leica CM1510 S – Cryostat... -
Page 12: Instrument Components And Specifications
Instrument components and specifications Overall view - instrument parts Section waste tray Specimen disc Brush shelf Knife holder CN Knife holder CE Knife holder base Fig. 3 Instruction manual V 1.4 – 04/2010... - Page 13 Heat extractor Thermal Quick-freezing shelf block (optional accessory) Leica CM1510 S – Cryostat...
-
Page 14: Technical Data
Instrument components and specifications Technical data Operating temperature range from +18 °C to +35 °C. All specifications related to temperature are based on an ambient temperature of +22 °C and maximum air humidity of 60%! Type CM1510 S CM1510 S CM1510 S Nominal voltage 100 V AC ±10%... - Page 15 F6: T2.0 A 6.3 x 32 mm; Fa. Schurter, Typ FST; Fa. Littlefuse, Typ 313 F7: T4.0 A 6.3 x 32 mm; Fa. Schurter, Typ FST; Fa. Littlefuse, Typ 313 F8: T2.0 A 6.3 x 32 mm; Fa. Schurter, Typ FST; Fa. Littlefuse, Typ 313 Leica CM1510 S – Cryostat...
-
Page 16: Setup
Setup Installation site requirements Do not operate in rooms with explosion hazard! To ensure the instrument works trouble-free, the instrument must be set up with at least 10 cm distance from all walls and furniture. Do not place anything next to the compressor ventilation grid (right side of the cabinet) to ensure adequate ventilation! The place of installation must meet the following requirements: •... -
Page 17: Standard Delivery - Packing List
1 Bottle of cryostat oil, type 407, 50 ml ........14 0336 06098 1 Bottle of OCT-Compound, mounting medium for cryosectioning, 125 ml ............ 14 0201 08926 1 Instruction manual Leica CM1510 S - G/E/F/S ....14 0436 80001 Leica CM1510 S – Cryostat... -
Page 18: Unpacking And Installation
Setup Unpacking and installation Unpacking as per the unpacking instructions attached to the outside of the instrument shipping crate. The instrument must be transported either in an upright position or slightly inclined, at an angle of max. 30 degrees! When pushing the instrument, do not grip the cabinet at the lid. Grip the cabinet only at the marked areas ( •... -
Page 19: Fastening The Handwheel
The protective foam parts between microtome and compressor MUST be removed prior to operating the instru- ment (see Fig. 7)! Caution! Edges of gilled evaporator are extremely sharp! High risk of in- jury! Fig. 7 Leica CM1510 S – Cryostat... -
Page 20: Electrical Connection
Setup Electrical connection During the start-up of the compressor the nominal voltage must not drop below the values specified in the ‘Technical Data‘! The compressor requires a start-up current between 45 and 50 A. Therefore, the electric circuit at the installation site must be in- spected by a qualified electrician to ensure that it meets the re- quirements for a smooth operation of the instrument. - Page 21 Bear in mind the required minimum switch-off period! • Turn the automatic circuit breaker on. The instrument is initialized. • The factory configuration settings are as follows: Real time: 00:00 Defrost time: 23:50 (adjustable, see chapter 5.2) Chamber cooling: (temperature indication) Leica CM1510 S – Cryostat...
-
Page 22: Operation
Operation Control panel Motorized coarse feed Forward / backward - fast Fig.10 Forward/ Display indicating: On/Off switch backward - Set / actual temperature for cryochamber - slow - Real time illumination - Defrost time Motorized coarse feed The motorized coarse feed moves the speci- away from knife men towards or away from the knife! The fast specimen movement towards the cut-... -
Page 23: Controller
• (Press and hold „P“ button and also press „Arrow up“). Fig. 13 Press the two buttons once again to deac- tivate the defrost function. The duration of the cryochamber and quick-freeze shelf defrost cycles is set to 8 minutes in the factory. Leica CM1510 S – Cryostat... -
Page 24: Setting User-Definable Parameters
Operation Defrosting the quick-freeze shelf (LED 1 and LED 3 on) • (Press and hold „P“ button and simulta- neously press Press the two buttons once again to deac- Fig. 14 tivate the defrost function. Setting user-definable parameters Set temperature: During normal operation, the actual cryochamber temperature is dis- played. - Page 25 5 secs. If the compressor does not switch on after that period of time, the LED will start blinking, indicating that the period during which the instrument was switched off was too short. (Safety meaure to avoid major instrument damage). Leica CM1510 S – Cryostat...
-
Page 26: Daily Work With The Instrument
Daily work with the instrument Specimen freezing 6.1.1 Quick-freeze shelf The cryochamber is equipped with a quick-freezing shelf (Fig. 20) for up to 10 specimen discs. When working inside the cryochamber, keep hands away from gilled evaporator – high risk of injury from sharp edges! Fig. -
Page 27: Fixing The Specimen Discs In The Specimen Head
• Insert the precooled knife or blade in the knife holder and clamp. For further details on how to handle the knife holder, please refer to the separate instruction manual for your knife holder. Leica CM1510 S – Cryostat... -
Page 28: Sectioning / Trimming
Daily work with the instrument Sectioning / trimming For all settings on knife holder and anti-roll guide, please refer to the separate instruction manual for your knife holder. Be careful when handling microtome knives and disposable blades. The cutting edge is extremely sharp and can cause se- vere injury! •... -
Page 29: Moving The Specimen With The Coarse / Precision Feed
• Decrease section thickness continually down to the appropriate value. After changing from one section thickness to another, the first two or three sections should be rejected. • When sectioning, turn the handwheel clockwise at a constant speed. Leica CM1510 S – Cryostat... -
Page 30: Defrosting
Daily work with the instrument Defrosting Defrosting the cryochamber actually means defrosting the evaporator to prevent excessive frost buildup. The gilled evaporator is flushed with hot gas during defrosting. The cryochamber itself is virtually frost-free and does not need to be defrosted. The condensation water produced during chamber defrosting is col- lected in a container located at the front of the cryostat cabinet. -
Page 31: Manual Defrosting Of The Quick-Freeze Shelf
• Remove all specimens from the cryostat. • Close the sliding window. • Switch off the cryochamber illumination. • Do not switch the instrument off with the automatic circuit breaker as there would be no cooling. Leica CM1510 S – Cryostat... -
Page 32: Shutdown For A Longer Period
Daily work with the instrument 6.6.2 Shutdown for a longer period If you do not intend to use the instrument for several weeks, you may turn it off. Please note, however, that it may take up to several hours to cool the cryochamber down to very low temperatures after turn- ing the instrument on again. -
Page 33: Temperature Selection Chart
Skin without fat Speenal or bloody tissue Testicular Thyroid Tongue Uterus curettage The temperature values given above are based on long-term experience, however, these are only approxi- mate values, as any tissue may require particular adjustments. Leica CM1510 S – Cryostat... -
Page 34: Troubleshooting
Troubleshooting Possible causes and remedies Problem Cause Remedy Frost on chamber walls and - Cryostat is exposed to air cur- - Change place of installation microtome rents (open windows and for the cryostat. doors, air conditioning). - Sliding window open over a - Close sliding window correct- longer period of time at a very low chamber temperature. - Page 35 - Blunt knife/blade. - Use different part of the cut- ting edge. - Cutting geometry (profile) of - Use knife with different cut- knife used not suitable. ting geometry. - Incorrect clearance angle.- - Adjust clearance angle. Leica CM1510 S – Cryostat...
- Page 36 Troubleshooting Problem Cause Remedy Thick/thin sections - Temperature incorrect for the - Select correct temperature tissue cut. and wait until correct temper- ature is reached. - Knife geometry (profile) inap- - Use knife with different profile propriate for the specimen (c or d) or try working with cut.
- Page 37 - Clean ventilation grid. dirty. Scraping noise at microtome slot - Friction between slot cover - Apply cryostat oil to the slot cover. and microtome housing. cover and distribute by turning the handwheel or with a clean cloth. Leica CM1510 S – Cryostat...
-
Page 38: Display Error Messages
Clean ventilation grids. • Compressor is running but there is no refrigeration. Call Leica Technical Service. Having eliminated the possible sources of error, press the thermal circuit breaker (1) to turn the instrument back on. If the instrument fails to switch on, call technical service. -
Page 39: Cleaning And Maintenance
Leica at least once a year. • Enter into a service contract at the end of the warranty period. For further information, please contact your local Leica service center. • Clean the instrument every day. • From time to time - above all after the instrument has been dried re-... -
Page 40: Automatic Circuit Breaker
• Wait approx. 5 minutes (the automatic cir- they are activated several times, call cuit breaker can be switched back on only Leica technical service! after it has cooled). • Switch the circuit breaker back on flipping it to the upper position. -
Page 41: Cleaning
Do not use organic solvents or any other aggressive substances for cleaning and disinfection! Only use the cleaning agents specified in this instruction manual such as Leica Cryofect, al- cohol or common commercial disinfectants based on alcohol! 8.3.1 Spray disinfection with Leica Cryofect Store only in tightly closed original bottle, at temperature no higher than 25 °C! - Page 42 Cleaning and maintenance Spray disinfection with Leica Cryofect 1. Select a temperature of -20 °C or higher. 2. Remove knife or blade from the knife holder. 3. Remove all specimen material, microscope slides and tools from the cryochamber. 4. Remove section waste from the cryochamber.
-
Page 43: Removing The Microtome
Wear appropriate protective gloves to remove the cold microtome from the cryochamber. Prolonged skin contact with cold parts of the instrument can cause frost bite! Leica CM1510 S – Cryostat... -
Page 44: Removing The Microtome Housing
For further information, please con- tact your Leica sales company! • Loosen the two screws (8) on both sides of the housing. • To remove, pull the housing upwards. The Fig. -
Page 45: Reinstalling The Microtome
• Put shelves, heat extractor, section waste tray, brush shelf and knife holder back into cryochamber. • Reinstall sliding window. • The instrument is ready to be switched back on. Leica CM1510 S – Cryostat... -
Page 46: Replacing The Fuses
Cleaning and maintenance Replacing the fuses Before replacing the fuses, turn off the instrument mains switch and pull the mains plug! Only use replacement fuses of the same specification as the original ones. For the required values, please refer to chapter 3.2 ‘Technical Data‘! Fuses other than the ones specified can cause severe damage to the instrument. -
Page 47: Replacing The Lamp
Fig. 34 - and push to the right until it en- gages in the socket. • Lightly push the lamp upward to engage in the clip. • Reinsert sliding window. • Reconnect instrument to mains power and Fig. 34 turn it back on. Leica CM1510 S – Cryostat... -
Page 48: Optional Accessories
Optional accessories Heat extractors Specimen freezing with the freezing shelf can be accelerated by the additional use of a heat extractor. 9.1.1 Mobile heat extractor • Store the heat extractor in the cryochamber. • Place it on the specimen surface to accelerate freezing. •... -
Page 49: Thermal Block
• If the cap sits too loosely, retighten with screw (10). Be careful not to overtighten the screw! • Once the specimen is removed from the disc, take the thermal block out of the cold cryochamber. Fig. 37 Leica CM1510 S – Cryostat... - Page 50 Optional accessories • Knife holder base for knife holders CN and CE ............. 14 0419 26140 • Knife holder CN for standard microtome knives or blade rails......... 14 0419 33993 Clearance angle and knife height adjustable Knife support rails for short and long knives Anti-roll guide and adjustable knife guard.
- Page 51 • Pressure plate B, 22°, ......................14 0502 29553 for high-profile disposable microtome blades • Pressure plate S, 22°,......................14 0502 29551 for low-profile disposable microtome blades • Glass insert - 70 mm ......................14 0419 33813 for all CE knife holders Leica CM1510 S – Cryostat...
- Page 52 • Cryostat oil - type 407, bottle of 250 ml ................14 0336 06100 • Caution - dangerous goods ....................14 0387 36193 Leica Cryofect - low-temperature disinfectant, 4 bottles of 250 ml each, for temperatures down to -20 °C.
-
Page 53: Warranty And Service
Leica Biosystems Nussloch GmbH guarantees that the contractual product delivered has been subjected to a comprehensive quality con- trol procedure based on the Leica in-house testing standards, and that the product is faultless and complies with all technical specifications and/or agreed characteristics warranted. -
Page 54: Decontamination Certificate (Master)
Dear Customer, any product that is to be returned to Leica Biosystems or serviced on site, must be cleaned and decontaminated in the appropriate manner. Since it is not possible to decontaminate for prion diseases, such as CJD, BSE, CWD etc., equipment exposed to specimens containing prion diseases cannot be returned to Leica Biosystems for... - Page 55 Important - to avoid refusal of shipment: Place one copy in the unit prior to packaging or hand it over to the service engineer. Customer assumes all responsibility for the immediate return shipment of articles sent to Leica without prop- er decontamination documentation.
-
Page 56: Information For The People´s Republik Of China
12. Information for the People´s Republik of China Instruction manual V 1.4 – 04/2010...
Need help?
Do you have a question about the CM1510S and is the answer not in the manual?
Questions and answers