
Related Manuals for Leica CM1520


Summary of Contents for Leica CM1520
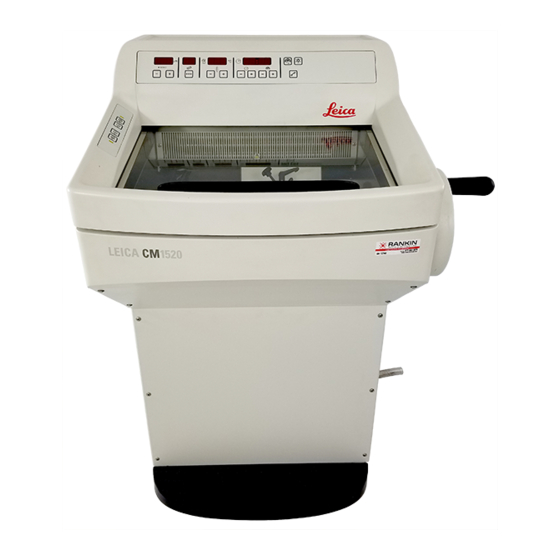
- Page 1 Leica CM1520 Cryostat Instructions for Use Leica CM1520, V1.2 – 09/2012, English SAP: RevC - 14 0491 81101 Always keep this manual with the instrument. Read carefully before working with the instrument.
- Page 3 Leica reserves the right to change technical spec- state-of-the-art technology as we understand it ifications as well as manufacturing processes following thorough investigation in this field. We without prior notice.
-
Page 4: Table Of Contents
Maintenance ............................... 13 Technical Data ............................14 Setting up the Instrument ........................16 Installation site requirements ........................16 Unpacking instructions for the CM1520 cryostat .................. 17 Standard delivery ............................20 Assembling the handwheel ........................21 Instrument Setup ............................ 22 Electrical connection ..........................22 Prior to operation ............................ -
Page 5: Table Of Contents
Possible sources of error, causes and remedies ................. 53 8.3.1 Changing the battery ..........................57 Cleaning, Disinfection, Maintenance ....................58 Cleaning ............................... 58 Spray disinfection with Leica Cryofect ....................59 Maintenance ............................... 60 9.3.1 General maintenance instructions ......................60 9.3.2 Replacing the fuses ........................... -
Page 6: Important Information
Important Information Symbols in the text and their meanings Symbol for labeling electrical and electron- ic equipment in accordance with Section 7 Warnings of the German Electrical and Electronic appear in a gray box and are marked Equipment Act (ElektroG). ElektroG is the by a warning triangle law regarding the sale, return and environ- mentally sound disposal of electrical and... - Page 7 With a pitch of 60 ° or more, the blue quartz sand flows into the ar- row-shaped indicator window and sticks there permanently. Improper handling of the ship- ment is immediately detectable and can be proven definitively. Leica CM1520 – Cryostat...
-
Page 8: Qualification Of Personnel
The instrument is not designed for unsupervised storage of specimen material. The instrument may only be operated within the scope of its designated use as described above and as per the instructions given in these Instructions for Use. The Leica CM1520 is also suitable for IVD (in vitro diagnostics). -
Page 9: Safety
The protective devices on both instrument and components must neither be removed nor modi- fied. Only service personnel qualified by Leica may repair the instrument and access the instru- ment's internal components. -
Page 10: Safety Devices
Safety Safety devices The instrument is equipped with the following safety devices: Handwheel lock and knife guard on the knife holder. The consistent use of these safety features and strict observation of the warnings and cautions in these Instructions for Use will safeguard the operator from accidents and/or personal injury to a great extent. -
Page 11: Operating Conditions
• This waiting period is necessary to allow the compressor oil, which may have been displaced during transport, to return to its original position. Failure to comply with this may cause damage to the instrument. • No additional extension cable may be used. Defrosting • The quick freeze shelf can become very hot during the defrosting process. Therefore, do not touch it! Leica CM1520 – Cryostat... -
Page 12: Operating The Instrument
• To ensure reliable drainage of condensate and to prevent a potential contamination risk, the drain tube (on the side of the instrument, Fig. 52) must be inserted in a suitable catch tank. Cleaning and disinfection We strongly recommend defrosting the CM1520 cryostat completely for 24 hours, 1-2x annually or as needed. • It is not necessary to remove the microtome for routine disinfection. Spray disinfection with Leica Cryofect is possible, thanks to the special insulation of the microtome. -
Page 13: Removing The Microtome
Safety • Do not use organic solvents or other aggressive substances for cleaning. Use only disinfectants listed in these Instructions for Use, such as Leica Cryofect (alcohol or other common alcohol-based disinfectants). For additional detailed information about disinfection, contact Leica Biosystems. Removing the microtome • The microtome is encapsulated and therefore does not require removal by the user. Maintenance Replacing the fuses • Turn the instrument off and disconnect the power plug before replacing... -
Page 14: Technical Data
Technical Data Type CM1520 CM1520 CM1520 CM1520 CM1520 test symbol c_CSA_us Nominal voltage 100 VAC ±10 % 120-127 VAC ±10 % 230 VAC ±10 % 220-230 VAC ±10 % 240 VAC ±10 % Nominal frequency 50/60 Hz 60 Hz 60 Hz... - Page 15 Transport temperature: -40 °C to +55 °C Height 1140 mm Observe item 4.1, "Installation site Weight requirements". (incl. microtome, without specimen cooling) approx. 135 kg All CM1520 instrument variants need the following secondary fuses: F1: T0.25A L250V Type FST 6.3x32 Brand: SCHURTER F2: T1.6A L250V Type FST 6.3x32...
-
Page 16: Setting Up The Instrument
Setting up the Instrument Installation site requirements Do not operate in rooms with explosion hazard! To ensure proper function of the instru- ment, it must be set up with a minimum distance on all sides from walls and furniture (see "Transport and installation"). The place of installation must meet the following requirements: - The instrument requires an installation area of approx. -
Page 17: Unpacking Instructions For The Cm1520 Cryostat
Setting up the Instrument Unpacking instructions for the CM1520 cryostat When the instrument is delivered, check the tilt indicators on the packaging. If the arrowhead is blue, the shipment was transported laying flat, was tilted at too great an angle or fell over during transport. - Page 18 Setting up the instrument Transport grip points Fig. 7 Fig. 8 • Lift and remove the wooden edge (6). • Remove the ramp (5) on the front side of the pallet (see Fig. 6) and correctly attach it to the back (see Fig. 8). Do not push the device by its hood (8)! Use the transport grip points ( , Fig.
- Page 19 To do so, unscrew both adjusting feet (1) using the provided open-end wrench (No. 13). When subsequently transporting the instru- ment any further on wheels, screw them back in all the way. 2 (not visible) Fig. 9 Leica CM1520 – Cryostat...
-
Page 20: Standard Delivery
Compare the delivered components with the parts list and your order. Should you find any discrepancies, please contact your Leica sales office without delay. A choice of different knife holders is available for the CM1520. Instructions for Use V 1.2 – 09/2012... -
Page 21: Assembling The Handwheel
• Attach the spring washer (3) to the screw (4) as shown in Fig. 10. • Tighten the screw (4) using an Allen key (6 mm). • Attach the cover disk (self-adhesive - not pictured). To dismount, proceed in reverse order. Rotate the handwheel only if the refrigeration system is on and the cryochamber is cold. Leica CM1520 – Cryostat... -
Page 22: Instrument Setup
(Fig. Use only the power cable provided by Leica. Failure to observe this causes an imminently hazardous situation that may result in death or serious injury to the operator or other per- sonnel. - Page 23 Instrument Setup • Place the storage shelves in the cryochamber. • Place the section waste tray and brush shelf in the cryochamber. • Place the knife holder base on the microtome base plate. • Set and clamp the blade/knife and knife holders in place (see Chap. 7.3). • Open the knife box with the knife and place it in the cryochamber for precooling. • Place all tools needed for specimen preparation in the cryochamber. • Close the sliding window. • Plug the power plug into the power socket. Leica CM1520 – Cryostat...
-
Page 24: Overview Of The Leica Cm1520
Instrument Setup Overview of the Leica CM1520 Fig. 11 Instructions for Use V 1.2 – 09/2012... - Page 25 Holder for heat extractor (optional) Specimen disc Cold extractor (optional) Section waste tray Brush shelf Orientable specimen head Blade/knife holder base (optional) Blade holder CE (optional) Knife holder CN (optional) Blade holder CE-TC (optional) Cover freezing shelf Fig. 12 Leica CM1520 – Cryostat...
-
Page 26: Power Switch And Circuit Breaker
Instrument Setup Power switch and circuit breaker The switch must be in the top position (switch position 1) for switching on the circuit breaker. The switch must be in the bottom position (switch position 0) for switching off the circuit breaker. Fig. -
Page 27: Operating The Instrument
Use the function button labeled with a clock symbol to set the time of day. To do so, set the current time using the keys. Pushing the button for more than 1 sec. increases or decreases the time continuously (auto-repeat function). Fig. 15 Leica CM1520 – Cryostat... -
Page 28: Setting The Automatic Defrost Time (Cryochamber)
Operating the Instrument 6.2.2 Setting the automatic defrost time (cryochamber) The automatic defrost cycle takes place once every 24 hours. Briefly touch the button to display the beginning of the defrost cycle which has currently been set. At the same time, the LEDs between the indication of hours and minutes are flashing. -
Page 29: Manual Defrosting Of The Cryochamber
From 20 - 60 µm in 5 µm increments The preselected section thickness appears in the display above the keys. Fig. 20 • Start trimming at approx. 20 µm. • Decrease the section thickness continually down to the appropriate value. After changing the section thicknesses, discard the first two or three sections. • For sectioning, turn the handwheel at a consistent speed. Leica CM1520 – Cryostat... -
Page 30: Display Lock
Operating the Instrument Display lock After the display is locked using the key button (press and hold for 5 sec.), set values can no longer be changed. Push the key button once more for 5 seconds to unlock the display. When the display is locked, the LEDs between the hour and minute indication on the time panel are turned off. -
Page 31: Daily Use Of The Instrument
• Place the specimen on the disc and orient. • Place the specimen disc in one of the holes of the quick freeze shelf and freeze the specimen at a low temperature. • Once the specimen is frozen, insert the speci- men disc (Fig. 24) with the specimen into the specimen head (Fig. 24) and start sectioning. Fig. 23 Leica CM1520 – Cryostat... -
Page 32: Stationary Heat Extractor (Optional)
Daily Use of the Instrument 7.1.2 Stationary heat extractor (optional) • Fasten the support (1, Fig. 23) of the heat extractor (2, Fig. 23) to the left side panel of the cryochamber using two screws in the provided holes and insert the heat extractor. • Lower the heat extractor cylinder on the specimen surface. After at least 30 seconds, the specimen is completely frozen. -
Page 33: Sectioning
Inserting the blade holder CE 3. Push the upper part of the blade holder onto the base. Clamp the blade holder into place using an Allen key (No. 4) on the left side (23). Fig. 26 Leica CM1520 – Cryostat... - Page 34 Daily Use of the Instrument Inserting the blades into blade holder CE Caution! Microtome blades are extremely sharp! The blade holder CE can be used either for the low-profile, narrow-band and high-pro- file, broad-band blades. Inserting the high-profile blades The safety gloves included in the stan- dard scope of delivery must be worn when inserting the blade! ...
- Page 35 To do so, fold the clamping lever (10) down- wards counterclockwise (Fig. 32). Fold the anti-roll guide system (4) to the left. Guide the brush with magnet to the blade and lift it upwards and out. Fig. 32 Leica CM1520 – Cryostat...
- Page 36 Daily Use of the Instrument The safety gloves included in the stan- dard scope of delivery must be worn when disposing of the blade! 5. Once the blade has been removed from the blade holder, it is disposed of into the dis- penser container (storage compartment in bottom, Fig.
- Page 37 Allen screw (23). If the sectioning results are not satisfactory, increase the clearance angle in 1° increments until you achieve optimum Fig. 35 results. Settings of 1° - 2° (blade holder CE) are well suited for most applications. Leica CM1520 – Cryostat...
- Page 38 Daily Use of the Instrument Adjusting the anti-roll guide system You can adjust the height of the anti-roll guide system using the knurled nut (8): • If you turn the nut counterclockwise, the anti-roll guide system moves toward the blade. • If you turn the nut clockwise, the anti-roll guide system moves away from the blade. If the anti-roll guide system is in the wrong position relative to the blade, the following problems will result: Fig.
-
Page 39: Blade Holder Ce-Tc
7.3.2 Blade holder CE-TC The blade holder CE-TC is designed only for dis- posable carbide metal blades (tungsten carbide - TC65). The handling of this holder is identical to that of the blade holder CE. Fig. 38 Leica CM1520 – Cryostat... -
Page 40: Knife Holder Cn
Daily Use of the Instrument 7.3.3 Knife holder CN Inserting the base 1. To insert the blade/knife holder base (1), move the lever (2) to the back. Slide the base onto the T-piece (3) of the baseplate. When inserting the blade/knife holder base, you have to overcome the resis- tance of a spring (located in the foot of the knife holder) by applying a little... - Page 41 After removing the knife from the knife holder, place it safely into the knife case. NEVER place it onto the work surface next to the instrument! Fig. 42 Leica CM1520 – Cryostat...
- Page 42 Daily Use of the Instrument Knife guard/lateral movement for knife holder CN The knife guard (18) is fixed and integrated into the clamping jaws. The knife guard has handles (19) that allow it to be moved. The knife guard is suit- able for knife lengths up to 16 cm.
- Page 43 • Lift off the clamping jaw (5) on the right side (caution: washers) and feed it into the adjacent hole (6). Tighten the screws from the underside of the segment arc. Repeat on the left side. Now use the longer knife back rest provided. Fig. 45 Leica CM1520 – Cryostat...
-
Page 44: Knife Holder Cn-Z With Anti-Roll Guide
For disinfection, commercially available, mild cleaners and disinfectants can be used – we recommend Leica Cryofect (not available in the USA). Wear gloves during cleaning to prevent frostbite. Instructions for Use V 1.2 – 09/2012... - Page 45 Also observe the warning message on Spray contaminated surfaces with a uniform coat Page 13! of concentrate or wipe them down with a rag soaked in it. After the recommended exposure time, wipe it off carefully. Leica CM1520 – Cryostat...
-
Page 46: Installing The Shelf (Movable) (Optional)
Daily Use of the Instrument Trimming the specimen Take care when handling microtome knives and disposable blades. The cutting edge is extremely sharp and can cause serious injuries. For that reason, always wear the cut- resistant safety gloves included in the standard scope of delivery! Always clamp the specimen block BEFORE clamping the knife or the blade. -
Page 47: Temperature Selection Chart (In Minus °C)
Spleenal or bloody tissue Testicular Thyroid Tongue Uterus curettage The temperature values given in this table are based on experience; however, these are only approximate values. as any tissue may require particular adjustments. Leica CM1520 – Cryostat... -
Page 48: Defrosting
Daily Use of the Instrument Defrosting Defrosting the cryochamber actually means defrosting the evaporator to prevent excessive frost buildup. The evaporator is flushed with hot gas during defrosting. The cryochamber is virtually frostfree and does not need to be defrosted. The condensation water that is produced during defrosting is collected in a container, which is located next to the instrument. -
Page 49: Manual Defrosting Of The Quick Freeze Shelf
• Remove all the specimens from the cryostat. • Attach the cover for the freeze shelf. • Remove the plug and close the sliding window. • Turn out the cryochamber illumination. • Lock control panel field 1 (Fig. 14) using the key button. • Do NOT switch off the instrument using the circuit breaker, as otherwise no cooling takes place. Leica CM1520 – Cryostat... -
Page 50: Shutdown For A Longer Period
Daily Use of the Instrument 7.6.2 Shutdown for a longer period If you do not intend to use the instrument for several weeks you may turn it off. Please note, however, that it may take up to several hours to cool the cryochamber down to very low temperatures after turning the instrument on again. -
Page 51: Troubleshooting
• After 17,610 hours, "HELP" is output in the real-time display to indicate the need for service mainte- nance. The display alternates between "HELP" and the real-time display. The note is acknowledged by pressing a key on the keyboard. The "HELP" display reappears for a shorter period. Leica CM1520 – Cryostat... -
Page 52: Temperature Control Button
Troubleshooting Temperature control button On the back of the cryostat cabinet there is a temperature control button (1, Fig. 51). If the temperature of the cryochamber exceeds 60 °C the switch is automatically activated and turns the instrument off. Possible causes and remedies: • Temperature of the direct surroundings is constantly higher than 40 °C. -
Page 53: Possible Sources Of Error, Causes And Remedies
- Anti-roll plate poorly aligned with - Align correctly. knife edge. - Incorrect clearance angle. - Set the correct clearance angle. - Knife/blade blunt or damaged. - Use different part of the cut- ting edge or replace. Leica CM1520 – Cryostat... - Page 54 Troubleshooting Problem Cause Remedy Sections not properly flattened - Knife/blade and/or anti-roll plate - Clean with dry cloth or brush. despite correct temperature and dirty. correctly aligned anti-roll plate. - Edge of anti-roll plate damaged. - Replace plate. - Blunt knife/blade. - Use different part of the cut- ting edge or replace.
- Page 55 - Blunt cutting edge. - Use different part of the cut- ting edge or replace. - Incorrect clearance angle. - Set the correct clearance angle. - Dried specimen. - Prepare new specimen. Leica CM1520 – Cryostat...
- Page 56 Troubleshooting Problem Cause Remedy Tissue adheres to the anti-roll - Dried specimen. - Cool down anti-roll plate or guide. - Anti-roll plate is too warm or reposition correctly. incorrectly positioned. - Static charge. - Remove static electricity. - Fat on the corner or edge of anti- - Remove fat with alcohol.
-
Page 57: Changing The Battery
7 years at the latest. All settings (time, defrost time, section thickness etc.) are lost when the instrument is switched off. There is no danger for the instrument. However, the customer must re-enter the setting values after changing the battery. Leica CM1520 – Cryostat... -
Page 58: Cleaning, Disinfection, Maintenance
• Remove the storage shelves and the brush shelf for cleaning. • Remove the closed sliding window from the front by gently lifting it (see 9.3.3, "Replacing the fluorescent lamp"). The use of flammable sprays within the cryostat chamber is permitted only with the Leica Cryofect tested by us. Do not use organic solvents or any other aggressive substances for cleaning and disin- fecting! -
Page 59: Spray Disinfection With Leica Cryofect
Allow the cryochamber to reach the previously selected temperature. Once the selected temperature is reached, either 5a. Spray the surfaces to be disinfected with a uniform coat of disinfectant (when using Leica Cryofect, a maximum of 10 sprays are allowed - see 2.6. -
Page 60: Maintenance
Leica. • Enter into a service contract at the end of the warranty period. For further information, please contact your local Leica service center. Fig. 53 • Clean the instrument every day. Weekly: Before the following parts can be oiled, all section waste and deposits must be carefully removed. - Page 61 Do not carry out any repairs on your own as this will invalidate the warranty. Repairs may only be carried out by qualified service engineers authorized by Leica. Detail 55a Fig. 55...
-
Page 62: Replacing The Fuses
Cleaning, Disinfection, Maintenance 9.3.2 Replacing the fuses Turn the instrument off and disconnect the power plug before replacing the fuses. Use only the fuse types specified in Chapter "3. Technical Data". Failure to comply with this can cause severe damage to the instrument and its surroundings and a risk of fatal injury! On the back of the instrument there is a fuse box with 4 fuses: • Unscrew the fuse cap with a screwdriver. -
Page 63: Replacing The Fluorescent Lamp
Installation of the new lamp • Hold the lamp in the correct mounting position (Fig. 59) as shown and push it to the right until it engages in the holder. • Push the lamp upwards slightly into the clip (5). • Replace the sliding window. • Connect the instrument to the power supply again and switch it on. Fig. 59 Leica CM1520 – Cryostat... -
Page 64: Ordering Information, Components And Consumables
Leica high-profile disposable blades, Type 818, 10 packs of 50, ........... 14 0358 38383 Leica low-profile disposable blades - Type 819, 1 pack of 50 ..........14 0358 38925 Leica low-profile disposable blades, Type 819, 10 packs of 50 ..........14 0358 38382 Reusable knives Knife, 16 cm length, profile c ...................... - Page 65 Heat extractor – stationary, assembly ................. 14 0471 30792 Parking station .......................... 14 0471 30793 Heat extractor - mobile ......................14 0443 26836 Transfer block for specimen discs, small (holder for specimen discs) ........ 14 0491 47787 Leica CM1520 – Cryostat...
- Page 66 Embedding medium for cryosectioning "Jung tissue freezing medium", 125 ml ....14 0201 08926 Cryostat oil - Type 407, 250 ml ...................... 14 0336 06100 Leica Cryofect - low-temperature disinfectant, 4 x 350 ml ............. 14 0387 42801 Safety gloves, cut-resistant, size S ..................... 14 0340 40859 Safety gloves, cut-resistant, size M ...................
- Page 67 16 cm in length. Knife pressure plate for ex- treme stability and full utilization of the knife blade. Clearance angle adjustment and knife height adjustment, anti-roll guide and adjustable knife guard. Order No..........14 0477 42363 Fig. 62 Leica CM1520 – Cryostat...
- Page 68 Ordering Information, Components and Consumables Blade holder CE, universal (high-profile and low- profile disposable blades) with lateral movement and glass anti-roll guide. Adjustable clearance angle. Order No..........14 0491 47873 Fig. 63 Blade holder CE, for low-profile disposable blades, without clear- ance angle adjustment, including blade/knife holder base and pressure plates...
- Page 69 Order No..........14 0800 37740 Fig. 67 Knife support for knife holder CN, for short knives Order No..........14 0419 19426 Fig. 68 Knife support for knife holder CN, for long knives Order No..........14 0419 19427 Leica CM1520 – Cryostat...
- Page 70 Ordering Information, Components and Consumables Disposable blades Leica TC-65, Leica TC-65 microtome, disposable blade system for sectioning hard specimen materials. The Leica TC-65 carbide metal disposable blades were specially developed for the requirements in labs where hard, blunt materials are routinely sectioned.
- Page 71 Knife, 16 cm length, profile d, Note: including knife case 14 0213 11140 Order No..........14 0216 07132 Knife, 16 cm carbide metal blade, profile d, Note: including knife case 14 0213 11140 Fig. 74 Order No..14 0216 04813 Leica CM1520 – Cryostat...
- Page 72 Ordering Information, Components and Consumables Knife, 12 cm length, profile d, for Leica cm1500 / cm1800 Note: including knife case 14 0213 11140 Order No..........14 0216 07130 Fig. 75 Variable knife case, for 1 to 2 knives from 10 to 16 cm in length Order No.
- Page 73 Embedding well bar set with large recesses consisting of: - 1 embedding well bar, recesses 30 mm - 4 specimen stages, large - 2 heat extractors - 8 dispensing slides Order No..........14 0201 39118 Leica CM1520 – Cryostat...
- Page 74 Ordering Information, Components and Consumables Set of freezing griddle/heat extractor, elevated consisting of: - 1 forceps, epoxy-coated - 1 putty knife - Extra elevating bars Order No..........14 0201 39119 Fig. 80 Embedding well bar Height: 25.4 mm with 4 recesses, size 18 mm, stainless steel Order No.
- Page 75 Order No..........14 0201 39125 Fig. 83 Container for specimen stages Order No..........14 0201 39126 Fig. 84 Dispensing slide for Dr. Peter's cryoembedding system pack of 8. Order No..........14 0201 39127 Fig. 85 Leica CM1520 – Cryostat...
- Page 76 Ordering Information, Components and Consumables Blue O-ring, for color marking of the specimen disc 20 and 30 mm pack of 10. Order No..........14 0477 43247 Red O-ring, for color-marking the 20 mm and 30 mm speci- men disc pack of 10.
- Page 77 Ordering Information, Components and Consumables Toolset for cryostats, consisting of: - 1 brush, narrow 14 0183 28642 - 1 Leica brush with magnet 14 0183 40426 - 1 key with handle, No. 5 14 0194 04760 - 1 Allen key, No. 2.5 14 0222 04137 - 1 Allen key, No.
- Page 78 Ordering Information, Components and Consumables Easy Dip, staining container Color: white pack of 6 Order No..........14 0712 40150 Color: pink pack of 6 Order No..........14 0712 40151 Fig. 89 Color: green pack of 6 Order No..........14 0712 40152 Color: Yellow pack of 6 Order No.
- Page 79 20 mm ........Order No. 14 0370 08636 25 mm ..........14 0416 19275 30 mm ..........14 0370 08587 40 mm ..........14 0370 08637 55 mm ..........14 0419 26491 50 x 80 mm .......... 14 0419 26750 Fig. 90 Leica CM1520 – Cryostat...
- Page 80 Ordering Information, View into the Cryochamber Enlarged detail Fig. 91 1 - Heat extractor, stationary (optional) 6 - Object head, directional 2 - Freeze shelf, 10 positions 7 - Waste tray 3 - Shelf, movable (optional) Enlarged detail - Storage space for both transfer blocks 4 - Blade holder CE with anti-roll guide (4a) –...
- Page 81 Order No....14 0491 47787 Fig. 93 Heat extractor, mobile Order No..........14 0443 26836 Fig. 94 Thermal block, for easy removal of frozen blocks from the speci- men disc Order No..........14 0398 18542 Fig. 95 Leica CM1520 – Cryostat...
- Page 82 Ordering Information, Components and Consumables Adapter, for Miles Tissue Tek specimen discs Order No..........14 0436 26747 Fig. 96 Add-on kit: Swing arm with anti-roll guide system consisting of: Swing arm Anti-roll guide system: - Glass insert 70 mm - Metal frame for exchangeable glass inserts CE - 100 µm spacer - Recommended section thickness 5 µm-50 µm...
- Page 83 - 50 mm consisting of: - Glass insert 50 mm - Metal frame for exchangeable glass inserts CN, CNZ - Recommended section thickness 5 µm - 50 µm Order No..........14 0419 33981 Fig. 101 Leica CM1520 – Cryostat...
- Page 84 Ordering Information, Components and Consumables Glass plate, glare-reducing, 70 mm wide Spare glass for anti-roll guide systems CE-BB: (14 0477 42491, 14 0477 42492, 14 0477 42493) for blade holder CE-BB (14 0477 43005) Fig. 102 Order No..........14 0477 42497 Glass insert - 50 mm For knife holder CN (14 0477 42358) Order No.
- Page 85 1 pair, size M Order No..........14 0340 29011 Fig. 107 Heat extractor, stationary, assembly Order No..........14 0471 30792 Low-temperature buffer for heat extractor ("park- Parking station ing station") 14 0471 30793 Fig. 108 Leica CM1520 – Cryostat...
- Page 86 Ordering Information, Components and Consumables Lapping device for knife, Profile c, 16 cm length Order No..........14 0337 08687 Lapping device for knife, Profile c, 12 cm length Fig. 109 Order No..........14 0337 08688 Lapping device for knife, Profile c, 10 cm length Order No.
- Page 87 Fig. 112 Metal case, for storing lapping stones Order No. 14 0337 04070 or 14 0337 04071 Order No..........14 0210 04073 Fig. 113 Strop, Type "Heidelberg" Order No..........14 0209 04066 Fig. 114 Leica CM1520 – Cryostat...
- Page 88 Ordering Information, Components and Consumables Screw clamp, for fastening strop of type "Heidelberg" Order No..........14 0285 07057 Fig. 115 Strop paste, red Order No..........14 0209 04064 Fig. 116 Storage system, movable for installation in the front part of the cryostat for cooled storage of preparation aids Order No.
-
Page 89: Mobile Heat Extractor - Application
(7) on the cold extractor. • After about 20 seconds, the frozen specimen can be removed from the specimen disc with forceps. • If the cap is too loose, readjust it with the small screw (10). Do not overtighten the screw. • After removing the specimen, remove the cold Fig. 119 extractor from the cold cryochamber once again. Leica CM1520 – Cryostat... -
Page 90: Warranty And Service
Leica Biosystems Nussloch GmbH guarantees that the contractual product delivered has been subjected to a comprehensive quality control proce- dure based on the Leica in-house testing standards, and that the product is faultless and complies with all technical specifications and/or agreed characteristics warranted. -
Page 91: Decontamination Certificate (Master)
(master) Dear Customer, Any product that is to be returned to Leica Microsystems or serviced on site must be cleaned and de- contaminated in the appropriate manner. Since it is not possible to decontaminate for prion diseases, such as CJD, BSE, CWD etc., equipment exposed to specimens containing prion diseases cannot be returned to Leica Microsystems for repair. - Page 92 Important - to avoid refusal of shipment: Place one copy in the unit prior to packaging or hand it over to the service engineer. Customer as- sumes all responsibility for the immediate return shipment of articles sent to Leica without proper decontamination documentation.
Need help?
Do you have a question about the CM1520 and is the answer not in the manual?
Questions and answers