Table of Contents
Advertisement
Quick Links
Advertisement
Table of Contents

Related Manuals for Valtra HiTech T3 Series


Summary of Contents for Valtra HiTech T3 Series
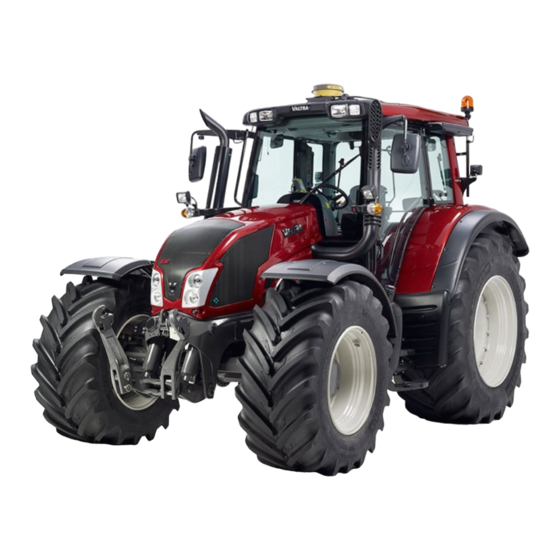
- Page 1 Operator's Manual T3 Series HiTech...
-
Page 2: About This Manual
About this manual This operator's manual is for Valtra T3 Series HiTech tractors. The T3 HiTech models are T133 H, T153 H, T173 H and T193 H. The manual is meant for agricultural tractors only. If the tractor is used for other applications, it is the owner's responsibility to ensure compliance with local regulations. -
Page 3: Tractor Serial Numbers
Tractor serial numbers When ordering spare parts or service, give the model indication and serial numbers and, in some cases, the engine, front axle, cab and transmission numbers. T133 H ACxx.x xxxxx GUID-91B52FC7-EDE8-4BB8-9403-DE0873CA0857 1. Power take-off identification number 2. Transmission Identification number 3. -
Page 4: Table Of Contents
Contents Contents About this manual..................1 Tractor serial numbers.................2 1 Safety precautions................13 Hazard statements.....................13 Safety rules......................13 1.2.1 Replacing safety and information signs............13 1.2.2 Maintaining hardware safety................14 1.2.3 Using tractor safety features................15 1.2.4 Safe operation....................16 1.2.4.1 Following safe operating practices..........16 1.2.4.2 Getting into and out of the cab............18 1.2.4.3 Driving on public roads...............18 1.2.4.4... - Page 5 Contents 2.14 Air suspended driver's seat ................50 2.15 Controls on the rear mudguard................51 2.16 Controls on the bonnet..................51 2.17 Rear controls and connections outside the cab..........52 2.18 Engine hood locking...................53 3 Operation....................54 Running the tractor in..................54 Preparing for use....................54 3.2.1 Adjusting the driver's seat................54 3.2.2 Adjusting the air-suspended driver's seat............56...
- Page 6 Contents 3.7.4 Trailer socket....................88 3.7.5 Two-pin power socket on the bonnet...............88 Driving the tractor....................89 3.8.1 Steering......................89 3.8.2 Power shuttle....................89 3.8.3 Using the power shuttle lever................90 3.8.4 Adjusting the power shuttle engagement speed ..........91 3.8.5 Using the parking brake...................92 3.8.6 Using the clutch pedal..................94 3.8.7 Adjusting the clutch pedal engagement position..........94 3.8.8...
- Page 7 Contents 3.9.3.6 Front power take-off speed view..........130 3.9.3.7 Engine speed view..............130 3.9.3.8 Fuel consumption views............130 3.9.3.9 Rear lower links' position view..........132 3.9.3.10 Front lower links' position view..........132 3.9.3.11 Sigma Power view..............133 3.9.3.12 Gearbox temperature view............133 3.9.3.13 Travel distance view..............134 3.9.3.14 Surface area view..............134 3.9.4 Periodical maintenance view................135...
- Page 8 Connecting an external hydraulic motor to the auxiliary hydraulics....182 3.15 Using the front linkage..................182 3.15.1 Setting front linkage lifting link positions............184 3.16 Using the Valtra front loader................185 3.16.1 Using the Valtra Quick front loader coupling plate.........187 3.16.2 Softdrive......................187 3.16.3 Locking the equipment...................188 3.16.4 Using the continuous floating position............189...
- Page 9 Contents 3.20 Towing devices....................212 3.20.1 Pick-up hitch....................212 3.20.1.1 Unlatching the pick-up hitch equipped with mechanical unlatching system ..............212 3.20.1.2 Unlatching the pick-up hitch equipped with hydraulic unlatching system..............213 3.20.1.3 Latching the pick-up hitch............215 3.20.2 Agricultural drawbar devices................216 3.20.3 Towing device frames ...................217 3.20.3.1 Adjusting the jaw height............218 3.20.3.2...
- Page 10 Contents 4.7.3.3 Greasing the pick-up hitch............253 4.7.3.4 Maintaining the front linkage.............253 4.7.3.5 Checking the front power take-off..........254 4.7.3.6 Greasing the brake cam............255 4.7.3.7 Greasing front axle mounting bearings........255 4.7.3.8 Greasing air-suspended front axle mounting bearings.....256 4.7.3.9 Greasing flexible front mudguards..........257 4.7.3.10 Checking belts' tension.............257 4.7.3.11...
- Page 11 Contents 4.7.6.7 Cleaning the cooling system.............297 4.7.6.8 Checking the engine vibration damper........300 4.7.6.9 Maintaining the air conditioning..........300 Checks and adjustments..................301 4.8.1 Changing tyres....................301 4.8.1.1 Setting the tyre parameter............302 4.8.1.2 Tyre parameters...............304 4.8.2 Track widths....................308 4.8.2.1 Agricultural front axle track widths..........308 4.8.2.2 Industrial front axle track widths..........309 4.8.2.3...
- Page 12 Contents Dimensions......................342 Weights......................342 Maximum permissible axle loading..............342 Tyres........................343 6.4.1 Wheel nuts tightening torque................344 6.4.2 Wheel stud dimensions..................344 6.4.3 Front axle tyre loadings and pressures............344 6.4.4 Rear axle tyre loadings and pressures............345 Spacing for wheel discs...................346 Track widths.....................346 6.6.1 Rear track widths....................346 6.6.2 Front track widths...................346 Engine......................347...
- Page 13 Contents 6.13.5.5 Euro trailer hitch with hydraulic extension........360 6.13.5.6 Drawbar eye................361 Alphabetical index...................362 - 12 -...
-
Page 14: Safety Precautions
1. Safety precautions Safety precautions Always follow the safety precautions given when working with the tractor. The regulations given do not release the operator from statutory and other national regulations as regards traffic safety and occupational health and safety. In addition to the precautions given in this manual, always follow the safety regulations applicable to different types of working sites and existing road traffic laws. -
Page 15: Maintaining Hardware Safety
Lock the brake pedals together whenever individual wheel brakes are not required and always when driving on the road. • Extensive repairs to the braking system should be undertaken only by an authorised Valtra workshop. • When implements or ballast weights are front-end mounted, the rear axle loading is decreased: •... -
Page 16: Using Tractor Safety Features
1. Safety precautions • Maintenance • Follow the maintenance instructions and safety precautions applicable to the tractor. • Stop the engine and lower the implement before carrying out any maintenance work on the tractor or implement. • Support the tractor from the correct support points on the frame and use suitable blocks or stands when carrying out maintenance tasks that require supporting the tractor. -
Page 17: Safe Operation
1. Safety precautions 1.2.4 Safe operation 1.2.4.1 Following safe operating practices To operate the tractor safely, follow all the safety precautions and instructions. • Avoid operating the tractor near ditches, embankments and holes. • Stay off slopes too steep for safe operation. •... - Page 18 1. Safety precautions • Front loader WARNING: The programmable features of the joystick or other controls MUST NOT be used to operate a loader. In order to prevent involuntary loader motion, the loader joystick controller must be of a self-neutralising type. When the operator releases his grip on the joystick, the joystick must return to a non-operational neutral position - except for float detent position in the loader lower direction.
-
Page 19: Getting Into And Out Of The Cab
1. Safety precautions • Operator Protection Structure (OPS) DANGER: Protection against penetrating objects is not provided (no OPS available) if the cab of your tractor is fitted with windows made of glass. Protection against penetrating objects is provided in accordance with ISO 8084 (OPS is available) if the cab of your tractor is fitted with windows made of polycarbonate, except the Side visibility cab (no OPS in Side visibility cab). -
Page 20: Controlling The Driving Speed
1. Safety precautions • When driving the tractor on public roads WARNING: Do not transport anything on the auxiliary hydraulic valves while driving on the road. The load, trailer link steering and such have to be locked (for example mechanically). •... -
Page 21: Operating With Implements
• Make sure to allow sufficient clearance for turning. Three-point hitch and side-mounted implements make a much larger arc when turning than towed equipment. Use only Valtra approved attachments and implements. • Familiarise yourself with the working area and terrain. -
Page 22: Running With Power Take-Off Driven Implements Or Machines
1. Safety precautions • Pull only from the approved drawbar. Towing or attaching to other locations may cause the tractor to overturn. GUID-B824BDA5-67EA-4CC6-AB40-7D1D42AD9627 1.2.4.7 Running with power take-off driven implements or machines Read and follow the given instructions to use power take-off (PTO) driven implements and machines safely. -
Page 23: Towing
1. Safety precautions 1.2.4.9 Towing Read and follow the given instructions to tow a trailer or an implement safely. WARNING: When the tractor is towing a trailer, the brake pedals must be locked together. The brakes are not to be used individually for steering. -
Page 24: Fire Hazards
1. Safety precautions DANGER: If the tractor engine is running, do not leave anybody in the cab without supervision, as the push buttons are easily operated. Always apply the parking brake. • Stop the engine and lower the implement to the ground when leaving the tractor. •... - Page 25 1. Safety precautions When the SCR after-treatment system is handled in such a way that there is a risk of exposure to dust, safety precautions must be taken. Such work includes, for example, opening the after-treatment system, machining, and disposal of the after-treatment system.
-
Page 26: Instruments And Controls
2. Instruments and controls Instruments and controls Pedals GUID-B9DB5C5F-FE87-4414-8461-21CBE5754B55 1. Clutch pedal 2. Locking pedal for steering wheel inclination 3. Latch for brake pedals 4. Brake pedals 5. Accelerator pedal Dashboard GUID-55CC5AC8-1BDA-4194-9C71-7100EAC218AA 1. Power shuttle lever 2. Powershift preprogramming push button 3. -
Page 27: Agroline Instrument Panel
2. Instruments and controls 7. Upper headlights (extra equipment) 8. Multifunctional lever 9. Ignition switch 10. Lever for adjusting steering wheel position 11. Electric centre, lower part of the dashboard 12. Steering wheel 13. A-pillar display 2.2.1 Agroline instrument panel The operator receives information from the gauges, coolant thermometer, tachometer and indicator lights. -
Page 28: Indicator Lights On The Left Side Of The Display
2. Instruments and controls Selectable view symbols The selectable views are the following functions shown on the top and bottom row of the display: Symbol Function Driving trip (m, km/miles) Rear PTO rotating speed (r/min) Front PTO rotating speed (r/min, extra equipment) Clock Transmission temperature Position of lower links (%, 0-100 Ac) -
Page 29: Indicator Lights On The Right Side Of The Display
2. Instruments and controls Indicator light Indication Parking brake indicator light The light (red) is lit to indicate that the power shuttle lever is in the parking brake position. GUID- F0C90BFB-3126-404D-8C49-3FA955C C4FD2 Low fuel level indicator light The light is lit (yellow) and a buzzer sounds once to indicate that about 50 litres of fuel is left. -
Page 30: Dashboard
2. Instruments and controls Dashboard GUID-5F1247BB-4AFE-4B0B-8FFC-60D3175EC97E 1. Power shuttle lever 2. Powershift preprogramming push button 3. Proline instrument panel 4. Main switch 5. Hazard warning flasher switch 6. Light switch 7. Proline instrument panel display change-over switch 8. Proline instrument panel display setting switch 9. -
Page 31: Symbols On The Proline Instrument Panel Display
2. Instruments and controls GUID-FC2CD6B7-89CF-4206-B450-F2A852212AB7 1. Fuel gauge 2. Coolant thermometer 3. Indicator lights for direction indicator 4. Tachometer 5. Speedometer 6. Indicator light for the main beam 7. Proline instrument panel display The fuel gauge shows the amount of fuel left in the tank. The coolant thermometer indicates the engine temperature. -
Page 32: Indicator Lights On The Left Side Of The Display
2. Instruments and controls Symbol Function Rear power take-off (PTO) speed (rpm) Front power take-off (PTO) speed (rpm) Engine speed (rpm) Immediate fuel consumption (ha, acre) Average fuel consumption (ha, acre) Immediate fuel consumption Average fuel consumption Fuel consumption Lower link position (%, 0-100) Lifting link position of front linkage (%, 0-100) Sigma power (%, 0–100) Gearbox temperature (C/F) -
Page 33: Indicator Lights On The Right Side Of The Display
2. Instruments and controls Indicator light Indication Engine oil pressure light GUID-A1E9566C-86CE-4AD3-A512- D772AE266E1E The exclamation mark is lit together with other indicator lights (yellow). GUID-8D5CD1CF-666F-46C9-9211-2B B777A73D4E Glow indicator light GUID-9DD75249-0CC3-461D-84EC- The light (yellow) is lit when the ignition key is in position and the engine is cold. - Page 34 2. Instruments and controls Indicator light Indication Four-wheel drive (4WD) indicator light The light is lit (yellow) to indicate that 4WD is engaged. GUID-1E59203D- F3B7-420D-ABC9- F7433B7A6C19 Front power take-off (PTO) indicator light The light (yellow) is continuously on and indicates that the front PTO (extra equipment) is engaged.
-
Page 35: Controls On The Right-Hand Side
2. Instruments and controls Controls on the right-hand side 2.4.1 Driving controls - 34 -... - Page 36 2. Instruments and controls GUID-D3FB5950-8998-46FE-BE63-EDEFDE806389 1. AutoComfort cabin suspension system (extra equipment) 2. Activation switch for Auto-Steering (extra equipment) 3. Change switch for A-pillar display views 4. Auto-Steering terminal connector 5. Cruise control (Cruise panel) (extra equipment) 6. Cruise control setting switch; the constant driving speed/engine revs (extra equipment) 7.
-
Page 37: Linkage
2. Instruments and controls 2.4.2 Linkage Rear linkage 11 11 GUID-2CE59CFA-242A-4FFA-B103-4BEAB2FA6AB5 1. Diagnose light 2. Lift/lower indicator lights 3. Lowering speed selector 4. Transport height selector 5. Draft control selector 6. Drive balance control, including slip control system, on Autocontrol D (ACD) linkage (extra equipment) 7. -
Page 38: Power Take-Off
2. Instruments and controls GUID-E3CF7018-A349-4131-B25F-6512E01EEF5A 1. Control lever, auxiliary hydraulics block 3 2.4.3 Power take-off Rear power take-off GUID-04B371AB-422B-4998-AB56-A82D3F3EEC58 1. Switch for rear power take-off (PTO) 2. Switch for the rear PTO automatic stop 3. Speed control lever for the rear PTO - 37 -... - Page 39 2. Instruments and controls Front power take-off Front power take-off (PTO) is extra equipment. GUID-6F81C523-F8B4-45EB-B153-D786F69791EC 1. Switch for front PTO - 38 -...
-
Page 40: Auxiliary Hydraulics
2. Instruments and controls 2.4.4 Auxiliary hydraulics The following instruments and controls are used to control the auxiliary hydraulics. GUID-387CDB30-6B3D-4B84-9E40-18F0D183EE6E 1. Release switch for equipment locking (extra equipment) 2. Main switch for the hydraulic loader 3. Switch for Softdrive (extra equipment) 4. -
Page 41: Other Controls
2. Instruments and controls 2.4.5 Other controls GUID-698E735D-CC91-4EE9-8045-7CADF77D2869 1. Mounting brackets (extra equipment) 2. Implement signal connection (extra equipment) 3. Lighter/power outlet 4. Switch for trailer hitch hydraulic unlatching/locking (extra equipment) 5. Control stop switch (extra equipment) 6. Indicator light for implement signal connection (extra equipment) 7. -
Page 42: Controls On The Rear Side
2. Instruments and controls Controls on the rear side 2.5.1 Rear window opening device GUID-B7032200-07B2-42CA-B684-4CFFD8A5D05E 1. Rear window opening device - 41 -... -
Page 43: Reverse Drive System Controls
2. Instruments and controls 2.5.2 Reverse drive system controls The reverse drive system is extra equipment. GUID-46A04C31-37E6-4B81-B954-DA1D61C958B1 1. Switch for Powershift, (3---steps) 2. STOP indicator light (red) 3. A-pillar display 4. Power shuttle lever 5. Powershift preprogramming push button 6. Lever for adjusting steering wheel inclination 7. -
Page 44: Controls On The Left-Hand Side
2. Instruments and controls Controls on the left-hand side The following controls are positioned on the left-hand side. GUID-1C4499EA-A11D-4133-91B6-2493C4FAE430 1. Side window opening handle 2. Storage compartment or place for ash tray, extra equipment 3. Storage compartment 4. Emergency brake, extra equipment - 43 -... -
Page 45: Controls On The Front Roof Console
2. Instruments and controls Controls on the front roof console The following controls are positioned in the front roof console. GUID-0B01F055-1E97-497A-9EC2-7EF32CF8F11D 1. Cab light 2. Recirculation control lever (not with automatic air conditioning) 3. Mirror heating, extra equipment 4. Mirror adjustment, extra equipment 5. -
Page 46: Controls On The Right-Hand Side Roof Console
2. Instruments and controls Controls on the right-hand side roof console The following figure shows the components on the right-hand side roof console. GUID-8C6EF57D-4FFF-47AF-B5AC-2E6430341506 1. Radio (extra equipment) 2. Rotating warning light switch (extra equipment) 3. Front working lights switch 4. -
Page 47: Controls On The Forest Equipment Right-Hand Side Roof Console
2. Instruments and controls Controls on the forest equipment right-hand side roof console 9 10 GUID-95C88AA8-4355-44D4-B842-88C65570C2DA 1. Fan control knob 2. Temperature control knob 3. Floor fan switch (extra equipment) 4. Rotating warning light switch (extra equipment) 5. Front working lights switch 6. -
Page 48: Controls On The Forest Equipment Left-Hand Side Roof Console
2. Instruments and controls 2.11 Controls on the forest equipment left-hand side roof console GUID-C79687A2-5647-4F66-975D-2EC3BF1191A3 1. Radio (extra equipment) 2.12 Air conditioning controls 2.12.1 Manual air conditioning controls The manual air conditioning system is extra equipment. GUID-FC188211-EA1D-4F1F-9AE8-94E1C4CEE5C3 1. Fan control knob 2. -
Page 49: Automatic Air Conditioning Controls
2. Instruments and controls 2.12.2 Automatic air conditioning controls The automatic air conditioning system is extra equipment. GUID-8EEFE0E5-2C8D-4CE0-BA9D-FE61034A548D 1. Fan control knob 2. Display 3. Temperature control knob 4. Air conditioning system on/off button 5. Defrosting button 6. Recirculation control button - 48 -... -
Page 50: Driver's Seat
2. Instruments and controls 2.13 Driver's seat GUID-09C4AD34-233B-4AEA-A328-C128E709298D 1. Storage compartment for manuals 2. Seat heating 3. Armrest adjustment 4. Backrest inclination adjustment 5. Seat belt anchor point 6. Seat turning lock/release 7. Height adjustment 8. Forward/backward adjustment 9. Suspension adjustment 10. -
Page 51: Air Suspended Driver's Seat
2. Instruments and controls 2.14 Air suspended driver's seat Air suspended driver's seat is extra equipment. GUID-F4AF8B6A-BF95-48FE-8238-12635155227D 1. Seat depth and cushion angle adjustment 2. Storage compartment for manuals 3. Headrest height adjustment and removal 4. Seat heating 5. Lumbar support adjustment 6. -
Page 52: Controls On The Rear Mudguard
2. Instruments and controls 2.15 Controls on the rear mudguard GUID-1379ECEF-F861-40EB-9109-14E7C7D2BAD8 1. Lift/lower push buttons 2. Rear power take-off on/off push button (extra equipment) 3. On/off valve 1 push buttons (extra equipment) 4. Rear valve 1 push buttons (extra equipment) 2.16 Controls on the bonnet The following controls are positioned on the bonnet. -
Page 53: Rear Controls And Connections Outside The Cab
2. Instruments and controls 2.17 Rear controls and connections outside the cab STOP STOP GUID-4A68A574-BFB0-4375-A301-58C6F10E6532 1. Inlet, remote control cables 2. Trailer socket 3. Trailer coupling Duo-Matic (extra equipment) 4. Emergency stop plug for rear power take-off (PTO) 5. Hitch ball storing bracket 6. -
Page 54: Engine Hood Locking
2. Instruments and controls 2.18 Engine hood locking Engine hood and the side plates are locked. You can open the hood and the side plates with the separate keys delivered with the tractor. GUID-FEED73CF-6F31-4E86-8920-E416F8B95902 1. Engine hood lock. 2. Side plate lock on the left side. 3. -
Page 55: Operation
Follow the maintenance program carefully and include the daily maintenance in your normal routine. • Only use genuine Valtra spare parts for optimum performance. 3.2.1 Adjusting the driver's seat You can adjust the driver's seat according to your height and weight. With these adjustments you can minimize the exposure to vibration, obtain the best support for your lower back and get the most comfortable driving position. - Page 56 3. Operation CAUTION: Do not attempt to adjust the seat while driving. There is an increased risk of loss of control. GUID-09C4AD34-233B-4AEA-A328-C128E709298D 1. Storage compartment for manuals 2. Seat heating 3. Armrest adjustment 4. Backrest inclination adjustment 5. Seat belt anchor point 6.
-
Page 57: Adjusting The Air-Suspended Driver's Seat
3. Operation • Adjust the suspension. The operator weight display shows the settings for operators of different weights. • To increase the suspension, turn the suspension adjustment lever clockwise. • To decrease the suspension, turn the suspension adjustment lever anti- clockwise. - Page 58 3. Operation GUID-F4AF8B6A-BF95-48FE-8238-12635155227D 1. Seat depth and cushion angle adjustment 2. Storage compartment for manuals 3. Headrest height adjustment and removal 4. Seat heating 5. Lumbar support adjustment 6. Seat turning lock/release 7. Armrest adjustment 8. Forward/backward adjustment 9. Backrest inclination adjustment 10.
- Page 59 3. Operation • Adjust the seat forwards or backwards. • Pull the forward/backward adjustment lever upwards. • Move the seat forwards or backwards to the desired position. • Turn the longitudinal suspension on or off. • To turn on the longitudinal suspension, turn the lever to the rear position. •...
-
Page 60: Adjusting The Armrest
3. Operation • Adjust the lumbar support. Turn the knob clockwise or anti-clockwise to adjust the lumbar support. The height and depth are adjusted at the same time. • Turn the seat heating on or off. • Adjust the headrest height by lifting or lowering it. •... -
Page 61: Adjusting The Steering Wheel
3. Operation 3.2.4 Adjusting the steering wheel You can adjust the steering wheel position with the lever and the locking pedal. CAUTION: Do not adjust the steering wheel position while driving. GUID-D702F6C1-5668-46E9-B84A-6175FC7A0A9D 1. Lever for adjusting steering wheel position 2. Locking pedal for steering wheel inclination •... -
Page 62: Adjusting Standard Mirrors
3. Operation 3.2.5 Adjusting standard mirrors You can adjust the position of the standard mirrors manually. GUID-94073A8E-5075-4F2D-A9E9-581B1312B9E4 1. Locking device of the mirror support 1. Loosen the locking device of the mirror support. 2. Adjust the mirror position. 3. Tighten the locking device. 3.2.6 Adjusting optional mirrors You can adjust the position of the optional mirrors electrically. -
Page 63: Heating Mirrors
3. Operation 3.2.7 Heating mirrors Mirror heating is extra equipment. GUID-F15F3525-F6B6-4020-A3C1-387FE9F0497F 1. Mirror heating switch • To switch the mirror heating on, press down the symbol side of the switch. • To switch the mirror heating off, press down the side of the switch opposite to the symbol. -
Page 64: Using The Rear Window Wiper
3. Operation 2. To switch the rear window heater off, press down the switch opposite to the symbol. If the rear window heater is not manually switched off, it switches off automatically after 10 minutes. 3.2.10 Using the rear window wiper The rear window wiper is extra equipment. -
Page 65: Using The Rear Window Washer
3. Operation 3.2.11 Using the rear window washer The rear window washer is extra equipment. GUID-02281C37-69A5-4001-B126-F0C7196D7262 1. Switch for the rear window washer • To turn on the rear window washer, press down the symbol side of the switch. The switch for the rear window washer is spring returned. •... -
Page 66: Using The Main Switch
3. Operation With the power shuttle, you can change the driving direction without using the clutch pedal. However, traditional use of the clutch pedal is still possible when changing direction, just make sure that you press the pedal fully down before moving the power shuttle lever. -
Page 67: Using The Control Stop
3. Operation NOTE: When starting the engine, the control stop must be disengaged. Otherwise the engine does not start. NOTE: Do not use the control stop when driving. The control stop automatically stops the engine if the stop light is lit. IMPORTANT: If the control stop stops the engine, the fault must be found and repaired before the engine is started again. - Page 68 3. Operation GUID-9B02020C-3389-4113-AFA0-CC49C784DA08 1. STOP position 2. Power on position 3. Start position 4. Ignition switch 5. Ignition key • To turn on the power, turn the ignition key from the STOP position to the power on position. In cold conditions, when the engine is cold, the glow indicator light on the Proline instrument panel is lit.
-
Page 69: Using The Roof Hatch
3. Operation 3.2.17 Using the roof hatch GUID-F4D74D75-2B07-4BEF-BDE1-294251FDA043 1. Handle 1. • Open the hatch by pushing the handle forward and pushing the hatch upward. • Close the hatch by pushing the handle forward and pulling the hatch downward. Starting the tractor 3.3.1 Starting under normal conditions WARNING: Never run the tractor in an enclosed building except with... - Page 70 3. Operation GUID-436251D4-B48E-4EEF-A554-E4C85B3B11BA 1. Engine oil pressure 2. Stop light (is flashing) 3. Gearbox oil pressure 4. Four-wheel drive 5. Parking brake 6. Battery charging 1. Check that the power shuttle lever is in the parking brake position. 2. Turn the hand throttle knob to the low idling position. 3.
-
Page 71: Starting Under Cold Conditions
3. Operation After starting a cold engine, the glow indicator light can light up again. The afterglow reduces white smoke and keeps the cold engine running smoothly. 3.3.2 Starting under cold conditions To ensure a successful start under cold conditions, use the engine heater and follow the instructions given. -
Page 72: Starting With An Auxiliary Battery
3. Operation 3.3.3 Starting with an auxiliary battery You can start the engine with an auxiliary battery (jump starting). WARNING: A fully charged battery connected directly to a dead battery can cause a current surge capable of causing the batteries to explode. -
Page 73: Using Upper Headlights
3. Operation • To switch on the headlights, press down the symbol side of the light switch. When the light switch is in this position, the main beams can be switched on by the multifunctional lever. NOTE: If the power is turned off when the headlights or parking lights are on, the buzzer goes on. -
Page 74: Using The Trailer Hitch Light
3. Operation IMPORTANT: If the tractor is equipped with the Infolight Xenon package, do not turn the lights more than 10 degrees up or down. If the lights are turned more than 10 degrees, the Xenon bulbs operating time is significantly shorter. GUID-55F65146-5180-4614-B3E1-5BD528BF9101 1. -
Page 75: Using The Cab Light
3. Operation GUID-4D868FA9-F1B0-4425-BB25-D0563F887D2F 1. Trailer hitch light switch • To switch on the trailer hitch light, press the symbol side of the switch. • To switch off the trailer hitch light, press the side of the switch opposite to the symbol. -
Page 76: Using Notification Devices
3. Operation Using notification devices 3.5.1 Using the direction indicators GUID-DF421284-07B1-4607-8475-FCEA88AE8216 1. Multifunctional lever • To switch on the left-hand side direction indicators, move the multifunctional lever to the front position. • To switch on the right-hand side direction indicators, move the multifunctional lever to the rear position. -
Page 77: Using The Rotating Warning Light
3. Operation 3.5.3 Using the rotating warning light Rotating warning light is an extra equipment. GUID-9D85D11B-FA5C-4AF0-91E6-243CAE24D02F 1. Rotating warning light switch • To switch on the rotating warning light, press the symbol side of the switch. • To switch off the rotating warning light, press the side of the switch opposite to the symbol. -
Page 78: Heating And Ventilation
3. Operation Heating and ventilation 3.6.1 Using the heater You can regulate the temperature and the fan on the roof console. GUID-B526B6FF-61F8-4B33-B185-EA29BCAE240D 1. Roof fan control knob 2. Temperature control knob 3. Switch for floor fan and an electrical pump (extra equipment) •... -
Page 79: Controlling Ventilation Nozzles And Air Recirculation
3. Operation 3.6.2 Controlling ventilation nozzles and air recirculation You can control the ventilation nozzles and air recirculation with the controls in the front roof console. GUID-1B68E635-D426-4357-870C-A04720A068FA 1. Recirculation control lever 2. Ventilation nozzles 3. Sun visor 4. Sun visor raising string •... -
Page 80: Using The Manual Air Conditioning
3. Operation 3.6.3 Using the manual air conditioning The manual air conditioning system is extra equipment. IMPORTANT: Use the air conditioning regularly to prevent seizing of the compressor. NOTE: Use the air conditioning for a few minutes at least once a month. NOTE: When the air conditioning system is in use, the cab doors and windows must be closed. -
Page 81: Automatic Air Conditioning
3. Operation 5. Reduce the fan speed to obtain a comfortable temperature. NOTE: To increase the efficiency of the air conditioning, keep the air recirculation open. GUID-302B33B9-04F4-44FF-B2DE-D6416FA987A7 1. Recirculation control lever 3.6.4 Automatic air conditioning 3.6.4.1 Air conditioning control panel The automatic air conditioning system is extra equipment. -
Page 82: Activating Air Conditioning When The Battery Has Been Disconnected
3. Operation 3.6.4.2 Activating air conditioning when the battery has been disconnected When the battery has been disconnected, you must calibrate the air conditioning system. • Turn the fan control knob to AUTO position. The automatic air conditioning starts the calibration. NOTE: During calibration, the air conditioning system cannot be used. -
Page 83: Controlling The Fan
3. Operation ECO mode Switching off the air conditioning with the air conditioning system on/off button activates the ECO mode. The air cooling compressor is turned off and the system tries to achieve the target temperature by other available means, such as fresh air intake and fan speed. -
Page 84: Automatic Air Conditioning System On/Off Button
3. Operation 3.6.4.5 Automatic air conditioning system on/off button GUID-D5681DD7-43B5-446A-8201-86C087D10D1D 1. Automatic air conditioning system on/off button • When the automatic air conditioning is on, the amber indicator LED is lit. • When the automatic air conditioning is off, the compressor and the indicator LED are off. -
Page 85: Defrosting
3. Operation Setting mode HI GUID-7D8E86DD-57B8-4BE1-B0BE-51E4FBF8BBAD The maximum heating effect is reached by setting the cab temperature above +28°C. When the HI mode is active: • The air conditioning indicator LED is lit. • The fan speed is 75% of the maximum (if operating automatically). •... -
Page 86: Selecting Air Recirculation
3. Operation • The air conditioning indicator LED is lit. • The defrosting button indicator LED is lit. • The fan speed is 75% of the maximum. • The fresh air intake is active. • The text HI is displayed. You can deactivate the defrosting by pressing the defrosting button again. -
Page 87: Power Outlets
3. Operation Power outlets 3.7.1 Lighter The tractor is equipped with a lighter. The lighter socket can be used also as an electric power output. GUID-68D24224-6BDB-4D01-9EA1-A16EC6FDB766 1. Lighter The lighter socket provides an output of 12 V DC; 10 A at a maximum. 3.7.2 Using the two-pin power socket and power switch Use the two-pin power socket for electrical equipment. -
Page 88: Three-Pin Power Socket
3. Operation 3.7.3 Three-pin power socket GUID-2E069E18-F87A-4955-886F-E29F9D45A466 1. Three-pin power socket 2. 5 A 3. 25 A 4. Ground The direct current is supplied through the power socket for different regulating elements, implements etc. 5 A is available through the ignition switch and 25 A direct from the battery. -
Page 89: Trailer Socket
3. Operation 3.7.4 Trailer socket Current from the tractor to the trailer is supplied through the trailer socket. GUID-148BC744-BF50-4F98-8A87-331CC78ED56D 1. Direction indicator left (yellow) 2. Brake light (red) 3. Parking light right (brown) 4. Direction indicator right (green) 5. Ground (white) 6. -
Page 90: Driving The Tractor
3. Operation The socket provides an output of 12 V DC; 10 A at a maximum. The power socket is activated when the parking lights are on. Driving the tractor 3.8.1 Steering NOTE: When the engine is not running, the steering is not power assisted. CAUTION: If a malfunction occurs in the steering system, stop the tractor and correct the malfunction before restarting. -
Page 91: Using The Power Shuttle Lever
3. Operation 3.8.3 Using the power shuttle lever GUID-85975454-7178-48B4-A4A3-344CB5D07905 1. Power shuttle lever • F (front position) = forward driving direction • N (centre position) = neutral • R (rear position) = reverse driving direction • P = parking brake position •... -
Page 92: Adjusting The Power Shuttle Engagement Speed
3. Operation 3.8.4 Adjusting the power shuttle engagement speed You can adjust the power shuttle engagement speed through the tractor terminal transmission settings. The index determines how quickly the torque of the power shuttle increases to the maximum value when the clutch is engaged. The index affects both the F (forward) and R (rearward) clutch engagements. -
Page 93: Using The Parking Brake
3. Operation 5. Press the Powershift pre-programming button. The last two bars are lit to indicate that the parameter value is shown on the bottom row. 6. Press Powershift push buttons to change the parameter value. 7. Press the Powershift pre-programming button to save the parameter value. You can discard the changes by pressing the HiShift push button. - Page 94 3. Operation WARNING: The parking brake does not engage at driving speeds over 2 km/h. If you move the power shuttle lever to the P position at higher driving speeds, the parking brake indicator light on the instrument panel and the P symbols on the A-pillar display flash and the buzzer alarms intermittently until the speed drops below the limitAlways ensure that the parking brake is actually engaged before leaving the tractor.
-
Page 95: Using The Clutch Pedal
3. Operation 3.8.6 Using the clutch pedal GUID-0FDC0EEE-E513-40D2-B148-7C426A433C57 1. Clutch pedal 1. Press the clutch pedal to release the traction. 2. Let the clutch pedal up gradually. IMPORTANT: Never rest your foot on the clutch pedal while driving. IMPORTANT: Do not allow the clutch to slip more than necessary when moving off. - Page 96 3. Operation 3. Press the pre-programming push button, depress the clutch pedal and turn the ignition on at the same time. GUID-A50D523E-B207-4B9A-A6C0-5A2F20FFB750 The setting menu symbols (D) appears on the display. The first two bars are lit to indicate that the parameter number is shown on the bottom row. 4.
-
Page 97: Braking
3. Operation 3.8.8 Braking You can use the brake pedals differently in various working situations. GUID-6295F787-9808-4BE4-BDB6-EA7943B8DF78 1. Brake pedals 2. Latch for brake pedals The tractor has two brake pedals which apply separately to the right and to the left side rear wheels. All four wheels are braking when pressing both brake pedals. -
Page 98: Starting To Drive
3. Operation GUID-CEE3F5AE-C363-416E-8D95-B195A8527D24 1. Emergency brake lever 1. Pull up the emergency brake lever. You have to pull it constantly as it does not stay locked. 2. Release the lever when the tractor has stopped. 3.8.10 Starting to drive 1. Start the engine. 2. -
Page 99: Transmission System
3. Operation WARNING: Do not turn the ignition key to the STOP position when driving. When the power is off, the parking brake applies and all wheels lock. NOTE: If the engine stops when driving, for example due to overload, you must turn the ignition key to the STOP position before starting again. -
Page 100: Speed Matching
3. Operation 3.8.11.1 Speed matching The speed matching automatically tries to even out speed differences which are too high by engaging the appropriate Powershift gear. Speed matching is always on when the driving speed is over 0.5 km/h and: • When changing speed range. -
Page 101: Selecting The Speed Gear
3. Operation 3.8.11.3 Selecting the speed gear The speed gears can be used in all three speed ranges and also in the forward and reverse gears. GUID-31E7AC23-E758-443E-BC92-0FF3643DB769 1. HiShift push button 2. Speed gear lever NOTE: Use the speed gear lever, not the range gear lever, to set the transmission to neutral when the engine is running. -
Page 102: Preprogramming Gear For Driving Direction Changing
3. Operation GUID-1A73BA94-8C44-444E-B140-3A6390859320 1. Powershift push buttons • To increase the Powershift gear, press • To decrease the Powershift gear, press The Powershift gear number flashes on the A-pillar display until the change process is completed. NOTE: If shifting down the Powershift gear would increase the engine speed beyond acceptable limits, the system will prevent the gear change. - Page 103 3. Operation GUID-6620A2FF-8682-42DD-8BA5-2E3A6258C436 If the Powershift function is not preprogrammed, the selected Powershift gear is engaged while changing direction. GUID-ED240242-BACB-4E43-8F22-1BAF14EEDC33 1. Power shuttle lever 2. Powershift preprogramming push button 3. Powershift push buttons The engine must be running when you preprogram the Powershift. •...
-
Page 104: Using The Shifting Automatics
3. Operation • To cancel the preprogramming: The engine must be running when you cancel the preprogramming. • Start the engine. • Press down the clutch and brake pedals to ensure safety. You can cancel the preprogramming also while driving. •... -
Page 105: Programming Shifting Automatics
3. Operation • Press the side of the shifting automatics switch opposite to the symbol to cycle through the programs. Before you can cycle through the programs, you must first activate the switch by pressing it once. The programs change in the following order: MODE 2, MODE 1, manual mode. 3.8.11.7 Programming shifting automatics You can program the shifting automatics to change the Powershift gear on... -
Page 106: Parking The Tractor
3. Operation 5. Press the Powershift push buttons to change the engine speed limit for downwards shifting. The current engine speed limit for downwards shifting is shown on the A- pillar display. GUID-8EDEC237-8904-413F-907A-185FD459CF9F 1. Current engine speed limit for shifting •... -
Page 107: Refueling The Tractor
3. Operation 4. Reduce the engine speed to idling. IMPORTANT: Before stopping the engine, allow the engine temperature to stabilise for at least two minutes. In some situations (for example, after working with a heavy load) when you engage the parking brake, the engine may perform cooling of the after- treatment system by increasing the idling RPM momentarily. -
Page 108: Filling The Adblue/Def Tank
3. Operation 2. Fill the tank. 3. Close the fuel tank cap. IMPORTANT: Never put AdBlue/DEF in the fuel tank, as the engine and fuel system may become damaged. IMPORTANT: Never put fuel in the AdBlue/DEF tank. Even small amounts of fuel in the AdBlue/DEF tank may damage the gaskets of the selective catalytic reduction (SCR) system. -
Page 109: Cruise Control
3. Operation • As the AdBlue fluid is very corrosive, if the tractor is splashed with fluid, wipe off and rinse with water. • If an electrical connector is splashed with AdBlue fluid, it must be replaced. • Crystals of AdBlue/DEF additive may appear on the vehicle in the event of spillage. -
Page 110: Programming The Driving Speed Cruise Control
3. Operation Cruise control setting switch With the cruise control setting switch, you can set or activate either the constant driving speed or the constant engine speed. Cruise control increasing/decreasing switch With the cruise control increasing/decreasing switch, you can increase or decrease the cruise control. -
Page 111: Programming The Engine Speed Cruise Control
3. Operation GUID-B4AB052E-ECFE-4FC9-9773-111552889744 1. Cruise control OFF button 2. Cruise control setting switch • To activate driving speed cruise control, press the symbol side of the cruise control setting switch. NOTE: To activate the driving speed cruise control driving speed must be over 1 km/h. -
Page 112: Activating And Deactivating The Engine Speed Cruise Control
3. Operation 2. Press the side opposite to the symbol of the cruise control setting switch for more than 2 seconds. The cruise control indicator light blinks on the instrument panel indicating that the setting value can be stored in the memory. 3. -
Page 113: Increasing The Cruise Control Setting
3. Operation 1. Press the side opposite to the symbol on the cruise control increasing/ decreasing switch to lower the driving speed or the engine speed. The cruise control setting decreases according to the following table. Driving speed 1...10 km/h 10...15 km/h >15 km/h Engine speed cruise... -
Page 114: Automatic Traction Control
3. Operation NOTE: You can increase the engine speed with the hand throttle lever or accelerator pedal when the cruise control function is on. 3.8.15 Automatic traction control Automatic traction control is useful in traffic and for example on jobs where you have to stop the tractor and at the same time use power take-off (PTO). - Page 115 3. Operation GUID-822D12F8-B9E9-40EC-B1C6-8E8E6AD8EC22 1. Automatic traction control switch 2. Automatic traction control symbol 1. Apply the parking brake. 2. Press the symbol side of the automatic traction control switch and release it. The automatic traction control is engaged in standby mode (but not in function). The automatic traction control symbol flashes on the tractor terminal display and A-pillar display.
-
Page 116: Front Axle Air Suspension
3. Operation 3.8.17 Front axle air suspension Driving a tractor with air suspension on the front axle is comfortable on uneven ground. When driving at high speed, the front axle suspension reduces the pitching of the tractor. Stress on the operator, tractor and implements is reduced. The automatic lever control keeps the axle in the same position within the tractor frame independently of the axle load. -
Page 117: Autocomfort Cab Suspension
3. Operation GUID-5316E8BD-67AE-47A8-90BE-7555895DD00C 1. Lock holes 2. Lock pins 3. Ring pins 4. Locking wheel 1. To disengage the air suspension, secure the lock pins in the lock holes. 2. Make sure that the ring pins of the lock pins are in place. 3. -
Page 118: Adjusting Autocomfort Cab Suspension
To decrease the stiffness, turn the AutoComfort potentiometer knob downwards. The flashing symbol on the AutoComfort calibration switch indicates the service codes. If the light starts flashing, contact an authorised Valtra workshop. The service code is also displayed on the tractor terminal display. - 117 -... -
Page 119: Calibrating Autocomfort Cab Suspension
IMPORTANT: It is not recommended for the operator to calibrate the AutoComfort cab suspension. A new calibration should be performed by an authorised Valtra workshop. WARNING: When calibrating, make sure that there is nobody near the cabin. The cabin moves to its extreme positions. -
Page 120: Deactivating Front Axle Suspension
3. Operation 2. Release the switch. When the calibration is done, the light goes out. 3. If the flashing does not stop within 2 minutes, start the calibration again. 3.8.19.3 Deactivating front axle suspension GUID-44EBB37E-A899-49B8-812A-5B81D0FCFF67 1. Front axle suspension deactivation / AutoComfort calibration switch 1. -
Page 121: Differential Lock
• The speed sensors are not calibrated. • The turning angle sensor is not calibrated (contact an authorised Valtra workshop). • There is a fault in the switch (the service code is displayed). -
Page 122: Four-Wheel Drive
3. Operation GUID-848407EE-9D52-44B2-820C-EB2F403052B2 1. Differential lock switch • To engage the differential lock, press down the symbol side of the differential lock switch (ON). • To use the automatic function of the differential lock, turn the differential lock switch to the middle position (AUTO). •... -
Page 123: Engaging And Disengaging The Four-Wheel Drive
3. Operation • The speed sensors are not calibrated. • A switch fault has occurred (the service code is displayed). 3.8.23 Engaging and disengaging the four-wheel drive You can control the engagement of the four-wheel drive (4WD) with the 4WD switch. - Page 124 3. Operation 1. Stop the engine and turn the ignition switch off. 2. Engage the parking brake. 3. Press the pre-programming push button, depress the clutch pedal and turn the ignition on at the same time. The setting menu symbols (D) appears on the display. The first two bars are lit to indicate that the parameter number is shown on the bottom row.
-
Page 125: Reverse Drive System
3. Operation 8. Press the Powershift push button to select the driving start automatics engagement time parameter. GUID-B4F83C0E-FEAF-4F49-AA11-311B99C1103C 9. Change the parameter value by pressing Powershift push buttons. GUID-A2273974-20E8-4D07-818D-246607F8A074 10. Press the HiShift push button to leave the setting menu and save all changes. If you want to leave the setting menu and discard all changes made, turn the ignition switch off. -
Page 126: Proline Instrument Panel Display
The reverse drive control does not operate when driving forward, because the tractor has a reverse drive preventing valve. If the lockout does not work, check the fuse. If the fuse is broken, contact an authorised Valtra workshop. The brake pedal for reverse drive control also controls the trailer brakes (extra equipment). -
Page 127: Fixed Views
3. Operation 3.9.1 Fixed views Fixed views show the operating hours and the time. Fixed views have two functions displayed on the bottom row, the operating hours and the clock GUID-7B5434D5-0FA3-4C91-9872-50CB49B6C364 1. Operating hours 2. Clock Operating hours Operating hours are displayed with an accuracy of one decimal place when the power is on. -
Page 128: Top And Middle Row Views
3. Operation • To select a function to display when the enlarged middle row display is in use: • Press the symbol side of the display change-over switch to browse for the functions in forward order. • Press the side of the display change-over switch opposite to the symbol to browse for the functions in reverse order. -
Page 129: Working Time View
3. Operation 3.9.3.1 Working time view The working time view shows how much time the tractor has spent on a special task. The working time is shown on the top or middle row of the display. GUID-9BF33969-7879-4BB2-93D4-CCA6AD7C4E80 1. Working time Working time can, for example, show the time spent on ploughing a certain area. -
Page 130: Driving Speed View
3. Operation 3.9.3.3 Driving speed view The driving speed is displayed in km/h or miles/h. The driving speed is shown on the top or middle row of the display. GUID-B7C1AF1F-3046-4DE6-B897-30B2A6E6B002 1. Driving speed The driving speed is displayed as follows: •... -
Page 131: Front Power Take-Off Speed View
3. Operation GUID-F32C777A-A48D-48B2-BBD4-858DE35A95F6 1. Rear power take-off speed The PTO rotation speed is shown beside the symbol with an accuracy of 10 rpm. 3.9.3.6 Front power take-off speed view The front power take-off (PTO) speed is shown in revolutions per minute (rpm). The front PTO speed is shown on the top or middle row of the display. - Page 132 3. Operation Immediate fuel consumption on the area worked GUID-4C587ACB-4D06-47F4-A10F-271E303A9254 1. Immediate fuel consumption on the area worked Average fuel consumption on the area worked GUID-48E86CB1-9B96-4BAE-8911-4C1EC4213843 1. Average fuel consumption on the area worked You can reset the fuel consumption information. Immediate fuel consumption in an hour GUID-70439AD2-56FC-44FB-BE46-30BC0964CA86 1.
-
Page 133: Rear Lower Links' Position View
3. Operation Total fuel consumption GUID-76A27D52-203F-441A-84F5-A13E181255EE 1. Total fuel consumption You can reset the fuel consumption information. 3.9.3.9 Rear lower links' position view The view shows the position of the rear lower links. The position of the rear lower links is shown on the top or middle row of the display. -
Page 134: Sigma Power View
3. Operation GUID-395E0FBB-ECB4-4C78-83B3-59B4375385BC 1. Lower links' position of the front linkage 3.9.3.11 Sigma Power view The Sigma Power view shows the percentage of the maximum power that is transferred through the power take-off (PTO). The Sigma Power is shown on the top or middle row of the display. GUID-3A9F12C1-E00F-4B05-9D53-1A8108539BB3 1. -
Page 135: Travel Distance View
3. Operation 3.9.3.13 Travel distance view The view shows the travel distance in metres, kilometres, yards or miles. You can also reset the distance reading. The travel distance is shown on the top or middle row of the display. GUID-BD044C69-C74E-4C35-823C-949161AD20D7 1. -
Page 136: Periodical Maintenance View
When the tool symbol and periodical maintenance hour number are lit on the display, the appropriate service work has to be carried out by an authorised Valtra workshop. If this work is not carried out, the tool symbol and periodical maintenance hour number are displayed for 10 seconds whenever the power is turned on. -
Page 137: Resetting Views
3. Operation 3.9.5 Resetting views You can reset the travel distance, fuel consumption, working time and worked area views. All the readings are reset at the same time. GUID-3C6D2464-49AA-45F1-B8E7-BFE48EDF8C30 1. Travel distance 2. Proline instrument panel display change-over switch 3. Proline instrument panel display setting switch 1. -
Page 138: Changing Parameters
3. Operation 1. To enlarge the middle row, press the side of the display setting switch opposite to the symbol. The top row vanishes, and the middle row enlarges to a height of two rows. 2. Press the switch again to return to the normal view. 3.9.7 Changing parameters 3.9.7.1... -
Page 139: Changing The Parameter Value
3. Operation 3. Exit the setting mode. Press and hold down the symbol side of the display setting switch for more than three seconds. 3.9.7.2 Changing the parameter value GUID-B759AF1A-A481-4FED-AB49-1559B2E918C7 1. Proline instrument panel display change-over switch 2. Proline instrument panel display setting switch •... -
Page 140: Setting The Implement Width
3. Operation 3.9.7.4 Setting the implement width GUID-962D81DE-047B-41F0-92F0-5F75B1B7600C 1. Implement width 1. Activate the implement width in the setting mode. 2. Change the value. 3.9.7.5 Changing the hour display GUID-990D5FA6-9017-48A5-AD61-2D78C7B81B90 1. Hour display 1. Activate the hour display in the setting mode. When the hour display is blinking, you can set the hours. -
Page 141: Changing The Clock Mode
3. Operation 3.9.7.7 Changing the clock mode GUID-01B25A24-0446-49F5-A021-D899DB38D179 1. Clock mode 1. Activate the clock mode in the setting mode. 2. Change the display to either 12-hour or 24-hour mode. 3.9.7.8 Activating the direction indicator buzzer GUID-6B0E5488-5692-4954-9D32-BB39283CD799 1. Direction indicator buzzer on 2. -
Page 142: Changing The Length Unit
3. Operation 3.9.7.10 Changing the length unit You can change the unit of length to be shown in either metric or imperial mode. NOTE: The units have to be changed separately for the tractor terminal display. GUID-6288B788-27E9-419D-8020-5A74A2447123 1. Metric units 2. -
Page 143: Activating And Deactivating The Front Power Take-Off Speed View
3. Operation 3.9.7.12 Activating and deactivating the front power take-off speed view GUID-BCF2C3E6-1E08-4FDE-A0E8-42CE42ABA3CD 1. Front PTO speed view on 2. Front PTO speed view off 1. Activate the front PTO speed view in the setting mode. 2. Activate or deactivate the front PTO speed view. This function activates the front PTO speed view if the tractor is retrofit with front PTO. -
Page 144: Agroline Instrument Panel Display
3. Operation 3.10 Agroline instrument panel display The Agroline instrument panel display shows information about different tractor functions. GUID-DB318D46-F670-47A9-9BAB-D30D54DC638E The display has two rows with either fixed or selectable views: • The bottom row view is fixed. • The operator can select the top row view. 3.10.1 Fixed views Fixed views show the operating hours and the driving speed (km/h / mph). -
Page 145: Selecting A View
3. Operation Operating hours Operating hours are displayed with an accuracy of one decimal place when the power is on. Driving speed (km/h / mph) When the driving speed is under 3 km/h, the symbol L is shown in the display. The display shows up to 15 km/h to one decimal place. -
Page 146: Travel Distance View
3. Operation Symbol Function Gearbox temperature (C/F) Lower link position (%, 0-100) Periodical maintenance 3.10.3.1 Travel distance view The travel distance is displayed in metres, kilometres, yards, or miles. The travel distance is shown on the top row of the display. GUID-EA131A29-8DD9-4071-9222-733D924CBBD3 1. -
Page 147: Clock
3. Operation GUID-3260AC5B-C12A-4EF0-A29E-41A57501D54E 1. Front power take-off speed The PTO rotation speed is shown beside the symbol with an accuracy of 10 rpm. 3.10.3.4 Clock The clock is displayed on the bottom row, either in 12-hour or 24-hour mode. GUID-025B37DE-FB40-4B12-B2F1-F6290E50C5BF 1. -
Page 148: Periodical Maintenance View
When the tool symbol and periodical maintenance hour number are lit on the display, the appropriate service work has to be carried out by an authorised Valtra workshop. If this work is not carried out, the tool symbol and periodical maintenance hour number are displayed for 10 seconds whenever the power is turned on. -
Page 149: Resetting Views
3. Operation GUID-7FE84A6E-6AB2-4C76-9299-36C70282C5F1 1. Periodical maintenance view 2. Agroline instrument panel display change-over switch 1. Press down the Agroline instrument panel display change-over switch side opposite to the symbol. 2. Simultaneously turn the power on. The periodical maintenance view has been cleared and will illuminate again when the next service interval has been reached. -
Page 150: Changing Parameters
3. Operation 3.10.6 Changing parameters 3.10.6.1 Activating and exiting the setting mode You must activate the setting mode to change the different settings. GUID-B400A8E6-2B79-40EA-ADF9-00C4E557179E 1. Agroline instrument panel display setting switch 1. Activate the setting mode. With the power switched on and the clock function selected, press and hold down the symbol side of the display setting switch for more than three seconds, until the display is in the setting mode (in 12 or 24 hours display).. -
Page 151: Resetting Time
3. Operation 1. Activate the backlight level in the setting mode. The backlights of the instrument panel will flash few times. 2. Select the right level. Press the opposite side to the symbol of the change over switch. 3.10.6.3 Resetting time GUID-8FBE23BA-C283-4292-B934-67E93DE3D0B9 1. -
Page 152: Changing The Agroline Tyre Parameters For Different Tyres
3. Operation 3.10.6.5 Changing the Agroline tyre parameters for different tyres GUID-2AA5E878-726E-4E9D-B9FF-E9165874E014 1. Tyre parameter code 1. Activate the tyre parameters in the setting mode. The letter m starts to flash. 2. Select the right code number. Press the opposite side to the symbol of the change over switch.By keeping the opposite side to the symbol of the of the change over switch pressed down the numbers change continuously.The code number value can vary between 100–400. -
Page 153: Power Shuttle Section
3. Operation 3.11.1 Power shuttle section GUID-DFD2DDCA-F1BA-4712-81DC-9B359F3D1536 1. Tractor symbol 2. Forward direction arrow 3. Reverse direction arrow 4. Transmission neutral symbol 5. Parking brake symbol 6. Preprogrammed Powershift gear symbol 7. Preprogrammed driving direction symbol Tractor symbol The tractor symbol is shown continuously when the power is on. Forward direction arrow The forward driving direction arrow is shown when forward driving direction is engaged. -
Page 154: Transmission Section
3. Operation Preprogrammed Powershift gear symbol The preprogrammed Powershift gear symbol (1, 2, or 3) flashes if there is preprogrammed Powershift gears and the power shuttle lever is in P or N position. When the forward driving direction is selected the preprogrammed Powershift gear symbol for reverse driving direction (1, 2, or 3) is shown. -
Page 155: General Information Section
3. Operation Automatic traction control symbol The automatic traction control symbol blinks when automatic traction control is activated. The symbol is displayed continuously when the desired direction has been reselected. Creeper speed range symbol The creeper speed range symbol blinks when the creeper speed range is being engaged. -
Page 156: Changing General Information Section Views
3. Operation • In the basic mode view, the tractor symbol and the current driving speed are shown if the tractor is moving. In the fixed view, they are shown continuously. The accuracy of the driving speed view is described in the following table. Driving speed Accuracy 0.0-9.9... -
Page 157: Rear Linkage
3. Operation 1. Select a view by pressing the view selection switch. The views are organised in the following order: basic mode, rear power take- off speed, front power take-off speed (if the tractor is equipped with the front power take-off), outdoor temperature, driving speed, time, AdBlue level. •... -
Page 158: Diagnose Light
3. Operation 3.12.1 Diagnose light When the tractor power is turned on, the diagnose light is lit for a moment, goes out and is lit again. The lit diagnose light indicates that the linkage has not been activated. GUID-0C39C0DB-07EE-4F45-8E6A-6B8CC1772846 1. Diagnose light IMPORTANT: Contact your dealer if the diagnostic light is flashing (the service code is displayed on the tractor terminal). -
Page 159: Using The Lift/Stop/Lower Switch
3. Operation 1. Press the lift/stop/lower switch rapidly two times to either of its extreme positions. Linkage activation requires two rapid presses of the lift/stop/lower switch for safety. Depending on the current position of the linkage, the latter of the presses defines the direction of the linkage movement to be activated. -
Page 160: Using The Linkage Floating Position
3. Operation NOTE: The position of the lower links can be displayed on the instrument panel display in the rear lower links' position view. GUID-4B4694FB-BCDD-477D-987D-42FF263605E1 1. Position control knob 2. Lift/stop/lower switch • To lift the lower links, turn the knob clockwise. •... -
Page 161: Using The Lift/Lower Switch And Lift/Lower Push Buttons
3. Operation IMPORTANT: Use the floating position when working with implements following the ground surface, otherwise the implement may be damaged. • To activate the floating position, turn the position control knob anti-clockwise to its extreme position (0). The lower links can now move freely up and down following the movements of the implement. -
Page 162: Lift/Lower Indicator Lights
3. Operation • To stop the movement of the linkage, release the lift/lower switch to the centre position or release the mudguard push button. The linkage has to be activated again every time the lift/lower switch has been used. 3.12.7 Lift/lower indicator lights The indicator lights indicate when the lower links are moving. -
Page 163: Limiting The Lifting Height
3. Operation 3.12.9 Limiting the lifting height The height limit is a useful feature, for example, when there is a risk that the implement could hit the cab or when using the power take-off (PTO) driven implements to prevent the PTO shaft from being damaged. IMPORTANT: The lifting height limitation must be used when using power take- off (PTO) powered implements to prevent the PTO shaft from being damaged. -
Page 164: Activating And Deactivating The Draft Control
3. Operation NOTE: The position of the lower links can be displayed on the instrument panel display in the rear lower links' position view. 3.12.11 Activating and deactivating the draft control GUID-D7E2700D-627D-44A6-9552-7FC2C4293637 1. Draft control selector • To activate the draft control, turn the draft control selector from position P to one of the eight levels. -
Page 165: Passing The Height Set By The Lifting Height Selector
3. Operation GUID-F503AC63-1F43-4572-B4F4-23592732D1BC 1. Lowering speed selector 2. Position control knob 3. Passing switch for position control knob 4. Lift/stop/lower switch 1. Set the lift/stop/lower switch to the lower (Autocontrol) position. 2. Press down the passing switch for position control knob. The lower links pass the limit set by the position control knob. -
Page 166: Using The Drive Balance Control
3. Operation GUID-474FAD8E-FF51-4B02-8A2E-8611D866FD7C 1. Lifting height selector 2. Passing switch for position control knob 3. Lift/stop/lower switch 1. Turn the lifting height selector to the MAX position. 2. Set the lift/stop/lower switch to the lift (transport) position. 3. Press down the passing switch for position control knob. The lower links pass the limit set by the lifting height selector. -
Page 167: Slip Control
3. Operation GUID-7290BCFF-5BCC-455D-905B-9DCDBAC0D0B9 1. Slip limit position 2. Drive balance position 3. Drive balance control selector 4. Drive balance control light 5. Lift/stop/lower switch 1. To activate the drive balance control, turn the drive balance control selector to the drive balance position. The drive balance control light is lit when the balance control is activated. -
Page 168: Using The Slip Control
3. Operation 3.12.16 Using the slip control You can use the slip control when the draft control selector is in the draft control area. GUID-35CA544E-9324-4564-B620-41037E583B78 1. Draft control selector 2. Drive balance control and slip control position 3. Slip limit position 4. -
Page 169: Three-Point Linkage
3. Operation 3.13 Three-point linkage STOP GUID-36CA3C97-D005-47B2-A8E9-575EBE5D3D14 1. Top link 2. Lifting link 3. Levelling gear 4. Check links 5. Hydraulic levelling ram (extra equipment) 6. Lower links The tractors are supplied with category 3 ball hitch lower links. WARNING: Ensure that the telescopic lower links lock correctly when implement is fitted. -
Page 170: Attaching Implements
3. Operation 3.13.1 Attaching implements DANGER: Always use the lift/lower switch when attaching or releasing implements. WARNING: When attaching or releasing an implement, support the implement to prevent it from falling. IMPORTANT: When using the hydraulic top link, ensure that it operates normally when you are attaching an implement. -
Page 171: Using Quick Couplings For Lower Links
3. Operation 2. Press the lift/lower switch to lift or lower the lower links. You can use the lift/lower push buttons on the mudguards also to lift or lower the lower links. The lower links lift as long as you press the symbol side of the lift/lower switch and lower as long as you press the switch side opposite to the symbol side of the lift/lower switch. -
Page 172: Setting The Release Cable For Lower Link Quick Couplings
3. Operation 1. Pull the lever to release the implement. GUID-B34D35B4-E0CE-4463-B721-C6B3DB17C240 2. You can leave the lock open by pulling the lever backwards (for example when demounting an implement). GUID-56C9DF34-89D5-4D27-9623-1EDC391238A8 3. Release the lock by pulling the lever forward. GUID-6BE1B613-7FB8-4BED-8071-6BBBAEFF057C The ball joints lock automatically when attaching the implement. - Page 173 3. Operation GUID-12DD1F53-CCDB-44B1-BE5F-F3C6DD58B55F 1. Release cable 2. Socket bracket 3. Loop on the lifting link 4. Quick coupling lock 1. Fasten the release cable to the socket bracket on the cab rear wall. 2. Pass the release cable through the loop on the lifting link. 3.
-
Page 174: Adjusting Lifting Links
3. Operation 3.13.3 Adjusting lifting links IMPORTANT: When adjusting the lifting links, make sure that they do not hit the tractor. GUID-DDA838C1-6B23-40E7-A263-B6EB1216A494 1. Adjust the linkage in to the position that there is no load on the lifting links. 2. Lift up the levelling screws and turn them in the required direction to adjust the length of the lifting links. -
Page 175: Adjusting Check Links
3. Operation 2. Attach the lifting links to the lower links. Different holes give different lifting ranges and lifting power for the lower links. When the tractor is equipped with heavy duty (HD) three-point linkage (lifting cylinder diameter 110 mm) there are only two holes on the lifting links. You can attach the carrier pin to the lower links in two different positions. -
Page 176: Automatic Check Links
3. Operation GUID-483E0119-D7B1-46B1-BD12-B8C10832EC05 1. Screw 1. Unscrew the screws. 2. Change the position of the check links' support. The position should be the same on both sides of the tractor. 3. Tighten all screws. 3.13.6 Automatic check links The automatic check links are used to limit the distance between the lower links. The automatic check links are extra equipment. - Page 177 3. Operation 2. Turn up the link. GUID-5544ECF6-E0D3-494E-ABB3-4801D2E7C410 1. Link 3. Lift up the turning handle. GUID-27DAF850-6E21-4D33-8448-AB0744D008C5 1. Turning handle 4. Adjust the length of the check link by turning the handle. IMPORTANT: If you shorten the right lifting link, check that the side limiter does not hit the tractor when the lifting link is raised to maximum height.
-
Page 178: Adjusting Pin-Adjustable Check Links
3. Operation 3.13.6.2 Adjusting pin-adjustable check links GUID-E4F4874B-2E1E-4964-A436-5A9582FC62A9 1. Locking pin 1. Pull out the locking pin. 2. Adjust the length of the check link. 3. Put the locking pin back to lock the length of the link. 3.13.6.3 Using the floating position of automatic check links GUID-0F9605D1-A348-47F5-8DFC-73A0939162EE 1. -
Page 179: Auxiliary Hydraulics
3. Operation • Lower the implement to working position to allow floating. • Lift the implement to transport position to lock the check links. 3.14 Auxiliary hydraulics GUID-142F2FE4-E54C-491B-BDCB-ADFC702F4371 1. Rear valve 2 2. Rear valve 1 3. Rear valve 4 (extra equipment) 4. -
Page 180: Controlling The Auxiliary Hydraulics Rear Valves
3. Operation Valve Positions 2/1-acting Out - hold - in 2 acting Out - floating - in 2 acting Out - hold - in - floating 2 acting Out - hold - in - position lock As extra equipment two electrically controlled adjustable valves for the front loader use can be fitted to the front side. - Page 181 3. Operation • To use the position lock: To use the position lock the tractor needs to be equipped with the valve that has position lock. • Push the control lever for the auxiliary hydraulics rear valve 3 or the control lever for the auxiliary hydraulics rear valve 4 to the extreme position to activate the position lock.
-
Page 182: Setting Valves For Single-Action Or Double-Action
3. Operation 3.14.2 Setting valves for single-action or double-action You can set a valve either for single-action or double-action if the valve has a valve adjustment knob. The valve adjustment knob is located under the valve. GUID-B8F91C97-43F2-4ED1-8112-0CAEA6694271 1. Valve adjustment knob •... -
Page 183: Connecting An External Hydraulic Motor To The Auxiliary Hydraulics
3. Operation 7. Attach or release the quick-action couplings. DANGER: When connecting auxiliary cylinders and hydraulic motors, ensure that the hoses are attached to the correct couplings. If you attache the hoses incorrectly, the functions are reversed. IMPORTANT: Use only couplings that comply to the standards. IMPORTANT: Clean the quick-action couplings thoroughly before attaching any auxiliary hydraulic equipment. - Page 184 3. Operation GUID-C7472AC4-7CCD-4221-B0EA-9457CE8BBC56 1. Control lever for auxiliary hydraulics rear valve 3 If the front linkage is connected to the auxiliary hydraulics front valves, you can control it by the joystick on the armrest. GUID-3DF8A0C8-41AA-4110-962D-485864042D77 1. Front loader hydraulics on/off switch 2.
-
Page 185: Setting Front Linkage Lifting Link Positions
3. Operation • If the implement follows the ground, use the floating position to carefully lower down the implement: IMPORTANT: Always use the floating position for implements following the ground contour. Otherwise there is a risk that the implement may get damaged or the traction for the front wheels may be lost. -
Page 186: Using The Valtra Front Loader
(extra equipment) have to be switched on. 3.16 Using the Valtra front loader WARNING: Check that all screws are tightened before using the front loader. WARNING: Always look at the implement. Objects can fall or roll backwards onto the driver when the loader is raised. - Page 187 3. Operation NOTE: Install the Valtra front loader according to the instructions in the Valtra loader Operator's Manual. If you want to install any other front loader, contact your local technical support. IMPORTANT: It is not recommended to attach the front loader to the valves with the timer function.
-
Page 188: Using The Valtra Quick Front Loader Coupling Plate
3. Operation 3.16.1 Using the Valtra Quick front loader coupling plate The quick coupling plate is extra equipment. GUID-8CB773BC-EC42-4B12-8AD5-5DBE5EAB2A6E 1. Hose multicoupler 2. Lock button 3. Lever CAUTION: Hold on to the lever firmly as the pressure may cause the coupler to hit your hand. -
Page 189: Locking The Equipment
3. Operation pressure accumulators even out the pressure peaks coming from the load on the loader. This makes driving smoother and the stress on the loader and tractor is reduced. You can keep Softdrive connected during most working activities. It is recommended that you disconnect Softdrive only if special precision is required. -
Page 190: Using The Continuous Floating Position
3. Operation 3.16.4 Using the continuous floating position Continuous floating position is useful for example when using sweeping implement or area plough. When using continuous floating position the joystick push buttons are for use of the extra valves and equipment locking. The continuous floating position has to be activated every time the power has been turned on. -
Page 191: Using The Floating Position With Joystick Buttons
3. Operation 3. Deactivate the continuous floating position: • Press the continuous floating position activation switch side opposite to the symbol. • Press the front loader hydraulics on/off switch side opposite to the symbol. • Turn the ignition key to the stop position. •... -
Page 192: Controlling The Extra Cylinder With The Change Valve
3. Operation 3. Turn on the floating position. • Press down the lower push button on the joystick. • Simultaneously move the joystick forward or rearward. When the floating position is in use the floating position indicator light is lit. IMPORTANT: Always use the floating position for implements following the ground contour. -
Page 193: Power Take-Off
3. Operation 3.17 Power take-off 3.17.1 Attaching implements to the power take-off Before attaching implements to the tractor power take-off (PTO), make sure the implement is designed for the used PTO speed (540 rpm or 1 000 rpm). CAUTION: Observe all safety precautions in any operation involving implements driven by the power take-off (PTO). - Page 194 3. Operation GUID-D381CC58-1E06-49BB-8F80-32FBB58821E1 1. Cover IMPORTANT: Make sure that the angles of the joint of the joint shaft are not exceeded. IMPORTANT: Do not exceed the maximum output durability of the PTO pin. WARNING: If the tractor engine stops for example due to overloading when using the PTO, turn the power off before restarting.
-
Page 195: Rear Power Take-Off
3. Operation • In freezing weather, ensure that the transmission oil and hydraulic oil are warm before engaging the PTO. Before engaging the PTO in freezing weather: • let the engine run for a few minutes to warm up the transmission oil •... -
Page 196: Recommended Rear Power Take-Off Shafts
3. Operation GUID-4958FCFB-0B02-4AE3-A231-8C8F0D00D3C3 1. Rear PTO on/off push button (extra equipment) Sigma Power The Sigma Power control system gives extra power for PTO work. When required for PTO work, the engine will automatically provide up to 30 hp more power. The Sigma Power activates automatically when the power transferred through the PTO rises high enough. -
Page 197: Activating Rear Power Take-Off
3. Operation The ISO norm does not limit the power of a 540 rpm 6-spline PTO shaft with a diameter of 1⅜” (35 mm). NOTE: For power over 67 hp (50 kW), use a 1 000 rpm output to ensure durability of the PTO shafts. -
Page 198: Starting Rear Power Take-Off
3. Operation • Select the PTO speed with the control lever. The tractor has one of the following PTO speed range alternatives: PTO speed ranges Lever position Function 540/1 000 PTO 540 activated Centre PTO deactivated PTO 1000 activated 1000 1 000/540E PTO 1000 activated 1000... -
Page 199: Stopping Rear Power Take-Off Temporarily
3. Operation • To start the rear PTO with the PTO switch: • Activate the standby mode by setting the rear PTO switch to the standby (centre) position. • Start the rear PTO by pressing down the symbol side of the PTO switch and releasing it. -
Page 200: Deactivating Rear Power Take-Off
3. Operation WARNING: When you do not need the power take-off (PTO), keep the PTO switch in off position. WARNING: Use the power take-off (PTO) speed control lever for the actual disengagement and engagement of the PTO. For example, when leaving the cab, move the lever to the centre position, except when using the PTO on/off push button on the mudguard (extra equipment). -
Page 201: Stopping The Rear Power Take-Off In Emergency
3. Operation • Press down the side of the rear PTO switch opposite to the symbol. GUID-135DF10F-1DC4-4E6B-A81C-6FF0F38FCCCD 1. Switch for rear PTO • Move the PTO speed control lever to the centre position (PTO deactivated). GUID-42E2DC1E-4E1E-4204-97B4-63C8E189C279 1. Rear PTO speed 540 2. -
Page 202: Using The Rear Power Take-Off Automatic Stop
3. Operation STOP STOP GUID-4A7A6F82-ED2C-4C80-A9EB-F55C8B38EDD8 1. PTO emergency stop socket • To stop the PTO from inside the cab, push the speed control lever for rear power take-off (PTO) towards the side panel to deactivate the PTO. • To restart the PTO: •... -
Page 203: Proportional Ground Speed Power Take-Off
3. Operation • To activate the PTO automatic stop, press the symbol side of the rear PTO automatic stop switch down to the AUTO position. The PTO disengages when the linkage is raised into the transport position and the 3 second delay time has passed. The PTO does not re-engage even though the linkage is lowered. -
Page 204: Adjusting The Rear Power Take-Off Engagement
3. Operation IMPORTANT: If the power-take off (PTO) is activated and the PTO speed exceeds 1 800 rpm, the buzzer alarm goes off and the warning light (exclamation mark) on the instrument panel is lit. Should this occur, immediately decrease the rpm to prevent damage to the rotating parts of the PTO. - Page 205 3. Operation 3. Press the pre-programming push button, depress the clutch pedal and turn the ignition on at the same time. GUID-A50D523E-B207-4B9A-A6C0-5A2F20FFB750 The setting menu symbols (D) appear on the display. The first two bars are lit to indicate that the parameter number is shown on the bottom row. 4.
-
Page 206: Front Power Take-Off
3. Operation 5. Press the Powershift pre-programming button. GUID-9EB34E62-7AEA-4FF1-B593-4A85D8843710 The last two bars are lit to indicate that the parameter value is shown on the bottom row. 6. Change the parameter value by pressing Powershift push buttons. 7. Press the Powershift pre-programming button to save the value. You can discard the changes by pressing the HiShift push button. -
Page 207: Activating And Deactivating Front Power Take-Off
3. Operation overheating. The cooling system is equipped with a relief valve inside the housing for cold conditions. GUID-A230586F-7BE6-4132-A410-5CFF6C71F633 IMPORTANT: The front power take-off (PTO) shaft's nominal rotating speed is 1 000 rpm and the rotating direction is to the left viewed from the front. Check that the implement is compatible before attaching. -
Page 208: Implement Signal Connection
3. Operation 3.18 Implement signal connection The implement signal connection complies with the ISO 11786 standard. The implement signal connection is extra equipment. The implement signal connection is situated in the lower part of the right-hand side pillar in the cab. GUID-3B93B1D4-E8C3-4598-B171-BE6DB92730AA 1. -
Page 209: Resetting The Implement Signal Connection
1. Stop the tractor. 2. Turn off the power. 3. Turn on the power. 4. Start the tractor. 5. If the light continues to blink, contact an authorised Valtra workshop. 3.19 Valtra ISOBUS The Valtra ISOBUS implement control system (extra equipment) fulfils the requirements of class 1. - Page 210 4. ISOBUS terminal connector 5. Implement signal connection 6. ISOBUS implement connector, the front connector is extra equipment. The Valtra ISOBUS controls the electric power of the system and the data transfer between the tractor and the implement. This data includes: •...
-
Page 211: Isobus Implement Connector
3. Operation • Distance based on information of the radar • Distance based on tyre rotation • Driving direction based on the power shuttle lever position • Front linkage and front PTO • Front PTO speed • Front PTO engagement 3.19.1 ISOBUS implement connector The ISOBUS implement connector is part of the ISOBUS implement control... -
Page 212: Bus Extension Connectors
3. Operation GUID-6E07E5DC-9779-45C6-B12C-678AF3E33BA3 1. Not in use 2. CAN L 3. Not in use 4. CAN H 5. Not in use 6. Power supply for terminating bias circuit (TBC PWR) 7. Power supply for electronic control unit (ECU PWR) 8. Ground for terminating bias circuit (TBC GND) 9. -
Page 213: Resetting The Isobus Connection
1. Indicator light for ISOBUS connection 1. Stop the tractor. 2. Turn off the power. 3. Turn on the power. 4. Start the tractor. 5. If the light continues to blink, contact an authorised Valtra workshop. 3.20 Towing devices 3.20.1 Pick-up hitch 3.20.1.1... -
Page 214: Unlatching The Pick-Up Hitch Equipped With Hydraulic Unlatching System
3. Operation GUID-C1F3A3A5-C9B2-40D5-B43A-70589B7D6027 1. Lift/lower switch 2. Hitch latch lever 1. Press the symbol side of the lift/lower switch to fully raise the linkage. 2. Pull the hitch latch lever to unlatch the hitch. Keep the lever pulled up. 3. Press the switch side opposite to the symbol side of the lift/lower switch to lower the linkage. - Page 215 3. Operation GUID-3951B793-8011-47F1-8F6A-E74887EC0912 1. Lifting height selector 2. Draft control selector 3. Pick-up hitch latch releasing switch 4. Lift/stop/lower switch 5. Passing switch for the position control knob 6. Position control knob 1. Set the lifting height selector to max position. 2.
-
Page 216: Latching The Pick-Up Hitch
3. Operation 3.20.1.3 Latching the pick-up hitch These instructions apply to both the Nordic pick-up hitch (extra equipment) and the Euro pick-up hitch (extra equipment) but not to the hydraulically extended Euro pick-up hitch (extra equipment). The instructions apply also to both the mechanical and the hydraulic (extra equipment) pick-up hitch unlatching systems. -
Page 217: Agricultural Drawbar Devices
3. Operation 1. Reverse the tractor up to the trailer/implement. 2. Align the pick-up hitch hook or drawbar pin to the eye of the trailer/implement beam. 3. Press the symbol side of the lift/lower switch to raise the linkage fully up until the hitch latches. -
Page 218: Towing Device Frames
3. Operation • Adjustable to four different distances from the power take-off (PTO) shaft. • In all positions, the drawbar can also be adjusted ±12.5° and ±25° laterally. Light agricultural towing device: • Only available for the trailer hitch. • Adjustable to two different distances from the PTO shaft. -
Page 219: Adjusting The Jaw Height
3. Operation 3.20.3.1 Adjusting the jaw height The height of mechanical and automatic jaws is adjusted in the same way. WARNING: You cannot change the jaw height if the lever is broken or dirty. The jaw must be locked and secured every time the height is changed. -
Page 220: Attaching To The Mechanical Jaw
3. Operation 3.20.3.2 Attaching to the mechanical jaw You can attach a trailer to the mechanical jaw using the coupling lever. GUID-24CCFE2A-AFFA-49EA-9BF2-F810A30DA7AE 1. Ring 2. Coupling lever • Pull up the ring at the top of the coupling lever to lift up the towing pin. WARNING: After attaching the trailer, check that the pulling pin is completely down and locked. - Page 221 3. Operation GUID-90B7436B-F0FA-487B-931D-B5F086BEEC95 1. Towing pin locking lever 2. Towing pin opening lever 1. Lift the towing pin up. To lift the pin, turn the opening lever to the upper position. 2. Attach the trailer to the coupling. When the draw eye reaches the bottom of the draw gap, the towing pin automatically goes down.
-
Page 222: Euro Pick-Up Hitch
3. Operation 3.20.4 Euro pick-up hitch The Euro pick-up hitch can be mounted instead of the standard pick-up hitch. The Euro pick-up hitch is extra equipment. WARNING: Do not exceed the maximum tyre loadings when attaching towing devices.Check axle tyre loadings given in technical specifications in this manual. - Page 223 3. Operation GUID-C383B9AE-1A3A-494E-83CC-24E14388FD7B 1. Bracket - 222 -...
-
Page 224: Euro Pick-Up Hitch With Hydraulic Extension
3. Operation 3.20.5 Euro pick-up hitch with hydraulic extension The Euro pick-up hitch with the hydraulic extension is otherwise similar to the Euro pick-up hitch, but you can move it hydraulically in longitudinal direction. 3.20.5.1 Unlatching the hydraulically extended Euro pick-up hitch GUID-3951B793-8011-47F1-8F6A-E74887EC0912 1. -
Page 225: Extending The Euro Pick-Up Hitch
3. Operation 6. Keep the pick-up hitch latch releasing switch pressed down, and press down the symbol side of the lift/stop/lower switch. NOTE: Make sure that the linkage is activated (the diagnose light is not lit). The linkage lowers below the latching point (to the position set by the position control knob). -
Page 226: Latching The Hydraulically Extended Euro Pick-Up Hitch
3. Operation GUID-2F046060-977C-4317-BB0F-49B36F4ACF23 1. Operating lever for auxiliary hydraulic valve 2 • Extend the towing device. Pull the lever of valve 2. • Retract the towing device. Push the lever of valve 2. 3.20.5.3 Latching the hydraulically extended Euro pick-up hitch WARNING: When attaching any implements, check that the drawbar eye engages the trailer hook correctly. - Page 227 3. Operation GUID-BCAA2B28-5D82-4E97-B443-173E1C3B3B9C 1. Lift/lower switch 2. Pick-up hitch latch releasing switch 1. Reverse the tractor up to the pick-up. 2. Align the pick-up hitch hook or drawbar pin to the eye of trailer/implement beam. 3. Press the opposite side to the symbol of the lift/lower switch to raise the linkage fully up until the hitch latches.
-
Page 228: Changing The Pick-Up Hitch Or Drawbar
3. Operation 5. Push the auxiliary hydraulic valve lever for valve 2 to retract the hydraulic extension. The hydraulic extension locks, you can hear a click when the hitch latches in longitudinal direction. 6. Ensure that the towing device extension is locked. Push and pull the auxiliary hydraulic valve lever for valve 2 several times to ensure that the hydraulic extension is fully locked and does not extend. - Page 229 3. Operation 1. Lower down and extend the towing device. 2. Raise the towing device to the locking position. 3. Unscrew the lock washer screws. 4. Remove the lock washer. 5. Remove the rearmost locking pin by pushing. GUID-7F4E8D3B-EDE7-4BF6-B601-720A5E6C65CC 1. Locking pins 6.
-
Page 230: Air Pressure System
3. Operation 3.21 Air pressure system You can get pressurised air (8 bar) for external purposes, for example for filling tyres, from the air pressure system (extra equipment). GUID-D693A76C-B461-4940-82A2-67961561B6B1 1. Pressurised air quick coupling You can also get compressed air from the air pressure coupling by turning it as far as it goes. - Page 231 3. Operation GUID-7FD85F7E-9697-4C5D-866B-8C15C4B7E65E 1. Air pressure system pressure gauge WARNING: The pressure of the air pressure system must be at its maximum, about 7-8 bar, before driving a tractor with a trailer equipped with air pressure brakes. When the ambient temperature is below +5°C, the antifreeze container must be filled with antifreeze liquid containing lubricant.
-
Page 232: Trailer
3. Operation 3.22 Trailer Several factors affect the compatibility of a trailer. The type of trailer that can be connected to the tractor depends, among other things, on: • The braking power of the tractor. • Whether the trailer has brakes. •... -
Page 233: Trailer Fluid Brake Valve
3. Operation GUID-36373947-19C0-41B7-BCA3-1FFFA3D3B654 1. Pressurised air quick coupling 2. Trailer coupling Duo-Matic WARNING: When the tractor is towing a trailer, lock the brake pedals together when driving on the road. When pressing one brake pedal only, the brake action of the trailer is smaller. WARNING: The pressure of the air pressure system must be at its maximum, about 7-8 bar, before driving a tractor with a trailer equipped with air pressure brakes. - Page 234 3. Operation WARNING: When the tractor is towing a trailer, the brake pedals must be locked together. The trailer brakes do not operate if only one of the brake pedals is pressed. WARNING: The trailer brakes do not work when using the parking brake. WARNING: When the engine is not running, the trailer brakes do not work.
-
Page 235: Maintenance
The periodical maintenance from 50 hours onwards can also be ordered from the authorised workshop. In that case the periodical maintenance is carried out by Valtra authorised and trained service personnel. Yearly maintenance The yearly maintenance schedule is suitable for tractors which have under 1000 running hours in a year. -
Page 236: Performing Maintenance Tasks
4. Maintenance • Change of oil in differential • Change of oil in hubs Other points The inspection contains the following services as well: • Lubrication according to maintenance chart • Road test of the tractor During the road test all the functions of the controls and instruments are checked. -
Page 237: Cleaning The Tractor
4. Maintenance • Use proper gloves and other protection for the noxious chemicals. Fuel, lubricating oil and coolant cause irritation to the skin if they are in contact with it for long periods. • Dispose the waste oil, liquid waste, oil filters and batteries properly and handle them carefully. -
Page 238: Cleaning The Engine Compartment
4. Maintenance 4.3.1.1 Cleaning the engine compartment Keep the engine surface clean to avoid the risk of fire. NOTE: Protect the environment by following the environmental regulations. The washing place must have a separator outlet when using detergents. • Let the engine cool down for a few minutes before washing. IMPORTANT: To avoid the risk of fire, do not wash the engine when it is hot. -
Page 239: Greasing Lubricating Points Fitted With Grease Nipples
4. Maintenance • Wipe the stains by using a detergent or plenty of water. The coated parts of the windows withstand different detergents well. NOTE: Do not use abrasive detergents and do not rub the windows dry. • Do not use the window wiper on a dry window. Ensure that there is enough fluid in the washer reservoir. - Page 240 4. Maintenance • The tractor must be supported from the correct support points on the frame. GUID-67E02C57-3917-4056-8734-732BF2A89683 1. Main support point 2. Secondary support point. GUID-6FD683A8-D181-44AA-B3D2-F11C172A6F79 1. Main support point 2. Secondary support point. - 239 -...
-
Page 241: Recommended Fuel And Lubricants
4. Maintenance Recommended fuel and lubricants 4.4.1 Fuel Make sure the correct fuel is used. The properties of light fuel oil that is only intended for heating do not meet the requirements of modern diesel engines, and cannot be used as fuel. The high pressure pump of the Common Rail system requires the fuel to have sufficient lubricity, because it does not have separate oil lubrication. -
Page 242: Biodiesel Fuel
4. Maintenance • Use the original container for storage. • Keep the container properly closed and in a cool, well-ventilated area. NOTE: The freezing temperature of the AdBlue/DEF is -11 °C. • Keep the container away from heat and direct sunlight. If AdBlue/DEF is stored at high temperatures, the solution may crystallise and release an ammonia odour. -
Page 243: Calsium Lf - Nlgi2 Calsium Grease Lf
4. Maintenance 4.4.2.2 Calsium LF - NLGI2 calsium grease LF Use the Calsium LF grease for greasing points exposed to water. Calsium LF is a long-fibre, high-quality, calcium-based universal grease for vehicle use. Calsium LF: • is suitable for greasing all heavy machines •... -
Page 244: Storing The Tractor For A Period Longer Than Two Months
4. Maintenance 4.5.2 Storing the tractor for a period longer than two months When storing the tractor for a period longer than two months, perform the following maintenance. • Clean, wash and lubricate the tractor. • Make sure that the coolant contains enough anti-corrosion liquid. •... -
Page 245: Periodical Maintenance
4. Maintenance • Check the pressure of the tyres. • Start the engine without racing it. • Test-run the tractor. 4.6.2 Running the tractor in after a storing period longer than two months You must run the tractor in after a storing period longer than two months. •... -
Page 246: Periodical Maintenance Chart
4. Maintenance The periodical maintenance view shows when you must perform the tractor service. NOTE: When the periodical maintenance view is shown on the display, the service work has to be carried out before the view is cleared. NOTE: Clean the tractor before maintenance. 4.7.1 Periodical maintenance chart You must follow the service intervals in the periodical maintenance chart. - Page 247 4. Maintenance Maintenance check point 10 h 50 h 500 h 1000 h 2000 h Check the belts' tightness. ● ● ● ● Check the fuel system prefilter and sediment bowl. ● ● ● ● Check the electrolyte level in the battery. ●...
-
Page 248: Daily Maintenance
4. Maintenance 4.7.2 Daily maintenance 4.7.2.1 Checking the engine oil level Check the engine oil level regularly. The engine oil level must be checked when the oil has cooled off and has had time to run down to the bottom of the oil sump. GUID-E4DDC903-7F23-42B7-AE6F-DE5B64866366 1. -
Page 249: Checking The Oil Level In The Transmission System
4. Maintenance 4.7.2.2 Checking the oil level in the transmission system Check the oil level in the transmission system periodically. Steering and transmission share the same oil system. GUID-744FEE18-66F6-4C3A-AF6B-4DADF2F462F5 1. Filler hole 2. Dipstick 3. Drain plug 4. Oil filter 1. -
Page 250: Checking The Coolant Level
4. Maintenance 4.7.2.3 Checking the coolant level Check the coolant level regularly. NOTE: Drain the cooling system completely every second year and refill it with new coolant. GUID-1FA47604-4411-4F60-AF11-C36696BA9D21 1. Expansion tank 2. Cold fluid level sign 1. Stop the engine and let it stand for a few minutes. The checking must be made when the fluid is cold. -
Page 251: Cleaning Radiators
4. Maintenance 4.7.2.4 Cleaning radiators Clean all the radiator honeycombs regularly. GUID-0FAF4386-F532-4F11-BB9A-195D55D71F0B 1. Engine coolant radiator 2. Engine intake air cooler 3. Air conditioning cooler (extra equipment) 4. Front power take-off (PTO) oil cooler (extra equipment) 5. Fuel cooler 6. Transmission oil cooler, in cleaning position 1. -
Page 252: Checking The Adblue/Def Tank Level
4. Maintenance 5. Close the engine cover. 4.7.2.5 Checking the AdBlue/DEF tank level NOTE: When the AdBlue level decreases to 5% or less, the torque and maximum rotation speed of the engine is slowly decreased. NOTE: When the AdBlue level decreases to approximately 0%, the torque and maximum rotation speed of the engine is slowly decreased. -
Page 253: Weekly Maintenance
4. Maintenance 4.7.3 Weekly maintenance 4.7.3.1 Greasing the three-point linkage Grease the three-point linkage regularly. NOTE: Use Universal Grease for greasing. 1. Grease the levelling screws. There are two grease nipples. 2. Grease the top link. There are two grease nipples. 3. -
Page 254: Greasing The Pick-Up Hitch
4. Maintenance 4.7.3.3 Greasing the pick-up hitch Grease the pick-up hitch periodically. NOTE: Use Universal Grease for greasing. • Apply grease to the grease nipples. GUID-4619475F-35DD-4555-9A83-4A4AC24C5953 1. Grease nipple 4.7.3.4 Maintaining the front linkage Check the front linkage periodically. • Check regularly that all screws and nuts are tight. -
Page 255: Checking The Front Power Take-Off
4. Maintenance • Tighten all screws and nuts of the front linkage after the first 15-25 running hours. • Check that the hydraulic connections have no leaks. • Grease the lifting cylinder pins and the lifting links shaft with Universal Grease every 50 hours. -
Page 256: Greasing The Brake Cam
4. Maintenance 4.7.3.6 Greasing the brake cam Use Calsium LF grease when greasing the brake cam. STOP GUID-D72414A3-ABC1-4CFB-B33A-9DCDC2B16F70 1. Grease nipple 2. Sliding surfaces 1. Grease the nipples on both sides of the brake cam. 2. Grease the sliding surface on the brake mechanism. 4.7.3.7 Greasing front axle mounting bearings You must grease the front axle mounting bearings regularly. -
Page 257: Greasing Air-Suspended Front Axle Mounting Bearings
4. Maintenance 4.7.3.8 Greasing air-suspended front axle mounting bearings Grease the air-suspended front axle mounting bearings regularly. GUID-F0E33177-526E-472E-8E2E-924A12D86F72 1. Front axle bearing grease nipples 1. Frequently check that all screws and nuts are tight. 2. Grease the nipples of the front axle mounting with Universal Grease . If the front axle is equipped with a transfer set of nipples (extra equipment), the nipples are on the left side of the tractor. -
Page 258: Greasing Flexible Front Mudguards
4. Maintenance 4.7.3.9 Greasing flexible front mudguards Grease the turning mechanism regularly with Calsium LF grease. GUID-2668F8E7-90B1-4FE2-B062-E93E8206C7F2 1. Turning mechanism 1. To aid the maintenance, turn the mudguards from the rear edge by pulling them sidewards. 2. Grease the turning mechanism regularly with Calsium LF grease. 4.7.3.10 Checking belts' tension Check the belts' tension regularly. -
Page 259: Changing The Fan And Air Pressure Compressor Belt
4. Maintenance 4.7.3.11 Changing the fan and air pressure compressor belt Change the belt if needed. GUID-93CAB70E-6E32-47B9-A9A5-9D0A7B11456E 1. Fan and air pressure compressor belt 2. Alternator and air conditioning compressor (extra equipment) belt 1. Remove the old belt by cutting. 2. - Page 260 4. Maintenance 3. Loosen the front PTO clutch hub screws. GUID-D08D2B4C-3C09-4EAC-A4C4-456BD6EF5201 1. Front PTO rubber clutch hub screw 4. Move the front PTO clutch forward a bit. GUID-058A4478-8261-47E3-BB60-29689EB8EA4F 1. Key 2. Front PTO clutch - 259 -...
-
Page 261: Changing The Alternator And Air Conditioning Compressor Belt
1. Fan and air pressure compressor belt 2. Alternator and air conditioning compressor (extra equipment) belt Changing the alternator and air conditioning compressor belt requires special tools. Contact an authorised Valtra workshop in case this belt needs to be changed. - 260 -... -
Page 262: Checking The Fuel System Prefilter And Sediment Bowl
4. Maintenance 4.7.3.13 Checking the fuel system prefilter and sediment bowl Check the fuel system prefilter and sediment bowl regularly. IMPORTANT: Water in the injection system destroys the system in a very short time. Always service the water trap and filters according to the specified amount of running hours. -
Page 263: Checking The Electrolyte Level In The Battery
4. Maintenance 4.7.3.14 Checking the electrolyte level in the battery Check the electrolyte level in the battery regularly. WARNING: Be careful with the battery solution.It is corrosive. As default the battery is placed under the steps. 1. Open the lock for the battery casing. GUID-462D3065-05C5-4028-8CBD-A237F2E612BA 1. -
Page 264: Checking The Tyre Pressure
4. Maintenance 6. Top up with distilled water, if required. IMPORTANT: During the cold season it is important that the engine is allowed to run for a while after topping up with distilled water, otherwise the water may freeze before it has had time to mix with the battery acid. WARNING: Under no circumstances should you attempt to replenish the battery acid yourself. -
Page 265: Windscreen Washer Fluid Reservoir
4. Maintenance 4.7.3.18 Windscreen washer fluid reservoir GUID-6A98458F-BC39-43F0-A5CF-2B98E4483A71 1. Washer fluid reservoir The washer fluid reservoir for the front and rear window is common.The rear window washer is extra equipment. NOTE: Check the amount of fluid weekly. When the temperature is under 0° C, use an anti-freeze agent in the fluid. - Page 266 4. Maintenance GUID-744FEE18-66F6-4C3A-AF6B-4DADF2F462F5 1. Filler hole 2. Dipstick 3. Drain plug 4. Oil filter DANGER: 1. Check that the tractor is standing on level ground. 2. Stop the engine and let it stand for a few minutes. 3. Remove the drain plug from the engine sump. 4.
-
Page 267: Checking The Engine Breathing System
4. Maintenance 4.7.4.3 Checking the engine breathing system Check the engine breathing system periodically. GUID-29C122E3-0320-4BF0-A857-7C7907D5A523 1. Ventilation hole • Check that the ventilation hole is not blocked. 4.7.4.4 Cleaning the cab ventilation air filter Clean the cab ventilation air filter periodically. WARNING: The air filter element does not remove chemicals from the outside air. -
Page 268: Checking The Brake Pedal Free Travel
4. Maintenance GUID-A3BD895F-8759-43F0-9780-CA19C820A36A 1. Air filter housing 2. Ventilation air filter 1. Remove the air filter housing from the upper left-hand corner of the cab roof. • Pull down from the handle. • Turn the handle counterclockwise. The turning direction is instructed on the handle. 2. -
Page 269: Adjusting Brake Pedals' Travel
4. Maintenance 1. Check the free travel of the brake pedal. On model T133 H, the free travel must be 70-80 mm when the pedals are latched together. On models T153 H - T193 H (boosted system), the free travel must be 35-45 mm when the pedals are latched together. -
Page 270: Checking The Parking Brake
4. Maintenance 6. Check that the pedal free travel is the same on both wheels. The pedal free travel must be ca. 35-45 mm. 7. Check the free travel on the rear brake pedal. The reverse drive control system is extra equipment. The pedal free travel must be ca. - Page 271 4. Maintenance 4. Pull the cable clearance to the end of the cable. STOP STOP GUID-4D9BE4F6-2A03-486A-BC39-42E57D61D24D 1. Cable 2. Clearance 3. Adjusting nut 4. Locking nut 5. Open the locking nut. 6. Adjust the clearance through the adjusting nut so that it is 1-2 mm. 7.
-
Page 272: Changing Transmission Oil Filters
4. Maintenance 4.7.4.9 Changing transmission oil filters Change the transmission oil filters regularly. GUID-E5C679C1-1514-49E3-ADE2-69FC501C9E9A 1. Low pressure filter of the transmission system 2. Transmission lubrication filter 1. Fit a suitable container under the filter. 2. Clean the filter housing and the surrounding area. 3. -
Page 273: Changing Hydraulic System Oil Filters
4. Maintenance 4.7.4.10 Changing hydraulic system oil filters Change the hydraulic system oil filters periodically. GUID-752A371E-F306-4A30-B6C2-60F70615CF9A 1. Pressure filter of the hydraulic system Oil filters are located on the right side of the tractor under the cab. The return oil filter is labelled with the text HYD on the mounting piece on top of it. -
Page 274: Checking The Oil Level In The Front Axle Differential
4. Maintenance 4.7.4.11 Checking the oil level in the front axle differential Check the oil level in the front axle differential periodically. Agricultural front axle: GUID-1E1BFB91-91C6-41CE-95BB-CE5CE00E6AFE 1. Inspection hole Industrial front axle: GUID-4753D85A-F9BB-49C3-9BCE-DAD0300F66BC 1. Inspection hole 1. Check that the oil is in level with the inspection hole. 2. -
Page 275: Checking The Oil Level In Front Axle Hubs
4. Maintenance 4.7.4.12 Checking the oil level in front axle hubs Check the oil level in the front axle hubs periodically. GUID-7598191B-540A-4E2E-8FA1-93BD16C2B4B9 1. Oil surface indicator line 1. Turn the wheel until the oil surface indicator line is horizontal. 2. Check that the oil surface is in level with the hole. 3. -
Page 276: Changing Front Pto Housing Oil And Washing Oil Filter
4. Maintenance 4.7.4.13 Changing front PTO housing oil and washing oil filter Change the oil of the front power take-off (PTO) housing and wash the oil filter regularly. GUID-D3B6982A-BBCD-457E-B92A-B002A05CF282 1. End plate 2. Lock ring 3. O-ring 4. Filter 5. Oil level hole 6. -
Page 277: Checking Front Pto Rubber Couplings
4. Maintenance 4.7.4.14 Checking front PTO rubber couplings Check the front power take-off (PTO) rubber couplings regularly. GUID-E577BC15-1B7A-4883-8D63-3E90E473D0D3 1. Rubber clutch pieces 2. Rubber coupling • Check the rubber coupling for tears. • Change the rubber coupling when needed. It is recommended to let an authorised workshop change the coupling. If you change the coupling yourself, when mounting the rubber clutch, make sure that the pieces are straight. -
Page 278: Adjusting Engine Valves
6. If the valves do not operate properly after cleaning, replace them with new ones. 4.7.4.17 Adjusting engine valves Contact an authorised Valtra workshop for the engine valve adjustment. NOTE: The engine valves must be adjusted after 500 operating hours. After the first adjustment, adjust the valves every 1 000 hours. - Page 279 4. Maintenance 1. Run the tractor, and raise and lower the hydraulic lift (or e.g. the front loader) until the oil is a little warm. 2. Lower the hydraulic lift (also the front lift). 3. Remove the drain plug under the housing. GUID-D6AD728D-8265-4740-8A3F-5360721C8631 1.
-
Page 280: Changing Oil In The Front Axle Differential
4. Maintenance 7. Pull out the dipstick to check the oil level. GUID-BD5BA437-D746-4BBE-9B40-BDCE0CD082C2 1. Hydraulic oil dipstick The dipstick is located in the front gearbox housing on the left. Make sure that after refilling, the oil level is between the minimum and maximum marks. 8. -
Page 281: Changing Oil In The Front Axle Hubs
4. Maintenance GUID-874BE334-3980-4131-A119-15C6FF648AA0 1. Drain plug 2. Inspection hole 1. Unscrew the drain plug. 2. Drain the oil into a suitable container. 3. Clean the plug and refit it. 4. Fill new oil through the inspection hole up to the level of the hole. 4.7.5.3 Changing oil in the front axle hubs Change oil in the front axle hubs periodically. -
Page 282: Changing The Cab Ventilation Air Filter
4. Maintenance 4.7.5.4 Changing the cab ventilation air filter Change the cab ventilation air filter periodically. GUID-A3BD895F-8759-43F0-9780-CA19C820A36A 1. Air filter housing 2. Ventilation air filter 1. Remove the air filter housing from the upper left-hand corner of the cab roof. 2. -
Page 283: Changing The Recirculation Filter
4.7.5.6 Changing the fuel filter Change the fuel filter periodically. Always use original Valtra fuel filters. IMPORTANT: Using other fuel filters than the original ones, even for a short period of time, may cause lower performance and expensive damages. IMPORTANT: When using over 5 % Biodiesel, change the fuel filter every 500 hours. -
Page 284: Changing The Fuel Prefilter
4.7.5.7 Changing the fuel prefilter Change the fuel prefilter periodically. Always use original Valtra fuel filters. IMPORTANT: Using other fuel filters than the original ones, even for a short period of time, may cause lower performance and expensive damages. - 283 -... - Page 285 4. Maintenance GUID-B85A5E24-EF90-425D-B2A0-E2CD828639B9 1. Fuel prefilter 2. Water detector 1. Clean the filter and its surroundings. 2. Disconnect the water detector wire. 3. Place a suitable container under the filter. IMPORTANT: Do not drain fuel on the ground! 4. Remove the filter. IMPORTANT: Unscrew the filter by hand, do not use a filter wrench.
-
Page 286: Changing Engine Air Filters
4. Maintenance 4.7.5.8 Changing engine air filters Change the main air filter and the safety filter periodically. 1. Open the cover of the air filter housing. GUID-3E33AEE3-D2E9-4FF5-AE4F-14F98DB50A61 1. Cover tightening nut 2. Ejector pipe The cover of the air filter housing is locked with one nut in the centre. 2. - Page 287 4. Maintenance 3. Remove the safety filter. GUID-5726279C-8E9E-4E45-8514-B9FC80251915 1. Safety filter 2. Safety filter tightening nut The safety filter is locked with one nut in the centre. IMPORTANT: Take the utmost care when removing the safety filter so that no dirt enters the induction pipe. NOTE: Do not clean the safety filter.
-
Page 288: Changing The Selective Catalytic Reduction System Supply Module Main Filter
4. Maintenance 4.7.5.9 Changing the selective catalytic reduction system supply module main filter 1. Remove the locking pin. GUID-462D3065-05C5-4028-8CBD-A237F2E612BA 1. Locking pin 2. Turn the steps down. 3. Unscrew the battery holders. GUID-E5E74F1E-7992-471A-9694-EC91A2E24278 1. Battery holder 4. Disconnect the battery leads. Disconnect the negative lead first. - Page 289 4. Maintenance 6. Remove the rubber cover. GUID-2407DF18-0EFB-4D97-A262-CC24856C03E6 1. Rubber cover 7. Clean the filter cover and its surroundings. 8. Remove the filter cover. Use 27 mm wrench. 9. Pull out the filter parts. GUID-E6DEB0E6-D7D6-47A4-80A8-5744627599A7 1. Filter 2. Equalizing element 3.
-
Page 290: Greasing The Flywheel Ring Gear
4. Maintenance 15. Fit the locking pin. CAUTION: Always fit the locking pin. 4.7.5.10 Greasing the flywheel ring gear Grease the flywheel ring gear periodically. GUID-95A332D9-083A-4D8E-A910-F2A2E634432B 1. Shield plug of the grease hole 1. Remove the shield plug of the grease hole on the clutch housing. The grease hole is located on the left-hand side of the clutch housing. -
Page 291: Adjusting Toe-In Of Front Wheels
4. Maintenance 4.7.5.12 Adjusting toe-in of front wheels Adjust the toe-in of the front wheels if needed. Before you adjust the toe-in, check that there is no free play in the ball joints of the steering arms and tie rod. NOTE: In order not to limit the steering movement, both tie rods must be adjusted. -
Page 292: Checking The Power Shuttle Operation
3. Tighten the breather by hand. 4.7.5.14 Checking the power shuttle operation Contact an authorised Valtra workshop for checking of the power shuttle operation. NOTE: Checking of the power shuttle operation must be done after 1 000 operating hours. 4.7.5.15 Tightening frame nuts and bolts Tighten the frame nuts and bolts periodically. - Page 293 4. Maintenance 2. Remove the drain plugs under the gearbox and final drives. GUID-6B0DFDCB-F4C4-4FE2-B52F-BFD7451DB03A 1. Final drives drain plugs 2. Gearbox drain plug 3. Drain the oil into a suitable container. 4. Clean and refit the plugs. 5. Clean the suction strainer. 6.
-
Page 294: Cleaning The Suction Strainer
4. Maintenance 9. Check that the oil level is between the marks. 10. Start the engine and check the oil level. 4.7.6.2 Cleaning the suction strainer Drain the oil from the transmission. GUID-DD716079-A81F-42D4-BE09-38D441883771 1. Suction strainer cover 2. Suction strainer 1. -
Page 295: Changing Oil In Brake System
4. Maintenance GUID-97415CE8-E1A3-469C-BB1F-617CADD9E6DE 1. Breather 1. Unscrew the old breather. 2. Lubricate the seal on the new breather. 3. Tighten the breather by hand. 4.7.6.4 Changing oil in brake system The brake system uses the same oil as the transmission system. The oil in the brake circuits is not changed when changing the transmission oil. -
Page 296: Bleeding The Brake System
4. Maintenance 4.7.6.5 Bleeding the brake system STOP STOP GUID-29CE4F75-F283-4A0F-8C44-B25F0F52DAF1 1. Bleeding nipples of the trailer air pressure brakes Both brake pedal circuits of the trailer air pressure brakes (extra equipment), right and left, have their own bleeding nipple. The control valve is situated on the right side under the cab on the air pressure reservoir. -
Page 297: Changing Oil In The Front Axle Brake System
4. Maintenance The nipple of the tractor fluid brake valve of the trailer (extra equipment) is also placed on the bleed plate on top of the left axle housing. 1. Start the tractor and let it run for ca. three minutes. This ensures that the oil from the pump is completely free from air. -
Page 298: Cleaning The Cooling System
4. Maintenance 4. Open the bleeding nipples. There is one bleeding nipple on both sides. GUID-556CB2D9-69CC-419C-AAE0-E47D46D443F1 1. Bleeding nipple 5. Put a hose from both bleeding nipples to containers. 6. Pump the brake pedals until there are no air bubbles in the oil. The oil has been changed when about 0.2 litres has come out from each side. - Page 299 4. Maintenance 3. Connect a hose from the radiator draining cock to a clean container and open the plug. GUID-B50878C6-B198-4EA5-9AB7-3AE75D7EA33C 1. Radiator draining cock 4. Open the drain cock on the cylinder block and open the drain plug on the oil cooler.
- Page 300 4. Maintenance 10. Close the drain plug of the oil cooler. 11. Loosen the hose placed between the thermostat housing and expansion tank. GUID-F779F6A0-0D85-49E0-8CB5-BB4E1DC26E39 1. Hose 12. Check that the restrictor hole (Ø about 2 mm) in the union is open. 13.
-
Page 301: Checking The Engine Vibration Damper
4.7.6.8 Checking the engine vibration damper Contact an authorised Valtra workshop for checking of the engine vibration damper. The outer circumference of the vibration damper (belt pulley) can twist in relation to the hub. For this reason, alignment marks have been added to the damper front face, which indicate the possible twisting. -
Page 302: Checks And Adjustments
Do not weld near the air conditioning system as poisonous gas may be released. The maximum permissible environmental temperature for the refrigerant pipes is 80°C. • If the air conditioning is not functioning properly, contact an authorised Valtra workshop for checking of the system. Checks and adjustments 4.8.1... -
Page 303: Setting The Tyre Parameter
4. Maintenance 4.8.1.1 Setting the tyre parameter You can adjust the tyre parameter according to your preferences through the A- pillar display settings. The index determines the instrument calibration of the tyres. The value range is between 700…1000. NOTE: If tyres of different dimensions are fitted to the tractor after delivery, the tyre parameter must be reset. - Page 304 4. Maintenance 4. Press the Powershift push buttons to select the parameter to be changed. GUID-15319FF0-E018-4091-A7C3-D840178007E3 The parameter number for the tyre parameter is 0001. 5. Press the Powershift pre-programming button. GUID-403237A4-1330-47F5-8C7D-4B445B47E3FC The last two bars are lit to indicate that the parameter value is shown on the bottom row.
-
Page 305: Tyre Parameters
4. Maintenance 4.8.1.2 Tyre parameters The following table defines the tyre parameters for the Proline instrument panel display. Tyre Parameter value 520/70R38 520/85R38 20.8R38 540/65R38 580/70R38 600/65R38 650/60R38 650/65R38 480/80R42 520/85R42 20.8R42 650/65R42 620/70R42 270/95R48 540/80R38 IND 650/65R42 IND 600/65-34 FOR 18.4-38/14 FOR 20.8-38/14 FOR 600/65R38 FOR... - Page 306 4. Maintenance Tyre Parameter value for T133 Parameter value for T133 H, with 40 km/h H, with 50 km/h 18.4-34/14 FOR 18.4-34/14 IND 18.4-34/8 N 18.4-34/ IND 18.4-38/14 FOR 18.4-38/14 IND 18.4-38/ FI 18.4R-34/8 GY 18.4R-34/8 M 18.4R-34/8 N 18.4R38 TA 18.4R-38/14 M 18.4R-38/8 GY 18.4R-38/ M...
- Page 307 4. Maintenance Tyre Parameter value for T133 Parameter value for T133 H, with 40 km/h H, with 50 km/h 600/65R34 TA 600/65R38 CON 600/65R38 GY 600/65R38 IND 600/65-34 FOR 600/65R-34/ M 600/65R-38/ M 620/70R42 KleberSuper9L 620/75R-30/ M 650/60R38 M (XEOBIB) 650/65R38 NO 650/65R38 CON 650/65R38 FOR...
- Page 308 4. Maintenance Tyre Parameter value for T173 Parameter value for T153 H-193 H, with 40 km/h H, and for T173 H-T193 H with 50 km/h 18.4R38 TA 18.4R-38/14 M 18.4R-38/8 GY 18.4R-38/ M 20.8R38 GY 20.8R38 IND 20.8R38 TA 20.8R-38/8 M 20.8R-38/ M 20.8R42 230/95R48 TA...
-
Page 309: Track Widths
4. Maintenance Tyre Parameter value for T173 Parameter value for T153 H-193 H, with 40 km/h H, and for T173 H-T193 H with 50 km/h 650/65R38 FOR 650/65R38 GY 650/65R38 M 650/65R42 650/75R38 680/75R32 M 4.8.2 Track widths The track width is measured between the middle of the tyres. If needed, adjust the track widths. -
Page 310: Industrial Front Axle Track Widths
4. Maintenance 520/60R28, 1 930 1 835 1 735 1 640 1 530 540/65R28 230/95R36 2 102 2 002 1 980 1 880 1 702 1 602 1 580 1 504 4.8.2.2 Industrial front axle track widths The industrial front axle track widths (in mm) are listed in the following table. 420/70R28 2 130 2 026... -
Page 311: Rear Axle Track Widths
4. Maintenance 4.8.2.3 Rear axle track widths The rear axle track widths (in mm) are listed in the following table. 18.4R38, 2 012 1 910 1 808 1 714 1 612 460/85R38 20.8R38, 2 012 1 910 1 808 1 714 520/70R38, 520/85R38, 480/80R42... -
Page 312: Using Twin-Mounted Wheels
4. Maintenance 4.8.4 Using twin-mounted wheels Twin-mounted wheels can be used for decreasing the surface pressure, but not for obtaining better side support. 1. Multiply the loading by 1.76 of the permissible load on one wheel. IMPORTANT: Do not exceed the maximum permitted axle loading even if the tyres allow a heavier load. -
Page 313: Electrical System
4. Maintenance 3. Pump fuel with the hand pump. Continue the pumping until there are no air bubbles in the fuel stream. 4. Remove the hose and close the bleeding plug. 5. Clean the engine of eventual overspill fuel. 6. Start the engine. The fuel system removes automatically the air left in the system. -
Page 314: Alternator
4. Maintenance • Clean the pole studs, the cable terminals and the battery retainer thoroughly. Wash off oxidised spots with water. Wipe the outside of the battery when it is clean, and coat the pole studs and the cable terminals with petroleum jelly. •... -
Page 315: Fuses And Relays In The Electric Centre
4. Maintenance 4.8.6.6 Fuses and relays in the electric centre The fuses and relays in the electric centre in the lower part of the dashboard are listed in the following tables. The fuse diagram is placed inside the fuse box. There is space for spare fuses. The electric centre in the lower part of the dashboard contains 49 fuses and the nominal current rating of these fuses is 5-30 A. - Page 316 4. Maintenance Fuse Nominal current Description TC1 (VP3), F/N/R/P-lever Transmission sensors 3-pole current socket, VMT Cruise switches Reserve Instrumentation Transmission sensors Parking ensure Twin-Trac, front PTO, front and cabin suspension Radio, electrical mirrors, handsfree, rear wiper/washer Seat, rear steering prevent Reserve Light switch 3-pole current socket...
-
Page 317: Fuses And Relays For The Urea Component
4. Maintenance Relay Description Auxiliary relay, +15 Waist working lights, front Auxiliary relay, +15 Rear working lights Direction indicator Intermittent control relay, front 4.8.6.7 Fuses and relays for the urea component The fuse diagram is placed inside the fuse box. There is space for spare fuses. GUID-FEF087D8-8D9F-416B-8C1F-DBEC2B27E05C Fuse Nominal current... -
Page 318: Engine Induction Air Preheater Fuse
4. Maintenance Relay Description DEF heater CTRL (DNOX supply module) DEF heater CTRL (pressure line) DEF heater CTRL (return line) DEF heater CTRL (suction line) DEF & DNOX heating main relay EEM supply 4.8.6.8 Engine induction air preheater fuse GUID-A32A693C-4CED-445C-BF82-4B8585484AF0 1. -
Page 319: Adjusting Headlights
4. Maintenance 4.8.6.10 Adjusting headlights It is important that the headlights are correctly adjusted when running on public roads. Before you adjust the headlights, make sure that the tractor load is normal and tyre pressure is correct. GUID-FA7656D1-1F35-4FF1-A2D4-B46F0F66CA39 1. Distance between headlight centres 2. -
Page 320: Power Transmission System
4. Maintenance 4.8.7 Power transmission system 4.8.7.1 Changing the rear power take-off shaft Change the rear power take-off (PTO) shaft when needed. IMPORTANT: Never run the tractor without the power take-off (PTO) shaft. GUID-7CC294BF-5FCC-460D-8987-E374E84E5E42 1. Inner circlip 1. Remove the inner circlip and the space ring. 2. -
Page 321: Steering System
4. Maintenance 4. Drive the tractor together with the trailer slowly forwards. Ask two people to count simultaneously how many revolutions the tractor and the trailer shaft each make. Stop counting when the tractor shaft has made 100 revolutions. 5. Compare the figures for the tractor and trailer shafts. •... -
Page 322: Cab And Shields
4. Maintenance 4.8.9 Cab and shields 4.8.9.1 Adjusting the steps for driving off-road 1. On the right side, remove the pin and the locking screw. GUID-DB19E68D-1D88-4208-8B93-F34933AC682F 1. Pin 2. Locking screw 2. Turn the right side step fully up and lock it in this position with the pin. GUID-FDE04FAF-3CC4-4129-A7DD-7E59F34649C2 1. -
Page 323: Limiting The Door Opening
4. Maintenance 3. On the left side, remove the lowest step completely by unscrewing three screws. GUID-B9481B13-0E49-4E2C-B31D-C63A3AE341A7 1. Screws 4.8.9.2 Limiting the door opening Limit the door opening when on twin wheels. GUID-26E5254C-769C-4408-B110-7BC1F79E3562 1. Gas spring 2. Fastening holes • Check that the door does not come in contact with the wheels when mounting twin wheels. -
Page 324: Adjusting Flexible Front Mudguards
4. Maintenance 4.8.9.4 Adjusting flexible front mudguards Adjust the flexible front mudguards, if needed. GUID-6576D9D9-86FC-4F2E-B464-354C8376A3D8 1. Fixing screws 2. Turning mechanism 3. Stoppers The front mudguards are adjusted correctly at the factory. With the fixing screws the pretension (15°) is adjusted for the mudguards to prevent vibration when driving straight. -
Page 325: Hydraulic System
4. Maintenance 4.8.10 Hydraulic system 4.8.10.1 Adjusting lifting links of the pick-up hitch Adjust the lifting links of the pick-up hitch if needed. The lifting height selector must be in the maximum position when the towing hook is unloaded. GUID-8943DED7-C904-4D18-A712-E6C09A107602 The lifting links must always have a certain amount of clearance when the rear linkage is in its upper position. -
Page 326: Maintaining The Automatic Jaw Of The Wagon Towing Device
This ensures that the grease spreads evenly to the desired surfaces. IMPORTANT: If the jaw is rusty, for example due to the fertiliser, do not use a rust-loosening agent for removing the rust but take it to an authorised Valtra workshop. -
Page 327: Faults And Remedial Actions
NOTE: If the book symbol starts flashing, contact avoided while the service code is displayed. an authorised Valtra workshop, even if the error • If the service code is not listed in the table, does not prevent driving the tractor. -
Page 328: Cleaning The Main Engine Air Filter
5. Faults and remedial actions Indicator light Indication Ʃ-indicator light (on model T193 H) The light is lit continuously (yellow) when the tractor is operating in the higher power range and using PTO. Parking brake indicator light If the light is lit and the STOP light is flashing, the parking brake cable is broken or incorrectly adjusted. -
Page 329: Identifying A Blocked Transmission Or Hydraulic System Filter
5. Faults and remedial actions IMPORTANT: The safety filter behind the main engine air filter must not be cleaned but must always be changed according to the maintenance schedule. The purpose of the safety filter is to prevent damage to the engine if the main engine air filter fails. - Page 330 5. Faults and remedial actions GUID-809DAC4C-E367-4CBD-BDE6-54B340ED071E 1. Low pressure filter of the transmission system 2. Transmission lubrication filter 3. Pressure filter of the hydraulic system Oil filters are located on the right side of the tractor under the cab. The return oil filter is labelled with the text HYD on the mounting piece on top of it.
-
Page 331: Warning Symbols On The Proline Instrument Panel Display
5. Faults and remedial actions Warning symbols on the Proline instrument panel display 5.3.1 Low fuel pressure warning GUID-1FE7B6E7-41BC-4B54-B124-5818B2DCEFE5 1. Instrument panel display 2. Proline instrument panel display setting switch This message gives information about the pressure drop of the fuel before the running faults appear. -
Page 332: Power Take-Off Speed Warning
5. Faults and remedial actions When the transmission speed or the engine speed has fallen low enough, the buzzer and exclamation mark go out and the display returns to the previously selected state. 5.3.3 Power take-off speed warning The power take-off (PTO) speed warning is shown on the instrument panel display when the ground speed PTO is engaged and the PTO speed rises above 1800 rpm. -
Page 333: Fuel Level Sensor Short Circuit Warning
When the fuel level sensor open circuit warning appears on the instrument panel display, the exclamation mark is lit also. If the warning appears on the display, contact an authorised Valtra workshop. To clear the display, press the side of the Proline instrument panel display setting switch opposite to the symbol. -
Page 334: Service Codes
5. Faults and remedial actions 3. The service codes start to scroll on the display in four parts. For example, the code 000091-13-035 is displayed in the following order. GUID-0F74E701-8C1D-4B75-9582-6E71A1A07DA6 • 0000 • 0091 • 0013 • 0035 The service code order number shows which code is currently scrolling on the display. - Page 335 5. Faults and remedial actions Service codes Error meaning/measures 000003 — 14— 000 Error in the fuel system. Engine output and speed will be reduced. • Check that there is an adequate amount of fuel in the tank. • Check that the fuel filter is not clogged or frozen. •...
- Page 336 5. Faults and remedial actions Service codes Error meaning/measures 000102 — 18 — 000 The engine boost pressure is too low. The engine runs but the malfunction has to be examined as soon as possible to avoid engine damage. • Check that the air filter is clean (see the warning light for blocked filter on the instrument panel).
- Page 337 5. Faults and remedial actions Service codes Error meaning/measures 000157 — 15 — 000 There is an error in the fuel system. The engine output and speed is limited. 000157 — 16 — 000 000157 — 17 — 000 • Switch power off for a moment and restart the engine.
- Page 338 5. Faults and remedial actions Service codes Error meaning/measures 000974 — 03 — 000 There is an error in the throttle pedal for the reverse drive controls. The engine only runs at low idling speed. 000974 — 04 — 000 1.
- Page 339 5. Faults and remedial actions Service codes Error meaning/measures 003363 — 03 — 000 There is an error in the exhaust SCR after-treatment system. Clear the reason for problem as soon as possible to avoid greater damage 003363 — 04 — 000 and blockages in the system.
- Page 340 5. Faults and remedial actions Service codes Error meaning/measures 004360 — 02 — 000 There is an error in the exhaust SCR after-treatment system. Engine output will be reduced after a while. 004360 — 03 — 000 Clear the reason for problem and stop driving the tractor as soon as possible. 004360 —...
-
Page 341: Steering System Malfunctions
5. Faults and remedial actions Service codes Error meaning/measures 521001 — 03 — 000 There is an error in the exhaust SCR after-treatment system. Clear the reason for problem as soon as possible to avoid greater damage 521001 — 04 — 000 and blockages in the system. -
Page 342: Towing The Tractor When The Engine Is Not Running
5. Faults and remedial actions 5.7.2 Towing the tractor when the engine is not running IMPORTANT: Avoid towing when the engine is not running, because the gearbox lubrication does not function. 1. Set the range gear lever to the neutral position. 2. -
Page 343: Technical Specifications
6. Technical specifications Technical specifications Dimensions Dimensions T133 H T153 H T173 H T193 H With front tyres 16.9R28 460/85R30 460/85R30 460/85R30 With rear tyres 20.8R38 20.8R42 20.8R42 20.8R42 Length (mm) 5 148 5 148 5 148 5 148 Width (mm) 2 338 2 338 2 338... -
Page 344: Tyres
6. Technical specifications Tyres Rear Front 460/85R38 380/85R28 18.4R38 14.9R28 520/70R38 420/70R28 520/85R38 420/85R28 1) 2) 520/85R42 460/85R30 20.8R38 16.9R28 1) 2) 540 / 65R38 440 / 65R28 580/70R38 480/70R28 2) 3) 600/65R38 480/65R28 650/60R38 520/60R28 650/65R38 540/65R28 1) 2) 3) 480/80R42 16.9R28 520 / 85R42... -
Page 345: Wheel Nuts Tightening Torque
6. Technical specifications 6.4.1 Wheel nuts tightening torque Wheel nuts Tightening torque (Nm) Front Rear Rim - wheel disc (front and rear) 6.4.2 Wheel stud dimensions Agricultural front axle Industrial front axle Rear axle Stud dimension M20x1.5 M20x1.5 M20x1.5 Number of studs per side 6.4.3 Front axle tyre loadings and pressures NOTE: The permissible wheel load can reduce the maximum permissible axle load. -
Page 346: Rear Axle Tyre Loadings And Pressures
6. Technical specifications IMPORTANT: On 50 km/h models driving at a maximum speed, the tyre loading is smaller. For more information, refer to the tyre manufacturer’s catalogue. 6.4.4 Rear axle tyre loadings and pressures NOTE: The permissible wheel load can reduce the maximum permissible axle load. NOTE: The maximum permissible rear axle load is 9 000 kg. -
Page 347: Spacing For Wheel Discs
6. Technical specifications Spacing for wheel discs Front, agricultural front axle (mm) 1 800 Front, industrial front axle (mm) 1 900 Rear (mm) 1 750 Track widths 6.6.1 Rear track widths Tyres, adjustable discs Track widths (mm) 18.4R38, 460/85R38, 520/70R38, 520/85R38, 20.8R38, 480/80R42 1 714, 1 808 , 1 910, 2 012... -
Page 348: Engine
6. Technical specifications Tyres Industrial axle, track widths (mm) Adjustable discs 14.9R28, 380/85R28, 420/70R28 1 530, 1 626, 1 732, 1 830 , 1 928, 2 026, 2 130 16.9R28, 420/85R28, 480/65R28, 480/70R28 1 530, 1 626, 1 732, 1 830, 1 928 , 2 026 540/65R28 1 530, 1 626, 1 732, 1 830, 1 928... -
Page 349: Engine Lubrication System
100 kPa (1 bar) Oil pressure at normal working speed 250-400 kPa (2.5-4 bar) Oil filter Type Disposable type filter element Oil type Valtra grade Valtra Engine CR-4 SAE grade 10W-40: -25°C...+40°C API grade CJ-4 ACEA grade Oil volume When changing with filter 19 litres Viscosity grade should be selected depending on the temperature outside. -
Page 350: Selective Catalytic Reduction System
6. Technical specifications Injection system Common rail injection High pressure pump with electric injection control 6.7.3 Selective catalytic reduction system System type Bosch DENOXTRONIC 2.2 Fluid type DIN70070/ISO22241 certified AdBlue/DEF Tank capacity 23.5 litres 6.7.4 Air cleaner Air cleaner Two-stage, dry element, with blockage indicator Pre-cleaner system Ejector 6.7.5... -
Page 351: Power Transmission
• Powershift 3-step Forward gears Reverse gears Oil type Valtra grade Valtra Transmission XT60 (classification: Valtra G2-08) Valtra Transmission XT60+ (classification: Valtra G2– B10) API grade GL-4 Oil volume When changing with filter 65 litres 6.9.4 Rear axle differential lock... -
Page 352: Rear Power Take-Off
6 splines ISO 500 21 splines ISO 500 ISO 500 20 splines 6 splines ASAE (Valtra 1203) 8 splines GOST 3480-58 Standard 6.9.5.4 Lower link end distance from rear power take-off shaft The length of the Power take-off (PTO) shaft (T measure, mm) -
Page 353: Proportional Ground Speed
6. Technical specifications GUID-3A495A70-9F56-4273-8001-7254707A4C47 1. 224 mm 2. T measure 6.9.5.5 Proportional ground speed Model Power take-off (PTO) axle rpm/1 rear wheel rpm T133 H, 40 km/h 40.81 T153 H-T193 H, 40 km/h 41.03 T153 H-T193 H, 50 km/h 40.79 6.9.6 Front power take-off Oil type... -
Page 354: Steering System
6. Technical specifications Parking brake Operation • Electro-hydraulically controlled with power shuttle lever • Driving brakes engaging with spring, disengaging with hydraulic pressure • When the engine is not running, the parking brake is automatically applied Hydraulic brake valve for trailer brakes (extra equipment) Operation •... -
Page 355: Turning Circle Radius
SAE grade API grade Differential Valtra Axle LS 80W-90 GL-5 Hub reduction gears Valtra Axle or Valtra Axle Hub reduction gears, Valtra Axle LS front axle with brakes Oil volume when changing with filter Axle type Differential (liters) Hub reduction gears (liters) -
Page 356: Cab And Shields
6. Technical specifications 6.12 Cab and shields 6.12.1 Cab filter capacity > Ø 0.2 μm 45% Standard filter (dop test, 300 m > Ø 1 μm 45% > Ø 5 μm 95% > Ø 8 μm 100% > Ø 0.2µm 10% Active coal filter, cab (dop test, 300 m >... -
Page 357: Working Hydraulic Circuit
• Hydraulic lift • Auxiliary hydraulics • Trailer brake valve (extra equipment Oil type Valtra grade: Valtra Hydraulic 46 DIN-grade: DIN 51524-3 HVLP Valtra grade: Valtra Transmission XT60/XT60+ • Classification: Valtra G2-08/G2–B10 • API-grade: GL-4 Standard ISO 15380, class HEES Bio-oil Bio-oil can not be mixed with mineral oil. -
Page 358: Rear Linkage
6. Technical specifications 6.13.3 Rear linkage Maximum lifting force Lifting cylinder ø Lower link type The length of the lower links 81 kN 100 mm Category 3, quick 940 mm coupling grabs Function Linkage version ACD With electro-hydraulic lower link draft sensing Draft control mixing (position control/draft control mixing) Lowering speed, independent of load... -
Page 359: Front Linkage
6. Technical specifications 6.13.4 Front linkage Lifting force 35 kN Number of lifting cylinders Diameter of the lifting cylinders 90 mm Lifting range at the end of the lifting links 750 mm Quick coupling hooks Category 3/2 6.13.5 Towing devices 6.13.5.1 Pick-up hitch Maximum permissible vertical loading... -
Page 360: Towing Device Frames
6. Technical specifications GUID-D50A0E55-D7FA-40EA-8B5F-C4ABD9CFFF6E 1. 330 mm, 18 kN / 375 mm, 15 kN 2. 190 mm, 30 kN / 230 mm, 30 kN 3. 246 mm 4. 349 mm, 18 kN / 394 mm, 18 kN 5. 209 mm, 30 kN / 249 mm, 30 kN 6. -
Page 361: Euro Trailer Hitch
6. Technical specifications 6.13.5.4 Euro trailer hitch The horizontal distances of the pulling point from the power take-off (PTO) shaft and the maximum vertical loadings: GUID-181E62A8-760D-43B0-A292-B941C62386B9 1. 481 mm 2. 351 mm 3. 226 mm 4. 285 mm 5. 189 mm 6. - Page 362 6. Technical specifications GUID-E5534C17-5B27-4541-AD59-D07B832008C1 1. 335 mm 2. 200 mm 3. 30 kN 4. 10 kN 5. 250 mm 6.13.5.6 Drawbar eye Drawbar eye standard ISO 5692-1 or ISO 20019 - 361 -...
- Page 363 Alphabetical index automatic check links......175 adjusting........175 4WD (four-wheel drive)......121 using floating position....177 disengaging.........122 automatic jaw engaging........122 maintaining........325 automatic traction control......113 AdBlue/DEF using..........113 filling..........107 auxiliary hydraulics storing.........240 controlling valves......179 agricultural drawbar.......216 controls..........39 agricultural towing device return coupling......178 specifications.......358 setting valves for single-action Agroline instrument panel or double-action......181 components........26...
- Page 364 chains differential lock using..........310 disengaging.........120 check links engaging........120 adjusting........174 positions........120 cleaning dimensions..........342 engine compartment....237 wheel studs.........344 front axle suspension bellows..237 direction indicator buzzer lights..........14 activating........140 polycarbonate windows....237 direction indicators........75 quick couplings......14 display backlight level steps..........14 setting........138, 149 tractor........14, 236 display contrast clock mode adjusting........142 changing......140, 150...
- Page 365 (continued) (continued) engine oil front axle specifications.......348 number..........2 volume.........348 pressure........344 engine speed cruise control specifications.......353 programming.......110 tyre loading........344 setting..........110 front axle suspension engine vibration damper deactivating.........119 checking........300 front linkage environment controls..........36 protecting......236, 237 lifting link positions......184 equipment maintaining........253 alternative........1 specifications.......358 extra..........1 using..........182 errors...
- Page 366 Calsium LF........242 using..........160 Grease Moly........242 lift/stop/lower switch Valtra Grease......241 using..........158 lifting height limiting.........162 hazard statements........13 selector........162 headlights lifting links adjusting........318 adjusting......173, 324 switch..........71 lighter............86 using........71, 72 lights........71, 72, 73, 74, 76 heater limiting door opening......322 using..........77 linkage horn............75...
- Page 367 (continued) oil filters power take-off identifying blocked.......328 speed warning......331 oil level power transmission........248 turning off........66 operating turning on........66 practices........16 preparing for use........54 ordering Proline instrument panel service..........2 components........29 spare parts........2 Proline instrument panel display...125 other controls...........40 enlarging middle row....136 fixed views........30 resetting views......136 parameter setting mode selectable views......30...
- Page 368 (continued) replacing steering system main engine air filter....327 specifications.......353 parts..........14 steering wheel safety and information signs..13 adjusting........60 reverse drive controls steps maximum driving speed....125 adjusting for off-road driving..321 using..........124 storing tractor reverse drive system longer than two months....243 controls..........42 shorter than two months....242 using..........124 sun visor..........78 roof console...
- Page 369 transmission system........98 working time view........128 changing oil filters.......271 travel distance view.......134, 145 turning circle radius.......354 twin-mounted wheels......311 twin wheels limiting door opening....322 two-pin power socket......86, 88 type plate EEC..........2 tyre parameters........304 changing........151 tyre pressure checking........263 tyres changing........301 specifications.......343 tyre setting parameter......302 upper headlights switch..........72 using..........72...
- Page 370 Valtra Inc. FI-44200 Suolahti, Finland Tel. +358 20 45501 www.valtra.com Copyright © 2011 by Valtra Inc. All rights reserved. Ref no 39 867 21 1 (09/2012) Printed in Finland by Kopijyvä English...
Need help?
Do you have a question about the HiTech T3 Series and is the answer not in the manual?
Questions and answers