Sign In
Upload
Manuals
Brands
Valtra Manuals
Tractor
HiTech T3 Series
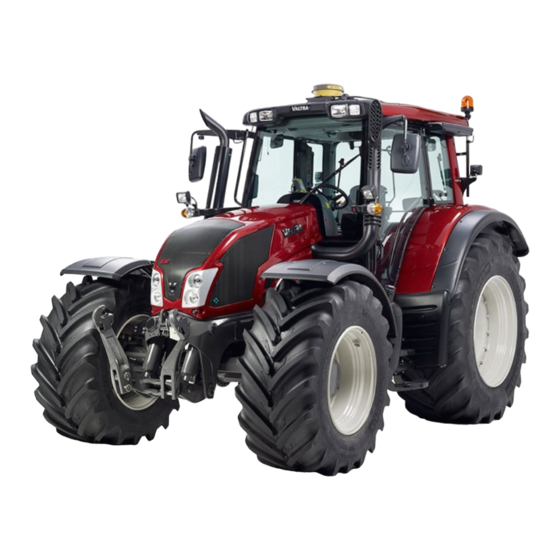
Valtra HiTech T3 Series Manuals
Manuals and User Guides for Valtra HiTech T3 Series. We have
2
Valtra HiTech T3 Series manuals available for free PDF download: Operator's Manual
Valtra HiTech T3 Series Operator's Manual (370 pages)
Brand:
Valtra
| Category:
Tractor
| Size: 24 MB
Table of Contents
About this Manual
2
Tractor Serial Numbers
3
Table of Contents
4
Safety Precautions
14
Hazard Statements
14
Safety Rules
14
Replacing Safety and Information Signs
14
Maintaining Hardware Safety
15
Using Tractor Safety Features
16
Safe Operation
17
Following Safe Operating Practices
17
Getting into and out of the Cab
19
Driving on Public Roads
19
Controlling the Driving Speed
20
Driving Downhill
20
Operating with Implements
21
Running with Power Take-Off Driven Implements or Machines
22
Using Ballast Weights
22
Towing
23
Ensuring Personal Safety of Other People
23
Fire Hazards
24
Handling Viton Seals Subjected to High Temperatures
24
After-Treatment System
24
Instruments and Controls
26
Pedals
26
Dashboard
26
Agroline Instrument Panel
27
Symbols on the Agroline Instrument Panel Display
27
Indicator Lights on the Left Side of the Display
28
Indicator Lights on the Right Side of the Display
29
Dashboard
30
Proline Instrument Panel
30
Symbols on the Proline Instrument Panel Display
31
Indicator Lights on the Left Side of the Display
32
Indicator Lights on the Right Side of the Display
33
Controls on the Right-Hand Side
35
Driving Controls
35
Linkage
37
Power Take-Off
38
Auxiliary Hydraulics
40
Other Controls
41
Controls on the Rear Side
42
Rear Window Opening Device
42
Reverse Drive System Controls
43
Controls on the Left-Hand Side
44
Controls on the Front Roof Console
45
Controls on the Right-Hand Side Roof Console
46
Controls on the Forest Equipment Right-Hand Side Roof Console
47
Controls on the Left-Hand Side Roof Console
47
Controls on the Forest Equipment Left-Hand Side Roof Console
48
Air Conditioning Controls
48
Manual Air Conditioning Controls
48
Automatic Air Conditioning Controls
49
Driver's Seat
50
Air Suspended Driver's Seat
51
Controls on the Rear Mudguard
52
Controls on the Bonnet
52
Rear Controls and Connections Outside the Cab
53
Engine Hood Locking
54
Operation
55
Running the Tractor in
55
Preparing for Use
55
Adjusting the Driver's Seat
55
Adjusting the Air-Suspended Driver's Seat
57
Adjusting the Armrest
60
Adjusting the Steering Wheel
61
Adjusting Standard Mirrors
62
Adjusting Optional Mirrors
62
Heating Mirrors
63
Using the Windscreen Wiper and Washer
63
Using the Rear Window Heater
63
Using the Rear Window Wiper
64
Using the Rear Window Washer
65
Power Shuttle Lever
65
Using the Main Switch
66
Control Stop
66
Using the Control Stop
67
Using the Ignition Switch
67
Using the Roof Hatch
69
Starting the Tractor
69
Starting under Normal Conditions
69
Starting under Cold Conditions
71
Starting with an Auxiliary Battery
72
Using Lights
72
Using Headlights
72
Using Upper Headlights
73
Using Working Lights
73
Using the Trailer Hitch Light
74
Using the Cab Light
75
Using Notification Devices
76
Using the Direction Indicators
76
Using the Horn
76
Using the Rotating Warning Light
77
Using Hazard Warning Flashers
77
Heating and Ventilation
78
Using the Heater
78
Controlling Ventilation Nozzles and Air Recirculation
79
Using the Manual Air Conditioning
80
Automatic Air Conditioning
81
Air Conditioning Control Panel
81
Activating Air Conditioning When the Battery Has Been Disconnected
82
Air Conditioning Control
82
Controlling the Fan
83
Automatic Air Conditioning System On/Off Button
84
Temperature View
84
Temperature Control
84
Defrosting
85
Selecting Air Recirculation
86
Power Outlets
87
Lighter
87
Using the Two-Pin Power Socket and Power Switch
87
Three-Pin Power Socket
88
Trailer Socket
89
Two-Pin Power Socket on the Bonnet
89
Driving the Tractor
90
Steering
90
Power Shuttle
90
Using the Power Shuttle Lever
91
Adjusting the Power Shuttle Engagement Speed
92
Using the Parking Brake
93
Using the Clutch Pedal
95
Adjusting the Clutch Pedal Engagement Position
95
Braking
97
Using the Emergency Brake
97
Starting to Drive
98
Transmission System
99
Speed Matching
100
Selecting the Range Gear
100
Selecting the Speed Gear
101
Using Powershift
101
Preprogramming Gear for Driving Direction Changing
102
Using the Shifting Automatics
104
Programming Shifting Automatics
105
Parking the Tractor
106
Refueling the Tractor
107
Filling the Fuel Tank
107
Filling the Adblue/Def Tank
108
Cruise Control
109
Cruise Control Switches
109
Programming the Driving Speed Cruise Control
110
Activating and Deactivating the Driving Speed Cruise Control
110
Programming the Engine Speed Cruise Control
111
Activating and Deactivating the Engine Speed Cruise Control
112
Decreasing the Cruise Control Setting
112
Increasing the Cruise Control Setting
113
Automatic Traction Control
114
Using the Automatic Traction Control
114
Front Axle Air Suspension
116
Disengaging the Front Axle Air Suspension
116
Autocomfort Cab Suspension
117
Adjusting Autocomfort Cab Suspension
118
Calibrating Autocomfort Cab Suspension
119
Deactivating Front Axle Suspension
120
Differential Lock
121
Engaging and Disengaging the Differential Lock
121
Four-Wheel Drive
122
Engaging and Disengaging the Four-Wheel Drive
123
Driving Start Automatics
123
Setting the Driving Start Automatics
123
Reverse Drive System
125
Proline Instrument Panel Display
126
Permitted Driving Inclinations for Driving the Tractor on a Slope
126
Fixed Views
127
Selecting a View
127
Top and Middle Row Views
128
Working Time View
129
Cruise Control View
129
Driving Speed View
130
Wheel Slip View
130
Rear Power Take-Off Speed View
130
Front Power Take-Off Speed View
131
Engine Speed View
131
Fuel Consumption Views
131
Rear Lower Links' Position View
133
Front Lower Links' Position View
133
Sigma Power View
134
Gearbox Temperature View
134
Travel Distance View
135
Surface Area View
135
Periodical Maintenance View
136
Clearing the Periodical Maintenance View
136
Resetting Views
137
Enlarging the Middle Row
137
Changing Parameters
138
Activating and Exiting the Setting Mode
138
Changing the Parameter Value
139
Setting the Display Backlight Level
139
Setting the Implement Width
140
Changing the Hour Display
140
Changing the Minute Display
140
Changing the Clock Mode
141
Activating the Direction Indicator Buzzer
141
Changing the Temperature Unit
141
Changing the Length Unit
142
Changing the Volume Unit
142
Activating and Deactivating the Front Power Take-Off Speed View
143
Activating and Deactivating the Front Lower Links' Position View
143
Adjusting the Display Contrast
143
Agroline Instrument Panel Display
144
Fixed Views
144
Selecting a View
145
Top and Bottom Row Views
145
Travel Distance View
146
Rear Power Take-Off Speed View
146
Front Power Take-Off Speed View
146
Clock
147
Gearbox Temperature View
147
Rear Lower Links' Position View
147
Periodical Maintenance View
148
Clearing the Periodical Maintenance View
148
Resetting Views
149
Changing Parameters
150
Activating and Exiting the Setting Mode
150
Setting the Display Backlight Level
150
Resetting Time
151
Changing the Clock Mode
151
Changing the Agroline Tyre Parameters for Different Tyres
152
A-Pillar Display
152
Power Shuttle Section
153
Transmission Section
154
General Information Section
155
Changing General Information Section Views
156
Rear Linkage
157
Diagnose Light
158
Activating the Linkage
158
Using the Lift/Stop/Lower Switch
159
Using the Position Control Knob
159
Using the Linkage Floating Position
160
Using the Lift/Lower Switch and Lift/Lower Push Buttons
161
Lift/Lower Indicator Lights
162
Setting the Lowering Speed
162
Limiting the Lifting Height
163
Draft Control
163
Activating and Deactivating the Draft Control
164
Passing the Position Set by the Position Control Knob
164
Passing the Height Set by the Lifting Height Selector
165
Using the Drive Balance Control
166
Slip Control
167
Using the Slip Control
168
Three-Point Linkage
169
Attaching Implements
170
Using Quick Couplings for Lower Links
171
Setting the Release Cable for Lower Link Quick Couplings
172
Adjusting Lifting Links
174
Adjusting Lower Links
174
Adjusting Check Links
175
Adjusting the Check Links' Length
175
Adjusting the Check Links' Support
175
Automatic Check Links
176
Adjusting Thread-Adjustable Check Links
176
Adjusting Pin-Adjustable Check Links
178
Using the Floating Position of Automatic Check Links
178
Auxiliary Hydraulics
179
Controlling the Auxiliary Hydraulics Rear Valves
180
Setting Valves for Single-Action or Double-Action
182
Using Quick-Action Couplings
182
Connecting an External Hydraulic Motor to the Auxiliary Hydraulics
183
Using the Front Linkage
183
Setting Front Linkage Lifting Link Positions
185
Using the Valtra Front Loader
186
Using the Valtra Quick Front Loader Coupling Plate
188
Softdrive
188
Locking the Equipment
189
Using the Continuous Floating Position
190
Using the Floating Position with Joystick Buttons
191
Controlling the Extra Cylinder with the Change Valve
192
Power Take-Off
193
Attaching Implements to the Power Take-Off
193
Rear Power Take-Off
195
Recommended Rear Power Take-Off Shafts
196
Activating Rear Power Take-Off
197
Starting Rear Power Take-Off
198
Stopping Rear Power Take-Off Temporarily
199
Deactivating Rear Power Take-Off
200
Stopping the Rear Power Take-Off in Emergency
201
Using the Rear Power Take-Off Automatic Stop
202
Proportional Ground Speed Power Take-Off
203
Adjusting the Rear Power Take-Off Engagement
204
Front Power Take-Off
206
Activating and Deactivating Front Power Take-Off
207
Implement Signal Connection
208
Resetting the Implement Signal Connection
209
Valtra ISOBUS
209
ISOBUS Implement Connector
211
ISOBUS Terminal Connector
211
Bus Extension Connectors
212
Resetting the ISOBUS Connection
213
Towing Devices
213
Pick-Up Hitch
213
Unlatching the Pick-Up Hitch Equipped with Mechanical Unlatching System
213
Unlatching the Pick-Up Hitch Equipped with Hydraulic Unlatching System
214
Latching the Pick-Up Hitch
216
Agricultural Drawbar Devices
217
Towing Device Frames
218
Adjusting the Jaw Height
219
Attaching to the Mechanical Jaw
220
Attaching to the Automatic Jaw
220
Euro Pick-Up Hitch
222
Euro Pick-Up Hitch with Hydraulic Extension
224
Unlatching the Hydraulically Extended Euro Pick-Up Hitch
224
Extending the Euro Pick-Up Hitch
225
Latching the Hydraulically Extended Euro Pick-Up Hitch
226
Changing the Pick-Up Hitch or Drawbar
228
Air Pressure System
230
Trailer
232
Trailer Air Pressure Brakes
232
Trailer Fluid Brake Valve
233
Maintenance
235
Maintenance Schedule
235
Service Inspection
235
Performing Maintenance Tasks
236
Cleaning the Tractor
237
Cleaning the Engine Compartment
238
Cleaning Front Axle Suspension Bellows
238
Cleaning Polycarbonate Windows
238
Greasing Lubricating Points Fitted with Grease Nipples
239
Supporting the Tractor
239
Recommended Fuel and Lubricants
241
Fuel
241
Quality Requirements for Engine Fuel
241
Storing Fuel
241
Storing Adblue/Def
241
Biodiesel Fuel
242
Grease
242
Universal Grease - NLGI2 Universal Grease
242
Calsium LF - NLGI2 Calsium Grease LF
243
Grease Moly - NLGI2 Moly Grease
243
Storing the Tractor
243
Storing the Tractor for a Period Shorter than Two Months
243
Storing the Tractor for a Period Longer than Two Months
244
Running the Tractor in after Storage
244
Running the Tractor in after a Storing Period Shorter than Two Months
244
Periodical Maintenance
245
Running the Tractor in after a Storing Period Longer than Two Months
245
Periodical Maintenance Chart
246
Daily Maintenance
248
Checking the Engine Oil Level
248
Checking the Oil Level in the Transmission System
249
Checking the Coolant Level
250
Cleaning Radiators
251
Checking the Adblue/Def Tank Level
252
Weekly Maintenance
253
Greasing the Three-Point Linkage
253
Checking the Pick-Up Hitch
253
Greasing the Pick-Up Hitch
254
Maintaining the Front Linkage
254
Checking the Front Power Take-Off
255
Greasing the Brake Cam
256
Greasing Front Axle Mounting Bearings
256
Greasing Air-Suspended Front Axle Mounting Bearings
257
Greasing Flexible Front Mudguards
258
Checking Belts' Tension
258
Changing the Fan and Air Pressure Compressor Belt
259
Changing the Alternator and Air Conditioning Compressor Belt
261
Checking the Fuel System Prefilter and Sediment Bowl
262
Checking the Electrolyte Level in the Battery
263
Checking the Tyre Pressure
264
Checking Wheel Nuts' Tightness
264
Checking the Emergency Brake
264
Windscreen Washer Fluid Reservoir
265
Maintenance Every 500 Hours
265
Greasing Door Hinges
265
Changing the Engine Oil and the Oil Filter
265
Checking the Engine Breathing System
267
Cleaning the Cab Ventilation Air Filter
267
Checking the Brake Pedal Free Travel
268
Adjusting Brake Pedals' Travel
269
Checking the Parking Brake
270
Adjusting the Parking Brake
270
Changing Transmission Oil Filters
272
Changing Hydraulic System Oil Filters
273
Checking the Oil Level in the Front Axle Differential
274
Checking the Oil Level in Front Axle Hubs
275
Changing Front PTO Housing Oil and Washing Oil Filter
276
Checking Front PTO Rubber Couplings
277
Checking and Greasing the Trailer Air-Pressure Brake System
277
Checking the Air Pressure System's Automatic Water Draining
277
Adjusting Engine Valves
278
Maintenance Every 1000 Hours or Yearly
278
Changing Oil in the Hydraulic System
278
Changing Oil in the Front Axle Differential
280
Changing Oil in the Front Axle Hubs
281
Changing the Cab Ventilation Air Filter
282
Changing the Recirculation Filter
283
Changing the Fuel Filter
283
Changing the Fuel Prefilter
284
Changing Engine Air Filters
286
Changing the Selective Catalytic Reduction System Supply Module Main Filter
288
Greasing the Flywheel Ring Gear
290
Checking the Front Wheel Toe-In
290
Adjusting Toe-In of Front Wheels
291
Changing the Hydraulics Breather
291
Checking the Power Shuttle Operation
292
Tightening Frame Nuts and Bolts
292
Maintenance Every 2000 Hours or Every Other Year
292
Changing Oil in the Transmission System
292
Cleaning the Suction Strainer
294
Changing the Transmission Breather
294
Changing Oil in Brake System
295
Bleeding the Brake System
296
Changing Oil in the Front Axle Brake System
297
Cleaning the Cooling System
298
Checking the Engine Vibration Damper
301
Maintaining the Air Conditioning
301
Checks and Adjustments
302
Changing Tyres
302
Setting the Tyre Parameter
303
Tyre Parameters
305
Track Widths
309
Agricultural Front Axle Track Widths
309
Industrial Front Axle Track Widths
310
Rear Axle Track Widths
311
Using Chains
311
Using Twin-Mounted Wheels
312
Engine
312
Bleeding the Fuel System
312
Electrical System
313
Safety Precautions for the Electrical System
313
Checking the Battery
313
Alternator
314
Protecting the Electrical System before Welding
314
Fuses and Relays
314
Fuses and Relays in the Electric Centre
315
Fuses and Relays for the Urea Component
317
Engine Induction Air Preheater Fuse
318
Cab Power Supply Fuse
318
Adjusting Headlights
319
Power Transmission System
320
Changing the Rear Power Take-Off Shaft
320
Checking the Transmission Ratio of a Power Take-Off Driven Trailer
320
Steering System
321
Adjusting the Steering Angle
321
Cab and Shields
322
Adjusting the Steps for Driving Off-Road
322
Limiting the Door Opening
323
Checking and Adjusting Front Mudguards
323
Adjusting Flexible Front Mudguards
324
Hydraulic System
325
Adjusting Lifting Links of the Pick-Up Hitch
325
Maintaining the Automatic Jaw of the Wagon Towing Device
326
Faults and Remedial Actions
327
Handling Error Situations
327
Errors Indicated by the Indicator Lights
327
Cleaning the Main Engine Air Filter
328
Identifying a Blocked Transmission or Hydraulic System Filter
329
Warning Symbols on the Proline Instrument Panel Display
331
Low Fuel Pressure Warning
331
Transmission Speed Warning
331
Power Take-Off Speed Warning
332
Fuel Level Sensor Open Circuit Warning
332
Fuel Level Sensor Short Circuit Warning
333
Viewing Service Codes
333
Service Codes
334
Steering System Malfunctions
341
Towing the Tractor
341
Towing the Tractor When the Engine Is Running
341
Towing the Tractor When the Engine Is Not Running
342
Technical Specifications
343
Dimensions
343
Weights
343
Maximum Permissible Axle Loading
343
Tyres
344
Wheel Nuts Tightening Torque
345
Wheel Stud Dimensions
345
Front Axle Tyre Loadings and Pressures
345
Rear Axle Tyre Loadings and Pressures
346
Spacing for Wheel Discs
347
Track Widths
347
Rear Track Widths
347
Front Track Widths
347
Engine
348
Engine Lubrication System
349
Fuel System
349
Selective Catalytic Reduction System
350
Air Cleaner
350
Cooling System
350
Electrical System
350
Power Transmission
351
Power Shuttle
351
Clutch
351
Gearbox
351
Rear Axle Differential Lock
351
Rear Power Take-Off
352
Rear Power Take-Off Alternatives
352
Rear Power Take-Off Ratios
352
Rear Power Take-Off Shafts
352
Lower Link End Distance from Rear Power Take-Off Shaft
352
Proportional Ground Speed
353
Front Power Take-Off
353
Front Power Take-Off Ratios
353
Front Power Take-Off Shafts
353
Brake System
353
Steering System
354
Front Axle
354
Turning Circle Radius
355
Front Air Suspension
355
Cab and Shields
356
Cab Filter Capacity
356
Windscreen Washer
356
Air Conditioning System
356
Noise Level
356
Exposure to Vibration
356
Hydraulic System
356
Low Pressure Circuit
356
Working Hydraulic Circuit
357
Valves for Auxiliary Hydraulics
357
Counter Pressure When Using the Return Connection for Auxiliary Hydraulics
357
Rear Linkage
358
Maximum Lifting Force on the Whole Lifting Area
358
Lifting Range at the End of the Lower Links
358
Front Linkage
359
Towing Devices
359
Pick-Up Hitch
359
Agricultural Towing Device
359
Towing Device Frames
360
Euro Trailer Hitch
361
Advertisement
Valtra HiTech T3 Series Operator's Manual (31 pages)
Brand:
Valtra
| Category:
Farm Equipment
| Size: 1 MB
Table of Contents
About this Manual
3
Tractor Serial Numbers
4
Table of Contents
5
Safety Precautions
14
Hazard Statements
14
Safety Rules
14
Replacing Safety and Information Signs
14
Maintaining Hardware Safety
15
Using Tractor Safety Features
16
Safe Operation
17
Following Safe Operating Practices
17
Getting into and out of the Cab
19
Driving on Public Roads
19
Controlling the Driving Speed
20
Driving Downhill
20
Operating with Implements
21
Running with Power Take-Off Driven Implements or Machines
22
Using Ballast Weights
22
Towing
23
Ensuring Personal Safety of Other People
23
Fire Hazards
24
Handling Viton Seals Subjected to High Temperatures
24
After-Treatment System
24
Instruments and Controls
26
Pedals
26
Dashboard
26
Agroline Instrument Panel
27
Symbols on the Agroline Instrument Panel Display
27
Indicator Lights on the Left Side of the Display
28
Indicator Lights on the Right Side of the Display
29
Dashboard
30
Proline Instrument Panel
30
Symbols on the Proline Instrument Panel Display
31
Advertisement
Related Products
Valtra T series Versu
Valtra T151eLS
Valtra T144
Valtra T144 A
Valtra T194 A
Valtra T214 A
Valtra HiTech T153 H
Valtra HiTech T193 H
Valtra T195 CVT
Valtra HiTech T174e H
Valtra Categories
Tractor
Farm Equipment
More Valtra Manuals
Login
Sign In
OR
Sign in with Facebook
Sign in with Google
Upload manual
Upload from disk
Upload from URL