
Related Manuals for PLANEPRINT JETWING


Summary of Contents for PLANEPRINT JETWING
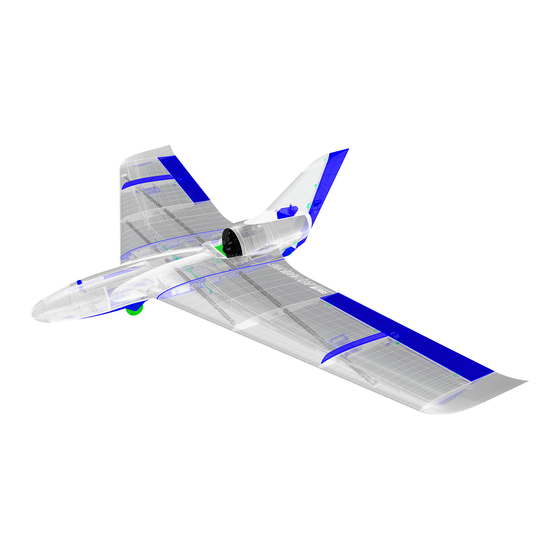
- Page 1 Modular high-performance EDF Jet Modular high-performance EDF Jet Standard WING ..Page 4 to 18 FUSELAGE EDF ..Page 19 to 48 You can fi nd the STL data NOTE: Slicing only at www.planeprint.com works with CURA!
- Page 2 It is essential for the necessary stability of the JETWING that the LW parts printed with PROFILE_5 are as stable as possible. Please use a test part to check the strength by fracture tests.
- Page 3 4S EDF 70 MM – FMS or Wemotec Mini Fan, Stream Fan (We use the FMS from Pichler) ATTENTION: the drive should provide a maximum thrust of 1.8 Kg. If you want to use a 5S or 6S drive, be aware that the JETWING will be overpowered and fl y accordingly carefully and dosed!
- Page 4 Now spray some activator spray on each hinge to cure the CA glue. Repeat on the other side of the hinges. Do not use too much glue and test if each hinge holds well. JETWING PRINTING & ASSEMBLING MANUAL © PLANEPRINT...
- Page 5 Standard WING LW-PLA JETWING Standard WING PRINTING & ASSEMBLING MANUAL © PLANEPRINT...
- Page 6 Please note the additional settings for the individual parts! Aileron Parts_p1_J.stl MATERIAL PLA, Weight: ~ 15 g ADDITIONAL SETTINGS None required Wing fences_p1_J.stl MATERIAL PLA, Weight: ~ 4 g ADDITIONAL SETTINGS None required JETWING Standard WING PRINTING & ASSEMBLING MANUAL © PLANEPRINT...
- Page 7 Please note the additional settings for the individual parts! Wing parts_p1_J.stl MATERIAL PLA, Weight: ~ 6 g ADDITIONAL SETTINGS None required Wing protector_p1_J.stl MATERIAL PLA, Weight: ~ 7 g ADDITIONAL SETTINGS None required JETWING Standard WING PRINTING & ASSEMBLING MANUAL © PLANEPRINT...
- Page 8 • set Brim • Retract settings for normal PLA IMPORTANT The ailerons must NOT be printed with LW-PLA, because at the high speed the JETWING can reach, the bending strength is not sufficient! Aileron 2 left_p5PLA_J.stl Aileron 2 right_p5PLA_J.stl MATERIAL...
-
Page 9: Material
The following parts must be sliced with the PROFILE P4_FLEX. Please note the additional settings for the individual parts! Hinges wings_p4_J.stl MATERIAL TPU ~ A95, Weight: ~ 2 g ADDITIONAL SETTINGS None required JETWING Standard WING PRINTING & ASSEMBLING MANUAL © PLANEPRINT... -
Page 10: Additional Settings
VarioShore. INFO Tension belt lenght If you want to change them slightly in length, you can simply change the dimension of the X-axis in Cura (Uniform scaling must NOT be selected). JETWING Standard WING PRINTING & ASSEMBLING MANUAL © PLANEPRINT... - Page 11 LW-PLA, ~ 29 g* *Weighed ADDITIONAL SETTINGS • Wall Line Count: 2 Wing 2 left_p5+_J.stl Wing 2 right_p5+_J.stl MATERIAL LW-PLA, ~ 16 g* *Weighed ADDITIONAL SETTINGS • Wall Line Count: 2 JETWING Standard WING PRINTING & ASSEMBLING MANUAL © PLANEPRINT...
- Page 12 LW-PLA, ~ 38 g* *Weighed ADDITIONAL SETTINGS • Wing left: Z Seam Position Back Right • Wing right: Z Seam Position Back Left Don‘t forget to set the Wall Line Count back to 1! JETWING Standard WING PRINTING & ASSEMBLING MANUAL © PLANEPRINT...
-
Page 13: None Required
Wing 5 left_p5_J.stl Wing 5 right_p5_J.stl MATERIAL LW-PLA, ~ 30 g* *Weighed ADDITIONAL SETTINGS None required Wing 6 left_p5_J.stl Wing 6 right_p5_J.stl MATERIAL LW-PLA, ~ 25 g* *Weighed ADDITIONAL SETTINGS None required JETWING Standard WING PRINTING & ASSEMBLING MANUAL © PLANEPRINT... - Page 14 Wingtip right_p5_J.stl MATERIAL LW-PLA, ~ 10 g* *Weighed ADDITIONAL SETTINGS None required Interconnects wing_p1_J.stl MATERIAL LW-PLA, ~ XX g* *Weighed ADDITIONAL SETTINGS None required You can also print the interconnects with PROFILE_1. JETWING Standard WING PRINTING & ASSEMBLING MANUAL © PLANEPRINT...
- Page 15 Follow the instructions „Gluing the parts“ on page 4. Wing 1 left_p5_J.stl medium l. Wing 4 left_p5_J.stl Wing 2 left_p5_J.stl medium l. Wing 5 left_p5_J.stl Wing 3 left_p5_J.stl medium l. Wing 6 left_p5_J.stl JETWING Standard WING PRINTING & ASSEMBLING MANUAL © PLANEPRINT...
- Page 16 Carbon tube Ø8*1000mm medium l. Interconnects wing_p1_J.stl medium l. medium l. Wing parts_p1_J.stl Wingtip left_p5_J.stl JETWING Standard WING PRINTING & ASSEMBLING MANUAL © PLANEPRINT...
- Page 17 Tapping screw Ø2*8 mm Wing parts_p1_J.stl Bottom side The sleeve for the tension belt must be aligned as shown here Tension belt TPUA95_p4_J.stl so that the belt can be secured with a screw. JETWING Standard WING PRINTING & ASSEMBLING MANUAL © PLANEPRINT...
- Page 18 Due to the high fl ying speed of the JETWING, the parts Wrap the servo with heat shrink are heavily loaded. tubing or tape before gluing!
- Page 19 FUSELAGE EDF version LW-PLA LW-PLA JETWING JETWING FUSELAGE EDF FUSELAGE EDF PRINTING & ASSEMBLING MANUAL PRINTING & ASSEMBLING MANUAL © PLANEPRINT...
- Page 20 Please note the additional settings for the individual parts! Battery mount_p1_J.stl MATERIAL PLA, Weight: ~ 3 g ADDITIONAL SETTINGS None required Canopy lock_p1_J.stl MATERIAL PLA, Weight: ~ 2 g ADDITIONAL SETTINGS None required JETWING FUSELAGE EDF PRINTING & ASSEMBLING MANUAL © PLANEPRINT...
- Page 21 Please note the additional settings for the individual parts! Fuselage protector 1_p1_J.stl MATERIAL PLA, Weight: ~ 9 g ADDITIONAL SETTINGS None required Fuselage protector 2_p1_J.stl MATERIAL PLA, Weight: ~ 5 g ADDITIONAL SETTINGS None required JETWING FUSELAGE EDF PRINTING & ASSEMBLING MANUAL © PLANEPRINT...
- Page 22 Please note the additional settings for the individual parts! Handling surfaces_p1_J.stl MATERIAL PLA, Weight: ~ 4 g ADDITIONAL SETTINGS None required Tension plate_p1_J.stl MATERIAL PLA, Weight: ~ 2 g ADDITIONAL SETTINGS None required JETWING FUSELAGE EDF PRINTING & ASSEMBLING MANUAL © PLANEPRINT...
- Page 23 ADDITIONAL SETTINGS None required Print this STL if you want to build the rudder with vector function (folder RUDDER VERSION). Carbon tool_p1_J.stl MATERIAL PLA, Weight: ~ 6 g ADDITIONAL SETTINGS None required JETWING FUSELAGE EDF PRINTING & ASSEMBLING MANUAL © PLANEPRINT...
- Page 24 None required Skid wheel back_p2_J.stl MATERIAL PLA, Weight: ~ 3 g ADDITIONAL SETTINGS None required If you want to build the version without wheels, take instead the STL Skid Glider back_p2_J.stl JETWING FUSELAGE EDF PRINTING & ASSEMBLING MANUAL © PLANEPRINT...
- Page 25 Skid wheel front_p2_J.stl MATERIAL PLA, Weight: ~ 9 g ADDITIONAL SETTINGS • Wall Line Count: 3 If you want to build the version without wheels, take instead the STL Skid Glider front_p2_J.stl JETWING FUSELAGE EDF PRINTING & ASSEMBLING MANUAL © PLANEPRINT...
- Page 26 None required Hinges rudder_p4_J.stl MATERIAL TPU ~ A95, Weight: ~ 2 g ADDITIONAL SETTINGS None required Print this STL if you want to build the rudder with vector function (folder RUDDER VERSION). JETWING FUSELAGE EDF PRINTING & ASSEMBLING MANUAL © PLANEPRINT...
- Page 27 Wheel back_p4_J.stl MATERIAL TPU A95, Weight: ~ 2 g ADDITIONAL SETTINGS • Infill Density 100 % Wheel front_p4_J.stl MATERIAL TPU A95, Weight: ~ 4 g ADDITIONAL SETTINGS • Infill Density 100 % JETWING FUSELAGE EDF PRINTING & ASSEMBLING MANUAL © PLANEPRINT...
- Page 28 Canopy 1_p5_J.stl or Canopy pilot 1_p5_J.stl MATERIAL LW-PLA, ~ 11 g* *Weighed ADDITIONAL SETTINGS None required Canopy 2_p5_J.stl or Canopy pilot 2_p5_J.stl MATERIAL LW-PLA, ~ 9 g* *Weighed ADDITIONAL SETTINGS None required JETWING FUSELAGE EDF PRINTING & ASSEMBLING MANUAL © PLANEPRINT...
- Page 29 EDF-Cover FMS 1_p5_J.stl or EDF-Cover Wemotec_p5_J.stl MATERIAL LW-PLA, ~ 8 g* *Weighed ADDITIONAL SETTINGS None required EDF-Cover FMS 2_p5_J.stl MATERIAL LW-PLA, ~ 1 g* *Weighed ADDITIONAL SETTINGS None required JETWING FUSELAGE EDF PRINTING & ASSEMBLING MANUAL © PLANEPRINT...
- Page 30 Fuselage 1_p5_J.stl MATERIAL LW-PLA, ~ 33 g* *Weighed ADDITIONAL SETTINGS None required Fuselage 2 left_p5_J.stl Fuselage 2 right_p5_J.stl MATERIAL LW-PLA, ~ 35 g* *Weighed ADDITIONAL SETTINGS None required JETWING FUSELAGE EDF PRINTING & ASSEMBLING MANUAL © PLANEPRINT...
- Page 31 Fuselage 2 part_p5_J.stl MATERIAL LW-PLA, ~ 5 g* *Weighed ADDITIONAL SETTINGS None required Fuselage 3_p5_J.stl MATERIAL LW-PLA, ~ 28 g* *Weighed ADDITIONAL SETTINGS None required JETWING FUSELAGE EDF PRINTING & ASSEMBLING MANUAL © PLANEPRINT...
- Page 32 LW-PLA, ~ 8 g* *Weighed ADDITIONAL SETTINGS None required This version is without rudder. If you want to build the rudder with vector function use the STL in the folder RUDDER VERSION. JETWING FUSELAGE EDF PRINTING & ASSEMBLING MANUAL © PLANEPRINT...
- Page 33 Tough PLA. • Flow 100 % • set Brim • Retract settings for normal PLA Print this STL if you want to build the rudder with vector function (folder RUDDER VERSION). JETWING FUSELAGE EDF PRINTING & ASSEMBLING MANUAL © PLANEPRINT...
- Page 34 • Retract settings for normal PLA Print this STL if you want to build the rudder with vector function (folder RUDDER VERSION). Nose_p5_J.stl MATERIAL LW-PLA, ~ 12 g* *Weighed ADDITIONAL SETTINGS • set Brim JETWING FUSELAGE EDF PRINTING & ASSEMBLING MANUAL © PLANEPRINT...
- Page 35 Basic settings for LW-PLA: Please follow the instructions in our WINGTEST AND CALIBRATION TOOL on our website for correct adjustment! Interconnects_p1_J.stl MATERIAL LW-PLA, ~ 2 g* *Weighed ADDITIONAL SETTINGS None required You can also print the interconnects with PROFILE_1. JETWING FUSELAGE EDF PRINTING & ASSEMBLING MANUAL © PLANEPRINT...
- Page 36 The surfaces must be absolutely fl at, nothing must protrude. Fuselage 2 right_p5_J.stl Fuselage 3_p5_J.stl Fuselage 2 left_p5_J.stl STEP 1 Interconnects_p1_J.stl Fuselage 2_p5_J.stl Fuselage 1_p5_J.stl Interconnects_p1_J.stl Nose_p5_J.stl JETWING FUSELAGE EDF PRINTING & ASSEMBLING MANUAL © PLANEPRINT...
- Page 37 4, you should turn the screws in and out again (hold the brackets with pliers). EDF-parts FMS_p2_J.stl Pay attention to the positio- Fuselage 4 Rudder_p5_J.stl Fuselage 4 Rudder_p5_J.stl ning as shown in the picture! Fuselage 1_p5_J.stl JETWING FUSELAGE EDF PRINTING & ASSEMBLING MANUAL © PLANEPRINT...
- Page 38 Carbon tube Ø8*480mm Fuselage protector 1_p1_J.stl Handling surfaces_p1_J.stl Skid wheel front_p2_J.stl Fuselage protector 2_p1_J.stl Skid Glider front_p2_J.stl Tension plate_p1_J.stl Fuselage protector 2_p1_J.stl JETWING FUSELAGE EDF PRINTING & ASSEMBLING MANUAL © PLANEPRINT...
- Page 39 Then place the rear PLA part (the version with the wheel or without) on the tube and align it vertically. Glue this part well too. Wheel front_p4_J.stl Metal screw 3*20mm with self-locking nut Wheel back_p4_J.stl Tapping screw Ø2*12 mm JETWING FUSELAGE EDF PRINTING & ASSEMBLING MANUAL © PLANEPRINT...
- Page 40 EDF in place. IMPORTANT it is imperative that the intake ring supplied with the EDF is mounted! EDF-parts FMS_p2_J.stl EDF-Cover FMS 1_p5_J.stl Controller JETWING FUSELAGE EDF PRINTING & ASSEMBLING MANUAL © PLANEPRINT...
- Page 41 If you plan to launch from the ground, you should glue the TPU mesh to the lower intake openings of the EDF. This will prevent dirt and small stones from being sucked in. JETWING FUSELAGE EDF PRINTING & ASSEMBLING MANUAL © PLANEPRINT...
- Page 42 Rudder assembly Rudder assembly Follow the instructions „Installing the hinges“ on page 4. Rudder 1_p5PLA_J.stl Hinges rudder_p4_J.stl Rudder Parts_p1_J.stl Rudder 2_p5PLA_J.stl Rudder Parts_p1_J.stl Rudder Parts_p1_J.stl JETWING FUSELAGE EDF PRINTING & ASSEMBLING MANUAL © PLANEPRINT...
- Page 43 STEP 2 Canopy Canopy Canopy_p5_J.stl Canopy lock_p1_J.stl STEP 1 Grub screw 3mm Canopy 1_p5_J.stl Canopy pilot_p5_J.stl Canopy 2_p5_J.stl RC Components – Battery mount Battery mount_p1_J.stl Velcro strap Self-adhesive Velcro tape JETWING FUSELAGE EDF PRINTING & ASSEMBLING MANUAL © PLANEPRINT...
- Page 44 NOTE The TPU Tension belts should be released during prolonged storage. Replace them with new ones when they lose tension. Change the position of the battery to achieve the correct CG. JETWING FUSELAGE EDF PRINTING & ASSEMBLING MANUAL © PLANEPRINT...
- Page 45 Technical specifi cations WINGSPAN 1270 mm/50 inches LENGHT 739 mm/29 inches FLIGHT WEIGHT 1490 grams (with Rudder, Battery 4S, 3450 mAh) JETWING PRINTING & ASSEMBLING MANUAL © PLANEPRINT...
- Page 46 With fl ying wings the optimum With fl ying wings the optimum CG range CG range is very small, the JETWING must balance exactly , the JETWING must balance exactly on the marks on the wings! on the marks on the wings! JETWING PRINTING &...
- Page 47 When checking the control directions, look at the aircraft from behind. Elevator up Elevator down Aileron left Aileron right Rudder left Rudder right FLIGHT PHASES: + 2 mm UP + 2 mm UP NORMAL + 6 mm UP + 6 mm UP START JETWING PRINTING & ASSEMBLING MANUAL © PLANEPRINT...
- Page 48 If you want to take off from the hand, you should defi nitely set a fl ight phase START via a switch, which you can change to NORMAL at a safe altitude. Hold the JETWING below the CG at the handling surfaces and throw it upwards by about 10° at 3/4 throttle or full throttle.
- Page 49 Filaments, printing supplies, hardware or mitter or model. consumables that can not be used after faulty 3D printing will not be replaced by PLANEPRINT.com in any way. Always keep the model in view and under control. Use only fully charged batteries.
Need help?
Do you have a question about the JETWING and is the answer not in the manual?
Questions and answers