Advertisement
Quick Links
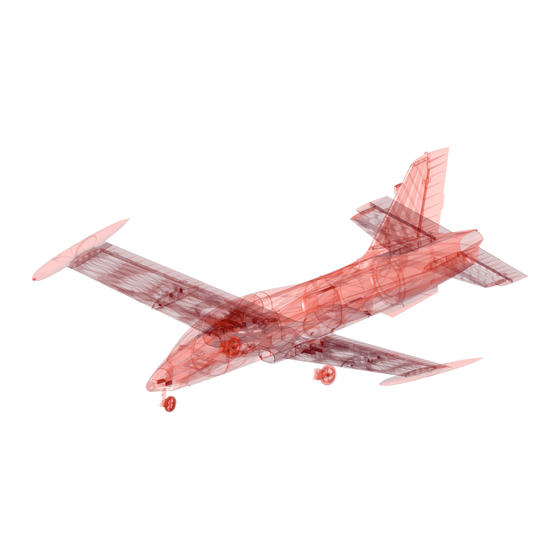
Aermacchi MB-339
• Detailed scale model in 3D super lightweight construction.
• Real 1 wall construction (Currently only supported by CURA!).
• Wingspan 1034 mm (40.7 inches), EDF 70 mm.
V4 2020
WATCH OUT!
This 3D print model
is specially optimized
for CURA.
STL DATA FOR DOWNLOADING
www.planeprint.com
AT
EN
EN
Advertisement

Subscribe to Our Youtube Channel
Related Manuals for PLANEPRINT Aermacchi MB-339


Summary of Contents for PLANEPRINT Aermacchi MB-339
- Page 1 Aermacchi MB-339 • Detailed scale model in 3D super lightweight construction. • Real 1 wall construction (Currently only supported by CURA!). • Wingspan 1034 mm (40.7 inches), EDF 70 mm. WATCH OUT! STL DATA FOR DOWNLOADING This 3D print model is specially optimized www.planeprint.com...
- Page 2 Our STL files are provided with indelible copyright water- marks that can be verified at any time. Thank you for your understanding and have fun with your PLANEPRINT MODEL! AERMACCHI MB-339 PRINTING & CONSTRUCTION MANUAL...
- Page 3 PRINTING MANUAL AERMACCHI MB-339 PRINTING & CONSTRUCTION MANUAL © PLANEPRINT...
- Page 4 Recommended additional settings are listed in the screenshots. INFO STL File: Battery-holder_p1.stl Material: Weight: ~ 6 g ADDITIONAL SETTINGS • Generate Support checked INFO STL fi le: Gear-left_p1.stl Material: Weight: ~ 6 g ADDITIONAL SETTINGS None required AERMACCHI MB-339 PRINTING & CONSTRUCTION MANUAL © PLANEPRINT...
- Page 5 PROFIL P1_FULLBODY INFO STL fi le: Gear-right_p1.stl Material: Weight: ~ 6 g ADDITIONAL SETTINGS None required INFO STL fi le: Gear-nose_p1.stl Material: Weight: ~ 7 g ADDITIONAL SETTINGS None required AERMACCHI MB-339 PRINTING & CONSTRUCTION MANUAL © PLANEPRINT...
- Page 6 PROFILE P1_FULLBODY INFO STL fi le: Pin-horns_p1.stl Material: Weight: ~ 4 g ADDITIONAL SETTINGS None required INFO STL fi le: Rims_p1.stl Material: Weight: ~ 12 g ADDITIONAL SETTINGS None required AERMACCHI MB-339 PRINTING & CONSTRUCTION MANUAL © PLANEPRINT...
- Page 7 PLEASE NOTE Use the fi le „small“ for smaller servos (Hitec HS-55), „big“ for larger ones (Turnigy TGY 50090M) INFO STL fi le: Servo-frame.stl Material: Weight: ~ 6 g ADDITIONAL SETTINGS None required AERMACCHI MB-339 PRINTING & CONSTRUCTION MANUAL © PLANEPRINT...
- Page 8 • Bottom Layers 0 • Skirt (no Brim) • reduce Nozzle Temp (200°C) INFO STL fi le: Rudder-3_p2.stl Material: Weight: ~ 5 g ADDITIONAL SETTINGS • Top Layers 4 • Skirt (no Brim) AERMACCHI MB-339 PRINTING & CONSTRUCTION MANUAL © PLANEPRINT...
- Page 9 Depending on your printer, a brim may not be required. INFO STL fi le: Canopy-1_p3.stl Material: Weight: ~ 19 g ADDITIONAL SETTINGS Depending on your printer, a brim may not be required. AERMACCHI MB-339 PRINTING & CONSTRUCTION MANUAL © PLANEPRINT...
- Page 10 Depending on your printer, a brim may not be required. INFO STL fi le: EDF-Cover_p3.stl Material: Weight: ~ 18 g ADDITIONAL SETTINGS Depending on your printer, a brim may not be required. AERMACCHI MB-339 PRINTING & CONSTRUCTION MANUAL © PLANEPRINT...
- Page 11 Depending on your printer, a brim may not be required. INFO STL fi le: Elevator1-right_p3.stl Material: Weight: ~ 19 g ADDITIONAL SETTINGS Depending on your printer, a brim may not be required. AERMACCHI MB-339 PRINTING & CONSTRUCTION MANUAL © PLANEPRINT...
- Page 12 Depending on your printer, a brim may not be required. INFO STL fi le: Elevator2-right_p3.stl Material: Weight: ~ 10 g ADDITIONAL SETTINGS Depending on your printer, a brim may not be required. AERMACCHI MB-339 PRINTING & CONSTRUCTION MANUAL © PLANEPRINT...
- Page 13 Depending on your printer, a brim may not be required. INFO STL fi le: Flap-right_p3.stl Material: Weight: ~ 10 g ADDITIONAL SETTINGS Depending on your printer, a brim may not be required. AERMACCHI MB-339 PRINTING & CONSTRUCTION MANUAL © PLANEPRINT...
- Page 14 Depending on your printer, a brim may not be required. INFO STL fi le: Fuselage2_p3.stl Material: Weight: ~ 100 g ADDITIONAL SETTINGS Depending on your printer, a brim may not be required. AERMACCHI MB-339 PRINTING & CONSTRUCTION MANUAL © PLANEPRINT...
- Page 15 Depending on your printer, a brim may not be required. INFO STL fi le: Fuselage4_p3.stl Material: Weight: ~ 76 g ADDITIONAL SETTINGS Depending on your printer, a brim may not be required. AERMACCHI MB-339 PRINTING & CONSTRUCTION MANUAL © PLANEPRINT...
- Page 16 Depending on your printer, a brim may not be required. INFO STL fi le: Nose2_p3.stl Material: Weight: ~ 5 g ADDITIONAL SETTINGS Depending on your printer, a brim may not be required. AERMACCHI MB-339 PRINTING & CONSTRUCTION MANUAL © PLANEPRINT...
- Page 17 Depending on your printer, a brim may not be required. INFO STL fi le: Rudder-2_p3.stl Material: Weight: ~ 11 g ADDITIONAL SETTINGS Depending on your printer, a brim may not be required. AERMACCHI MB-339 PRINTING & CONSTRUCTION MANUAL © PLANEPRINT...
- Page 18 Depending on your printer, a brim may not be required. INFO STL fi le: Wing1-right_p3.stl Material: Weight: ~ 61 g ADDITIONAL SETTINGS Depending on your printer, a brim may not be required. AERMACCHI MB-339 PRINTING & CONSTRUCTION MANUAL © PLANEPRINT...
- Page 19 INFO STL fi le: Wing2-right_p3.stl Material: Weight: ~ 39 g ADDITIONAL SETTINGS Depending on your printer, a brim may not be required. This is part of the wing, no brim! AERMACCHI MB-339 PRINTING & CONSTRUCTION MANUAL © PLANEPRINT...
- Page 20 STL fi le: WingtipV2-left_p3.stl WingtipV2-right_p3.stl Material: Weight: ~ 13 g ADDITIONAL SETTINGS Depending on your printer, a brim may not be required. Use the Fan or reduce the nozzle temp a bit AERMACCHI MB-339 PRINTING & CONSTRUCTION MANUAL © PLANEPRINT...
- Page 21 TPU soft or middel Weight: ~ 1 g ADDITIONAL SETTINGS None required INFO STL fi le: Tires_p4.stl Material: TPU soft or middel Weight: ~ 12 g ADDITIONAL SETTINGS Infi ll Density 100 % AERMACCHI MB-339 PRINTING & CONSTRUCTION MANUAL © PLANEPRINT...
-
Page 22: Required Accessories
55 mm • rod connection 9 Pieces TIPP We recommend the purchase of a small range of screws, which can be used for all future PLANEPRINT models. TOOLS Simply search the Internet for: M2 Flat Head Tapping • Cutter knife Screw Assortment …... - Page 23 CONSTRUCTION MANUAL AERMACCHI MB-339 PRINTING & CONSTRUCTION MANUAL © PLANEPRINT...
- Page 24 Be careful when handling the cutter! First remove these support parts carefully AERMACCHI MB-339 PRINTING & CONSTRUCTION MANUAL © PLANEPRINT...
- Page 25 CA Glue. Look at the instructions on the next page! long connector short connector First glue the connectors in the fuselage, then glue on the rudder and elevator. AERMACCHI MB-339 PRINTING & CONSTRUCTION MANUAL © PLANEPRINT...
- Page 26 Wait for the adhesive to clot, then spray Be careful not the activator on it. to use too much glue, the flap must move easily! These spacers ensure the correct gap distance. Don´t remove! AERMACCHI MB-339 PRINTING & CONSTRUCTION MANUAL © PLANEPRINT...
-
Page 27: Wing Attachment
Wing-2 8 mm carbon fi ber Tube inside If the carbon tubes in the wings are a little stiff, clamp the remaining tube in a drill and enlarge the hole a little. AERMACCHI MB-339 PRINTING & CONSTRUCTION MANUAL © PLANEPRINT... - Page 28 EDF drill holes for the screws The cover is attached with six fl at screws 2 * 8mm. If your EDF protrudes further, something needs to be cut off on the cover. AERMACCHI MB-339 PRINTING & CONSTRUCTION MANUAL © PLANEPRINT...
- Page 29 The fl ap servos both point in the same direction and can be connected to the receiver using a V-cable. The pin horns of the fl aps must point backwards! Center of gravity AERMACCHI MB-339 PRINTING & CONSTRUCTION MANUAL © PLANEPRINT...
- Page 30 Bowden cable. position for the Bowden cable. TURNIGY TGY-50090M HITEC HS-55 servoframe big Servo frame small You can use these spacers to achieve the optimal height. HITEC HS-55 TURNIGY TGY-50090M AERMACCHI MB-339 PRINTING & CONSTRUCTION MANUAL © PLANEPRINT...
- Page 31 For reasons of space, the rod connectors must point inwards and cannot be adjusted later. So the elevators can be adjusted in the front of the fuselage. AERMACCHI MB-339 PRINTING & CONSTRUCTION MANUAL © PLANEPRINT...
- Page 32 Add CA Glue to the Canopy‘s magnetic recesses and place the Canopy on the magnets on the fuselage. adhesive strip adhesive strip Neodym Super Neodym Super Magnet 5x5x5 mm Magnet 5x5x5 mm AERMACCHI MB-339 PRINTING & CONSTRUCTION MANUAL © PLANEPRINT...
-
Page 33: Retractable Landing Gear
The same here Since the cable duct is very narrow for reasons of space, insert a wire befo- rehand and pull the cable through the duct. AERMACCHI MB-339 PRINTING & CONSTRUCTION MANUAL © PLANEPRINT... - Page 34 In the end he comes out here. the servo‘s rod connection. Glue on the pin horn here. It has to face forward! The linkage must be on the axis of rotation of the rudder. AERMACCHI MB-339 PRINTING & CONSTRUCTION MANUAL © PLANEPRINT...
- Page 35 DETAIL PHOTOS AERMACCHI MB-339 PRINTING & CONSTRUCTION MANUAL © PLANEPRINT...
- Page 36 Finally, position the battery mount so that the correct CG is reached exactly. Make a mark so that you always use the battery in the same position! Center of grativy AERMACCHI MB-339 PRINTING & CONSTRUCTION MANUAL © PLANEPRINT...
-
Page 37: Transmitter Configuration
Mix with the flaps minimal elevator down legs, see the mark under the fuselage. TECHNICAL SPECIFICATIONS 1.008 mm (39.4 inches) 1.034 mm (40.7 inches) FLYING WEIGHT: ~ 1.750 g, depending on RC components and 3D printing AERMACCHI MB-339 PRINTING & CONSTRUCTION MANUAL © PLANEPRINT... -
Page 38: Control Direction Test
7. Move the flap switch to position 2. The flaps should move down by the set value „half“. 8. Move the flap control switch to position 3. The flaps should move down by the set value „whole“. RUDDER FLAPS AERMACCHI MB-339 PRINTING & CONSTRUCTION MANUAL © PLANEPRINT... -
Page 39: Age Recommendation
Filaments, printing supplies, hardware or mitter or model. consumables that can not be used after faulty 3D printing will not be replaced by PLANEPRINT.com in any way. Always keep the model in view and under control. Use only fully charged batteries.
Need help?
Do you have a question about the Aermacchi MB-339 and is the answer not in the manual?
Questions and answers