Advertisement
Quick Links
Advertisement

Related Manuals for PLANEPRINT FOUGA MAGISTER


Summary of Contents for PLANEPRINT FOUGA MAGISTER
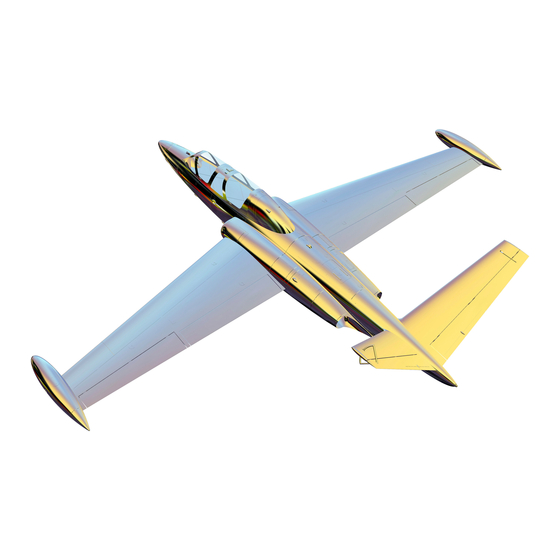
- Page 1 FOUGA MAGISTER You can fi nd the STL data NOTE: Slicing only at www.planeprint.com works with CURA!
- Page 2 Our STL files are provided with indelible copyright water- marks that can be verified at any time. Thank you for your understanding and have fun with your PLANEPRINT MODEL! FOUGA MAGISTER PRINTING & ASSEMBLING MANUAL...
- Page 3 Please note the additional settings for the individual parts! fm_battery holder_profi le1.stl MATERIAL PLA, Weight: ~ 6 g ADDITIONAL SETTINGS None required fm_Gear Covers_profi le1.stl MATERIAL PLA, ~ 3 g ADDITIONAL SETTINGS None required FOUGA MAGISTER PRINTING & ASSEMBLING MANUAL © PLANEPRINT...
- Page 4 Please note the additional settings for the individual parts! fm_Gear nose_profi le1.stl MATERIAL PLA, ~ 8 g ADDITIONAL SETTINGS • Wall Line Count 3 fm_Gear main_profi le1.stl MATERIAL PLA, ~ 16 g ADDITIONAL SETTINGS • Wall Line Count 3 FOUGA MAGISTER PRINTING & ASSEMBLING MANUAL © PLANEPRINT...
- Page 5 Please note the additional settings for the individual parts! fm_Interconnects_profi le1.stl MATERIAL PLA, ~ 3 g ADDITIONAL SETTINGS None required fm_Lights_profi le1.stl MATERIAL transparent PLA, ~ 3 g ADDITIONAL SETTINGS • Wall Line Count 10 FOUGA MAGISTER PRINTING & ASSEMBLING MANUAL © PLANEPRINT...
- Page 6 The following parts must be sliced with the PROFILE P1_FULLBODY. Please note the additional settings for the individual parts! fm_Parts_profi le1.stl MATERIAL PLA, ~ 12 g ADDITIONAL SETTINGS None required fm_Rims_profi le1.stl MATERIAL PLA, ~ 7 g ADDITIONAL SETTINGS None required FOUGA MAGISTER PRINTING & ASSEMBLING MANUAL © PLANEPRINT...
- Page 7 There are different variants, look at the fi le name! fm_Servocovers Flaps_xxx _profi le1.stl MATERIAL PLA, ~ 6 g ADDITIONAL SETTINGS None required INFO There are different variants, look at the fi le name! FOUGA MAGISTER PRINTING & ASSEMBLING MANUAL © PLANEPRINT...
- Page 8 PROFILE P1_FULLBODY The following parts must be sliced with the PROFILE P1_FULLBODY. Please note the additional settings for the individual parts! fm_Nose detail_profi le1.stl MATERIAL PLA, ~ 2 g ADDITIONAL SETTINGS None required FOUGA MAGISTER PRINTING & ASSEMBLING MANUAL © PLANEPRINT...
- Page 9 The following parts must be sliced with the PROFILE P2_HOLLOWBODY. Please note the additional settings for the individual parts! fm_Gear Brackets_profi le2.stl MATERIAL PLA, ~ 5 g ADDITIONAL SETTINGS • Wall Line Count: 5 View of the infi ll FOUGA MAGISTER PRINTING & ASSEMBLING MANUAL © PLANEPRINT...
- Page 10 PLA, ~ 15 g ADDITIONAL SETTINGS None required fm_Canopy 1_profi le3.stl MATERIAL PLA, ~ 24 g ADDITIONAL SETTINGS • Fan 80 % (in the upper range there is a risk of overheating) FOUGA MAGISTER PRINTING & ASSEMBLING MANUAL © PLANEPRINT...
- Page 11 Depending on your printer, a brim may not be required. fm_Canopy 2_profi le3.stl MATERIAL PLA, ~ 24 g ADDITIONAL SETTINGS None required fm_Elevator 1_profi le3.stl MATERIAL PLA, ~ 17 g ADDITIONAL SETTINGS None required FOUGA MAGISTER PRINTING & ASSEMBLING MANUAL © PLANEPRINT...
- Page 12 Depending on your printer, a brim may not be required. fm_Elevator 2_profi le3.stl MATERIAL PLA, ~ 11 g ADDITIONAL SETTINGS None required fm_Flap-left_profi le3.stl fm_Flap-right_profi le3.stl MATERIAL PLA, ~ 22 g ADDITIONAL SETTINGS None required FOUGA MAGISTER PRINTING & ASSEMBLING MANUAL © PLANEPRINT...
- Page 13 Depending on your printer, a brim may not be required. fm_Fuselage 1_profi le3.stl MATERIAL PLA, ~ 65 g ADDITIONAL SETTINGS None required fm_Fuselage 2_profi le3.stl MATERIAL PLA, ~ 84 g ADDITIONAL SETTINGS None required FOUGA MAGISTER PRINTING & ASSEMBLING MANUAL © PLANEPRINT...
- Page 14 Depending on your printer, a brim may not be required. fm_Fuselage 3_profi le3.stl MATERIAL PLA, ~ 95 g ADDITIONAL SETTINGS None required fm_Fuselage 4_profi le3.stl MATERIAL PLA, ~ 82 g ADDITIONAL SETTINGS None required FOUGA MAGISTER PRINTING & ASSEMBLING MANUAL © PLANEPRINT...
- Page 15 Depending on your printer, a brim may not be required. fm_Fuselage 5_profi le3.stl MATERIAL PLA, ~ 34 g ADDITIONAL SETTINGS None required fm_Fuselage 6_profi le3.stl MATERIAL PLA, ~ 7 g ADDITIONAL SETTINGS None required FOUGA MAGISTER PRINTING & ASSEMBLING MANUAL © PLANEPRINT...
- Page 16 Depending on your printer, a brim may not be required. fm_Nose_profi le3.stl MATERIAL PLA, ~ 14 g ADDITIONAL SETTINGS None required fm_Stabilizer 1-left_profi le3.stl fm_Stabilizer 1-right_profi le3.stl MATERIAL PLA, ~ 21 g ADDITIONAL SETTINGS None required FOUGA MAGISTER PRINTING & ASSEMBLING MANUAL © PLANEPRINT...
- Page 17 Depending on your printer, a brim may not be required. fm_Stabilizer 2-left_profi le3.stl fm_Stabilizer 2-right_profi le3.stl MATERIAL PLA, ~ 12 g ADDITIONAL SETTINGS None required fm_Wing 1-left_profi le3.stl fm_Wing 1-right_profi le3.stl MATERIAL PLA, ~ 54 g ADDITIONAL SETTINGS None required FOUGA MAGISTER PRINTING & ASSEMBLING MANUAL © PLANEPRINT...
- Page 18 Depending on your printer, a brim may not be required. fm_Wing 2-left_profi le3.stl fm_Wing 2-right_profi le3.stl MATERIAL PLA, ~ 43 g ADDITIONAL SETTINGS None required fm_Wing 3-left_profi le3.stl fm_Wing 3-right_profi le3.stl MATERIAL PLA, ~ 34 g ADDITIONAL SETTINGS None required FOUGA MAGISTER PRINTING & ASSEMBLING MANUAL © PLANEPRINT...
- Page 19 Depending on your printer, a brim may not be required. fm_Wing 4-left_profi le3.stl fm_Wing 4-right_profi le3.stl MATERIAL PLA, ~ 10 g ADDITIONAL SETTINGS None required fm_Wingtip-left_profi le3.stl fm_Wingtip-right_profi le3.stl MATERIAL PLA, ~ 16 g ADDITIONAL SETTINGS None required FOUGA MAGISTER PRINTING & ASSEMBLING MANUAL © PLANEPRINT...
- Page 20 In profi le P3_SURFACE, there should not be more than one STL on the buildplate at the same time, otherwise slicing errors can occur! Depending on your printer, a brim may not be required. fm_EDF-Cover_profi le3.stl MATERIAL PLA, ~ 10 g ADDITIONAL SETTINGS • 30 % Fan FOUGA MAGISTER PRINTING & ASSEMBLING MANUAL © PLANEPRINT...
- Page 21 Alternatively, it can also be printed with TPU A95. ADDITIONAL SETTINGS • Wall Line Count: 5 fm_Hinges_profi le4.stl MATERIAL LW-TPU varioShore Flow 100 % Weight: ~ 3 g Or normal TPU A95. ADDITIONAL SETTINGS None required FOUGA MAGISTER PRINTING & ASSEMBLING MANUAL © PLANEPRINT...
- Page 22 • Bottom Layers: 6 • Infi ll Density: 15 % • Infi ll Pattern: Gyroid • print twice TPU A95: • Wall Line Count: 3 • Top Layers: 3 • Infi ll Pattern: Gyroid FOUGA MAGISTER PRINTING & ASSEMBLING MANUAL © PLANEPRINT...
- Page 23 • Top Layers: 4 • Bottom Layers: 4 • Infi ll Density: 15 % • Infi ll Pattern: Gyroid TPU A95: • Wall Line Count: 2 • Top Layers: 3 • Infi ll Pattern: Gyroid FOUGA MAGISTER PRINTING & ASSEMBLING MANUAL © PLANEPRINT...
- Page 24 Rod connection Carbon tube Tapping screws Ø1.5 or 2mm Tools • Cutter knife • small Philips screwdriver • Drill Ø4mm, Ø3mm, Ø2,5mm, Ø1,5mm • Metal saw and metal file (or better a Dremel) FOUGA MAGISTER PRINTING & ASSEMBLING MANUAL © PLANEPRINT...
- Page 25 4S or 6S LiPo-Akku SERVOS Hitec HS-5055MG or (or similar in the same size), 7 pieces RETRACTION GEAR 2x Servoless Retraction Gear small (32mm x 25mm) 1x Servoless Retraction Nose-Gear small max. 55 mm FOUGA MAGISTER PRINTING & ASSEMBLING MANUAL © PLANEPRINT...
- Page 26 Wait again for the glue to run in, and then spray the activator on it. Do not use too much glue, the flap must move easily! These spacers ensure the correct gap distance. Don´t remove! FOUGA MAGISTER PRINTING & ASSEMBLING MANUAL © PLANEPRINT...
- Page 27 3_profi le3.stl fm_Fuselage 4_profi le3.stl Fuselage 3: Carefully open the additional air inlets on the underside. Cut along the edge several times with little pressure, then you can simply break it out. FOUGA MAGISTER PRINTING & ASSEMBLING MANUAL © PLANEPRINT...
- Page 28 Carbon tubes Ø8*74mm pen and carefully glue the parts together. Make sure that no glue gets on the moving parts! fm_Fuselage 1_profi le3.stl medium l. medium l. fm_Nose_profi le3.stl fm_Fuselage 1_profi le3.stl FOUGA MAGISTER PRINTING & ASSEMBLING MANUAL © PLANEPRINT...
- Page 29 (keep some distance to the blue areas). Then cut out the individual glass surfaces exactly along the black lines. Then glue the foil parts from the inside into the canopy frame. FOUGA MAGISTER PRINTING & ASSEMBLING MANUAL © PLANEPRINT...
- Page 30 2-right_profi le3.stl fm_Hinges_profi le4.stl Carbon rod Ø4*197mm fm_Elevator 2_profi le3.stl fm_Stabilizer 1-right_profi le3.stl fm_Interconnects_profi le1.stl fm_Fuselage 5_profi le3.stl fm_Lights_profi le1.stl fm_Fuselage 6_profi le3.stl fm_Parts_profi le1.stl Carbon rod Ø1.5mm or something similar fm_Tire-back_profi le4.stl FOUGA MAGISTER PRINTING & ASSEMBLING MANUAL © PLANEPRINT...
- Page 31 Instructions see at basic information IMPORTANT The carbon tubes must NOT be glued! fm_Lights_profile1.stl medium l. fm_Interconnects_profile1.stl fm_Wing 4-left_profile3.stl fm_Wing 3-left_profile3.stl fm_Aileron-left_profile3.stl fm_Wing 2-left_profile3.stl fm_Wing 1-left_profile3.stl fm_Flap-left_profile3.stl Carbon tube fm_Hinges_profile4.stl Ø8*538mm Carbon tube Ø8*910mm FOUGA MAGISTER PRINTING & ASSEMBLING MANUAL © PLANEPRINT...
- Page 32 Carbon tube Carbon tube Ø8*538mm Ø8*910mm Nose detail Some fougas are equipped with brackets on the nose, if desired you can glue them to the marked areas. FOUGA MAGISTER PRINTING & ASSEMBLING MANUAL © PLANEPRINT...
- Page 33 Since the PLA yields somewhat over time, these must be checked frequently so that the landing gear does not become loose. You can also glue in the steel wire. fm_Tire_profile4.stl FOUGA MAGISTER PRINTING & ASSEMBLING MANUAL © PLANEPRINT...
- Page 34 Aditional parts. These parts replace the retractable landing gear. They can also be Bowden used if you want to mount larger wheels. Cable duct fm_Gear Brackets_profile2.stl Cable duct: remove support FOUGA MAGISTER PRINTING & ASSEMBLING MANUAL © PLANEPRINT...
- Page 35 EDF must be fi tted! Otherwise, the EDF has signifi cantly less power. Cable routing Cable routing The controller is cooled via the landing gear shaft. Battery Controller EDF 70 mm FOUGA MAGISTER PRINTING & ASSEMBLING MANUAL © PLANEPRINT...
- Page 36 Servo nose wheel Position the receiver here. The controller is located under the battery holder Self-adhesive and is optimally cooled. Velcro. Feed the controller cable through here. fm_Parts_profi le1.stl fm_battery holder_profi le1.stl FOUGA MAGISTER PRINTING & ASSEMBLING MANUAL © PLANEPRINT...
- Page 37 Flap If you want to connect both fl ap servos with a Y-cable to one channel, you must install them in the same direction! Aileron Flap FOUGA MAGISTER PRINTING & ASSEMBLING MANUAL © PLANEPRINT...
- Page 38 3. The fl aps should move down by the set value „full“. IMPORTANT The fl aps must be aligned exactly the same in every position, otherwi- se the aircraft will not fl y straight! FLAPS FOUGA MAGISTER PRINTING & ASSEMBLING MANUAL © PLANEPRINT...
- Page 39 The aircraft must balance 86 mm/3.38 inches behind the leading edge (see markings on the fuselage). For the fi rst fl ight we recommend to move the center of gravity about 5 mm/0.2 inches further forward. FOUGA MAGISTER PRINTING & ASSEMBLING MANUAL...
- Page 40 It is a good idea to be conservative with the flight timer until you gain experience with your airplane. TECHNICAL SPECIFICATIONS WINGSPAN 1370 mm/53.9 inches LENGHT 1134 mm/44.6 inches FLIGHT WEIGHT 2030 grams (with 4S/4200 MaH-Battery) FOUGA MAGISTER PRINTING & ASSEMBLING MANUAL © PLANEPRINT...
- Page 41 Filaments, printing supplies, hardware or mitter or model. consumables that can not be used after faulty 3D printing will not be replaced by PLANEPRINT.com in any way. Always keep the model in view and under control. Use only fully charged batteries.
Need help?
Do you have a question about the FOUGA MAGISTER and is the answer not in the manual?
Questions and answers