Advertisement
Quick Links
Advertisement

Subscribe to Our Youtube Channel
Related Manuals for PLANEPRINT BIG BOBBER


Summary of Contents for PLANEPRINT BIG BOBBER
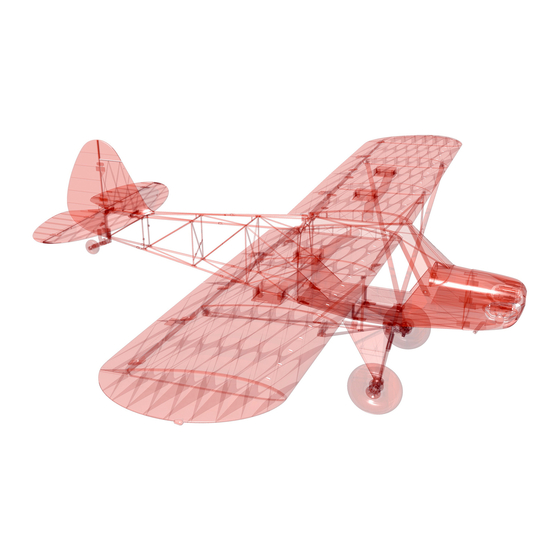
- Page 1 „BIG BOBBER“ • Very detailed Scale model in 3D lightweight construction. • Real 1 wall construction (Currently only supported by CURA!). • Wingspan 1370 mm (54 inches). WATCH OUT! STL DATA FOR DOWNLOADING This 3D print model is specially optimized www.planeprint.com...
- Page 2 Association meeting in Carpi, Italy. In 1999, the pro- not hesitate to contact Zlin if you think you want to duction of the Savage was relocated to the Czech become part of the dealer network. Courtesy of Zlin Aviation S.r.o. BIG BOBBER PRINTING & CONSTRUCTION MANUAL © PLANEPRINT...
- Page 3 Our STL files are provided with indelible copyright water- marks that can be verified at any time. Thank you for your understanding and have fun with your PLANEPRINT MODEL! BIG BOBBER PRINTING & CONSTRUCTION MANUAL...
- Page 4 PRINTING MANUAL BIG BOBBER PRINTING & CONSTRUCTION MANUAL © PLANEPRINT...
- Page 5 ADDITIONAL SETTINGS • Wall Line Count 8 • Generate Support checked INFO STL: Canopy 1-left_profi le1_bb.stl Canopy 1-right_profi le1_bb.stl Material: PLA Weight: ~ 11 g ADDITIONAL SETTINGS • Wall Line Count 8 BIG BOBBER PRINTING & CONSTRUCTION MANUAL © PLANEPRINT...
-
Page 6: Additional Settings
Material: PLA Weight: ~ 7 g ADDITIONAL SETTINGS • Wall Line Count 8 INFO STL: Wind shield edge_profi le1_bb.stl Material: PLA Weight: ~ 2 g ADDITIONAL SETTINGS • Wall Line Count 10 BIG BOBBER PRINTING & CONSTRUCTION MANUAL © PLANEPRINT... - Page 7 Cockpit_profi le1_bb.stl Material: PLA Weight: ~ 2 g ADDITIONAL SETTINGS • Wall Line Count 8 INFO STL: Gear 1_profi le1_bb.stl Material: PLA Weight: ~ 25 g ADDITIONAL SETTINGS • Wall Line Count 8 BIG BOBBER PRINTING & CONSTRUCTION MANUAL © PLANEPRINT...
- Page 8 Gear back_profi le1_bb.stl Material: PLA Weight: ~ 3 g ADDITIONAL SETTINGS • Wall Line Count 8 INFO STL: Grid 1_profi le1_bb.stl Material: PLA Weight: ~ 10 g ADDITIONAL SETTINGS • Wall Line Count 8 BIG BOBBER PRINTING & CONSTRUCTION MANUAL © PLANEPRINT...
- Page 9 Weight: ~ 8 g ADDITIONAL SETTINGS • Wall Line Count 8 INFO STL: Grid 3-left_profi le1_bb.stl Grid 3-right_profi le1_bb.stl Material: PLA Weight: ~ 8 g ADDITIONAL SETTINGS • Wall Line Count 8 BIG BOBBER PRINTING & CONSTRUCTION MANUAL © PLANEPRINT...
- Page 10 Grid 4_profi le1_bb.stl Material: PLA Weight: ~ 10 g ADDITIONAL SETTINGS • Wall Line Count 8 INFO STL: Grid 5_profi le1_bb.stl Material: PLA Weight: ~ 8 g ADDITIONAL SETTINGS • Wall Line Count 8 BIG BOBBER PRINTING & CONSTRUCTION MANUAL © PLANEPRINT...
- Page 11 Weight: ~ 7 g ADDITIONAL SETTINGS • Wall Line Count 8 INFO STL: Motor mount-21mm_profi le1_bb.stl Motor mount-customizable_ profi le1_bb.stl Material: PLA Weight: ~ 5 g ADDITIONAL SETTINGS • Wall Line Count 8 BIG BOBBER PRINTING & CONSTRUCTION MANUAL © PLANEPRINT...
- Page 12 Parts_profi le1_bb.stl Material: PLA Weight: ~ 7 g ADDITIONAL SETTINGS • Wall Line Count 8 INFO STL: Rims_profi le1_bb.stl Material: PLA Weight: ~ 10 g ADDITIONAL SETTINGS • Wall Line Count 8 BIG BOBBER PRINTING & CONSTRUCTION MANUAL © PLANEPRINT...
- Page 13 Material: PLA Weight: ~ 10 g ADDITIONAL SETTINGS • Wall Line Count 8 INFO STL: Servo mount (…)_profi le1_bb.stl Material: PLA Weight: ~ 4 g ADDITIONAL SETTINGS • Wall Line Count 8 BIG BOBBER PRINTING & CONSTRUCTION MANUAL © PLANEPRINT...
- Page 14 Material: PLA Weight: ~ 1 g ADDITIONAL SETTINGS • Wall Line Count 8 INFO STL: Position lights_profi le1_bb.stl Material: transparent PLA Weight: ~ 1 g ADDITIONAL SETTINGS • Wall Line Count 8 BIG BOBBER PRINTING & CONSTRUCTION MANUAL © PLANEPRINT...
- Page 15 Material: PLA silver or black Weight: ~ 11 g ADDITIONAL SETTINGS • Top Layers 4 INFO STL: Engine 2_profi le2_bb.stl Material: PLA red Weight: ~ 3 g ADDITIONAL SETTINGS • Top Layers 4 BIG BOBBER PRINTING & CONSTRUCTION MANUAL © PLANEPRINT...
- Page 16 Weight: ~ 11 g ADDITIONAL SETTINGS • Wall Line Count 5 INFO STL: Strut 2-left_profi le2_bb.stl Strut 2-right_profi le2_bb.stl Material: PLA Weight: ~ 11 g ADDITIONAL SETTINGS • Wall Line Count 5 BIG BOBBER PRINTING & CONSTRUCTION MANUAL © PLANEPRINT...
- Page 17 The following parts must be sliced with the profi le PROFILE P2_HOLLOWBODY. Recommended additional settings are listed in the screenshots. INFO STL: Grid tool_profi le2_bb.stl Material: PLA Weight: ~ 4 g ADDITIONAL SETTINGS Non necessary BIG BOBBER PRINTING & CONSTRUCTION MANUAL © PLANEPRINT...
- Page 18 Weight: ~ 19 g ADDITIONAL SETTINGS • Brim • Slightly less nozzle temperatures INFO STL: Aileron-left_profi le3_bb.stl Aileron-right_profi le3_bb.stl Material: PLA Weight: ~ 18 g ADDITIONAL SETTINGS • Brim • Slightly less nozzle temperatures BIG BOBBER PRINTING & CONSTRUCTION MANUAL © PLANEPRINT...
- Page 19 Material: PLA Weight: ~ 32 g ADDITIONAL SETTINGS Non necessary INFO STL: Cowling 2_profi le3_bb.stl Material: PLA Weight: ~ 4 g ADDITIONAL SETTINGS • Fan 100 % • Slightly less nozzle temperatures BIG BOBBER PRINTING & CONSTRUCTION MANUAL © PLANEPRINT...
- Page 20 • Brim Finally, at the tip, the Nozzle temperature should be reduced and the fan to 100%! INFO STL: Elevator 2_profi le3_bb.stl Material: PLA Weight: ~ 26 g ADDITIONAL SETTINGS Non necessary BIG BOBBER PRINTING & CONSTRUCTION MANUAL © PLANEPRINT...
- Page 21 INFO STL: Fuselage 1_profi le3_bb.stl Material: PLA Weight: ~ 65 g ADDITIONAL SETTINGS Non necessary INFO STL: Fuselage 2_profi le3_bb.stl Material: PLA Weight: ~ 24 g ADDITIONAL SETTINGS Non necessary BIG BOBBER PRINTING & CONSTRUCTION MANUAL © PLANEPRINT...
- Page 22 Rudder 1_profi le3_bb.stl Material: PLA Weight: ~ 12 g ADDITIONAL SETTINGS Non necessary INFO STL: Rudder 2_profi le3_bb.stl Material: PLA Weight: ~ 20 g ADDITIONAL SETTINGS • Z Seam Position: Back Left BIG BOBBER PRINTING & CONSTRUCTION MANUAL © PLANEPRINT...
- Page 23 Wing 1-left_profi le3_bb.stl Wing 1-right_profi le3_bb.stl Material: PLA Weight: ~ 63 g ADDITIONAL SETTINGS Non necessary INFO STL: Wing 2-left_profi le3_bb.stl Wing 2-right_profi le3_bb.stl Material: PLA Weight: ~ 64 g ADDITIONAL SETTINGS Non necessary BIG BOBBER PRINTING & CONSTRUCTION MANUAL © PLANEPRINT...
- Page 24 Wing 3-left_profi le3_bb.stl Wing 3-right_profi le3_bb.stl Material: PLA Weight: ~ 60 g ADDITIONAL SETTINGS Non necessary INFO STL: Wingtip-left_profi le3_bb.stl Wingtip-right_profi le3_bb.stl Material: PLA Weight: ~ 21 g ADDITIONAL SETTINGS Non necessary BIG BOBBER PRINTING & CONSTRUCTION MANUAL © PLANEPRINT...
- Page 25 • Infi ll Density 100 % INFO STL: Gear fl ex_profi le4_bb.stl Material: TPU soft Weight: ~ 11 g ADDITIONAL SETTINGS • Wall Line Count 8 • Infi ll Density 100 % BIG BOBBER PRINTING & CONSTRUCTION MANUAL © PLANEPRINT...
- Page 26 STL: Tire back_profi le4_bb.stl Material: TPU soft Weight: ~ 3 g ADDITIONAL SETTINGS • Wall Line Count 3 • Top Layers 5 • Bottom Layers 3 • Infi ll Density 15 % BIG BOBBER PRINTING & CONSTRUCTION MANUAL © PLANEPRINT...
- Page 27 The following parts must be sliced with the profi le PROFILE P4_FLEX (fl exible materials). Recommended additional settings are listed in the screenshots. INFO STL: Hinges_profi le4_bb.stl Material: TPU soft Weight: ~ 2 g ADDITIONAL SETTINGS Non necessary BIG BOBBER PRINTING & CONSTRUCTION MANUAL © PLANEPRINT...
-
Page 28: Required Accessories
• Philips screwdriver purchase of a small range • Needle nose pliers of screws, which can be • Drill Ø 1,5 mm and 3 mm used for all future Planeprint models. Simply search the Internet for: M2 Flat Head Tapping Screw Assortment …... - Page 29 CONSTRUCTION MANUAL BIG BOBBER PRINTING & CONSTRUCTION MANUAL © PLANEPRINT...
-
Page 30: Basic Information
The adhesive connections must hold perfectly! and align the parts perfectly. If glue co- mes out, wipe with a cloth. Then spray IMPORTANT! activator spray on the glue points. This surfaces should be sanded Connections BIG BOBBER PRINTING & CONSTRUCTION MANUAL © PLANEPRINT... - Page 31 STEP 1 STEP 2 Be careful not to use too much glue, the flap must move easily! These spacers ensure the correct gap distance. Don´t remove! STEP 2 STEP 1 BIG BOBBER PRINTING & CONSTRUCTION MANUAL © PLANEPRINT...
- Page 32 Rudder and Elevator STEP 2 Interconnects (Parts_profile1.stl) STEP 1 Hinges Do not glue this hinge yet! BIG BOBBER PRINTING & CONSTRUCTION MANUAL © PLANEPRINT...
-
Page 33: Assembling The Fuselage
Assembling the fuselage Interconnects bold (Parts_profi le1.stl) BIG BOBBER PRINTING & CONSTRUCTION MANUAL © PLANEPRINT... - Page 34 Assembling the fuselage Do not glue this part and then remove it again later. Tapping screws Ø2*8mm Tapping screws Ø2*8mm BIG BOBBER PRINTING & CONSTRUCTION MANUAL © PLANEPRINT...
-
Page 35: Assembling The Wings
Assembling the wings Wingtip Attention: the wing parts Wing 3 must not be interchanged! Wing 2 Wing 1 See information on page 29! Flap-left Hinges Flap-left Aileron-left Aileron-left Interconnects (Parts_profi le1.stl) BIG BOBBER PRINTING & CONSTRUCTION MANUAL © PLANEPRINT... - Page 36 Carbon fi ber Tube Ø 6 mm Lenght: 236 mm (9 inches) Fastening the wings (bottom side of wing 1) Drill carefully into the carbon tube (not completely through). Tapping screw Ø2*8mm Drill Ø1,5 mm BIG BOBBER PRINTING & CONSTRUCTION MANUAL © PLANEPRINT...
- Page 37 Use the Grid tool to connect these parts straight. Make sure that the left and right grid are exactly the same length! Strengthen the joints with the strips of Cockpit_profi le1_bb.stl strips of Cockpit_profi le1_bb.stl BIG BOBBER PRINTING & CONSTRUCTION MANUAL © PLANEPRINT...
- Page 38 Assembling the grid Tapping screws Do not glue this spot yet! Important: pay attention to the correct alignment! BIG BOBBER PRINTING & CONSTRUCTION MANUAL © PLANEPRINT...
- Page 39 Now you can also glue the trailing edge, before that you have to put a hinge into it. Hinge We recommend to reinforce all glued areas of the grid with a drop of CA-glue. BIG BOBBER PRINTING & CONSTRUCTION MANUAL © PLANEPRINT...
- Page 40 Ø3*83mm Tapping screws Ø2*12mm carbon rod Ø3*117mm Tapping screws Ø2*12mm Metal screw M3*43mm fold double or triple hair gum Use as many rubber bands as necessary until the suspension is rather tight. BIG BOBBER PRINTING & CONSTRUCTION MANUAL © PLANEPRINT...
- Page 41 Assembling the tail wheel Tapping screws Ø2*8mm TPU part Gear back 2_profi le4_bb.stl carbon rod Ø3*18mm Metal screw M3*18mm Assembling the struts Assembling the struts Tapping screws Ø2*8mm Tapping screw Ø2*12mm Tapping screw Ø2*12mm BIG BOBBER PRINTING & CONSTRUCTION MANUAL © PLANEPRINT...
- Page 42 (if desired) Servo elevator For the linkage of rudder and elevator use carbon rod Ø1,5mm There is a choice of servo mount for different servos and also a customizable version. Tapping screws Ø2*16mm BIG BOBBER PRINTING & CONSTRUCTION MANUAL © PLANEPRINT...
- Page 43 A Velcro strip can be inserted through the openings. Cable clip Assembling of the tow coupling Tapping screw Ø2*8mm Carbon rod Ø1.5mm BIG BOBBER PRINTING & CONSTRUCTION MANUAL © PLANEPRINT...
-
Page 44: Installation Of The Wing Servos
V-cable on one channel. Aileron left There is a choice of servo Aileron right covers for different servos and also a customizable version. BIG BOBBER PRINTING & CONSTRUCTION MANUAL © PLANEPRINT... - Page 45 Suitable foils are overhead foils or binding covers of scripts (~0,2mm, offi ce trade) in DIN A4 format. Cut the foil as exactly as possible along the black lines. Before cutting, apply transparent double-sided adhesive tape here. Cutout for the tow coupling (only if you put one in). BIG BOBBER PRINTING & CONSTRUCTION MANUAL © PLANEPRINT...
- Page 46 Do NOT use CA glue here! The aggressi- ve vapours would make the fi lm cloudy. Use UHU or similar. Wind shield edge BIG BOBBER PRINTING & CONSTRUCTION MANUAL © PLANEPRINT...
- Page 47 Cockpit print template IMPORTANT: the print must be set to 100% page size, so that the size fits exactly! Be careful when handling the cutter! BIG BOBBER PRINTING & CONSTRUCTION MANUAL © PLANEPRINT...
- Page 48 DETAIL PHOTOS BIG BOBBER PRINTING & CONSTRUCTION MANUAL © PLANEPRINT...
- Page 49 DETAIL PHOTOS BIG BOBBER PRINTING & CONSTRUCTION MANUAL © PLANEPRINT...
-
Page 50: Transmitter Configuration
5 mm/0.2 inches further forward. TECHNICAL SPECIFICATIONS 912 mm 1370 mm WEIGHT: Without RC components: ~ 995 g Flight weight: ~ 1400 g BIG BOBBER PRINTING & CONSTRUCTION MANUAL © PLANEPRINT... -
Page 51: Control Direction Test
7. Move the flap switch to position 2. The flaps should move down by the set value „half“. 8. Move the flap control switch to position 3. The flaps should move down by the set value „whole“. RUDDER FLAPS BIG BOBBER PRINTING & CONSTRUCTION MANUAL © PLANEPRINT... -
Page 52: Age Recommendation
Filaments, printing supplies, hardware or mitter or model. consumables that can not be used after faulty 3D printing will not be replaced by PLANEPRINT.com in any way. Always keep the model in view and under control. Use only fully charged batteries.
Need help?
Do you have a question about the BIG BOBBER and is the answer not in the manual?
Questions and answers