
Subscribe to Our Youtube Channel
Related Manuals for PLANEPRINT ZIGGY


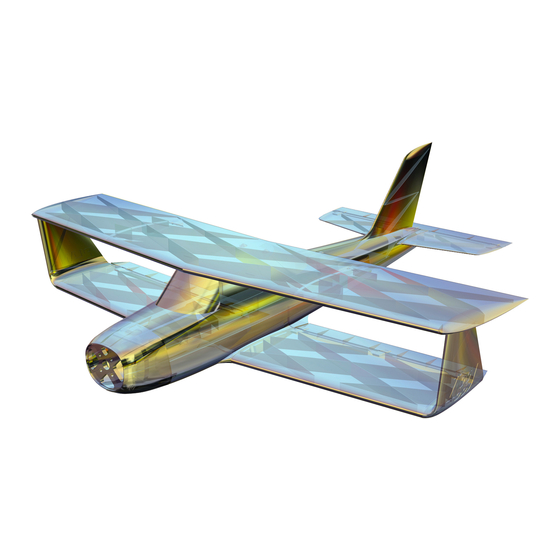
Summary of Contents for PLANEPRINT ZIGGY
- Page 1 ZIGGY You can fi nd the STL data NOTE: Slicing only at www.planeprint.com works with CURA!
- Page 2 Here we show you how to make adjustments from a standard CURA profile. For this model we need only 4, easy to create profiles. It is important to follow the instructions from PLANEPRINT.com to slice the part correctly. However, it can be useful to perfect your 3D printing by making some additional settings depending on the printer and filament used.
- Page 3 PLA, Weight: ~ 10 g ADDITIONAL SETTINGS None required Interconnects_profi le1_zy.stl MATERIAL PLA, ~ 1 g ADDITIONAL SETTINGS None required NOTE You can also print the interconnects with LW-PLA, then they are less visible. ZIGGY PRINTING & ASSEMBLING MANUAL © PLANEPRINT...
- Page 4 NOTE There are different versions for different engines: Motor back mount 31mm_profi le1_zy.stl Motor back mount undrilled_profi le1_zy.stl Motor front mount 14mm_profi le1_zy.stl Motor front mount 16mm_profi le1_zy.stl Motor front mount undrilled_profi le1_zy.stl ZIGGY PRINTING & ASSEMBLING MANUAL © PLANEPRINT...
- Page 5 PROFILE P1_FULLBODY normal PLA The following parts must be sliced with the PROFILE P1_FULLBODY. Please note the additional settings for the individual parts! Servomount_profi le1_zy.stl MATERIAL PLA, ~ 5 g ADDITIONAL SETTINGS None required ZIGGY PRINTING & ASSEMBLING MANUAL © PLANEPRINT...
- Page 6 The optimal weight and suffi cient strength is achieved with 60 % fl ow. Increase the temperature until the wall thickness is 0.4 to 0.5 mm. (We print at 250° and 60% fl ow). ZIGGY PRINTING & ASSEMBLING MANUAL © PLANEPRINT...
- Page 7 The optimal weight and suffi cient strength is achieved with 60 % fl ow. Increase the temperature until the wall thickness is 0.4 to 0.5 mm. (We print at 250° and 60% fl ow). ZIGGY PRINTING & ASSEMBLING MANUAL © PLANEPRINT...
- Page 8 The optimal weight and suffi cient strength is achieved with 60 % fl ow. Increase the temperature until the wall thickness is 0.4 to 0.5 mm. (We print at 250° and 60% fl ow). ZIGGY PRINTING & ASSEMBLING MANUAL © PLANEPRINT...
- Page 9 The optimal weight and suffi cient strength is achieved with 60 % fl ow. Increase the temperature until the wall thickness is 0.4 to 0.5 mm. (We print at 250° and 60% fl ow). ZIGGY PRINTING & ASSEMBLING MANUAL © PLANEPRINT...
- Page 10 The optimal weight and suffi cient strength is achieved with 60 % fl ow. Increase the temperature until the wall thickness is 0.4 to 0.5 mm. (We print at 250° and 60% fl ow). ZIGGY PRINTING & ASSEMBLING MANUAL © PLANEPRINT...
- Page 11 The optimal weight and suffi cient strength is achieved with 60 % fl ow. Increase the temperature until the wall thickness is 0.4 to 0.5 mm. (We print at 250° and 60% fl ow). ZIGGY PRINTING & ASSEMBLING MANUAL © PLANEPRINT...
- Page 12 The following parts must be sliced with the PROFILE P4_FLEX. Please note the additional settings for the individual parts! Hinges_profi le4_zy.stl MATERIAL TPU ~ A95, Weight: ~ 1 g ADDITIONAL SETTINGS None required ZIGGY PRINTING & ASSEMBLING MANUAL © PLANEPRINT...
- Page 13 • CA activator • Steel wire Ø0.6mm*400mm (or Ø0.8mm, max. Ø1mm for the servo linkages) • small Rod connection, 3 pieces Rod connection Tools • Cutter knife • small Philips screwdriver • needle-nose pliers ZIGGY PRINTING & ASSEMBLING MANUAL © PLANEPRINT...
- Page 14 RC COMPONENTS 2S-Setting (Like our Ziggy from the offi cial Planeprint video) ENGINE AXI 2203/40 VPP PROP APC 6x6E (our prototype from the video) But you can also use other motors. It is important that the motor should have a weight of about 20 grams.
-
Page 16: Assembling Manual
Wings assembly – Wing down After the winglet is glued, carefully cut off the protruding corner along Winglet-left-LW_profi le3_zy.stl the end edge so that the aileron can be mounted. WING-down-left_LW_profi le3_zy.stl medium l. ZIGGY PRINTING & ASSEMBLING MANUAL © PLANEPRINT... - Page 17 CA glue on the hinge. Wait again for the glue to run in, and then spray the activator on it. Do not use too much glue, the aileron must move easily! ZIGGY PRINTING & ASSEMBLING MANUAL © PLANEPRINT...
-
Page 18: Fuselage Assembly
Assemble the parts as shown in the picture. Elevator_LW_profi le3_zy.stl medium l. HS-left_LW_profi le3_zy.stl Linkages_profi le1_zy.stl Interconnects_profi le1_zy.stl thin HS-right_LW_profi le3_zy.stl Fuselage2_LW_profi le3_zy.stl medium l. Fuselage3_LW_profi le3_zy.stl Hinges_profi le4_zy.stl These must NOT be removed! ZIGGY PRINTING & ASSEMBLING MANUAL © PLANEPRINT... - Page 19 1.5 degrees downwards and 1.5 degrees to the right (viewed from above). If your prop turns to the left, the motor must point to the left. Then glue the motor mount well to the fuselage 1. ZIGGY PRINTING & ASSEMBLING MANUAL © PLANEPRINT...
- Page 20 Now attach the steel wire to the linkage and feed both through the opening in the fuselage. Then glue the wing down to the fuselage. Repeat with the other side. medium l. Steel wire WING-down-left_LW_profi le3_zy.stl ZIGGY PRINTING & ASSEMBLING MANUAL © PLANEPRINT...
- Page 21 Note the positioning guides on the fuselage and underside of the upper wing. medium l. medium l. medium l. Cover STEP 2 Cover_LW_profi le3_zy.stl STEP 1 ZIGGY PRINTING & ASSEMBLING MANUAL © PLANEPRINT...
-
Page 22: Servo Mount
Attention Before you switch on the servos for the first time, reduce the maximum travel considerably so that the rudders cannot touch anything. ZIGGY PRINTING & ASSEMBLING MANUAL © PLANEPRINT... -
Page 23: Center Of Gravity (Cg)
If you have a very fast motorization, the CG should be placed a little further forward. CG scale_profi le1_zy.stl For the exact determination of the CG you will fi nd a CG scale in the download. ZIGGY PRINTING & ASSEMBLING MANUAL © PLANEPRINT... -
Page 24: Control Direction Test
8 mm, down: 8 mm AILERON left: 6 mm, right: 6 Expo setting (for some remote controls a minus has to be in front of the number) ELEVATOR 40 % AILERON 40 % ZIGGY PRINTING & ASSEMBLING MANUAL © PLANEPRINT... -
Page 25: Technical Specifications
The best way to start is to grab the top of the fuselage behind the wing and set the engine to full throttle or near full throttle. Then throw the Ziggy upward at an angle of at least 45 degrees with a quick swing. -
Page 26: Age Recommendation
Filaments, printing supplies, hardware or mitter or model. consumables that can not be used after faulty 3D printing will not be replaced by PLANEPRINT.com in any way. Always keep the model in view and under control. Use only fully charged batteries.
Need help?
Do you have a question about the ZIGGY and is the answer not in the manual?
Questions and answers