
Related Manuals for PLANEPRINT SHARD


Summary of Contents for PLANEPRINT SHARD
- Page 1 You can fi nd the STL data NOTE: Slicing only at www.planeprint.com works with CURA!
- Page 2 It is essential for the necessary stability of the SHARD that the LW parts printed with PROFILE_5 are as stable as possible. Please use a test part to check the strength by fracture tests.
- Page 3 PLA or PLA+, Weight: ~ 2 g ADDITIONAL SETTINGS • Z Seam Alignment: User Specifi ed • Z Seam Position: Back • Built Plate Adhension Type: Brim Interconnects_p1_Shard.stl MATERIAL LW-PLA, ~ 2 g ADDITIONAL SETTINGS None required SHARD PRINTING & ASSEMBLING MANUAL © PLANEPRINT...
- Page 4 48 mm hole spacing, if your motor has a larger cross with it. In this variant, the space for installation is very tight, possibly something must be fi led off at the cross. SHARD PRINTING & ASSEMBLING MANUAL © PLANEPRINT...
- Page 5 Please note the additional settings for the individual parts! Mount battery_p1_Shard.stl MATERIAL PLA or PLA+, Weight: ~ 8 g ADDITIONAL SETTINGS None required • Print this part twice Mount rc_p1_Shard.stl MATERIAL PLA or PLA+, ~ 9 g ADDITIONAL SETTINGS None required SHARD PRINTING & ASSEMBLING MANUAL © PLANEPRINT...
- Page 6 Please note the additional settings for the individual parts! Parts 1_p1_Shard.stl MATERIAL PLA or PLA+, Weight: ~ 16 g ADDITIONAL SETTINGS None required Parts 2_p1_Shard.stl MATERIAL PLA or PLA+, ~ 12 g ADDITIONAL SETTINGS None required SHARD PRINTING & ASSEMBLING MANUAL © PLANEPRINT...
- Page 7 Please note the additional settings for the individual parts! Parts 3_p1_Shard.stl MATERIAL PLA or PLA+, Weight: ~ 20 g ADDITIONAL SETTINGS None required Parts 4_p1_Shard.stl MATERIAL PLA or PLA+, ~ 5 g ADDITIONAL SETTINGS None required SHARD PRINTING & ASSEMBLING MANUAL © PLANEPRINT...
- Page 8 Please note the additional settings for the individual parts! Rim_p1_Shard.stl MATERIAL PLA or PLA+, Weight: ~ 5 g ADDITIONAL SETTINGS None required • Print this part twice Servo brackets_p1_Shard.stl MATERIAL PLA or PLA+, ~ 13 g ADDITIONAL SETTINGS None required SHARD PRINTING & ASSEMBLING MANUAL © PLANEPRINT...
- Page 9 Please note the additional settings for the individual parts! Spinner plate_p1_Shard.stl MATERIAL PLA or PLA+, ~ 6 g ADDITIONAL SETTINGS None required Wing protectors_p1_Shard.stl MATERIAL PLA or PLA+, ~ 13 g ADDITIONAL SETTINGS None required SHARD PRINTING & ASSEMBLING MANUAL © PLANEPRINT...
- Page 10 VarioShore. INFO Tension belt lenght If you want to change them slightly in length, you can simply change the dimension of the X-axis in Cura (Uniform scaling must NOT be selected). SHARD PRINTING & ASSEMBLING MANUAL © PLANEPRINT...
- Page 11 • Top Layers: 4 • Bottom Layers: 4 • Infi ll Density: 17 % • Infi ll Pattern: Grid or Gyroid • Print this part twice View in cross-section printed with Colorfabb VarioShore LW-TPU. SHARD PRINTING & ASSEMBLING MANUAL © PLANEPRINT...
- Page 12 TPU A95 and VarioShore The following parts must be sliced with the PROFILE P4_FLEX. Please note the additional settings for the individual parts! Hinges_p4_Shard.stl MATERIAL TPU VarioShore, Weight: ~ 2 g ADDITIONAL SETTINGS None required SHARD PRINTING & ASSEMBLING MANUAL © PLANEPRINT...
- Page 13 Aileron 1 left_p5_Shard.stl Aileron 1 right_p5_Shard.stl MATERIAL LW-PLA, ~ 13 g* *Weighed ADDITIONAL SETTINGS None required Aileron 2 left_p5_Shard.stl Aileron 2 right_p5_Shard.stl MATERIAL LW-PLA, ~ 13 g* *Weighed ADDITIONAL SETTINGS None required SHARD PRINTING & ASSEMBLING MANUAL © PLANEPRINT...
- Page 14 Aileron 3 left_p5_Shard.stl Aileron 3 right_p5_Shard.stl MATERIAL LW-PLA, ~ 10 g* *Weighed ADDITIONAL SETTINGS None required Canopy 1_p5_Shard.stl MATERIAL LW-PLA, ~ 17 g* *Weighed ADDITIONAL SETTINGS None required SHARD PRINTING & ASSEMBLING MANUAL © PLANEPRINT...
- Page 15 Basic settings for LW-PLA: Please follow the instructions in our WINGTEST AND CALIBRATION TOOL on our website for correct adjustment! Canopy 2_p5_Shard.stl MATERIAL LW-PLA, ~ 17 g* *Weighed ADDITIONAL SETTINGS None required Canopy 3_p5_Shard.stl MATERIAL LW-PLA, ~ 24 g* *Weighed ADDITIONAL SETTINGS None required SHARD PRINTING & ASSEMBLING MANUAL © PLANEPRINT...
- Page 16 Elevator 1 left_p5_Shard.stl Elevator 1 right_p5_Shard.stl MATERIAL LW-PLA, ~ 9 g* *Weighed ADDITIONAL SETTINGS None required Elevator 2 left_p5_Shard.stl Elevator 2 right_p5_Shard.stl MATERIAL LW-PLA, ~ 8.4 g* *Weighed ADDITIONAL SETTINGS None required SHARD PRINTING & ASSEMBLING MANUAL © PLANEPRINT...
- Page 17 INFO: If you have problems with printing, you can also fi nd this part in a split version in the Optional parts folder. Fuselage 2 left_p5_Shard.stl Fuselage 2 right_p5_Shard.stl MATERIAL LW-PLA, ~ 47 g* *Weighed ADDITIONAL SETTINGS None required SHARD PRINTING & ASSEMBLING MANUAL © PLANEPRINT...
- Page 18 INFO: If you have problems with printing, you can also fi nd this part in a split version in the Optional parts folder. Fuselage 4_p5_Shard.stl MATERIAL LW-PLA, ~ 60 g* *Weighed ADDITIONAL SETTINGS None required SHARD PRINTING & ASSEMBLING MANUAL © PLANEPRINT...
- Page 19 Basic settings for LW-PLA: Please follow the instructions in our WINGTEST AND CALIBRATION TOOL on our website for correct adjustment! Fuselage 5_p5_Shard.stl MATERIAL LW-PLA, ~ 46 g* *Weighed ADDITIONAL SETTINGS None required Fuselage 6_p5_Shard.stl MATERIAL LW-PLA, ~ 12 g* *Weighed ADDITIONAL SETTINGS None required SHARD PRINTING & ASSEMBLING MANUAL © PLANEPRINT...
- Page 20 Gear Leg R+L_p5_Shard.stl MATERIAL LW-PLA, ~ 5.8 g* *Weighed ADDITIONAL SETTINGS • Print this part twice HS left_p5_Shard.stl HS right_p5_Shard.stl MATERIAL LW-PLA, ~ 18 g* *Weighed ADDITIONAL SETTINGS None required SHARD PRINTING & ASSEMBLING MANUAL © PLANEPRINT...
- Page 21 Basic settings for LW-PLA: Please follow the instructions in our WINGTEST AND CALIBRATION TOOL on our website for correct adjustment! Rudder 1_p5_Shard.stl MATERIAL LW-PLA, ~ 14 g* *Weighed ADDITIONAL SETTINGS None required Rudder 2_p5_Shard.stl MATERIAL LW-PLA, ~ 15 g* *Weighed ADDITIONAL SETTINGS None required SHARD PRINTING & ASSEMBLING MANUAL © PLANEPRINT...
- Page 22 SFG 1 R+L_p5_Shard.stl MATERIAL LW-PLA, ~ 3 g* *Weighed ADDITIONAL SETTINGS • Print this part twice SFG 2 R+L_p5_Shard.stl MATERIAL LW-PLA, ~ 3.5 g* *Weighed ADDITIONAL SETTINGS • Print this part twice SHARD PRINTING & ASSEMBLING MANUAL © PLANEPRINT...
- Page 23 LW-PLA, ~ 7 g* *Weighed ADDITIONAL SETTINGS • We recommend to print the spinner with a little more material fl ow (80%) INFO: On www.planenprint.com/shard under Free tuning parts you will fi nd a version for larger props. VS_p5_Shard.stl MATERIAL...
- Page 24 Wheel Cap 1 left_p5_Shard.stl Wheel Cap 1 right_p5_Shard.stl MATERIAL LW-PLA, ~ 5 g* *Weighed ADDITIONAL SETTINGS None required Wheel Cap 2 left_p5_Shard.stl Wheel Cap 2 right_p5_Shard.stl MATERIAL LW-PLA, ~ 3.1 g* *Weighed ADDITIONAL SETTINGS None required SHARD PRINTING & ASSEMBLING MANUAL © PLANEPRINT...
- Page 25 ADDITIONAL SETTINGS • left: Z Seam Position: back right • right: Z Seam Position: back left Wing 1 part left_p5_Shard.stl Wing 1 part right_p5_Shard.stl MATERIAL LW-PLA, ~ 3.6 g* *Weighed ADDITIONAL SETTINGS None required SHARD PRINTING & ASSEMBLING MANUAL © PLANEPRINT...
- Page 26 Wing 2 left_p5_Shard.stl Wing 2 right_p5_Shard.stl MATERIAL LW-PLA, ~ 50 g* *Weighed ADDITIONAL SETTINGS None required Wing 3 left_p5_Shard.stl Wing 3 right_p5_Shard.stl MATERIAL LW-PLA, ~ 36 g* *Weighed ADDITIONAL SETTINGS None required SHARD PRINTING & ASSEMBLING MANUAL © PLANEPRINT...
- Page 27 It is essential to print these parts with LW-PLA! Basic settings for LW-PLA: Please follow the instructions in our WINGTEST AND CALIBRATION TOOL on our website for correct adjustment! X_p5_Shard.stl MATERIAL LW-PLA, ~ 1.7 g* *Weighed ADDITIONAL SETTINGS None required SHARD PRINTING & ASSEMBLING MANUAL © PLANEPRINT...
- Page 28 Magnet Rod 1: 3x 265, 1x 200 Rod 2: 1x 265, 2x 180, 1x 150, 1x 100, 2x 40, 1x 30 Rod 3: 1x 170, 3x 150, 1x 75, 1x 30 Carbon tube SHARD PRINTING & ASSEMBLING MANUAL © PLANEPRINT...
- Page 29 NOTE Tthis motorization is very powerful and optimized for 3d maneuvers. The Shard is not full throttle safe with it. Always be careful, it is up to your discretion and the quality of your printing and assembly as to what stresses the aircraft can withstand.
- Page 30 LW-PLA PLA+ CARBON...
-
Page 31: Basic Information
Now spray some activator spray on each hinge to cure the CA glue. Repeat on the other side of the hinges. Do not use too much glue and test if each hinge holds well. SHARD PRINTING & ASSEMBLING MANUAL © PLANEPRINT... -
Page 32: Wing Assembly
Wing 2 left_p5_Shard.stl Use the carbon tubes to align the parts exactly, but make sure that no glue gets on the tubes! Wing 1 left_p5_Shard.stl Interconnects_p1_Shard.stl Wing 1 part left_p5_Shard.stl Wing protectors_p1_Shard.stl Carbon tubes Ø8mm*1000mm SHARD PRINTING & ASSEMBLING MANUAL © PLANEPRINT... - Page 33 Servo aileron Mount the servos as shown in the picture. Servo brackets_p1_Shard.stl Parts 4_p1_Shard.stl Rod connections Steel wire Ø1mm or Carbon rod Ø2mm SHARD PRINTING & ASSEMBLING MANUAL © PLANEPRINT...
-
Page 34: Fuselage Assembly
PLA parts to the outside of the fuselage. Carbon rods Make sure that no glue gets Ø4mm*180mm on the carbon rods, these must be removed again! Parts 1_p1_Shard.stl Carbon rods Ø4mm*265mm Parts 3_p1_Shard.stl Parts 1_p1_Shard.stl SHARD PRINTING & ASSEMBLING MANUAL © PLANEPRINT... - Page 35 Fuselage 1_p5_Shard.stl Fuselage 1_p5_Shard.stl Carbon rods Ø4mm*150mm Fuselage 1_p5_Shard.stl Now the parts fuselage 1 to fuselage 5 can be mounted. Fuselage 2_p5_Shard.stl Interconnects_p1_Shard.stl Fuselage 3_p5_Shard.stl Fuselage 4_p5_Shard.stl Fuselage 5_p5_Shard.stl SHARD PRINTING & ASSEMBLING MANUAL © PLANEPRINT...
-
Page 36: Elevator Assembly
Rudder 2_p5_Shard.stl HS right_p5_Shard.stl Fuselage 6_p5_Shard.stl Carbon rod Ø4mm*100mm Carbon rod Ø4mm*200mm HS left_p5_Shard.stl Parts 2_p1_Shard.stl Rudder 1_p5_Shard.stl Parts 2_p1_Shard.stl Finally, glue the hinges as described on page 31. These three hinges are wider! SHARD PRINTING & ASSEMBLING MANUAL © PLANEPRINT... - Page 37 The ropes for the rudder should be crossed. Make sure that the ropes are taut and hang the rod clamps in the second hole from the inside. Servo brackets_p1_Shard.stl Servo brackets_p1_Shard.stl SHARD PRINTING & ASSEMBLING MANUAL © PLANEPRINT...
-
Page 38: Gear Assembly
You may have to drill the screw holes to 2.5 mm. Parts 3_p1_Shard.stl Grub screws Ø3mm SHARD PRINTING & ASSEMBLING MANUAL © PLANEPRINT... -
Page 39: Controller Assembly
Screw the gear tightly enough to the PLA part in fuselage 6 so that it can still be moved and connect the control horns with two hair gums. Controller assembly Mount rc_p1_Shard.stl Mount battery_p1_Shard.stl SHARD PRINTING & ASSEMBLING MANUAL © PLANEPRINT... - Page 40 Place the PLA discs on the carbon tube and apply just a drop of medium CA glue to the edge to fi x it to the fuselage. remove the carbon tube and glue the disc well in place with thin CA glue. SHARD PRINTING & ASSEMBLING MANUAL © PLANEPRINT...
-
Page 41: Motor Mounting
The cooling sheets are absolutely essential for engine cooling. The fuselage contains recesses that show the exact position. You should only glue them in after the motor has been installed. Cooling sheets_p1_Shard.stl SHARD PRINTING & ASSEMBLING MANUAL © PLANEPRINT... -
Page 42: Canopy Assembly
Parts 4_p1_Shard.stl Grub screw Ø3mm Decals In your download you will fi nd a folder with templates for decals in various vector formats (in original size) as well as various suggestions for coloring. SHARD PRINTING & ASSEMBLING MANUAL © PLANEPRINT... -
Page 43: Center Of Gravity (Cg)
There are two CG markings on the wing. The front one is 100 mm from the leading edge and is recommended for maiden flight. The rear one is 10 mm further back and is optimal for aerobatics. Where the CG is actually located on your SHARD depends on your personal preferences. SHARD PRINTING &... -
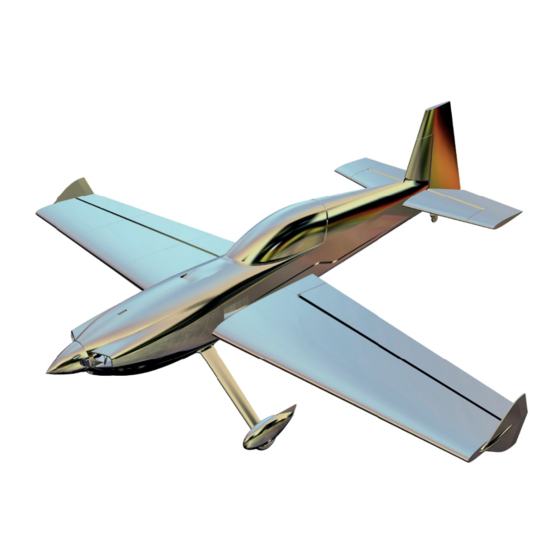
Page 44: Technical Specifications
AILERON 40 % 50 % of the number) RUDDER 30 % 40 % Technical specifi cations WINGSPAN 1300 mm/51.2 inches LENGHT 1300 mm/51.2 inches FLIGHT WEIGHT 2.100 grams SHARD PRINTING & ASSEMBLING MANUAL © PLANEPRINT... -
Page 45: Control Direction Test
Control Direction Test Turn on the transmitter and connect the battery. When checking the control directions, look at the aircraft from behind. Elevator up Elevator down Aileron left Aileron right Rudder left Rudder right SHARD PRINTING & ASSEMBLING MANUAL © PLANEPRINT... - Page 46 © PLANEPRINT.com, A-6021 Innsbruck, Conradstraße 6, info@planeprint.com © Design STL files by René Marschall • Layout: marschall designlab, marschall.cc All STL are subject to the copyright of René Marschall. It is not allowed to mold and rebuild Planeprint models with other materials (carbon, wood ...).
Need help?
Do you have a question about the SHARD and is the answer not in the manual?
Questions and answers