Table of Contents
Advertisement
Quick Links
Advertisement
Table of Contents

Related Manuals for OHAUS MB95


Summary of Contents for OHAUS MB95
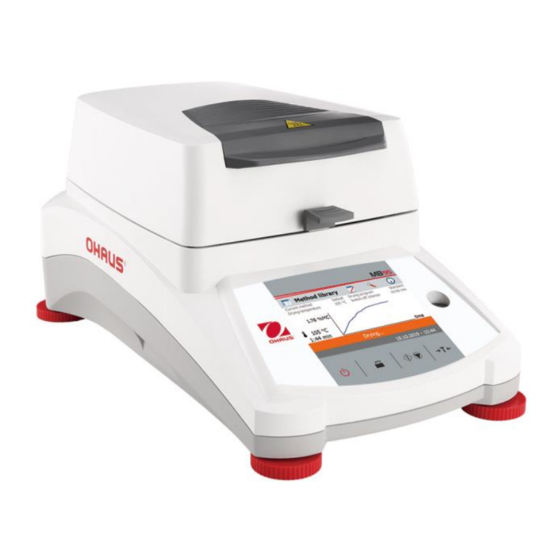
- Page 1 Instruction Manual MB95 Moisture Analyzer...
-
Page 3: Table Of Contents
MB95 EN-1 Table of Contents GETTING TO KNOW YOUR MOISTURE ANALYZER ..............4 Introduction ..........................4 Overview of the Moisture Analyzer ..................4 What is a Moisture Analyzer? ....................4 SAFETY INFORMATION ........................ 5 2.1 Definition of Signal Warnings and Symbols .................. 5 2.2 Product Specific Safety Notes ....................... - Page 4 EN-2 MB95 6.5.4 Factory reset ......................... 30 6.5.5 Software update ........................31 METHOD LIBRARY........................32 Use of the method library ....................... 32 7.1.1 Method load, edit and delete ..................32 7.1.2 Method export and import ....................33 Method parameters (drying parameters) ................34 7.2.1...
- Page 5 MB95 EN-3 Overview of Controls Turns On or Off display and fan. When pressed, sends Print command. When pressed, either starts or stops the drying process. When pressed, performs Tare function. Leveling indicator Leveling Feet Used to level the Moisture Analyzer.
-
Page 6: Getting To Know Your Moisture Analyzer
GETTING TO KNOW YOUR MOISTURE ANALYZER This section provides you with essential information on your MB95 Moisture Analyzer. Please read through the section carefully even if you have previous experience with OHAUS Moisture Analyzers and be sure to familiarize yourself with the safety notes. -
Page 7: Safety Information
Your Moisture Analyzer conforms with all common standards and directives. It supports standard procedures, work techniques and records as required by GLP (Good Laboratory Practices) and SOP (Standard Operating Procedure). We recommend the use of the OHAUS SF40A Printer. SAFETY INFORMATION 2.1 Definition of Signal Warnings and Symbols Safety notes are marked with signal words and warning symbols. -
Page 8: Product Specific Safety Notes
Your Moisture Analyzer is used for determining the moisture in samples. Use the instrument exclusively for this purpose. Any other type of use and operation beyond the limits of technical specifications without written consent from OHAUS, is considered as not intended. Moisture determination applications must be optimized and validated by the user according to local regulations. - Page 9 MB95 EN-7 CAUTION The Halogen Moisture Analyzer works with heat! a) Ensure sufficient free space around the instrument to avoid heat accumulation and overheating (approx. 1 m free space above the heating module). b) The vent over the sample must never be covered, plugged, taped over or tampered with in any other way.
-
Page 10: Installation
Quick Guide Remove packing material from the instrument. Check the instrument for transport damage. Immediately inform your Ohaus dealer if you have complaints or parts are missing. Store all parts of the packaging. This packaging guarantees the best possible protection for the transport of your instrument. -
Page 11: Installing The Tray Pan, Draft Shield And Pan Support
MB95 EN-9 Installing the Tray Pan, Draft Shield and Pan Support Lift the cover straight up and Install the tray pan in the base of the heating chamber. Install the draft shield (only one position possible) on top of the tray pan. -
Page 12: Connecting To A Power Supply
Check to ensure the voltage stated on the Moisture Analyzer’s data label matches your local line voltage. If this is not the case, do not connect the Moisture Analyzer to the power supply, contact your responsible OHAUS dealer. The halogen dryer unit is designed to operate at a specific line voltage (90V AC or 240V AC). -
Page 13: Making A Simple Measurement
MB95 EN-11 Note: As your Moisture Analyzer needs no warm-up time when in the standby mode and is immediately ready for testing samples, we advise you to switch the display off by use of the On/Off button and not to disconnect it from the power supply. - Page 14 EN-12 MB95 Drying and measurement You are now able to follow the progress of the drying cycle on the display. This first display comes up automatically when the test was started. Observing the test progress There are five displays available when the Moisture Analyzer is running a test.
-
Page 15: Menu
MB95 EN-13 MENU The Home screen appears after the moisture analyzer has been switched on. Button area Current Method Results area Instructions area Date and time area 1. Method library: Change parameters and create new method. 2. Test results: Manage test results. -
Page 16: Setup
EN-14 MB95 Setup Press the Setup button to access the Setup menu. Help Information Press the Help button to access the Help menu. SETUP The setup menu is activated by pressing the Setup button. The menu contains: lock out, weight and temperature adjustment, user settings, device settings, system and data management. -
Page 17: Adjustment
MB95 EN-15 Press Lock out to access the lock out menu. Press Lock to lock out Press Unlock to release. Adjustment 6.2.1 Weight adjustment The Moisture Analyzer can be adjusted with an external mass of 50 grams. Adjustment of the Moisture Analyzer is not absolutely necessary for a correct moisture determination as the measurement is relative. -
Page 18: Temperature Adjustment
EN-16 MB95 Press the Adjustment button to access adjustment menu. Press Back to return to previous step. Press the Weight adjustment-external button The display highlights the action you should take. Follow the instructions on the display. Remove the sample pan. Place the required weight on the sample pan, close the cover. - Page 19 MB95 EN-17 Press adjustment button. Press Back to return to previous screen. Press Exit to return to Home screen. Press Temperature adjustment button. You are now prompted to remove the pan support. Place a temperature calibration kit and close the upper housing.
-
Page 20: Weight Adjustment Record
EN-18 MB95 CAUTION: Danger of burns. Be careful when removing the temperature calibration kit from the dryer unit as it can be very hot. Allow it to cool down by opening the cover before removing. Remove the calibration kit. Replace the pan support in its proper positions. -
Page 21: User Settings
MB95 EN-19 Press Weight and temperature adjustment button to access the adjustment screen. Press Back to return to previous screen. Press Exit to return to Home screen. Press the Temperature adjustment history button. Here you will find the last temperature adjustment result. -
Page 22: Brightness
EN-20 MB95 Select LANGUAGE. Note: If you select English as the dialog language, the date format is changed and appears on all records in the MM/DD/YYYY format. 6.3.2 Brightness Press Setup button to access the Setup menu. Press Back to return to Home screen. -
Page 23: Sound
MB95 EN-21 6.3.3 Sound Press Setup button to access the Setup menu. Press Back to return to previous screen. Press User settings button to access the User settings menu. Press Back to return to previous screen. Press Exit to return to Home screen. - Page 24 EN-22 MB95 Press Setup button to access the setup menu. Press Back to return to previous screen. Press Device settings to access the Device settings menu. Press Back to return to previous screen. Press Exit to return to Home screen.
-
Page 25: Peripherals
MB95 EN-23 Set time format. Set time. Press +and – to set correct time. 6.4.2 Peripherals This Moisture Analyzer is equipped with USB and RS232 compatible interfaces for communication with USB storage devices, printers and computers. The following sections describe the hardware and software provided with the Moisture Analyzer. - Page 26 EN-24 MB95 Setting Device port Select the com1 for RS232, com4 for USB Setting Baud rate Select the desired baud rates of 1200, 2400, 4800, 9600, 19200, 38400, 57600 and 115200. Default setting is 9600 Baud. Setting Data bits Select the desired data bits of 7 or 8. Default setting is 8.
-
Page 27: Print
MB95 EN-25 6.4.3 Print Press Setup button to access the Setup menu. Press Back to return to Home screen. Press Device settings button. Press Back to return to previous screen. Press Exit to return to Home screen. Press Print settings button to access the Print settings menu. -
Page 28: Touch Screen Adjustment
EN-26 MB95 Press Device settings button to access the Device menu settings. Press Back to return to previous screen. Press Exit to return to Home screen. Press GLP and GMP Data to access the GLP and GMP Data menu. Press Back to return to previous screen. -
Page 29: System And Data Management
MB95 EN-27 Please follow the process to adjust the screen. When the adjustment complete, press OK to exit. System and data management 6.5.1 Export and import settings and methods Press Setup button to access Setup menu. Press Back to return to Home screen. - Page 30 EN-28 MB95 Press File name to change file name. Press Location to select the export location. Press Export selection to select the export items. Press Cancel to previous step. Press the items to select. Press Cancel to cancel data export.
-
Page 31: Backup And Restore
MB95 EN-29 6.5.2 Backup and restore Press Backup and restore to backup or restore the system settings. 6.5.2.1 Backup system Press Backup system on USB flash drive to back up system. Press Back to previous step. Press Back to return to previous step. -
Page 32: Export Event Logs
EN-30 MB95 After select the restore file, the Restore button is available. Press Cancel the restore. Press Restore to execute. 6.5.3 Export event logs Press Export event logs to access the export event logs menu. Press File name to change file name. -
Page 33: Software Update
MB95 EN-31 After factory reset, press OK to restart instrument. 6.5.5 Software update Press Software update to access the update the software. Press update from file to select file to update. Press Cancel to return to previous screen. After select the update file, the Update button is available. -
Page 34: Method Library
EN-32 MB95 METHOD LIBRARY This section contains information on the use of the Method Library which will enable you to set the actual drying parameters such as Profile, Switch-Off, Display, Target Weight and the use of the library. The Operating Concept You have already set the Moisture Analyzer setup in Section 6 and have tried the simple moisture determination in Section 4. -
Page 35: Method Export And Import
MB95 EN-33 7.1.2 Method export and import Press Export to export methods. Press File name to change export file name. Press Location to select the export location. Press Export selection to select methods to export. Press Cancel to return to previous screen. -
Page 36: Method Parameters (Drying Parameters)
EN-34 MB95 After selecting the import file, the Import button is available. Press Location to change the import location. Press Import selection to select methods to import. Press Cancel to return to previous screen. Method parameters (drying parameters) 7.2.1 Drying program The drying program (profile) contains four settings, Standard, Fast, Ramp and Steps. -
Page 37: Drying Temperature
MB95 EN-35 Step Profile For STEP 1, use the defined temperature and time. Repeat the above procedure for step 2 and Final step. 7.2.2 Drying temperature The drying temperature can be set from 40 ° C to 200 ° C. -
Page 38: Display Mode
EN-36 MB95 Timed switch-off With this switch-off criterion selected, the measurement lasts until the preset drying time has elapsed (the display provides you with continuous information on the drying time). Using the +/- buttons, enter the desired drying time and press the OK button. -
Page 39: Start Weight
MB95 EN-37 ���������� ��������ℎ�� − ������ ��������ℎ�� %����(���������������� ��������������) = × 100% ���������� ��������ℎ�� ������ ��������ℎ�� %���� ( ������������ �������������� ) = × 100% ���������� ��������ℎ�� ���������� ��������ℎ�� − ������ ��������ℎ�� %����(������������ ��������������) = × 100% ������ ��������ℎ�� 7.2.5 Start weight Start weight is used when previous samples have been tested and the Start weight is known. -
Page 40: Starting Mode
EN-38 MB95 The check weighing bar indicates the sample weight. 7.2.6 Starting mode In this menu you can define if the instrument should perform certain functions automatically or manually. Press the Starting mode button. Automatic This mode can be used for most kinds of samples. -
Page 41: Method Creation
MB95 EN-39 Method creation Press Method library on the Home screen. The method library is displayed. Press the New… button. Enter either a method name or identifying number and press the OK button. Press each selection to set desired values. -
Page 42: Results
EN-40 MB95 RESULTS This section contains the management and evaluation of measurement results. 8.1 Test Results Press Results button on the Home screen to access the results menu. Select the method name to list all the test results of the method. -
Page 43: Result Export
MB95 EN-41 Press result item to select. Press to select all items. Press Cancel back to previous step. After select the items, the OK button is available. Press result item to remove. Press to remove all items. Press Cancel back to previous step. - Page 44 EN-42 MB95 Press result item to check one result data and export it. Press Export to export this result. Press Export to export this result. Press File name to edit file name. Press Location to select export location. Press Cancel to previous step.
-
Page 45: Help Information
MB95 EN-43 HELP INFORMATION Level Assist Press Help button on the Home screen to access the help information menu. Select Level Assist button to access it. Please adjust the level feet accordingly. Press screen to exit. 10. PRINTING TEST DATA Printing data to an external computer or printer requires the communication parameters be set first. - Page 46 EN-44 MB95 Test data printout Statistics printout ---MOISTURE DETERMINATION--- --- STATISTICS DATA --- Type MB95 Halogen Moisture Analyzer 1234567 Type MB95 SW(Drying Unit) 1.30 SNR(Drying Unit) 1234567 SW(Terminal) 1.10.01 SNR(Terminal) SW(Drying Unit) 1.30 Company SW(Terminal) 1.10.01 Department Instrument ID Sample Number Last Data 88.12 %MC...
-
Page 47: Rs232 Command Table
MB95 EN-45 10.1 RS232 Command Table Output Formats Data output can be initiated in one of two ways: 1. By pressing the Print button; 2. Using the Print Interval feature; RS232 Commands All communication is accomplished using standard ASCII format. Only the characters shown in the following table are acknowledged by the Moisture Analyzer. -
Page 48: Care And Maintenance
EN-46 MB95 11. CARE AND MAINTENANCE In this section, you will learn how to keep your Moisture Analyzer in good condition and how to replace consumable parts. 11.1 Cleaning Interior/Exterior Components To continue to obtain precise measurements, it is advisable to clean the interior components at regular intervals. - Page 49 MB95 EN-47 Removing Glass for Cleaning If the inside of the glass is dirty, lift up the heating chamber, release the glass for cleaning by pressing both sides of the glass holder. Attention: Caution when releasing the glass from the glass holder.
-
Page 50: Replacing Power Line Fuse
EN-48 MB95 11.2 Replacing Power Line Fuse If the instrument display fails to light after switching it on, check the power outlet first. If power is available, and the instrument fails to operate, the power fuse may be open (blown). -
Page 51: Error Detection
For safe operation, the instrument is equipped with a duplicate overheating protection device: The dryer unit has a thermal overload protection device which switches off the heating element. Contact your OHAUS dealer. Problem: The measurements are not repeatable. Probable causes: —... -
Page 52: Service Information
If the Troubleshooting section does not resolve or describe your problem, you will need to contact an authorized Ohaus Service Agent. For Service assistance in the United States, please call Aftermarket, Ohaus Corporation toll-free at (800) 526-0659. An Ohaus Product Service Specialist will be available to help you. -
Page 53: Specifications
Marking Standard This product conforms to the EMC directive 2004/108/EC, the Low Voltage Directive 2006/95/EC. The complete Declaration of Conformity is available online at www.ohaus.com. AS/NZS 61000.6.1, AS/NZS 61000.6.3 CAN/CSA C22.2 No. 61010-1, UL Std No. 61010-1 FCC Note This equipment has been tested and found to comply with the limits for a Class A digital device, pursuant to Part 15 of the FCC Rules. - Page 54 This Class A digital apparatus complies with Canadian ICES-003. ISO 9001 Registration In 1994, Ohaus Corporation, USA, was awarded a certificate of registration to ISO 9001 by Bureau Veritus Quality International (BVQI), confirming that the Ohaus quality management system is compliant with the ISO 9001 standard’s requirements. On May 21, 2009, Ohaus Corporation, USA, was re-registered to the ISO 9001:2008 standard.
- Page 56 Ohaus Corporation 7 Campus Drive Suite 310 Parsippany, NJ 07054 USA Tel: +1 973 377 9000 Fax: +1 973 944 7177 www.ohaus.com With offices worldwide. *30566901* P/N 30566901A © 2019 Ohaus Corporation, all rights reserved. Printed in China...
Need help?
Do you have a question about the MB95 and is the answer not in the manual?
Questions and answers