OHAUS MB120 Service Manual
Moisture analyzer
Hide thumbs
Also See for MB120:
- Instruction manual (76 pages) ,
- User manual (53 pages) ,
- Quick start manual (10 pages)
Table of Contents
Advertisement
Advertisement
Table of Contents

Subscribe to Our Youtube Channel
Related Manuals for OHAUS MB120


Summary of Contents for OHAUS MB120
- Page 1 SERVICE MANUAL MB90 & MB120 Moisture Analyzer...
-
Page 3: Table Of Contents
1.9.8 User management.....................23 1.10 System and data management ..................25 CHAPTER 2 – TROUBLE SHOOTING ..................27 2.1 Trouble shooting ......................27 2.1.1 General Procedures for Troubleshooting ............27 2.2 Problem solver ......................28 2.3 Testing ........................29 MB90 MB120 Series Service Manual Ohaus Corporation www.ohaus.com... - Page 4 3.1 Preventive maintenance ....................30 3.1.1 Preventive Maintenance Checklist ..............30 3.2 Preventive measures ....................30 3.3 Opening the MB90 and MB120 ...................32 3.4 Replacing the power PCB and power switch ..............34 3.5 Replacing the AC plug fuse ..................36 3.6 Replacing the AC plug ....................36 3.7 Replacing the control board ..................37...
- Page 5 B.4.3 Span (Service Span Calibration) ................80 APPENDIX C. DOWNLOADING ANALYZER FIRMWARE ............81 C1. MB90_MB120 Firmware ....................81 C2. Downloading MB90 and MB120 Firmware..............81 C2.1 software version SR1.03 or before ..............81 C2.2 software version SR1.10 or later .................83 C3. Clear software ......................85 C4.
-
Page 7: Chapter 1 - Getting Started
1.1 Introduction This service manual contains the information needed to perform routine maintenance and service on the Ohaus MB90&MB120 Moisture Analyzer. Familiarity with the scale’s Instruction Manual is assumed. The contents of this manual are summarized below: Chapter 1 Getting Started – Contains information on service facilities, tools and test equipment, specifications, and the control functions of the scale. -
Page 8: Definition Of Signal Warnings And Symbols
- Only connect the AC power cord to a compatible grounded electrical outlet. • Do not position the analyzer such that it is difficult to disconnect the power cord from the power receptacle. MB90 MB120 Series Service Manual Ohaus Corporation www.ohaus.com... -
Page 9: Service Facilities
Area must be clean and free of excessive dust. • Work surface must be stable and level. • Scale must not be exposed to direct sunlight or radiating heat sources. • Use an approved Electro-Static Device. MB90 MB120 Series Service Manual Ohaus Corporation www.ohaus.com... -
Page 10: Tools And Test Equipment Required
3. Standard Electronics tool kit. 4. Soldering iron (50 watt) and solder (rosin core solder, not acid core). 5. Solder remover. 6. Ohaus Temperature Calibration Kit P/N 11113857 7. Soft, lint-free cleaning cloth 8. Anti-static bags for PCBs 9. Anti-static wrist strap and mat 1.6 Test mass required... -
Page 11: Specifications
Pan Size 90mm diameter Adjustable Feet and Level Interface RS232, USB host, USB device Weight (lb/kg) 5.23 Shipping Weight (lb/kg) 8.35 1.7.1 Admissible Ambient Conditions: Use only in closed rooms Indoor use only. MB90 MB120 Series Service Manual Ohaus Corporation www.ohaus.com... - Page 12 100 V – 120 V or 200 V – 240 V, 50/60 Hz (the voltage is given by the heating element) Power line fuse 1 piece, 5 x 20 mm, T6,3 H 250 V MB90 MB120 Series Service Manual Ohaus Corporation www.ohaus.com...
-
Page 13: Controls
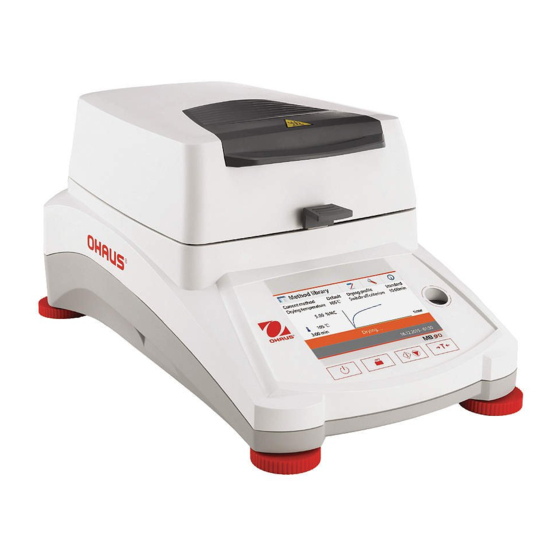
CHAPTER 1 - GETTING STARTED 1.8 Controls Figure 1-1. MB90 & MB120 Membrane Switch and Display. Turns On or Off display and fan. When pressed, sends Print command. When pressed, either starts or stops the drying process. When pressed, performs Tare function. -
Page 14: Display
3. Setup: Change system settings. 4. Help guide: Method development guide and help information. Button segment Parameters segment Results segment Instruction segment Date and time segment Figure 1-2. MB120 and MB90 Display Screen. MB90 MB120 Series Service Manual Ohaus Corporation www.ohaus.com... -
Page 15: Setup Navigation
- If this is stipulated by your quality assurance system (GLP, GMP, ISO 9001). - If you suspect the analyzer has been abused. To calibrate the analyzer, processed as follows: Press Setup button on the main screen. MB90 MB120 Series Service Manual Ohaus Corporation www.ohaus.com... - Page 16 Remove the sample pan and place the required weight on the sample pan, close the cover. Follow the instructions on the display. The display indicated if the calibration was successful. MB90 MB120 Series Service Manual Ohaus Corporation www.ohaus.com...
- Page 17 Replace the pan handler and place a temperature calibration unit on the pan handler. Note: The unit will not calibrate with the pan support in place. MB90 MB120 Series Service Manual Ohaus Corporation www.ohaus.com...
- Page 18 Proceed exactly as you did for the first temperature. After you have set the display to agree with the thermometer, highlight ACCEPT NEW CAL, then press the Enter button. The display returns to ANALYZER SETUP. MB90 MB120 Series Service Manual Ohaus Corporation www.ohaus.com...
- Page 19 Press Setup button on the main screen. The Setup menu appears. Press Weight and temperature calibration button. The Adjustments screen appears. Press the Last temperature calibration result button. Here you will find the last temperature calibration result. MB90 MB120 Series Service Manual Ohaus Corporation www.ohaus.com...
-
Page 20: User Settings
The User settings screen appears. Press Language button. Select LANGUAGE. Note: If you select English (US) as the dialog language, the date format is changed and appears on all records in the American notation (month/day/year). MB90 MB120 Series Service Manual Ohaus Corporation www.ohaus.com... - Page 21 1.9.3.2 Brightness Press Setup button on the main screen. The Setup menu appears. Press User settings button. The User settings screen appears. Press Brightness button. To adjust the brightness of the screen. MB90 MB120 Series Service Manual Ohaus Corporation www.ohaus.com...
- Page 22 CHAPTER 1 - GETTING STARTED 1.9.3.2 Beep Press Setup button on the main screen. The Setup menu appears. Press User settings button. The User settings menu appears. Press Beep button. Make volume adjustment. MB90 MB120 Series Service Manual Ohaus Corporation www.ohaus.com...
-
Page 23: Device Settings
Press Setup button on the main screen The Setup menu appears. Press Device settings. The Device settings menu appears. Press the Date-Time button. Press the follow items to set the date and time. Press Back to exit. MB90 MB120 Series Service Manual Ohaus Corporation www.ohaus.com... - Page 24 Press Set date to save it. Press Back to exit. Set time format. Press Back to exit. Set time. Press +and – to set correct time. Press Set time to save it. Press Back to exit. MB90 MB120 Series Service Manual Ohaus Corporation www.ohaus.com...
-
Page 25: Peripherals
Press Peripherals button. Press the following buttons to set RS232 port when RS232 port link to printer or other RS232 compatible device. Setting device port Select the com1 for RS232, com4 for USB MB90 MB120 Series Service Manual Ohaus Corporation www.ohaus.com... - Page 26 NONE,EVEN or ODD. Default setting is NONE. Setting stop bits Select the desired stop bits of 1 or 2. Default setting is 1. Setting handshake Select the desired handshake of NONE, Xon/Xoff. Default setting is NONE. MB90 MB120 Series Service Manual Ohaus Corporation www.ohaus.com...
-
Page 27: Print
The Print settings menu appears. Press Print results automatically to switch ON or OFF. Press Print GLP data to switch ON or OFF. Press the Intermediate results print interval button. Choose the interval seconds or minutes. MB90 MB120 Series Service Manual Ohaus Corporation www.ohaus.com... -
Page 28: Company Information
The Setup menu appears. Press Device settings button. The Device menu appears. Press Company Information button. The Company information screen appears. Press each button to set the company name, department and instrument ID. MB90 MB120 Series Service Manual Ohaus Corporation www.ohaus.com... -
Page 29: User Management
Press Setup button on the main screen. The Setup menu appears Press User Management button. The Users screen appears. Press New button to create a new user. Key in the user name and press OK to save. MB90 MB120 Series Service Manual Ohaus Corporation www.ohaus.com... - Page 30 CHAPTER 1 - GETTING STARTED Set the password. Enable the password. Set the password. Set the user profile. MB90 MB120 Series Service Manual Ohaus Corporation www.ohaus.com...
-
Page 31: System And Data Management
1.10 System and data management Press Setup button on the main screen. The Setup menu appears. Press System and data management The System and data management menu appears. Export and Import settings and methods. MB90 MB120 Series Service Manual Ohaus Corporation www.ohaus.com... - Page 32 CHAPTER 1 - GETTING STARTED System backup and restore. Factory reset. Software update. Note: For the rest of the Menu navigation please kindly refer to Instruction Manual. MB90 MB120 Series Service Manual Ohaus Corporation www.ohaus.com...
-
Page 33: Chapter 2 - Trouble Shooting
In the event of erratic or fluctuating weight readings, isolate the problem to either the mechanical or the electronic area of the Moisture Analyzer. If a problem arises that is not covered in this manual, contact Ohaus: www.ohaus.com. MB90 MB120 Series Service Manual... -
Page 34: Problem Solver
Defective temperature sensor. Replace temperature sensor. above 230° C. Defective Power Switch. Replace Power Switch. Defective Power board. Replace Power Board. Defective Control Board. Replace Control Board. Defective Main PCB. Replace Main PCB. MB90 MB120 Series Service Manual Ohaus Corporation www.ohaus.com... -
Page 35: Testing
Replace load cell 2.3 Testing Before servicing the MB90 and MB120 Moisture Analyzer, an operational test and various performance tests should be made to ascertain whether or not the unit meets specifications. Turn the Moisture Analyzer on and allow it warm up for at least one hour before performing these tests. -
Page 36: Chapter 3 - Maintenance Procedures
4. Make a visual inspection for faulty connectors, wiring, and loose hardware. 3.2 Preventive measures Common hand tools are sufficient to disassemble the MB90 and MB120 moisture analyzers. Turn the Analyzer off and unplug the power cord before you begin. - Page 37 To avoid electrostatic damage during production, conducting floors, controlled air humidity, and EMC mats are used. When servicing the unit it is also advisable – as soon as the instrument is opened – to neutralize electrostatic charges. MB90 MB120 Series Service Manual Ohaus Corporation www.ohaus.com...
-
Page 38: Opening The Mb90 And Mb120
CHAPTER 3 – MAINTENANCE PROCEDURES 3.3 Opening the MB90 and MB120 1. Lift the top. 2. Remove the Sample Pan, Pan Handle, Pan Support, Draft Shield and Tray Pan. Inspect the interior and exterior. (See Figure 3-1.) 3. Remove the Analyzer In use cover. - Page 39 Figure 3-4. Three screws in Top Housing. D- Wire to Heating chamber E- Grounding cable Note: Take note on the cable routing. 8. Lift the top housing off and set it aside. MB90 MB120 Series Service Manual Ohaus Corporation www.ohaus.com...
-
Page 40: Replacing The Power Pcb And Power Switch
3. Remove the 4 screws securing the power board compartment. Remove 4 compartment screws. 4. Below show the Analyzer Power Switch and Power Board. A- Power Board B- Power Switch Note: Take note on the cable and wire routing. MB90 MB120 Series Service Manual Ohaus Corporation www.ohaus.com... - Page 41 Note: When there is power cycling the Power Switch PCB the green LED will light up. If the LED does not light up possible defective PCB or main fuse in the AC plug is open circuit and need to be replaced. MB90 MB120 Series Service Manual Ohaus Corporation www.ohaus.com...
-
Page 42: Replacing The Ac Plug Fuse
AC Plug. Both AC Plug and cable tie is as a kit as below along with others cable sets. 30246957 SP, Base Cable Kit, MB90 MB120 MB90 MB120 Series Service Manual Ohaus Corporation www.ohaus.com... -
Page 43: Replacing The Control Board
3. Locate the Control Board which is above the load cell. 4. Locate the 5 screws securing the Control Board to the housing and detach the load cell cable and cable from Control Board to Power Board. MB90 MB120 Series Service Manual Ohaus Corporation www.ohaus.com... -
Page 44: Replacing The Main Pcb
Cables to Keyboard. 3. Remove the cables from Main PCB to Control Board and cable to key board. 4. Locate and remove the 4 screws that secure the Main PCB to housing. MB90 MB120 Series Service Manual Ohaus Corporation www.ohaus.com... -
Page 45: Replacing The Load Cell
5. Lift up the Load Cell metal cover you will see the Load Cell kit. 6. Remove the Load Cell cable from the Main PCB and remove the 6 screws securing the Load Cell kit. MB90 MB120 Series Service Manual Ohaus Corporation www.ohaus.com... -
Page 46: Replacing The Load Cell Accessory Kit
Moisture adsorb material Moisture adsord material: 1. After removing the Load cell kit from its compartment (Refer to 3.9) you will see the moisture absorb material (as shown above and below pictures). MB90 MB120 Series Service Manual Ohaus Corporation www.ohaus.com... - Page 47 Load cell rubber ring 6. The rubber ring needs to be replaced if ware and tare is detected. Note: DO NOT Stress the rubber ring when inserting into the load cell kit. MB90 MB120 Series Service Manual Ohaus Corporation www.ohaus.com...
-
Page 48: Replacing The Heating Chamber Parts
Remove the Sample Pan, Pan Handle, Pan Support, Draft Shield and Tray Pan (3.2) Remove the chamber metal lid cover and plastic lid cover. After removing the compartment heating chamber components expose as below. MB90 MB120 Series Service Manual Ohaus Corporation www.ohaus.com... - Page 49 3.11.1.1 Replacing the Temperature sensor. 1. Remove the temperature wire from its protective sleeve. 2. Detach the wire connection as show below. 3. Remove the two screws holding the temperature sensor in position. MB90 MB120 Series Service Manual Ohaus Corporation www.ohaus.com...
- Page 50 4. Open and close the Top Housing while checking for an intermittent cable problem. Readings should not fluctuate during this test. 5. If resistance and flex tests (3 & 4 above) are OK, the Temperature Sensor is good. If not, replace the cable or sensor. MB90 MB120 Series Service Manual Ohaus Corporation www.ohaus.com...
- Page 51 - Gently separate the two metal clips which securing the chamber glass in position. 3. Remove the temperature sensor. (3.10.1.1) 4. Remove the two screws securing the temperature sensor holder in place. MB90 MB120 Series Service Manual Ohaus Corporation www.ohaus.com...
- Page 52 The two ends of the Halogen lamp must not be bent toward or away from each other; otherwise, the glass tube will break Typical lift span of a halogen lamp is approximately 5000 heating hours. MB90 MB120 Series Service Manual Ohaus Corporation www.ohaus.com...
- Page 53 3. Remove the halogen lamp if necessary (3.11.1.3) 4. Remove the two wires connected to the Thermal overload. 5. Use a wrench to loosen the nut which securing the Thermal overload in place. MB90 MB120 Series Service Manual Ohaus Corporation www.ohaus.com...
- Page 54 During this step care is needed to avoid breaking the Halogen lamp. (if the halogen lamp still attached). 3.11.1.5 Installing the Thermal Overload. 1. Install the component by reversing steps mention in 3.11.1.4. 2. Install back the Thermal overload following the below parts install sequence. MB90 MB120 Series Service Manual Ohaus Corporation www.ohaus.com...
- Page 55 2. Press the devise's reset button. Then re-test. 3. If test fails, replace the components. 4. Reassemble the Heating Unit. 5. Perform a Temperature Calibration. (See Appendix A.2) 6. Conduct Performance Tests. MB90 MB120 Series Service Manual Ohaus Corporation www.ohaus.com...
-
Page 56: Replacing Top Housing Components
1. Open the Analyzer and remove the Main PCB (3.8) 2. Remove the top housing cast iron plate by removing the 6 screws as shown below. 3. You will see the below components. MB90 MB120 Series Service Manual Ohaus Corporation www.ohaus.com... - Page 57 1. Open the Analyzer and remove the Main PCB (3.8) 2. Remove the housing cast iron plate (3.11.2) 3. Locate the Fan. 4. Remove the Fan cable connected to the Lid sensor board. 5. Remove and replace the Fan. MB90 MB120 Series Service Manual Ohaus Corporation www.ohaus.com...
- Page 58 5. Remove and replace the Lid sensor board. 3.11.2.4 Replacing the LCD display. 1. Open the Analyzer and remove the Main PCB (3.8) 2. Remove the housing cast iron plate (3.11.2) 3. Locate the LCD display. MB90 MB120 Series Service Manual Ohaus Corporation www.ohaus.com...
- Page 59 1. Use a broad blade, such as a wide X-Acto™ knife, to remove the label. Clean the glue residue from the Housing surface. Then carefully place the new label where the old one was. MB90 MB120 Series Service Manual Ohaus Corporation www.ohaus.com...
-
Page 60: Chapter 4 - Final Testing
CHAPTER 4 – FINAL TESTING 4.1 Final tesing Before servicing the MB90 or MB120 Moisture Analyzer, an operational test and various performance tests should be done to determine if the unit meets specifications. Turn the Moisture Analyzer on and allow it warm up for at least one hour before performing these tests. -
Page 61: Precision Test
Inspect and correct if necessary. (See Off-Center Load Test.) 3. Foreign material or debris between the pan and the base will cause the Analyzer to fail the test. 4. Vibrations, drafts or a non-level surface can cause failures. MB90 MB120 Series Service Manual Ohaus Corporation www.ohaus.com... -
Page 62: Repeatability Test
6. Mean = (Reading 1 + Reading 2 + Reading 3 + Reading 4 + Reading 5 7. + Reading 6 + Reading 7+ Reading 8 + Reading 9 + Reading 10) / 10 Mean =________ MB90 MB120 Series Service Manual Ohaus Corporation www.ohaus.com... -
Page 63: Repeatability Test
8. The difference in the weights of the test mass should be within the Linearity tolerance in Table 1-1. If not, calibrate (see Appendix A.1) and repeat the test. 9. If the unit remains out of tolerance, the Load Cell may need to be replaced. MB90 MB120 Series Service Manual Ohaus Corporation www.ohaus.com... - Page 64 CHAPTER 5 PARTS IDENTIFICATION & DIAGRAMS This section of the manual contains exploded views for MB90 and MB120. The exploded view drawings are designed to identify the parts which can be serviced on the scale in the field. Note that not all parts identified are available as spare parts – for current parts lists contact your local Ohaus distributor, or www.ohaus.com.
-
Page 65: Chapter 5 Parts Identification & Diagrams
CHAPTER 5 PARTS IDENTIFICATION & DIAGRAMS CHAPTER 5 PARTS IDENTIFICATION & DIAGRAMS 5.1 MB90 & MB120 parts Figure 5-1. MB90 & MB120: Housing and Parts. MB90 MB120 Series Service Manual Ohaus Corporation www.ohaus.com... - Page 66 CHAPTER 5 PARTS IDENTIFICATION & DIAGRAMS TABLE 5.1: MB90 & MB120 parts Drawing Item Description Hinge Thermal Overload Halogen Bulb Glass Pan Holder Pan support Wind Ring Tray Air Channel Kit Main Board Key Board Overlay Load Cell Load Cell Acc Kit...
-
Page 67: Appendix A. Weight And Temperature Calibration
Note: Do not cover the lid during any weight calibration To calibrate the analyzer, proceed as follows: Press the Setup button to access the Setup menu. Press Back to return to Home screen. MB90 MB120 Series Service Manual Ohaus Corporation www.ohaus.com... - Page 68 The display highlights the action you should take. Follow the instructions on the display. Remove the sample pan. Place the required weight on the sample pan and remove the weigh from pan. MB90 MB120 Series Service Manual Ohaus Corporation www.ohaus.com...
- Page 69 APPENDIX A STANDARD CALIBRATION The display indicates if the calibration was successful. MB90 MB120 Series Service Manual Ohaus Corporation www.ohaus.com...
-
Page 70: Temperature Calibration
Note: The temperature calibration kit (11113857) is available as optional equipment. Press Setup button to access the calibration menu. Press Back to return to Home screen. Press Weight and temperature calibration button. Press Back to return to previous screen. MB90 MB120 Series Service Manual Ohaus Corporation www.ohaus.com... - Page 71 Adjust the display reading to agree with the thermometer, and then press the Enter button. You have 15 minutes to make this adjustment, otherwise the calibration is terminated. MB90 MB120 Series Service Manual Ohaus Corporation www.ohaus.com...
- Page 72 Be careful when removing the temperature calibration unit from the dryer unit as it can be very hot. Allow it to cool down by opening the cover before removing. Remove the calibration unit. Replace the pan support in its proper positions. MB90 MB120 Series Service Manual Ohaus Corporation www.ohaus.com...
-
Page 73: Appendix B. Software Service Tool Instructions
For the latest software service tool version and instructions on how to use it, please follow below steps: 1. Go to http://dmx.ohaus.com and log in with your username and password. 2. Go to View by product. 3. Open the folder ‘Service Software’. - Page 74 APPENDIX B SOFTWARE SERVICE TOOL INSTRUCTIONS After selecting 'MB90/120 MOISTURE' under 'Product Selection' you will be able to see the below 'Function Selection' which support MB90/120 Moisture Analyzer. MB90 MB120 Series Service Manual Ohaus Corporation www.ohaus.com...
-
Page 75: Restore Eeprom
B.1 Restore EEPROM Restore EEPROM allows authorize service person to upload and restore the scale data. Information such as below will need to provide to OHAUS in order to obtain the scale eif file. 1. Analyzer Model Number. 2. Analyzer Serial Number. - Page 76 1. Analyzer Serial Number. 2. Analyzer Load Cell Serial Number. 3. Model Number. 4. Point to the Analyzer and Load Cell image file (eif files) provided by OHAUS. 5. Click Next to complete the Write Image File process. MB90 MB120 Series Service Manual...
-
Page 77: Replace Main Pcb
After powering up an Analyzer with new PC board, you will see the display screen as below indicating no software is installed. You will need to upload the software to a USB drive first before performing this function. Updated firmware is available on OH DMX, MB90 MB120 Series Service Manual Ohaus Corporation www.ohaus.com... - Page 78 APPENDIX B SOFTWARE SERVICE TOOL INSTRUCTIONS Information such as below will need to provide to OHAUS in order to obtain the scale eif file. 1. Analyzer Model Number. 2. Analyzer Serial Number. 3. Analyzer Load Cell Serial Number. Once 'Replace Main PCB' is selected the Com Port Configuration option will appears, complete the configuration and click Next.
- Page 79 2. Analyzer Load Cell Serial Number. 3. Model Number. 4. Point to the Analyzer and Load Cell image file (eif files) provided by OHAUS. 5. Click Next to complete the Write Image File process. Note: After completing the above information when you click 'Next' you will hear a beep sound from the Analyzer and the Analyzer will display the below message.
-
Page 80: Replace Control Board
Updated firmware is available in OH DMX. Kindly refer to Appendix C on how to install MB90 and MB120 firmware. Information such as below will need to provide to OHAUS in order to obtain the scale eif file. 1. Analyzer Model Number. - Page 81 2. Model number. 3. Load Cell Serial Number. 4. Point to the Analyzer and load cell image file provided by OHAUS. 5. Click Next to complete the Replace Control Board process. Note: After completing the information above and clicking next, you will hear a beep from the Analyzer and the Analyzer will display the message below.
- Page 82 APPENDIX B SOFTWARE SERVICE TOOL INSTRUCTIONS MB90 MB120 Series Service Manual Ohaus Corporation www.ohaus.com...
-
Page 83: Diagnostics
Next. You will see the bellow window. MB90/120 Diagnostics consists the below function. 1. Ramp - A to D conversion information. 2. Linearization- Service Linearization (performing Service Linearization). 3. Span- Service Span (performing Service Span Calibration) MB90 MB120 Series Service Manual Ohaus Corporation www.ohaus.com... -
Page 84: Ramp On
4. Key in scale command and press 'Send'. The right side window will show the response to the command. 5. MB90 and MB120 support the below print command. B.4.1 Ramp ON Select 'Ramp ON' the right hand window will show the A to D conversion signal from Load cell to Main PCB. -
Page 85: Linearization (Service Linearization Calibration)
Follow instruction on the Analyzer display screen when selecting this function. During Service Linearity Calibration below test weight is required. Model MB90 MB120 Test weight 25g and 50g 50g and 100g Note: Do not cover the lid during any weight calibration MB90 MB120 Series Service Manual Ohaus Corporation www.ohaus.com... -
Page 86: Span (Service Span Calibration)
Analyzer display screen when selecting this function. During Service Span Calibration below test weight is required. Model MB90 MB120 Test weight 100g Note: Do not cover the lid during any weight calibration MB90 MB120 Series Service Manual Ohaus Corporation www.ohaus.com... -
Page 87: Appendix C. Downloading Analyzer Firmware
Both Analyzers used the same firmware THEREFORE factory configuration will define the model of the Analyzer. Since the firmware operated under MB90 and MB120 are different from the rest of OHAUS products there are no MOT or BIN files uploaded for this products. - Page 88 Autorun file from the thumb drive and start the firmware upload. 4. The firmware upload will not carry on if the below occurs. - All the 9 files stated above are still in the zipped folder. MB90 MB120 Series Service Manual Ohaus Corporation www.ohaus.com...
-
Page 89: C2.2 Software Version Sr1.10 Or Later
2, Plug the *USB to the back of the analyzer 'USB Host com port' 3, Press the 'Setup button' to access the Setup menu, select 'System and data management' for the 'software update' MB90 MB120 Series Service Manual Ohaus Corporation www.ohaus.com... - Page 90 6, Update procedure takes about 5~10 minutes. During this time, there will be blank screen and information screens. The user must wait for the device to re-startup and go into a normal weighing screen 7, Check the software version as below picture MB90 MB120 Series Service Manual Ohaus Corporation www.ohaus.com...
-
Page 91: C3. Clear Software
1. Un-zip 'ClearSR.zip' as below, copy all the 3 files in an empty Thumb drive. 2. Plug the Thump drive into the back of the Analyzer and power up the unit. 3. Wait until the Analyzer displaying the below message, this show the software erase successful. MB90 MB120 Series Service Manual Ohaus Corporation www.ohaus.com... - Page 92 6. Complete the Image file upload and follow by Service Lin and Span calibration to complete the whole process. Perform Temp calibration if necessary. Note: Once you had performed this action in an MB120, the Analyzer will back to factory default model which is MB90 after software download. Up-loading the Analyzer original image file following a Service Lin and Span will complete the action.
-
Page 93: C4. Reset The Analyzer Password
Under MB90 and MB120 Moisture Analyzer folderUserSoftware. You will locate the file name 'MB120 Password Reset.zip' files on the right window. Download the file and un-zip the file into an empty USB thumb drive. After un-zipping the file drag all the files inside folder ' MB90_120 Password Reset' into your thumb drive (you will have total 3 files). - Page 94 Autorun file from the thumb drive and start the password reset process. 4. Once the process is completed you will see the below on Analyzer Screen. MB90 MB120 Series Service Manual Ohaus Corporation www.ohaus.com...
- Page 95 APPENDIX C DOWNLOAD ANALYZER FIRMWARE 5. Remove the thump drive and RE-BOOT. The Analyzer after rebooting will then show the screen below after a successful password reset. MB90 MB120 Series Service Manual Ohaus Corporation www.ohaus.com...
- Page 96 ™ Registered trademark of Ohaus Corporation. The information contained in this manual is believed to be accurate at the time of publication, but Ohaus Corporation assumes no liability arising from the use or misuse of this material. Reproduction of this material is strictly prohibited.
Need help?
Do you have a question about the MB120 and is the answer not in the manual?
Questions and answers