Table of Contents
Advertisement
Quick Links
Advertisement
Table of Contents

Related Manuals for PR Lighting XR480S BWS


Summary of Contents for PR Lighting XR480S BWS
- Page 1 XR480S BWS PR-2483 The user manual contains important information about the safe installation and use of a projector. Please read and follow these instructions carefully and keep the manual in a safe place for future reference. PR LIGHTING LTD. http://www.pr-lighting.com...
- Page 2 Any future technical changes are not subject to further notice. Note: For the products made by Guangzhou PR lighting Ltd, the warranty for the whole product is one year starting from the delivery date but the light source is not within the warranty.
-
Page 3: Safety And Warnings
1. SAFETY AND WARNINGS NOTE Before a projector’s installation, power-on, operation and maintenance, please carefully read the safety information hereinafter! The following safety signs are used in the user manual. Warning User Electrical Protective Flames High Goggles Manual shock Gloves Temperature When unpacking , check if there is transportation damage before using the projector. - Page 4 cord supplied through the safety cord holes for safety support. Before any installation, maintenance and cleaning work, please ensure the projector is disconnected from ● power mains. ℃.After stable operation , After running for 30minutes, the temperature of the housing of the projector is ●...
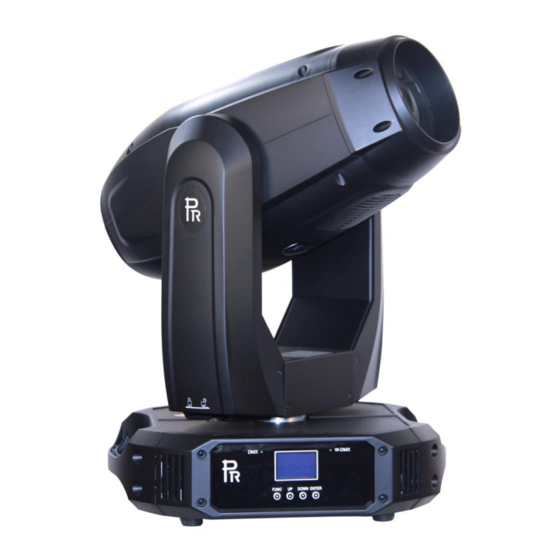
- Page 5 3. APPEARANCE 1. Front Lens 2. Lens Cover 3. Head Cover 4. Tilt Lock 5. Handle 6. Arm Cover 7. Pan Lock While transportation, the head should be locked-Tilt Lock(4) and Pan Lock(6) should be at locking positions. Before the use of the projector, unlock both. Rear Panel of the Base 1.
-
Page 6: Installation
4. INSTALLATION RIGGING ● Before moving a projector, Please lock Pan and Tilt. Before its operation, please unlock them. It’s forbidden to run a projector with power while it is locked. Warning please run the safety cord Clamp through the two holes for safety Safety cord Handle Control menu... - Page 7 DMX CONTROL CONNECTION: ● Connection between controller and projector and between one projector and another must be made with a twin-screened cable, with each wire having at least a 0.5mm in diameter. Connection to and from the projector is via cannon 5 pin (which are included with the projector) or 5 pin XLR plugs and sockets.
- Page 8 ALIGNMENT/INSTALLATION/REPLACEMENT OF A LAMP ● Lock the yoke before fitting/replacingthe lamp. Just as Shown by Figure 1, after Opening the cover at the rear of the projector by loosening 8 fastfit screws, you can open the head. To adjust the lamp as per Figure 2. Take out the lamp as per the figure 3. Before lamp installation, tighten its power wires well.
-
Page 9: Gobo Replacement
Figure3 : Removal of lamp 2.Remove the cover after its 4 screws are 1.Loosen a tightening screw at the lamp's side loosened by a cross screwdriver 2. Remove the lamp's two wires and push it obliquely for the removal. 4.Connect the lamp wires after a new lamp is in place, and align and tighten the lamp as per figure2 GOBO REPLACEMENT ●... -
Page 10: Setup And Configuration
5. SETUP AND CONFIGURATION FRONT PANEL OPERATION ● The projector configuration can be set conveniently via push buttons and color touch screen. To browse through or change the projector ’s settings, touch the white area of the touch screen or press OK button for more than ►... -
Page 11: Operation Menu
Only after the projector is linked with a transmitter, can it receive wireless signal sent by the transmitter. If unlinking it, Press “Enter” for the menu of Un-link Wireless under the upper level menu of Config Settigns , then the fixture is unlinked with the wireless transmitter. - Page 12 Short Mode Standard Mode Extended Mode Ch.01 Strobe Ch.02 Dimmer Ch. 03 Dimmer Fine Ch.04 Color Wheel Ch.05 Color Wheel Fine Ch.06 Fixed Gobo Wheel Ch.07 Rot. Gobo Wheel1 DMX Channel Mode Ch.08 Rot. Gobo1 Rotation Ch.09 Rot. Gobo1 Rotation F. Ch.10 Prism1 Ch.11 Prism1 Rotation Ch.12 Prism2...
- Page 13 Invert ON Invert Auto English\Chinese Language Setting Touch Calibration Celsius Degree Temperature Unit Fahrenheit Degree Un-Link Wireless Really Un-Link? Confirm or Cancel Restore Defaults? Defaults Confirm or Cancel Pan DMX Invert OFF/ ON Tilt DMX Invert OFF/ ON Pan/Tilt Settings Pan Tilt Swap OFF/ ON Option Settings...
- Page 14 Total Hours × × × × Display Board= × × × C Pan & Tilt board × × × C Temperature Driver Board1 × × × C Driver Board 2 × × × C Head Sensor= × × × C Sys Boot Display Board xxx xxx xxx xxx...
- Page 15 Operation Change Operation Mode? User Memory 2 Mode Confirm or Cancel Change Operation Mode? Preset Memory Confirm or Cancel Change Operation Mode? Stand-Alone Mode User Memory 1 Confirm or Cancel Change Operation Mode? User Memory 2 Confirm or Cancel Change Operation Mode? Static Scene Confirm or Cancel Strobe XXX...
-
Page 16: Dmx Protocol
Diffuser Pan XXX Pan Fine XXX Tile XXX Tilt Fine XXX Pan & Tilt Speed &Time XXX Power/ Special Fun. Delay Time XXX Delay Unit XXX Link to Step XXX Reset User Memory? Reset User Memory 1 Confirm or Cancel Reset User Memory? Reset User Memory 2 Init User Memory... - Page 17 20-31 Gobo1 Fixed Gobo 32-43 Gobo2 Wheel 44-55 Gobo3 56-67 Gobo4 68-79 Gobo5 80-91 Gobo6 92-103 Gobo7 104-115 Gobo8 116-127 Gobo9 128-146 Clockwise rotation from slow to fast 147-165 Anti Clockwise rotation from slow to fast 166-175 Shake effect 1 from slow to fast 176-185 Shake effect 2 from slow to fast 186-195...
- Page 18 000-128 Gobo Indexing(0~540degrees) Rotation (Clockwise From slow to Fast) 129-188 Gobo Rotation 189-195 Stop Rotation (Anti-Clockwise From slow to Fast) 196-255 Gobo Rotation 000-255 Gobo Rotation in 16 Bit Fine 000-016 Open Prism 1 017-127 Prism1 000-128 Prism Indexing 129-191 Rotation(Anti-Clockwise from slow to fast) Prism1 Rotation Stop...
- Page 19 140-149 Pan & Tilt Reset Color System Reset 150-159 Gobo Wheel Reset 160-169 Dimmer/Shutter Reset 170-179 180-189 Zoom/Frost/Focus/Prism Reset 190-199 Reserved 200-209 Total Reset 210-229 Reserved Lamp Off 230-239 Reserved 240-255 Note: 1. The projector can’t be turned on within 1 minute after the lamp-off. 2.
-
Page 20: Error Messages
9.ERROR MESSAGES The system can detect some errors during the reset, if displayed, touch to view the error. The error messages are as follows: Name Type Correction Timeout/magnet Sensor/Encoder Check if wiring, positioning parts and motors are normal Tilt Timeout/magnet Sensor/Encoder Check if wiring, positioning parts and motors are normal Timeout Check if wiring, positioning parts and motors are normal... -
Page 21: Technical Data
10. TECHNICAL DATA INPUT VOLTAGES: 100V~240V AC,50/60Hz RATED POWER :650W@220V LAMP SPECIFICATIONS: Ushio 480W Lamp Color Temperature 7000K Manufacturers Rated Lamp Life 1500hours COLORS 1 Color wheel: 13colors(plus 1CTO)+ Open, rainbow effect with bi-directional and variable speeds, Stepping/linear color changing Wave Code No. -
Page 22: Fixed Gobo Wheel
FIXED GOBO WHEEL 1 Fixed gobo wheel: 10 gobos +open+ animation effect Bi-directionally rotatable, and shakable at variable speeds, 2channels to control gobos and shift between animation effects. Gobo1 Gobo 2 Gobo 3 Gobo 4 Gobo 5 Gobo 6 Gobo 7 Gobo 8 Gobo 9 Gobo 10... -
Page 23: Frost Filter
FROST FILTER: 1Pc frost filter FOCUS: DMX linear Focus ZOOM: DMX linear Zoom DIMMER/STROBE: 0-100% Linearly adjustable/ Double shutter blades, 0.3~25 F.P.S HEAD MOVEMENT: Pan 540º , Tilt 270º with auto position correction BEAM ANGLE: Beam Mode: 2.3° -- 10° , Linear Adjustment Spot Mode: 5°... -
Page 24: Light Output
SIZES: LIGHT OUTPUT: 9430 5300 21234 2260 10° Lux 84936 3260 2.3° Lux 162000 91120 1458050 364515 40500 58320 10° 2.3° Distance (m) Min Diameter (m) 1.25 0.21 1.04 0.42 0.83 0.62 Max Diameter (m) 5.14 0.86 4.28 1.71 2.57 3.43 24/30... - Page 25 25/30...
-
Page 26: Circuit Diagram And Pcb Connections
11. CIRCUIT DIAGRAM AND PCB CONNECTIONS CIRCUIT DIAGRAM ● 26/30... - Page 27 PCB CONNECTIONS ● 1.6-Channel SLAVE1 :P/N230060430 8 Channel Driver Board 1 M1-1 Motor 24V Input M1-2 Motor Reserved M1-3 Motor Reserved M1-4 Motor HALL1-6Magnet Sensor M1-5 Motor HALL1-5 Magnet Sensor M1-6 Motor HALL1-4 Magnet Sensor Reserved HALL1-3 Magnet Sensor Reserved HALL1-2 Magnet Sensor Reserved HALL1-1 Magnet Sensor...
- Page 28 12. COMPONENT ORDER CODES NAME PART NO. QUANTITY REMARK 030040233A PAN MOTOR TILT MOTOR 030040233A 030040121 DIMMER/STROBE MOTORS ROTATING GOBO WHEEL MOTOR 030040213A 030040224A FIXED GOBO MOTOR 030040214 COLOR WHEEL MOTOR 030040214 DIFFUSER MOTOR 030040224A GOBO ROTATION MOTOR FOCUS MOTOR 030040213A 030040221A FROST MOTOR...
- Page 29 29/30...
- Page 30 1582 Xingye Avenue, Nancun Panyu Guangzhou, 511442 China TEL: +86-20-3995 2888 PR lighting will try its best to offer accurate and overall information about a product’s technical data. Any changes won’t be notified if necessary. Patented Products. Counterfeiting Will be Prosecuted! P/N: 320020583 Version: 2018.12.13...
Need help?
Do you have a question about the XR480S BWS and is the answer not in the manual?
Questions and answers