Table of Contents
Advertisement
Advertisement
Table of Contents

Related Manuals for PR Lighting XRLED 300 SPOT


Summary of Contents for PR Lighting XRLED 300 SPOT
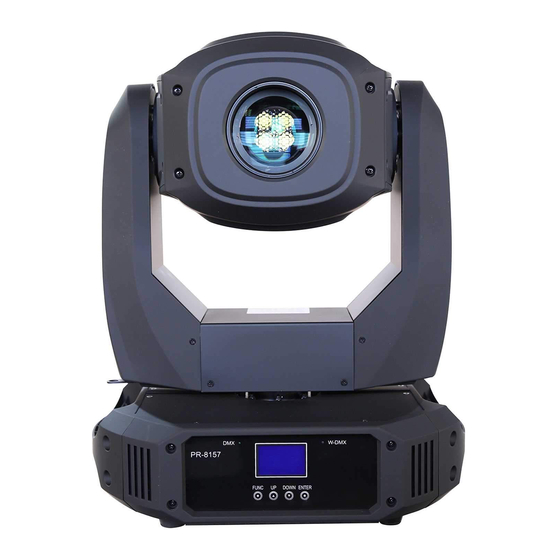
- Page 1 XRLED 300 Spot PR-8157 This product manual contains important information about the safe installation and use of this projector. Please read and follow these instructions carefully and keep this manual in a safe place for future reference. PR LIGHTING LTD.
-
Page 2: Table Of Contents
INDEX SAFE USAGE OF THE PROJECTOR……………………………………………………………………………… INSTALLING THE PROJECTOR…………………………………………………………………………………... POWER SUPPLY – MAINS………………………………………………………………………………………… CONTROL CONNECTIONS………………………………………………………………………………………. DMX TERMINATOR………………………………………………………………………………………………. SETUP OPTIONS-PROJECTOR CONFIGURATION……………………………………………………………… TO SET THE DMX START ADDRESS…………………………………………………………………………….. STAND-ALONE MODE……………………………………………………………………………………………. MASTER/SLAVE MODE…………………………………………………………………………………………... OPERATION MENU……………………………………………………………………………………………….. REPLACING GOBOS……………………………………………………………………………………………… DMX PROTOCOL………………………………………………………………………………………………….. INDICATION OF LED DIGITAL TUBE……………………………………………………………………………. MAINTENANCE……………………………………………………………………………………………………... -
Page 3: Safe Usage Of The Projector
SAFE USAGE OF THE PROJECTOR When unpacking and before disposing of the carton check there is no transportation damage before using the projector. Should there be any damage caused by transportation, consult your dealer and do not use the apparatus. The projector is for indoor use only, IP20. -
Page 4: Installing The Projector
INSTALL THE PROJECTOR Clamp Safety cord Warning Handle Please run the safety cord thyough a safety cord hole for safety Safety cord hold Operation menu Take 2 clamps and the safety cord out from the package and mount 2 clamps on the underside of fixture with 2 retainers attached to each clamp. -
Page 5: Control Connections
CONTROL CONNECTION Connection between controller and projector and between one projector and another must be made with a 2 core-screened cable, with each core having at least a 0.5mm diameter. Connection to and from the projector is via cannon 5 pin (which are included with the projector) or 3 pin XLR plugs and sockets. -
Page 6: Setup Options-Projector Configuration
SETUP OPTIONS-PROJECTOR CONFIGURATION A device configuration can be set conveniently via pressbutton switch and LCD display. Launch the projector. Press button ENTER more than 5 seconds to unlock panel, LED display shows functional menus which have their own sub-menus for designated functions, the below is the details Press button UP or DOWN if you want to browse through the various Setup Options. -
Page 7: Stand-Alone Mode
STAND-ALONE MODE Operate the projector without connecting a controller, enable the master mode in the operation panel, the projector will run in Stand-Alone mode automatically. DMX address can be set without limitations. MASTER/SLAVE MODE Many projectors can run synchronously in the Master/Slave mode by linking them with each other. Select one projector as the master with setting options at any mode of master’s modes enabled and make the other projectors as the slaves with setting options slave mode enabled and their DMX start address “001”. -
Page 8: Operation Menu
OPERATION MENU 1st LEVEL 2nd LEVEL 3rd LEVEL 4th LEVEL DMX Address (1~499) Reset Are You Sure Standard 20 DMX Mode Short 15 Default is ( :Standard) Extended24 Pan Tilt Swap Default is ( :OFF) Pan&Tilt Invert Default is ( :OFF)... - Page 9 Reverse Rotation Shake 1 ~ 6 NO Gobo Gobo 1 - Gobo 7 Rotating Gobo Rotation Reverse Rotation Shake 1 ~ 6 Stop rotating Gobo rotation Rotation ReverseRotation PrismSet Have Stop PrismRotate Rotation ReverseRotation 0-255 Focus Linearly focusing 0-255 Zoom Linearly Zoom Pan Location...
-
Page 10: Replacing Gobos
REPLACING GOBOS Rotating Gobo Wheel Fixed Gobo Wheel Disconnect the fixture from power. Carefully lift off the cover by undoing the 4 fast-fit screws. Before the replacement of fixed gobos, take leaf spring out using finger, push the gobos out carefully and insert new gobos. For rotating gobos: take rotating gobo wheel out by hand, push gobos out after pulling out leaf springs. -
Page 11: Dmx Protocol
DMX PROTOCOL Short Standard Extended FUNCTION DESCRIPTION mode mode mode 000-015 black Strobe Strobe speed from slow to fast 016-255 Dimmer 000-255 Dimming from dark to light (0-100%) Dimmer Fine 000-255 Dimmer in 16 Bit precision White 000-015 Color 1 016-031 0320-47 Color 2... - Page 12 Gobo shake 6 from fast to slow 240-255 000-015 white 016-031 Gobo1 Gobo 2 032-047 Gobo 3 048-063 064-079 Gobo 4 080-095 Gobo 5 096-111 Gobo 6 112-127 Gobo 7 Rotating Gobo Wheel 128-143 Rotation speed from slow to fast 144-159 Reverse rotation from slow to fast 160-175...
- Page 13 001-009 Effect 1(speed from fast to slow) 010-019 Effect 2(speed from fast to slow) 020-029 Effect 3(speed from fast to slow) 030-039 Effect 4(speed from fast to slow) 040-049 Effect 5(speed from fast to slow) 050-059 Effect 6(speed from fast to slow) 060-069 Effect 7(speed from fast to slow) 070-079...
-
Page 14: Indication Of Led Digital Tube
INDICATION OF LED DIGITAL TUBE LED Indications: DMX Signal OK Green Indication NO DMX Signal Wireless DMX Signal available Blue Indication Not linked to any transmitter Flash Lose link with a transmitter or being linked with one Explanations for logo on top-right of the LCD display: Slave Master DMX512 Mode... -
Page 15: Troubleshooting
TROUBLESHOOTING PROBLEM ACTION Check the fuse on the power socket. The projector doesn’t switch on Replace the lamp. The lamp comes on but the projector doesn’t Make sure that the projector is correctly configurated. respond to the controller Replace or repair the DMX cable. The projector only functions intermittently Make sure the fan is working and not dirty. - Page 16 1 Fixed gobo wheel : 7 interchangeable gobos+ white bi-directional wheel scrolling at variable speeds, shaking at variable speeds Gobo diameter: Φ24mm Gobo image diameter: Φ20mm PRISM: 1x3 facet prism, bi-directionally rotatable at variable speeds Iris: Linearly adjusted with Macro FOCUS: linearly focusing controlled by DMX DIMMER:...
- Page 17 WEIGHT: 19.2Kg SIZES: XRLED LIGHT OUTPUT: 17/20...
-
Page 18: Electrical Diagram
ELECTRICAL DIAGRAM 18/20... -
Page 19: Component Order Codes
COMPONENT ORDER CODES NAME PART NO. QUANTITY REMARK 300W POWER SUPPLY 192010168 150W LIGHT SOURCE 150020271 FUSE 270041037 TILT BELT 290151339 PAN BELT 290151218 HEAD BOTTOM FAN 030060035 BASE FAN 030069005 PAN MOTOR 030040229 TILT MOTOR 030040207 CONSTANT CURRENT SUPPLY 192010167 PAN/TILT DRIVE PCB 230060224... - Page 20 PR LIGHTING LTD. 1582 Xingye Avenue, Nancun Panyu Guangzhou, 511442 China TEL: +86-20-3995 2888 FAX: +86-20-3995 2330 P/N: 320020187 Version: 20140725 20/20...
Need help?
Do you have a question about the XRLED 300 SPOT and is the answer not in the manual?
Questions and answers