Table of Contents
Advertisement
Quick Links
Advertisement
Table of Contents

Related Manuals for PR Lighting XPar 1012


Summary of Contents for PR Lighting XPar 1012
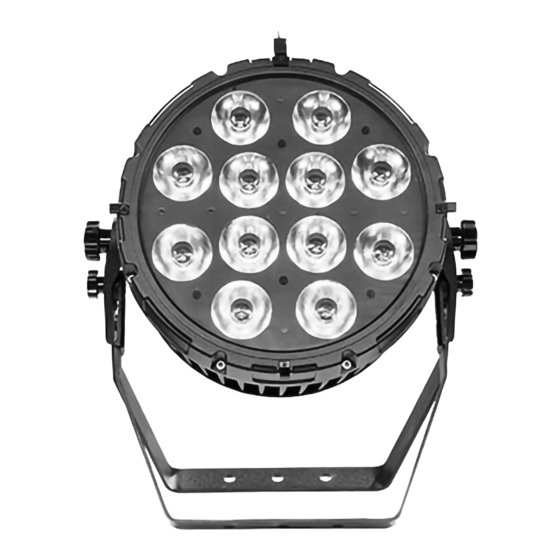
- Page 1 XPar 1012 PR-8208 The user manual contains important information about the safe installation and use of a projector. Please read and follow these instructions carefully and keep the manual in a safe place for future reference. PR LIGHTING LTD. http://www.pr-lighting.com...
-
Page 2: Table Of Contents
INDEX …………………………………………………………………………………………… SAFETY AND WARNINGS ……………………………………………………………………………………………………… INSTUCTIONS ……………………………………………………………………………… CLEANING AND MAINTENANCE ● ……………………………………………………………………………………………… TROUBLESHOOTING ● ……………………………………………………………………………………………………… 3. APPEARANCE …………………………………………………………………………………………………… 4. INSTALLATION …………………………………………………………………………………………………………… RIGGING ● …………………………………………………………………………… PLACE A UNIT ON A FLAT SURFACE ● OF THE ACCESSORIES……………………………………………………………………… INSTALLATION ● ………………………………………………………………………………………………… TRANSPORTATION ●... -
Page 3: Safety And Warnings
1. SAFETY AND WARNINGS NOTE Before a projector’s installation, power-on, operation and maintenance, please carefully read the safety information hereinafter! The following safety signs are used in the user manual. User Electrical Protective High Warning Flames Goggles Manual shock Gloves Temperature ●... -
Page 4: Instuctions
●There are safety cord holes at the bottom of the base of a projector. In view of safety, please run the safety cord supplied through the safety cord holes for safety support. ●Before any installation, maintenance and cleaning work, please ensure the projector is disconnected from power mains. -
Page 5: Troubleshooting
●TROUBLESHOOTING PROBLEM ACTION Check the power cord connection. Power Switch fails or is not connected well, call a professional The projector doesn’t switch on technician for repairing and checking. Control board is not connected normally, call a professional technician for repairing and checking . -
Page 6: Installation
Product’s External Functional Sketch: Name Remarks Frost panel(Optional) Other components should be selected if frost panel selected Barn Door (Optional) Knob Support XLR cable Small Power Cord Transparent Display Cover(Optional ) Used in harsh environment like dusty area or being under water 4. -
Page 7: Rigging
●RIGGING Take 1 clamps and the safety cord out from the package and mount 2 clamps on the underside of fixture with 2 retainers attached to each clamp. Hang the fixture on the structure and fasten the screws attached to each clamp. (See the WARNING on the underside of the base as shown above) To pass the SAFETY CORD through the HOLES for safety! Always ensure that the projector is firmly anchored to avoid vibration and slipping whilst functioning. -
Page 8: Transportation
If the Top Hat is selected, Its Installation is illustrated in the diagrams below: Loosen the screw in the shape of a butterfly(1) in the front part of the unit(4), turn the clipping component(2) in the shape of 7 by a little amount, then place the Top Hat (3). Turn the clipping component(2) backward and tighten the butterfly screws(1). -
Page 9: Dmx Control Connection
● DMX CONTROL CONNECTION: Connection between controller and projector and between one projector and another must be made with a twin-screened cable, with each wire having at least a 0.5mm in diameter. Connection to and from the projector is via cannon 5 pin (which are included with the projector) or 5 pin XLR plugs and sockets. -
Page 10: Setup And Configuration
5. SETUP AND CONFIGURATION ● FRONT PANEL OPERATION Projector configuration can be set conveniently via push button and LCD display. Launch the projector and press button ENTER for more than 3 seconds to unlock the panel, the LCD will show the function menu of the projector, each main menu has its submenus and each submenu has a specific function. -
Page 11: Operation Menu
6. OPERATION MENU level menu level menu level menu level menu Standard mode:001 – 507 DMX Address Extended mode:001-502 Standard 6 DMX Channel Mode (Default:STD6) Extended 11 Slave Master/Slave Default:Slave (Default:Slave) Master 128-255 Color Offset Green 128-255 128-255 Blue Language English Default:English (Default:English)... -
Page 12: Dmx Protocol
7. DMX PROTOCOL Standard Extended Function Description mode mode Dimming 000-255 Linear Dimming 0%-100% Color Temperature 001-255 Linear adjustment 000-016 017-024 White(10000K) 025-032 White(7200K) 033-040 White(5600K) 041-048 White(3200K) 049-056 Cyan 057-064 Yellow 065-072 Magenta Color Macros 073-080 081-088 Green 089-096 Blue 097-104 Light blue... - Page 13 240-255 Preset memory 16 001-015 User Memory1 016-031 User Memory2 032-047 User Memory3 048-063 User Memory4 064-079 User Memory5 080-095 User Memory6 096-111 User Memory7 112-127 User Memory User Memory8 128-143 User Memory9 144-159 User Memory10 160-175 User Memory11 176-191 User Memory12 192-207 User Memory13...
-
Page 14: Technical Data
TECHNICAL DATA ,50/60Hz INPUT VOLTAGES: 100V/120V/200V/220V /230V/240V AC RATED POWER :130W@220V LIGHT SOURCE SPECIFICATIONS: 12pcs of RGBW LED lamp Power Consumption 120 W (12X10W) Manufacturers Rated Lamp Life 50000hours COLORS R/G/B/W DIMMING Linear Dimming from 0-100% STROBE Electronic Strobe 0.5-33FP.S. BEAM ANGLE Beam Angle(1/2peak) θ... -
Page 15: Sizes
SIZES: LIGHT OUTPUT:... -
Page 16: Circuit Diagram And Pcb Connections
9. CIRCUIT DIAGRAM AND PCB CONNECTIONS ● CIRCUIT DIAGRAM... -
Page 17: Pcb Connections
●PCB CONNECTIONS (250020250) Master Board Name Optical sensor power supply signal input PWM signal Wireless board thermal switch 230060213) LED Diver( Name power supply LED Driver PWM signal input... -
Page 18: Component Order Codes
LED lamp Board(230060327) : Name LED Lamp Thermal Switch 10.COMPONENT ORDER CODES Name Code No. Remarks Power Switch 192010188 LED light source 230060327 LED Driver Board 230060213 LCD master board 230060120 Front Glass Panel 080090115 Transparent Display Cover 290190109 Optional Seal for Transparent Display Cover 290019142 Optional... - Page 20 1582 Xingye Avenue, Nancun Panyu Guangzhou, 511442 China TEL: +86-20-3995 2888 PR lighting will try its best to offer accurate and overall information about a product’s technical data. Any changes won’t be notified if necessary. Patented Products. Counterfeiting Will be Prosecuted! P/N: 320020409...
Need help?
Do you have a question about the XPar 1012 and is the answer not in the manual?
Questions and answers