Table of Contents
Advertisement
Quick Links
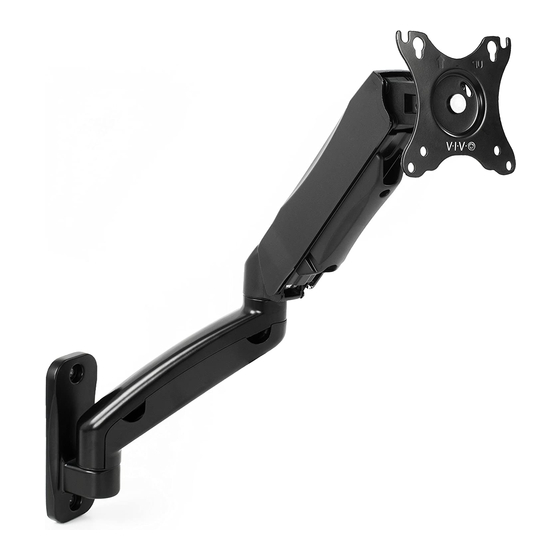
Single Monito Monitor Wall M Wall Mount
Instruction Manual
Mode Monito l : MOUNT- MOUNT-V001G V001G
Email: help@vivo-us.com
Live chat: www.vivo-us.com
Call: 1-800-371-5654
-
Scan the QR code with your mobile device or follow the link
to helpful videos and specifications related to this product.
https Requir : MOUNT- / /vivo us Requir . com/pr Wall M o ducts Requir / mount v001g
-
T-V001G o ols Requir Re Monito q uir Wall M e Monito d : MOUNT-
phillips screwdriver
Package Monito Conte Monito n ts Requir
A (x1)
B (x2)
Monitor Arm
Cover
M A (x4)
-
M B (x4)
-
M5x12
M4x12
W A (x2)
-
W B (x2)
-
Screw
Anchor
-
C (x1)
5mm Allen Key
M C (x4)
-
D5
W C (x2)
-
Washer
1
Advertisement
Table of Contents

Subscribe to Our Youtube Channel
Related Manuals for Vivo MOUNT-V001G


Summary of Contents for Vivo MOUNT-V001G
- Page 1 Requir : MOUNT- / /vivo us Requir . com/pr Wall M o ducts Requir / mount v001g T-V001G o ols Requir Re Monito q uir Wall M e Monito d : MOUNT-...
- Page 2 As Requir s Requir e Monito m bly Steps Ste Monito p s Requir Ste Monito p 2 Ste Monito p 1 Press covers (B) into screw holes. Option A: MOUNT- Wood Wall Ins Requir t allation Use a pencil to mark drilling location for wood beam and drill 2.2” deep holes using 3/16”bit.
- Page 3 Ste Monito p 4 Ste Monito p 3 (Conti (Continue Monito d ) Tighten the socket screw if the joints are making a popping sound. Install screws (M-A) or (M-B) with washers (M-C) in top two holes of Adjust arm tension by turning screw with Allen wrench (C). Turn the monitor, leaving 3mm of space between the screw heads and clockwise to reduce tension and turn counterclockwise to increase Tighten using 5mm Allen Wrench (C).
- Page 4 Call: 1-800-371-5654 If any parts are received damaged or defective, please contact us. We are happy to replace parts to ensure you have a fully functioning product. For more VIVO products, check out our website at www.vivo-us.com. Last updated: 5/1/2018...
Need help?
Do you have a question about the MOUNT-V001G and is the answer not in the manual?
Questions and answers