Table of Contents
Advertisement
Quick Links
Advertisement
Table of Contents

Related Manuals for Vivo MOUNT-VW04G


Summary of Contents for Vivo MOUNT-VW04G
- Page 1 White Pneumatic Arm TV Wall Mount Instruction Manual SKU: MOUNT-VW04G Scan the QR code with your mobile device or follow the link for helpful videos and specifications related to this product. https://vivo-us.com/products/mount-vw04g help@vivo-us.com www.vivo-us.com 1-800-371-5654...
- Page 2 CAUTION! DO NOT INSTALL INTO DRYWALL ALONE. VERIFY YOUR WALL CONSTRUCTION. USE WOOD STUDS TO MOUNT. We include mounting for brick and concrete walls. If unsure, please contact us at vivo-us. com, email at help@vivo-us.com, or call us at 1-800-371-5654.
-
Page 3: Tools Needed
TOOLS NEEDED Phillips Drill Pencil Screwdriver ASSEMBLY STEPS STEP 1 Remove plastic covers from wall mount bracket on arm (A). STEP 2 OPTION A: Wood Wall Installation Use arm (A) with a bubble level to mark drilling locations on wall where stud is located, and drill 2.2”... - Page 4 STEP 2 (Continued) OPTION B: Concrete/Brick Wall Installation Use arm (A) with a bubble level to mark drilling locations on wall, and drill 2.4” deep holes using a 3/8” bit. Mount arm to wall using screws (W-A) and anchors (W-B). STEP 3 Reattach plastic covers.
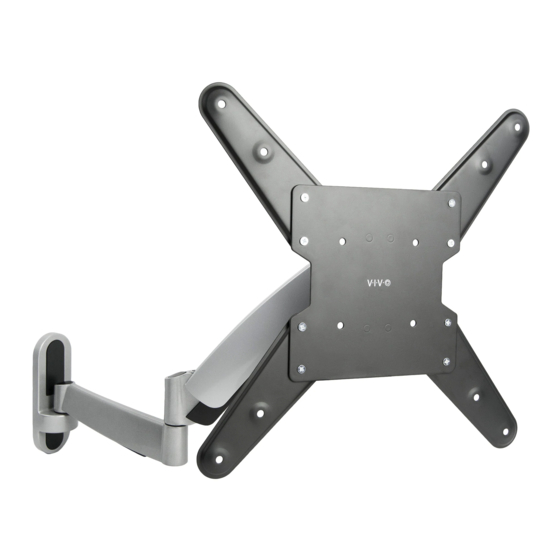
- Page 5 STEP 4 For VESA 300x300 and 400x400 TV mounting hole patterns, attach extensions (C, D) to VESA plate (B) in X pattern using M6x8mm bolts (F). For VESA 400x200 TV mounting hole patterns, attach extensions (C, D) to VESA plate (B) in horizontal pattern using M6x8mm bolts (F).
- Page 6 STEP 5 (Continued) OPTION B: Curved/Recessed Back TV With TV face down on a flat surface, secure VESA plate to the TV using bolts (M-C, M-D, M-E), spacers (M-H, M-I) and washers (M-G). STEP 6 Loosen wingnuts on VESA plate to make sure there is 4mm of space between wing nuts and VESA plate.
- Page 7 STEP 7 To adjust gas spring lift strength, turn the screw on the top of the center joint using 6mm Allen wrench (H). Clockwise will reduce strength, and counter-clockwise will increase (screw turns most easily when arm is facing straight forward). NOTE: If the mount makes a popping noise when raising or lowering, tighten the socket set screw on top of the adjustment screw using a large flat-blade screwdriver.
- Page 8 Love your new VIVO setup and want to share? Tag us in your photo! @vivo_us If any parts are received damaged or defective, please contact us. We are happy to replace parts to ensure you have a fully functioning product.
Need help?
Do you have a question about the MOUNT-VW04G and is the answer not in the manual?
Questions and answers