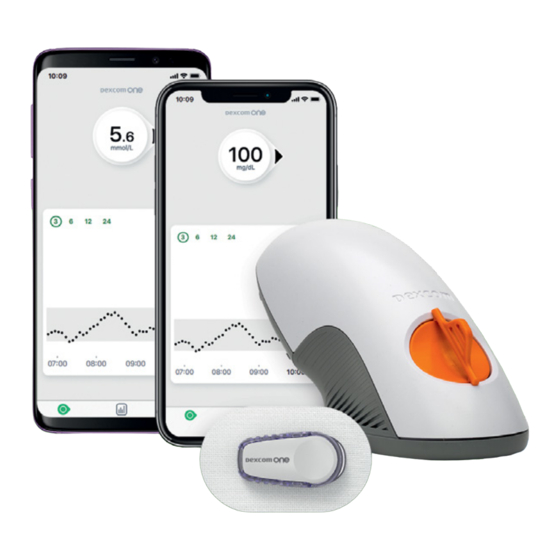
Dexcom one User Manual
Hide thumbs
Also See for one:
- Manual (12 pages) ,
- Start here manual (20 pages) ,
- Getting started (32 pages)

Related Manuals for Dexcom one


Summary of Contents for Dexcom one
- Page 1 USER GUIDE Welcome Home screen overview Alerts Treatment decisions Starting a new sensor Appendices Instructions For Use...
-
Page 3: Table Of Contents
5.1 When to use your BG meter instead of your Dexcom ONE ......29 5.2 When to watch and wait . - Page 4 Appendix C Taking care of your Dexcom ONE � � � � � � � � � � � � � � � � � � � � � � � � � � � 52 C.1 Dexcom ONE storage and maintenance ..52 C.2 System disposal .
-
Page 5: Chapter 1 Welcome
Continuous Glucose Monitoring (CGM) System (Dexcom ONE) part of your life! 1.1 Get started To set up your Dexcom ONE, follow instructions in the Start Here guide or the Dexcom ONE video tutorials available at dexcom.com. This booklet, the Dexcom ONE User Guide,... - Page 6 No glucose alerts unless you turn them on. • Turn on alerts during setup to get glucose and system alerts when sensor warmup is over. Dexcom ONE alerts will NOT override your smartphone’s settings. • You will NOT hear high or low glucose alerts if your phone is set to silent (sound is turned off) •...
-
Page 7: Chapter 2 Dexcom One Safety Statements
The Dexcom ONE Continuous Glucose Monitoring System (Dexcom ONE) is a glucose monitoring system indicated for persons, including pregnant women, ages 2 years and older. Dexcom ONE is designed to replace fingerstick blood glucose (BG) testing for diabetes treatment decisions. -
Page 8: Warnings
No number, no arrow, no treatment decision. When in doubt, get your BG meter out. • Do not use if… Do not use Dexcom ONE if you are on dialysis, or critically ill. It is not known how different conditions or medications common to these populations may affect performance of the system. - Page 9 Has your healthcare professional given you self- monitoring tasks? You should keep doing them. Having Followers does not replace medical advice. Follow Dexcom ONE instructions. If you do not, you could have a severe low or high glucose event. Precaution •...
-
Page 10: Start Up Safety Statements
• Use correct sensor code When you start a new sensor, you must enter a code into your display device to use Dexcom ONE. Each sensor has its own code printed on the back of the adhesive patch. Do not use a code from a different sensor or make up a code. - Page 11 • Do not start sensor past use by date You can start a new sensor on or before its Use By date. This gives you full wear. Starting a sensor past its Use By date may cause incorrect results. Dexcom ONE User Guide Dexcom ONE safety statements...
- Page 12 • Where to insert: things to check Keep the safety guard on until you put the Dexcom ONE applicator against your skin. If you remove the safety guard first, you may hurt yourself by accidentally pushing the button that inserts the sensor before you mean to.
-
Page 13: Transmitter Safety Statements
Warnings • Inspect Do not use a damaged or cracked transmitter. A damaged transmitter could cause injuries from electrical shocks and may make Dexcom ONE not work correctly. • Use as directed The transmitter is small and may pose a choking hazard. -
Page 14: Display Device Safety Statements
• Check settings • Optional alerts: You will be prompted to turn on the optional alerts when setting up your Dexcom ONE system. You must turn them on to get glucose and system alerts. Follow the instructions and safety warnings in this user guide to make sure you receive alerts on your display device. - Page 15 Tips • Use Dexcom ONE receiver: If you use the Dexcom receiver, be sure to use the one that comes with your Dexcom ONE system. Receivers from previous generations won't work with the Dexcom ONE system.
- Page 16 • Is it on? If the display device is turned off (shut down), it will not show Dexcom ONE readings or alerts. Make sure your display device is turned on. • Check smartphone accessory devices...
-
Page 17: Chapter 3 Display Device Screens
Chapter 3 Display device screens This chapter describes the Dexcom ONE glucose information and navigation features on your display device. 3.1 Home screen You spend most of your time on the home screen. It shows your sensor readings (readings) and glucose trend information. - Page 18 When you turn on your: • Low Alert: Color changes to red when your glucose goes too low. • High Alert: Color changes to yellow when your glucose goes too high. Dexcom ONE User Guide Display device screens...
- Page 19 • Up to 5 mmol/L in 30 minutes Rapidly rising or falling Changing more than: • 0.2 mmol/L each minute • 5 mmol/L in 30 minutes No arrow Cannot determine trend. Use BG meter to make treatment decisions. Dexcom ONE User Guide Display device screens...
- Page 20 Low is red. High is yellow. • Target range: The gray box shows the fixed target range of 3.9-10.0 mmol/L, the international consensus for the recommended target range. Dexcom ONE User Guide Display device screens...
- Page 21 Icon Description Glucose: Your home screen Reports: Shows your glucose information for a specific period, including average glucose and average time in range. Settings: Edit alerts, change settings, customize sounds, and more. Dexcom ONE User Guide Display device screens...
- Page 22 You can also test the speaker. • Replace sensor and stop sensor session: Stop this sensor and start a new one. (More in Chapter 6: Starting a new sensor.) • Power off: Turn off the receiver. No readings or alerts when powered off.
-
Page 23: Reports
12 days of CGM data. • Time in Range: Percentage of time that glucose levels are in Low, Target, and High ranges based on international consensus for target range. Dexcom ONE User Guide Display device screens... -
Page 24: Screen Issues
NOT 10:30 getting readings or alerts. (More in Appendix A: Signal Loss Troubleshooting.) Always keep receiver within 6 meters of transmitter. Wait up to 30 minutes. Dexcom ONE User Guide Display device screens... -
Page 25: Chapter 4 Alerts
Alerts Turning on alerts can help you stay in your target range. They are an important tool when making treatment decisions with Dexcom ONE. Talk to your healthcare professional about the best Low Alert and High Alert settings for you. -
Page 26: Low And High Alerts
• You can choose your alert level and tone. High Glucose Alert (High Alert) High Glucose Lets you know when your Dexcom ONE sensor reading is above your High mmol/L Alert level. • Turn on your High Receiver Alert during setup. -
Page 27: Turn On Alerts
• Alert vibrations feel the same as notifications you get from other apps on your smartphone. The only way to know if it is from Dexcom ONE is to look at your smartphone. Dexcom ONE User Guide... - Page 28 Signal Loss Brief Sensor Issue Back Receiver alert settings • Dexcom ONE alerts will NOT override your receiver settings. • If your receiver is set to vibrate, you will NOT hear high or low glucose alerts. • Check your receiver sound settings: Go to Menu >...
- Page 29 For example, are you worried about insulin stacking—taking doses too close together? To use your Dexcom ONE as a tool to avoid insulin stacking, your healthcare professional should advise you to turn on the Snooze feature in your High Alert setting.
- Page 30 The screens below show Snooze Alerts set at 2 hours. If your Dexcom ONE readings remain high for 2 hours after your first High Alert, you will get another alert. This lets you know you might want to take more insulin. If 2 hours pass and you are in your target range, your High Alert will not repeat.
-
Page 31: Chapter 5 Treatment Decisions
BG meter to make treatment decisions until you know how Dexcom ONE works for you. Sometimes you must use your BG meter instead of Dexcom ONE. And other times it is best not to treat, just watch and wait. Work with your healthcare professional to put together a plan for making treatment decisions. - Page 32 Rely on your BG meter for treatment decisions when: • Dexcom ONE is missing a number, an arrow, or both. Examples: Use your BG meter if you see any of these. Display What it means HIGH No number Receiver HIGH...
-
Page 33: When To Watch And Wait
Wait up to 30 minutes. In other words, no number, no arrow, no CGM treatment decision. • Your Dexcom ONE readings do now match your symptoms. Example: you do not feel right but your readings show your glucose is in target range. -
Page 34: How To Use The Trend Arrows
5.4 Treat with professional advice Talk to your healthcare provider about: • Using Dexcom ONE to manage your glucose • Setting alert levels • Comparing BG meter values and sensor readings • Fingerstick best practices 5.5 Practice making... - Page 35 • Slowly Falling mmol/L Arrow: Glucose is falling up to 3.4 mmol/L in 30 minutes. What you should do: • Use your Dexcom ONE to treat as you normally would. Breakfast time: Think about: Ninety minutes • Number and Arrow: later you are sitting You have both.
- Page 36 • Down arrow: Your You see: glucose is falling up to 5 mmol/L in 30 minutes. What you should do: mmol/L • Use your Dexcom ONE to treat. Because of the down arrow, take a little less. Dexcom ONE User Guide Treatment decisions...
-
Page 37: Additional Treatment Help
5.6 Additional treatment help Talk to your healthcare professional about: • Using Dexcom ONE to manage your diabetes • Setting High and Low alert levels • Comparing BG meter values and sensor readings • Fingersticking best practices Online video tutorials Access online video tutorials at dexcom.com. - Page 38 • How to replace your sensor • Traveling with your Dexcom CGM We also have training available online to support your continuous glucose monitoring (CGM) learning experience. Dexcom ONE User Guide Treatment decisions...
-
Page 39: Chapter 6 Starting A New Sensor Session
Remember, after your sensor session has ended, you will not get any sensor readings. To resume getting sensor readings, follow the steps below to remove the old sensor, then insert a new one, and complete the sensor warmup. 6.1 Remove your sensor Follow these steps to: •... -
Page 40: Reuse Your Transmitter
Dexcom representative to order another. When the transmitter has less than one sensor session of battery life left, you will not be able to use it to start a new sensor session. Go to Appendix A: Troubleshooting. - Page 41 APPENDIX Troubleshooting Dexcom Clarity Taking care of your Dexcom ONE Packaging symbols Warranty Technical information Professional use instructions Glossary...
-
Page 42: Appendix A Troubleshooting
(dexcom.com). A.1 Accuracy – sensor readings do not match blood glucose meter value Different body fluids give different numbers: • BG meter measures glucose from blood. • Dexcom ONE sensor measures glucose from interstitial fluid. Dexcom ONE User Guide Troubleshooting... -
Page 43: Accuracy - Sensor Readings Do Not Match Symptoms
1. Gently peel off adhesive patch with applicator attached. 2. Check insertion site to make sure the sensor is not left in the skin. 3. Do not reuse applicator. 4. Contact Technical Support at dexcom.com, or contact your local Dexcom representative. Dexcom ONE User Guide Troubleshooting... - Page 44 • Putting Overpatch or medical tape (such as Blenderm) over the adhesive patch. Do not cover transmitter. Avoid open wounds. • To order Overpatch, contact Technical Support at dexcom.com, or contact your local Dexcom representative. Overpatch Medical Tape For your next sensor session, you can prevent peeling before inserting your sensor by: •...
-
Page 45: App Shuts Off
• App: Go to Settings > Alerts • Receiver: Go to Menu > Settings > Alerts 2. Dexcom ONE alerts will NOT override your smart device's settings. • App: You will NOT hear high or low glucose alerts if your phone is set to silent (sound is off) or vibrate. -
Page 46: Common Alerts
Solution 1. Check transmitter; is it snapped into transmitter holder? 2. Wait up to 3 hours while the Dexcom ONE fixes itself. 3. If not corrected after 3 hours, contact Technical Support at dexcom.com, or contact your local Dexcom representative. - Page 47 Check troubleshooting tips and try pairing again. Try Pairing Again Troubleshooting Tips Edit Transmitter SN Dexcom ONE did not pair. Solution 1. Make sure transmitter is snapped into transmitter holder. 2. Check the transmitter serial number (SN) and try again.
- Page 48 6 meters of each other. If you are in water, keep device closer than 6 meters. 2. Turn Bluetooth off and on. 3. Restart display device. Reopen Dexcom ONE app if using your smartphone. 4. If these tips do not solve the problem, contact Technical Support at dexcom.com,...
- Page 49 Transmitter Battery Low Your transmitter will expire in about 3 weeks. Do not replace your current transmitter with a new one yet. Wait until the Transmitter Battery system tells you to replace it. If you haven't already, please order a new transmitter.
-
Page 50: End Sensor Session Early
Transmitter not working. Sensor session automatically stops. Solution To report this issue and get a replacement, contact Technical Support at dexcom.com, or contact your local Dexcom representative. No alerts or sensor readings until replaced. Use your BG meter for treatment decisions. -
Page 51: Gap In Graph
9:00 10:00 11:00 A.9 Technical support For help with the Dexcom ONE CGM system, contact Technical Support at dexcom.com, or contact your local Dexcom representative. Any serious incident that has occurred in relation to this device should be reported to the manufacturer and the competent authority of the Member State in which you are established. -
Page 52: Recharge Receiver
Once snapped into place, the transmitter is water resistant. Swim, shower, take a bath: no need to worry about water and your Dexcom ONE – just leave your display device in a dry area. If you are in water, your display device needs to be closer than 6 meters to get sensor readings. -
Page 53: Appendix B Dexcom Clarity
Get reports on the web at clarity.dexcom.eu and on the go using the Dexcom Clarity app. Just log in with your Dexcom information. When you also use the Dexcom CGM app, you automatically... -
Page 54: Appendix C Taking Care Of Your
• Store at temperatures between 0°C and 45°C. • Store between 10% and 95% relative humidity. Receiver • Keep battery charged. Only use Dexcom USB charging/download cable. • When carrying the receiver in your purse or pocket consider using a screen protector that doesn't interfere with the information displayed. -
Page 55: System Disposal
• Using alcohol wipes to clean the receiver hasn't been tested Use correct transmitter and sensor • Dexcom ONE components are not compatible with any previous Dexcom products. Do not mix transmitters, receivers, and sensors from different generations. C.2 System disposal... -
Page 56: Appendix D Packaging Symbols
Appendix D Packaging symbols Symbols are on the Dexcom ONE packaging. They show proper and safe use of the Dexcom ONE. For symbol descriptions, refer to the table below. Some of these symbols may not have meaning in your region and are listed for informational purposes only. - Page 57 Provided by Enclosure Objects > 12.5 mm diameter; immersion in water Keep Away from Heat Keep Dry Manufacturer CE Marking of Conformity MR (Magnetic Resonance) Unsafe Part Number Serial Number Sterilized Using Irradiation STERILE R Dexcom ONE User Guide Packaging symbols...
- Page 58 Temperature Limit Type BF Applied Part Use By Date Dexcom ONE User Guide Packaging symbols...
-
Page 59: Appendix E Risks And Benefits
In this appendix, you’ll learn what they are. E.1 Risks The risks with using Dexcom ONE are: • Not getting your alerts • Using Dexcom ONE to make treatment decisions when you should not • Sensor insertion issues • Adhesive reactions •... - Page 60 For more information on how to make treatment decisions using your Dexcom ONE, go to Chapter 5. Paracetamol/acetaminophen interfering substance risks With the Dexcom ONE, you can take a standard...
-
Page 61: Benefits
• Decreasing the pain and hassle from frequent blood glucose testing, sparing the fingertips Knowing your trends The Dexcom ONE not only sends you a glucose reading every 5 minutes but also provides overviews of your glucose trends and patterns. This... - Page 62 Making treatment decisions using Dexcom ONE You can use your Dexcom ONE reading and trend arrow to make treatment decisions. Go to Chapter 5 for more information. No fingersticks calibration is needed. This reduces the pain and burden of excessive fingersticks (Price and Walker, 2016) and potential errors due to inaccurate calibration (Wadwa, 2018).
-
Page 63: Appendix F Dexcom One Warranty
(“Limited Warranty”) for the period commencing on the date of original purchase and expiring one (1) year thereafter, provided it is not modified, altered, or misused. Note: If you received this receiver as a replacement... - Page 64 Dexcom’s obligations under the limited warranty During the Limited Warranty Period, Dexcom will replace, without charge to User, any defective receiver. To obtain assistance regarding a defective receiver, contact Dexcom Technical Support at dexcom.com...
-
Page 65: Dexcom Sensor Limited Warranty
F.2 Dexcom sensor limited warranty What is covered and for how long? To the extent allowed by law, the Dexcom ONE sensor is provided to you “as is.” Dexcom hereby disclaims all warranties (express, implied, and statutory) with respect to the sensor, including, but not limited to,... -
Page 66: Dexcom Transmitter Limited Warranty
What is covered and for how long? Dexcom, Inc. or its local Dexcom affiliate (“Dexcom”) provides a limited warranty to the individual end user (“you” or “User”) that the Dexcom ONE transmitter (the “transmitter”) is free from defects in material and workmanship under normal use (“Limited Warranty”) for the period commencing on the date of... - Page 67 (which may be subject to a separate limited warranty), whether provided by Dexcom or any other party; this includes your cell phone or smart device and your connection to the Internet.
- Page 68 Dexcom ONE or any feature or service provided by Dexcom for use with the Dexcom ONE. These limits on Dexcom’s warranty and liability...
-
Page 69: Appendix G Technical Information
When HIGHER is better Adults Performance metrics* Pediatrics Clinical Accuracy % of readings that were in the Clarke [99.8%] Error Grid (CEG) A [100%] Zone [% CEG A+B Zone] Reference is YSI (Yellow Springs Laboratory Instrument) Dexcom ONE User Guide Technical information... -
Page 70: Product Specifications
WARNING: Portable RF communications equipment (including peripherals such as antenna cables and external antennas) should be used no closer than 30 cm to any part of the Dexcom ONE CGM system including cables specified by the manufacturer. Otherwise, degradation of the performance of this equipment could result. - Page 71 Operational conditions Humidity: Humidity: 10%–95% RH 10%–90% RH Temperature: Temperature: Storage and 0°C–45°C 0°C–40°C transport Humidity: Humidity: conditions 10%–95% RH 10%–90% RH -396 meters -382 meters Operating to 4,206 to 5,000 altitude meters meters Dexcom ONE User Guide Technical information...
- Page 72 The maximum surface temperature of Applied part = 43°C. Essential performance The Dexcom ONE system measures patients' glucose sensor readings with specified accuracy under the stated operating conditions. The Essential Performance of the Dexcom ONE CGM system also Dexcom ONE User Guide Technical information...
- Page 73 Quality of service summary Quality of Service for the Dexcom ONE System wireless communication using Bluetooth Low Energy is assured within the effective range of 6 meters, unobstructed, between the Dexcom ONE transmitter and paired display device at regular 5-minute intervals.
- Page 74 ± 15 kV Air IEC 61000-4-2 Magnetic field (50Hz) 30 A/m IEC 61000-4-8 Electrical fast ± 2 kV for transient/burst power supply lines IEC 61000-4-4 ± 0.5 kV, ± 1 Surge kV line(s) to IEC 61000-4-5 line(s) Dexcom ONE User Guide Technical information...
- Page 75 EMC environment cannot be guaranteed. An interference event can be recognized by gaps in sensor readings or gross inaccuracies. The user is encouraged to try to mitigate these effects by one of the following measures: • If the Dexcom ONE sensor reading does not match your symptoms or expectations take a fingerstick.
- Page 76 • Dexcom ONE reading: 6.5 • Acceptable range (20%): 5.2 – 7.7 mmol/L • BG meter value: 5.5 • Your Dexcom ONE may not be working normally when those two numbers are: • More than 30% apart (if Dexcom ONE reading is 3.9 or more)
-
Page 77: Radio Regulations Compliance
G.3 Radio regulations compliance Hereby, Dexcom, Inc. declares that the radio equipment type Dexcom ONE System is in compliance with Directive 2014/53/EU. The full text of the EU declaration of conformity is available at the following internet address: dexcom.com/doc. -
Page 78: Appendix H Professional Use Instructions
H.1 Introduction Dexcom ONE supports multi-patient use. You just: • Prepare Dexcom ONE for your patient • Tell the patient what Dexcom ONE is and how it works • Set up the system with the patient • Follow up with the patient to share insights on their glucose trends, patterns, and statistics This helps both of you manage their diabetes better. - Page 79 • Soak and Scrub: • Put transmitter in prepared soak for 3 minutes • While immersed, scrub uneven areas (see green arrows) with a soft bristled brush or a pre-saturated bleach wipe Dexcom ONE User Guide Professional use instructions...
- Page 80 • Focus on the uneven areas • Swirl in Cavicide for 10 seconds • Soak: • Put transmitter in prepared soak • Swirl it for 30 seconds • Then let it soak for another 3 minutes Dexcom ONE User Guide Professional use instructions...
-
Page 81: Explain To Patient What Dexcom One Is And How It Works
10 seconds • Dry: Wipe transmitter dry with cloth H.3 Explain to patient what Dexcom ONE is and how it works This table shows you what to explain to your patients and lets you know where you can find patient-centered information to help them understand. -
Page 82: Follow Up With Patient
You can review this information with the patient to give them insights about how to better manage their diabetes. At the end of the session, remove Dexcom ONE from the patient. Go to Chapter 6: Starting a new sensor session for more information. -
Page 83: Next Steps
H.6 Next steps Your patient may want to have their own Dexcom ONE. It is available for personal use. Direct them to dexcom.com for more information. You are ready to use Dexcom ONE on another patient and introduce them to the benefits of Dexcom ONE. -
Page 84: Appendix I Glossary
Operating system used for Android smart devices. Software installed on a smart or mobile device. App or The Dexcom ONE app is a Application display for continuous glucose monitoring. App Store or Internet store for downloading Play Store applications to a smart device. - Page 85 If left untreated, Hyperglycemia hyperglycemia can lead to serious complications. The default High Alert in Dexcom ONE is set to 11.1 mmol/L. Consult your healthcare professional to determine the appropriate hyperglycemia setting for you. Low BG. Same as “low” or low blood sugar.
- Page 86 (IEC) is a nonprofit, non- governmental, international organization created to produce safety standards for electronics. One of the safety standards is the Ingress Protection (IP) Marking, which classifies and rates how protected an electronic device is against dust, water, accidental contact, etc.
- Page 87 Special care to be exercised by you or your healthcare Precaution professional for the safe and effective use of Dexcom ONE. A statement of the intended Safety uses of Dexcom ONE and Statement relevant warnings, precautions, and contraindications.
-
Page 88: Index
Index Accuracy Dexcom ONE Readings Do Not Match Blood Glucose Meter Value, 40 Dexcom ONE Readings Do Not Match Symptoms, 41 Adhesive Patch, 41 Alerts, 23 Brief Sensor Issue, 44 Signal Loss, 46 Transmitter Alerts, 47, 48 Turn On, 25... - Page 89 Transmitter Alert, 48 Transmitter Battery Low Alert, 47 Treatment Decisions, 29, 32 Trend Arrow, 15, 16, 32 Troubleshooting, 40 Use Meter Instead of Dexcom ONE, 29 Warranty, 61 Watch and Wait, 31 Water and the Dexcom ONE, 49 Dexcom ONE User Guide...
- Page 90 Page intentionally left blank...
- Page 91 Dexcom, Dexcom ONE, Dexcom Share, Share, and Dexcom Clarity are either registered trademarks or trademarks of Dexcom, Inc. in the United States and may be in other countries. Bluetooth is a registered trademark owned by Bluetooth SIG, Inc. Apple is a trademark of Apple Inc., registered in the U.S.
- Page 92 Dexcom, Inc� 6340 Sequence Drive San Diego, CA 92121 USA +1�858�200�0200 dexcom�com Outside US: Contact your local Dexcom representative EC REP MDSS GmbH Schiffgraben 41 30175 Hannover, Germany AW00096-07 Rev 001 MT00096-07 Rev Date: 2021/12...
Need help?
Do you have a question about the one and is the answer not in the manual?
Questions and answers