Advertisement
VHX Display
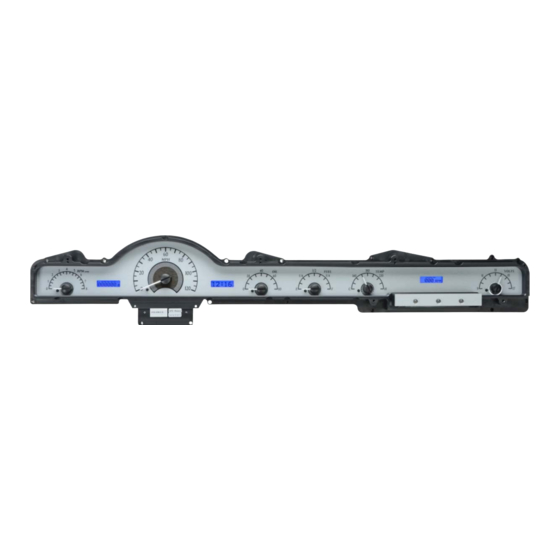
VHX-50M
Dakota Digital VHX Instrument Installation
For 1950-51 Mercury
Your new VHX-50M kit includes:
Universal Sender
Pack
Installation Manuals
Switch Harness
(12) 8-18x1.5"
Screws & Lock
Washers
(4) 10-16x1.5"
Screws & Lock
Control Box
Washers
Ford Speed
(2) CAT5 Cables
Adapter
Installation
1. Remove the stock gauges, separator plate, and lens from the bezel. These items can be set aside
and are not reused.
Manual # 650385A
Advertisement
Table of Contents

Related Manuals for Dakota Digital VHX-50M


Summary of Contents for Dakota Digital VHX-50M
- Page 1 VHX Display VHX-50M Dakota Digital VHX Instrument Installation For 1950-51 Mercury Your new VHX-50M kit includes: Universal Sender Pack Installation Manuals Switch Harness (12) 8-18x1.5” Screws & Lock Washers (4) 10-16x1.5” Screws & Lock Control Box Washers Ford Speed (2) CAT5 Cables...
- Page 2 2. Remove the clear protective tape from the lens of the VHX system and with a Phillips screwdriver, carefully mount the Dakota Digital gauge cluster to the factory bezel. Use the supplied (12) #8-18 screws with lock washers as indicated by the grey arrows and the (4) #10-16 screws and lock washers shown by the black arrows.
- Page 3 3. Connect the two CAT5 cables and the 3-pin clock harness (included) to the Dakota Digital system. Either CAT5 cable can be used on either jack on the instrument system as well as the control box. Refer to the Operating Manual for Clock / Auxiliary Displays for installation procedures of wiring the clock display.
Need help?
Do you have a question about the VHX-50M and is the answer not in the manual?
Questions and answers