Advertisement
Your new VHX-54C-PU kit should include:
Universal Sensor
Pack
Switch Assembly
Installation
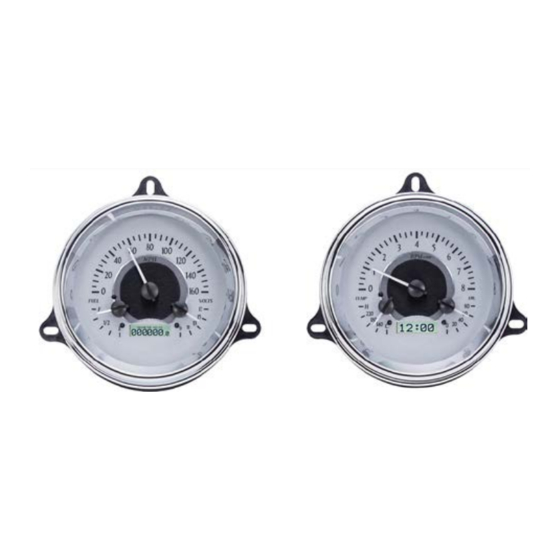
1. Remove the stock gauges from the dash. They are held in place by three nuts on the tabs of the
stock gauge housings. Save the nuts as they will be re-used to secure the new VHX kit.
2. Remove the clear protective tape from the new
VHX gauges to prepare them for installation.
Secure the new VHX gauges back into the
dash re-using the original nuts, six total. The
photo, at right, is of the '47-'53 Chevy Pickup
but the idea is the same, except the '54 has
three mounting tabs instead of four.
VHX-54C-PU
Dakota Digital VHX Instrument Installation
For '54 and '55 "First Series" Chevy pickup systems
VHX Displays
Installation Manuals
(1) 36"CAT5 Cable
(1) 12"CAT5 Cable
Control Box
Manual # 650322A
Advertisement
Table of Contents

Related Manuals for Dakota Digital VHX-54C-PU


Summary of Contents for Dakota Digital VHX-54C-PU
- Page 1 VHX-54C-PU Dakota Digital VHX Instrument Installation For ‘54 and ‘55 “First Series” Chevy pickup systems Your new VHX-54C-PU kit should include: VHX Displays Universal Sensor Pack Installation Manuals Control Box Switch Assembly (1) 36”CAT5 Cable (1) 12”CAT5 Cable Installation 1. Remove the stock gauges from the dash. They are held in place by three nuts on the tabs of the stock gauge housings.
- Page 2 3. Connect the two halves of the new VHX system with the supplied 12” CAT5 cable. Also, route the 3’ cable towards the control box location and connect it to the display. 12” Cable 3’ Cable 4. Display installation is complete, refer to the main manual for wiring instructions to complete the VHX installation.
- Page 3 Manual # 650322A...
Need help?
Do you have a question about the VHX-54C-PU and is the answer not in the manual?
Questions and answers