urmet domus IPerCom 1741 Configuration Booklet
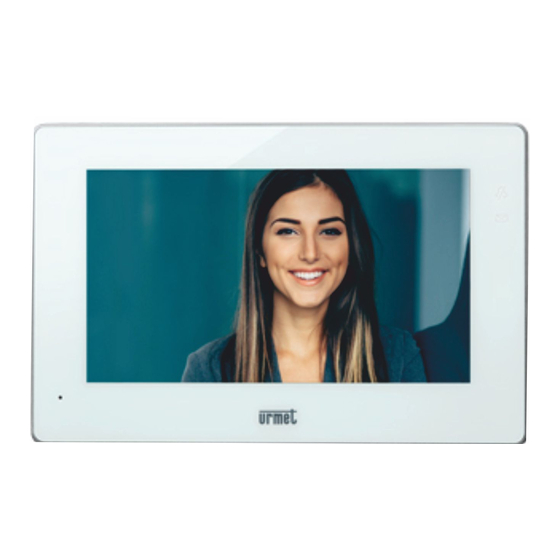
Ip 7” basic video door phone
Hide thumbs
Also See for IPerCom 1741:
- Installation handbook (29 pages) ,
- Installation handbook (29 pages) ,
- Instructions manual (60 pages)

Related Manuals for urmet domus IPerCom 1741


Summary of Contents for urmet domus IPerCom 1741
- Page 1 Mod. 1741 DS 1741-004 LBT 20950 AAAAAAAAAAAA Interactive Links IP 7” BASIC VIDEO DOOR PHONE Ref. 1741/1 USE AND PARAMETER CONFIGURATION BOOKLET...
- Page 2 The information contained in this booklet has been carefully collected and checked; however, the manufacturer may not be held responsible for any errors or omissions. The manufacturer reserves the right to introduce at any time and without notice improvements or changes in the products and services described in the booklet.
-
Page 3: Table Of Contents
The features described in the following booklet refer to version: 2.1.0_49_VER_7_8_0_R7 of the IP 1741/1 Video door phone. Interactive Links The document contains INTERACTIVE LINKS for faster and more efficient consultation. INDEX 1. DEVICE GENERAL DESCRIPTION .......................5 In a nutshell ..........................5 How to turn on the screen and access the various functions .............5... - Page 4 2.27 Auto-on function ........................28 2.28 How to view snapshots ......................28 2.28.1 How to delete one or more snapshots ................29 2.29 How to call the lift ........................29 3. USE OF THE DEVICE AS TERMINAL FOR: HOME AUTOMATION, ACCESS CONTROL, INTRUSION ALARM CONTROL UNIT, ANDROID AND MULTIMEDIA ..........30 Media Player ..........................30...
-
Page 5: Device General Description
DEVICE GENERAL DESCRIPTION IN A NUTSHELL The Video door phone 1741/1 is an IP touchscreen device of the Ipercom system that can operate as: • advanced IP Video Door Phone; • Android Applications Manager. The Video door phone uses the Android operating system and is able to perform both the specific functions of Urmet systems and the generic functions of Android devices. To optimise user-friendliness, the Video door phone comes with certain factory-preloaded applications. -
Page 6: How To Navigate Between Applications
The video door phone functions are the following: Recording short audio messages (Post.it) Calling the switchboard (if the Ipercom system is adequately pre-set) Lift control (if the Ipercom system is adequately pre-set). Activating an auxiliary function, e.g. turning on the stair lights (if the Ipercom system is adequately pre-set). Opening a driveway or garage gate. Opening the door WARNING! The functions’... - Page 7 For all details on the Apps present on the video door phone, see the relevant paragraphs in the following manual. The key can be used to scan a QR Code and access with your smartphone a page on the Urmet website, where you can check the datasheet of the product in question. To return to the Home Page from any screen page, tap the icon in the middle of the bottom bar.
-
Page 8: How To Interpret The Reports
HOW TO INTERPRET THE REPORTS The bar at the top right of the screen shows status information: Automatic door opening (if this feature is enabled). Set the following device states: At home / Recording / Divert / Remote (only one active at a time). LAN connection to Ipercom network ... -
Page 9: Screen Lock Function
How to send a panic alarm: • Turn on the screen, if off, by tapping it at any point or by pressing the Home button on the IP 1741/1 Video door phone. • Tap the icon always visible in the bottom left corner of the screen, unless it had been disabled or a switchboard is present in the system (see section “Configurations”). •... -
Page 10: Using The Device As Video Door Phone Terminal
USING THE DEVICE AS VIDEO DOOR PHONE TERMINAL The Video Door Phone application is the main application of the IP 1741/1 Video door phone and it is also the default Home Page. The application turns the device into an advanced video door phone terminal. HOW TO ANSWER AN EXTERNAL CALL When the Video door phone receives an outdoor door phone video call, it rings and the screen lights up from its default switched-off state. The video door phone will show the image of the caller on the display. -
Page 11: How To Answer A Call With The "Remote" Option Enabled
2.1.1 How to answer a call with the “Remote” option enabled If the “Remote” option has been activated in the apartment, when a call is received the screen does not show the caller image (see image below), even if there is only one IP Video Door Phone; (for more information see the Ipercom technical manual on www.urmet.com): On the video door phone you want to use to answer, press “Tap here to see who is calling you”. -
Page 12: How To Answer An Intercom Call
After answering, by tapping the various icons you can then: Store a snapshot of the switchboard operator displayed on the screen. Enlarge or shrink the image, also changing its format from 4:3 to 16:9 Turn the Video door phone microphone off and then back on, to stop the switchboard opera- tor hearing what you are saying. When the microphone is turned off, the corresponding icon is crossed out. The icon is only displayed after the call has been answered. Close the call. -
Page 13: Receiving And Answering A Call From Your Smartphone Via Callme App
RECEIVING AND ANSWERING A CALL FROM YOUR SMARTPHONE VIA CALLME APP ATTENTION! It is possible to receive a call from a smartphone via CallMe App if: • on the smartphone, there is an account properly registered and configured on the Urmet Cloud • the call forwarding function has been activated on the video door phone (for more information, refer to “Call forwarding settings”). -
Page 14: How To Access Video Door Phone Functions
HOW TO ACCESS VIDEO DOOR PHONE FUNCTIONS Turn on the screen, if off, by tapping it at any point or by pressing the Home button on the IP 1741/1 Video door phone. The Home Page, i.e. the Video Door Phone main page, is displayed if the default configuration has been maintained. If a different Video Door Phone Home Page has been selected, go to the Top Page and select the Video Door Phone application The Video Door Phone page shows the functions that can be used. Select the desired video door phone function by pressing the relevant icon. -
Page 15: How To Listen To An Audio Message
Press the RECORD icon to start a new recording. The maximum length of the message is 10 seconds. The remaining recording time is displayed by a progress bar. To stop recording before the end of the available time tap the STOP button. At the end of the recording, the message is automatically saved, with recording date and time, the LED starts flashing and a message appears on the relevant icon. -
Page 16: How To Activate An Auxiliary Function
HOW TO ACTIVATE AN AUXILIARY FUNCTION If the Video Door Phone system is equipped with a special decoder that is properly configured (for further information, see the Ipercom technical manual on www.urmet.com), you can activate an auxiliary function (staircase lights, garden lights, etc. ) in the following manner: • Access the main page of the Video Door Phone application. •... -
Page 17: How To Activate The Video Door Phone Voicemail
2.11 HOW TO ACTIVATE THE VIDEO DOOR PHONE VOICEMAIL To activate the Video Door Phone Voicemail: • Tap the icon in the bottom right corner. • Select the RECORDING button. • The icon displayed switches from From this moment onwards, all calls from the outdoor station will ring the Video door phone and will be recorded. -
Page 18: Activating The "Divert" Mode
From now on, calls will no longer be forwarded to smartphones on which the CallMe App has been installed and configured, only panic alarm notifications sent by the video door phone in the apartment will be forwarded. 2.15 ACTIVATING THE “DIVERT” MODE The “Divert” mode allows diverting the call to the relevant exchange, to all the exchanges in the system or to a contact in the directory. -
Page 19: How To Delete One Or More Voicemail Recordings
• Select the call that you wish to view details. A pop-up window opens. Tap the button to listen to the recorded message, the button to close the window. 2.17.1 How to delete one or more voicemail recordings How to delete one or more recorded messages: • Open the list of voicemail calls (see previous section) •... -
Page 20: Door Open Indication
2.19 DOOR OPEN INDICATION The video door phone has the icon in the upper bar of the display, which indicates whether the door has remained open on one or more entries. The door open condition is signalled by the call stations only if the duration of this event is at least 30 seconds. -
Page 21: How To Check The Call Log
“How to answer an intercom call”. For a description of the icons shown in the window see the section • If the called contact answers the call, basic voice communication is activated. • If the called contact does not answer the call, the call is automatically terminated. You can terminate a call by tapping the icon •... -
Page 22: How To Send A Text Message
For each call the following information is shown: — An icon that shows whether the call was incoming , outgoing or if it was missed — The identifier or name of the caller or the called contact. — Date and time of the call. If the contact is another video door phone or a switchboard, the icon , is displayed to call it back “Making an intercom... - Page 23 • Press the icon to select the message recipients. • Press the “Write message” field to write the message to be sent. • When finished, press SEND to send the message. If you had already started chats, you can directly select in the left-hand box the recipients to whom your message will be sent. DS1741-004...
-
Page 24: Searching For A Name In The Directory
You can also send messages from the address book. To do this: • Tap the icon next to the recipient. A message window opens where messages previously sent to that recipient are shown, complete with date and time of sending. •... - Page 25 • The Contacts directory is displayed. Press the icon. • The request screen for entering a new contact opens. • Select the various fields to enter the requested data: VIDEO DOOR The identification code of the video door phone 1717/31 - /33 - /41 or 1717/21 PHONE CODE or 1741/1 or 1761/31 - /33 that you want to add to the directory can be read in the lower right corner of the Video Door Phone Homepage. FULL NAME The name with which your new contact will appear in your address book. SENDER Name and surname of the person who sends the request.
-
Page 26: How To Resend A Contact Request
• After filling in all fields, press the SEND REQUEST icon to send the recipient a request to add him/her to the directory. Confirm the sending request in the pop-up window that is displayed. IMPORTANT: Adding a new contact to your address book is not automatic. For confidentiality reasons, the request must first be approved by the person that you wish to add, using the procedure described in section 3 How to accept contact requests. In addition, the person who has authorised the addition of the contact may, even at a later stage, revoke the authorisation, by deleting the corresponding contact from your address book. -
Page 27: How To Delete Contact Requests
• Select the new request received. • Press the ACCEPT button to add the contact request to the directory. 2.26 HOW TO DELETE CONTACT REQUESTS To delete one or more (sent or received) contact requests: • Press the icon on the Video Door Phone Main Page •... -
Page 28: Auto-On Function
2.27 AUTO-ON FUNCTION To use the auto-on function, i.e. display the images taken by the cameras of the outdoor call stations or by other cameras of the system, follow the procedure below: • Access the main page of the Video Door Phone application • Press the icon. • The list of available cameras on which auto-on function can be used is displayed. Select the name of the device on which you want to view live images. •... -
Page 29: How To Delete One Or More Snapshots
• The list of available snapshots is displayed. Press on the snapshot name to display it. For each snapshot, the date and time it was stored are shown. Press the X icon to close the image view. 2.28.1 How to delete one or more snapshots •... -
Page 30: Use Of The Device As Terminal For: Home Automation, Access Control, Intrusion Alarm Control Unit, Android And Multimedia
USE OF THE DEVICE AS TERMINAL FOR: HOME AUTOMATION, ACCESS CONTROL, INTRUSION ALARM CONTROL UNIT, ANDROID AND MULTIMEDIA MEDIA PLAYER Switch on the screen if it is off, by tapping it any point or by pressing the Home button on the video door phone. -
Page 31: Gallery
Touch the icon . The video door phone media player opens. The media player allows you to play audio tracks on the video door phone or play recorded songs on the SD card. You can split the audio tracks into different categories or create your own playlist. Press the button to return to the Home Page. GALLERY Switch on the screen if it is off, by tapping it any point or by pressing the Home button on the video door phone. -
Page 32: Android App
Tap the icon to directly access the Top Page. Top Page Touch the icon . The video intercom gallery opens. The gallery can be used to play videos or view images. For example, you can view snapshots of external images captured during a call with the door unit or play back the images on the SD card. The video door phone can also be used to take photos or record video via the front web camera. - Page 33 Video Door Phone Home Page (default option) Tap the icon to directly access the Top Page. Top Page Tap the icon . The Android home page will open. DS1741-004...
-
Page 34: Preloaded Android Apps
Via the button you can access all the preloaded Apps and Widgets. The most commonly used ones will appear directly in the Android home page and are briefly described in the section here below. WARNING! If you have changed the Home Page, you may find that: If the Top Page has been selected as the Home Page, you can select Android page • directly by tapping the icon If another application has been selected as the Home Page, you can tap the icon •... -
Page 35: Configurations
CONFIGURATIONS The parameter and function configurations are divided into two groups: • configuration of video door phone parameters and functions; • configuration of parameters and functions of the Video Door Phone application CONFIGURATION OF VIDEO DOOR PHONE PARAMETERS 4.1.1 How to change the Home Page To change the video door phone Homepage, follow the procedure below: • Turn on the screen, if off, by tapping it at any point or by pressing the Home button. • Press the icon to access the Top Page. •... -
Page 36: How To Change The Video Door Phone Language
• Press the Wallpaper item (the active background is shown to the right) to display a pop-up window in which you can choose the display background. Select the new background from the list or press the X icon in the upper right corner to close the window without making any modification. 4.1.3 How to change the Video door phone language To change the Video door phone language, follow the procedure below: •... -
Page 37: Maintenance
• Press the Time Format item (the active time format is shown on the right) to display a pop-up window in which you can choose the time format of the video door phone: 24 hours or 12 hours (displayed at the top right). Select the time format or press the X icon in the upper right corner to close the window without making any modification. - Page 38 4.1.5.1 Restarting the system The following function allows restarting the video door phone system. To restart, proceed as follows: • In the maintenance menu, press Reboot. • A pop-up window is displayed on the screen to confirm the operation. • Press the Confirm button to confirm the operation and restart the video door phone. Press the Cancel button to cancel the operation and close the pop-up window. DS1741-004...
- Page 39 4.1.5.2 User Data Reset The User Data Reset control deletes the stored data, i.e. existing chats, manually added contacts and the call log. The User Data Reset operation is irreversible. To reset the user data, proceed as follows: • In the maintenance menu, press User Data Reset. •...
- Page 40 4.1.5.3 Factory Reset settings The reset to factory settings deletes all configurations made on the video door phone. To reset to factory settings, proceed as follows: • In the maintenance menu, press Factory Reset. • A pop-up window is displayed on the screen to confirm the operation. • Press the Confirm button to perform the operation and delete all the configurations in the video door phone and return it to the factory default configuration. Press the Cancel button to cancel the operation and close the pop-up window.
- Page 41 4.1.5.4 Saving user data to SD card Saving user data to SD card allows saving the configurations made by the user to an SD card. To save user data on an SD card, insert the memory card into its slot in the video door phone and follow the procedure below: • In the maintenance menu, press Backup user data on SD Card. •...
- Page 42 4.1.5.5 Restoring user data from SD card Restoring user data from SD card allows restoring a configuration previously saved on SD card on the video door phone. To restore user data, insert the memory card containing the previously saved data into its slot in the video door phone and follow the procedure below: • In the maintenance menu, press Restore user data from SD card. •...
- Page 43 4.1.5.6 Firmware version of the video door phone It is possible to view the firmware version of the video door phone. • In the maintenance menu, scroll through the various items until displaying Version. • The firmware version of the video door phone is displayed on the right, eg: 2.1.0_49_7_8_0_R7. 4.1.5.7 Ipercom Configuration It is possible to view the date of the last modification to the system configuration of the Ipercom system. • In the maintenance menu, scroll through the various items until Ipercom Configuration. •...
-
Page 44: Configure The Networks
4.1.6 Configure the Networks To configure the networks of the video door phone, follow the procedure below: • Turn on the screen, if off, by tapping it at any point or by pressing the Home button. • Press the icon to access the Top Page. • Press the icon to access the video door phone parameter configuration page. • Press the Network parameter to display the screen where the available networks are listed The network settings identified as ‘’POE Port (Video Door Phone)’’ cannot be changed. 4.1.7 Show configuration QR Code The following parameter is dedicated to the installer for configuration of the Ipercom System (for more information, refer to the Ipercom technical manual on www.urmet.com). - Page 45 • Turn on the screen, if off, by tapping it at any point or by pressing the Home button. • Press the icon to access the Top Page. • Press the icon to access the video door phone parameter configuration page. • Press Screen Saver item to display the screen for activating and setting the function. • Activate the function by pressing the corresponding button in the upper right corner. DS1741-004...
-
Page 46: Activating The Screen Lock Function
• It is possible to select 3 types of Screen Saver: – Clock: a (digital or analogue) clock is displayed on the screen. – Colour Mode: displays an image with different colours on the screen. – Photo Frame: displays on the screen one or more images loaded from an SD card or present in the video door phone memory. -
Page 47: How To Change The Audio Volume
• Press the icon to access the video door phone parameter configuration page. • Tap the writing Melodies (Tunes). A new window opens that lists the various types of call. • Tap the call type that you wish to change the tune of. • A pop-up window opens listing the available tunes. • Select the new tune or tap the X icon at the top right to close the window without making any changes. -
Page 48: How To Change Screen Settings
4.2.3 How to change screen settings To change screen settings: • Turn on the screen, if off, by tapping it at any point or by pressing the Home button. • Press the icon to access the Top Page and then the icon for the video door phone application. • Press the icon in the upper right corner to access the video door phone configurations page: • Tap the writing Video. A window opens listing the various screen parameters (the current value is shown to the right of each parameter): –... -
Page 49: Device Mode Settings
In Large buttons mode, the following functions will not be available when receiving calls: – the button for rejecting calls; – the button for temporarily changing the graphical user interface in 16:9 mode. All other features remain unchanged. The screen shown refers to a door phone call from a door station to an apartment in which more than one IP video door phone are present. - Page 50 4.2.4.1 How to automatically open the door The following parameter allows opening the door automatically when a call is received without the need to answer, to activate the function follow the procedure below: • Press the Device Mode Settings parameter and then select Automatic Door Open. •...
- Page 51 – Recording Time, i.e. the max duration of the audio/video message (between 10 and 20 seconds). – Audio Message, i.e. the personalised audio message that is played at the outdoor calling station when video door phone voicemail is activated. – Play Audio Message allows the audio message to be enabled or disabled when the video door phone voicemail is active.
- Page 52 – SIP ID: The following parameter allows displaying SIP ID (set in an Ipercom version lower than 2.1) of the CallMe account on which you receive calls on your smartphone The SIP ID is visible only if the CallMe Manager support has not been enabled during system configuration and if the “Call forwarding URI on MAX”...
-
Page 53: Accessibility
5. Press the “Activate and verify” button to activate the function. If successful, a screen confirming the activation of the function is displayed. If unsuccessful, a screen indicating the function activation failure is displayed. Carry out the procedure again, making sure that you are carrying out the steps described correctly (for more information, refer to chapter “Setting up the call forwarding function”... - Page 54 • Press the Accessibility item to display the screen listing the different ways to use the video door phone: 4.2.5.1 Visually impaired user mode The following parameter enables and configures the Visually impaired mode parameters. • Press the Accessibility parameter and then select Visually impaired mode. • The screen with the various settings and parameters of the usage mode is displayed. DS1741-004...
- Page 55 In this mode, it is not possible to access the address book of the video door phone due to the lack of visual feedback from the user. However, it is possible to define two contacts in the phonebook as favourites that can be called by means of a single tap or a double tap on the screen on the main page.
- Page 56 held pressed to switch to normal mode. If the screen switches The icon in the bottom left corner off, either voluntarily or after the timeout, the visually impaired user mode is automatically restored the next time the power is turned on and the video door phone will play the following voice message “THE SCREEN IS ON”.
-
Page 57: Network Settings
You can end the call by swiping left on the screen. 4.2.5.1.4 Making a call With the video door phone at rest, to start a call, the user will have to make a single or double tap on the screen to call the contacts associated with the performed action (see Activation and configuration of blind mode chapter). -
Page 58: How To Enable Or Disable The Panic Icon
• Select the Network Settings, then click on Device Status. He comes a window is displayed where the network parameters relating to the video door entry phone are listed. WARNING! The parameters can only be read and not edited. 4.2.7 How to enable or disable the Panic icon To enable or disable the Panic icon, follow the procedure below: •... -
Page 59: How To Restart Video Door Phone Application
4.2.8 How to restart Video Door Phone application To restart Video Door Phone application, follow the procedure below: • Switch on the screen by tapping it any point or by pressing the Home button. • Press the icon to access the Top Page and then the icon for the video door phone application. - Page 60 • Scroll the list and tap the word Information. Information showing the software versions of the video door phone software versions, in addition to the IP address and the MAC address of the video door phone itself. DS 1741-004 LBT 20950 URMET S.p.A.
Need help?
Do you have a question about the IPerCom 1741 and is the answer not in the manual?
Questions and answers