
Subscribe to Our Youtube Channel
Related Manuals for Polycom DMA 7000


Summary of Contents for Polycom DMA 7000
- Page 1 ® ™ Polycom 7000 System Getting Started Guide v. 2.3 February 2011 3725-76311-020D...
- Page 2 Polycom, Inc. End User License Agreement Use of this software constitutes acceptance of the terms and conditions of the Polycom DMA 7000 system end-user license agreement (EULA). The EULA is included in the release notes document for your version, which is available on the Polycom Support page for the Polycom DMA 7000 system.
-
Page 3: Table Of Contents
Unpack and Install the Hardware Components ..... . . 6 Configure the Polycom DMA System Server(s) ..... . . 7 Alternate Procedure: Configure the Polycom DMA System Server(s) Without Using the USB Stick . - Page 4 DMA Getting Started Guide Polycom, Inc.
-
Page 5: Polycom Dma
Use of this software constitutes acceptance of the terms and conditions of the Polycom DMA 7000 system end-user license agreement (EULA). The EULA is included in the release notes document for your version, which is available on the Polycom Support page for the Polycom DMA 7000 system. Polycom, Inc. -
Page 6: Collect Necessary Materials
DMA Getting Started Guide Collect Necessary Materials Before you install a Polycom DMA system, collect these materials: • Polycom DMA system server shipment • Completed First-Time Setup Worksheet • PC running Microsoft® Windows® (XP Pro or Vista) with: — USB port —... - Page 7 Yes or no. If no, indicate speed and full or half duplex. Shared Sigaling Network Settings Needed only if signaling network is separate. In that case, required even for single-node installation. Virtual signaling host Local host name of the virtual signaling name host. Polycom, Inc.
- Page 8 If you’re not sure what value to use, leave the default of 0. Default IPv6 gateway The interface to use for accessing the IPv6 gateway, generally eth0. Optionally, the gateway’s address and the interface, specified as: <IPv6_address>%eth0 Polycom, Inc.
- Page 9 Destination The destination network mask for this route. Length The destination CIDR subnet. Interface In split network configuration, specify the interface for this route. IP address of router for this route. Optional, and only needed for non-default routers. Polycom, Inc.
-
Page 10: Unpack And Install The Hardware Components
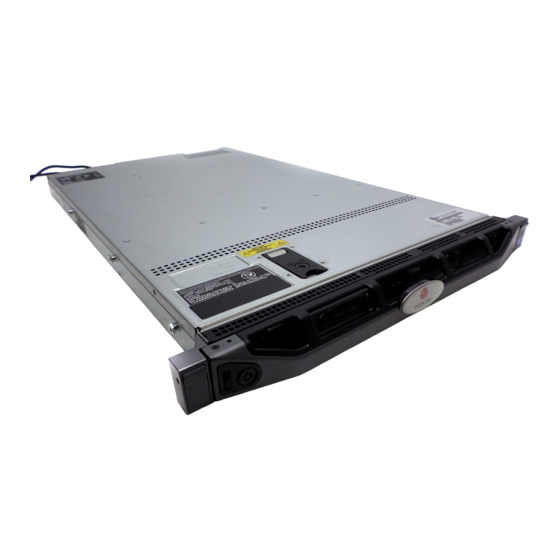
A two-node system shipment contains a second set of the above items. Examine the contents for damage. If you find damage, file a claim with the delivery carrier. Polycom is not responsible for damage sustained during shipment. Remove all of the components from their containers. -
Page 11: Configure The Polycom Dma System Server(S)
Remove the bezel(s) from the server(s). Configure the Polycom DMA System Server(s) You configure the Polycom DMA system server(s) using the Polycom DMA USB Configuration Utility on the USB memory stick. To configure the system server(s) without using the USB memory stick, see “Alternate Procedure: Configure the Polycom DMA System Server(s) Without Using... - Page 12 Select the correct System time zone for your location. We strongly recommend selecting the best location-specific setting, not one of the generic GMT offset settings. Leave Auto Adjust For Daylight Savings checked (deselecting this may cause problems, especially with NTP servers). Polycom, Inc.
- Page 13 Remove USB Mass Storage Device. When a message tells you it’s safe to do so, disconnect the USB memory stick from the PC. The Polycom DMA system software is already installed on the server(s), so the system installation disk isn’t needed to set up a new system. Using it overwrites the same software already on the server and needlessly lengthens the setup process.
- Page 14 Node 1, and joins the cluster. When done, both servers’ LCDs display DMA Clustered. 18 On a PC with network access to the Polycom DMA system, point your browser to the system’s virtual host name or IP address and log in with user ID admin and password admin.
-
Page 15: Alternate Procedure: Configure The Polycom Dma System Server(S)
Alternate Procedure: Configure the Polycom DMA System Server(s) Without Using the USB Stick If for some reason you don’t have or can’t use the Polycom DMA USB Configuration Utility on the USB memory stick, the following procedure enables you to complete the initial setup using only a laptop PC and an Ethernet cable. - Page 16 The reboot process takes several minutes. When it’s finished, the front panel LCD displays DMA Ready. From a PC with network access to the Polycom DMA system, point your browser to the system’s virtual host name or IP address and log in with user ID admin and password admin.
- Page 17 — Install security certificates. — Manage system access, either by adding local users or by integrating the Polycom DMA system with your enterprise directory, remove the default admin login, and secure the system. — Make other desired configuration changes.
- Page 18 DMA Getting Started Guide Polycom, Inc.
-
Page 19: Regulatory Notices
EEA Regulatory Notices This Polycom DMA system has been marked with the CE mark. This mark indicates compliance with EEC Directives 2006/95/EC and 2004/108/EC. A full copy of the Declaration of Conformity can be obtained from Polycom Ltd, 270 Bath Road, Slough, Berkshire, SL1 4DX, UK. - Page 20 Polycom DMA Regulatory Notices South Korean Regulatory Notices Chinese Regulatory Notices Czech Republic Regulatory Notices South Korean Regulatory Notices Polycom, Inc.
- Page 21 La prise électrique à laquelle l’appareil est branché doit être installée près de l’équipement et doit toujours être facilement accessible. Installation Instructions Installation must be performed in accordance with all relevant national wiring rules. L’Installation doit être exécutée conformément à tous les règlements nationaux applicable au filage électrique. Polycom, Inc.
- Page 22 Polycom DMA Polycom, Inc.
- Page 23 ® ™ Polycom 7000 시스템 시작 안내서 v. 2.0 2010 년 2 월 3725-76311-008B...
- Page 24 스 마크이며 미국과 기타 여러 국가에서 등록된 마크 및 관습법 마크입니다. 다른 모든 상표는 해당 소유자의 자산입니다. 특허 정보 동봉한 제품은 Polycom, Inc.에서 소유한 하나 이상의 미국 및 외국 특허 및 특허 출원의 보호 대상입니다. © 2008-9 Polycom, Inc. All rights reserved. Polycom, Inc.
- Page 25 Polycom DMA 시스템 서버 구성 ........
- Page 26 DMA 시작 안내서 Polycom, Inc.
-
Page 27: Polycom ® Dma ™ 시스템 서버 설정
점 회의 플랫폼 서버 또는 2 노드 서버 클러스터를 처음 설정할 때 필요한 단계 에 대해 설명합니다. 새 서버를 설치하여 단일 노드 시스템을 2 노드 클러스터로 확장하는 경우 Polycom 작동 안내 의 "두 번째 서버 추가" 또는 온라인 도움말을 참조하십시오. -
Page 28: 최초 시간 설정 워크시트 작성
내 시스템 값 설명 노드 1 시스템 이름 첫 번째(또는 유일한) Polycom DMA 시스템 서버의 로컬 호 스트 이름입니다. 유효한 호스트 이름을 기입해야 합니다. 문자 a - z(대소문자 구분 안 함), 숫자 0 - 9 및 내부 하이픈을 사용할 수 있습니다. -
Page 29: 하드웨어 구성요소 포장 풀기 및 설치
™ Polycom 시스템 서버 설정 하드웨어 구성요소 포장 풀기 및 설치 Polycom DMA 시스템에서는 하나 또는 두 개의 Polycom 브랜드 Dell 서버가 사 용됩니다. 하드웨어 포장 풀기 및 설치하기 Polycom DMA 시스템 서버가 장착되어 있는 Polycom RMX 2000 회의 플... -
Page 30: Polycom Dma 시스템 서버 구성
이때 서버 전원을 켜지 마십시오. 서버에서 베젤을 분리합니다. Polycom DMA 시스템 서버 구성 USB 메모리 스틱에 있는 Polycom DMA USB 구성 유틸리티를 사용하여 Polycom DMA 시스템 서버를 구성합니다. USB 메모리 스틱을 사용하지 않고 시스템 서버를 구성하는 방법은 "대안: USB 스틱... - Page 31 시간 서버를 가급적 3개, 적어도 1개 이상 지정할 것을 적극 추천합니다. 가급적 NTP 계층 3 고품질 시간 서버를 사용하십시오. 다음을 클릭합니다. 보안 구성 페이지에서 사용할 보안 처리 되지 않는 액세스 방법을 하나 이 상 선택하거나 최대 보안을 선택합니다. Polycom, Inc.
- Page 32 장치 안전하게 제거를 선택합니다. 안전하게 제거할 수 있다는 메시지가 표 시되면 USB 메모리 스틱을 PC에서 분리합니다. Polycom DMA 시스템 소프트웨어가 서버에 이미 설치되어 있으므로 시스템 설치 디 스크로 새 시스템을 설치할 필요가 없습니다. 설치 디스크를 사용할 경우 서버에 이 미 있는 동일한 소프트웨어를 덮어쓰므로 설치 프로세스가 불필요하게 길어집니다.
- Page 33 시스템 소프트웨어를 교체하지 않을 경우에는(또는 재부팅 후에 교체할 경 우) 서버가 노드 1의 구성 설정을 가져와 클러스터와 결합시킵니다. 완료되 면 두 서버의 LCD에 DMA Clustered라고 표시됩니다. 17 Polycom DMA 시스템과 네트워크로 연결된 PC에서는 브라우저를 시스템 의 가상 호스트 이름 또는 IP 주소로 지정하고 로그인합니다(사용자 ID: admin, 암호: admin).
-
Page 34: 대안: Usb 스틱을 사용하지 않고 Polycom Dma 시스템 서버 구성
대안: USB 스틱을 사용하지 않고 Polycom DMA 시스템 서버 구성 어떤 이유로 인해 USB 메모리 스틱에 Polycom DMA USB 구성 유틸리티가 없 거나 사용할 수 없는 경우, 다음 절차를 통해 랩탑 PC와 이더넷 케이블만 사용하 여 최초 설정을 완료할 수 있습니다. - Page 35 ® ™ Polycom 시스템 서버 설정 Polycom DMA 시스템과 네트워크로 연결된 PC에서는 브라우저를 시스템 의 가상 호스트 이름 또는 IP 주소로 지정하고 로그인합니다(사용자 ID: admin, 암호: admin). 구성 > 시스템 > 시스템 시간으로 이동해 다음 작업을 실시합니다. 해당 지역의 정확한 시스템 시간대를 선택합니다.
- Page 36 DMA 시작 안내서 Polycom, Inc.
-
Page 37: Polycom ® Dma ™ 시스템 서버 기술 사양
® ™ Polycom 시스템 서버 기술 사양 아래 표에는 Polycom ® Distributed Media Application ™ (DMA ™ ) 시스템에서 ™ 사용되는 Dell PowerEdge R610 시스템용 기술 사양이 나옵니다 . 항목 설명 프로세서 쿼드 또는 듀얼 코어 Intel® Xeon® 프로세서 1~2개... - Page 38 함 전면 15핀 VGA 비디오 4핀 2개, USB 2.0 규격 내부 4핀 1개, USB 2.0 규격 내장 SD 모듈 플래시 메모리 카드 슬롯(옵션) 1개, 내장 SD 모듈 포함 비디오 통합형 Matrox G200 비디오 유형 8MB 공유 비디오 메모리 Polycom, Inc.
- Page 39 참고: 2950피트 이상의 고도에서는 최대 작동 온도가 1°F/550ft로 저하됩니다. -40° ~ 65°C (-40° ~ 149°F), 최대 온도 변화: 시간당 20°C 보관 상대 습도 20% ~ 80%(비응축), 최대 습도 변화: 시간당 10% 작동 5% ~ 95%(비응축), 최대 습도 변화: 시간당 10% 보관 Polycom, Inc.
- Page 40 전체 6개 면에서 펄스 시간 2ms ± 10%에서 반정현 충격 보관 71G ± 5% 전체 6개 면에서 235인치/초이상의 속도 변화로 사각파 충격 고도 -16 ~ 3,048 m(-50 ~ 304,800.00 cm) 작동 참고: 2950피트 이상의 고도에서는 최대 작동 온도가 1°F/550ft로 저하됩니다. -16 ~ 10,600m(-50 ~ 35,000ft) 보관 Polycom, Inc.
- Page 41 מדריך תחילת העבודה עבור מערכת Polycom שלDMA 7000 ® ™ v. 2.0 2010 פברואר 3725-76311-009B...
- Page 42 .. במסגרת החוק, שכפול כולל תרגום לשפה אחרת או לעיצוב שונהPolycom, Inc. מפורש בכתב מאת . שומרת לעצמה את זכות הבעלות והבעלות בכל הזכויות הקנייניות באשר לתוכנה הכלולה עם המוצרPolycom, Inc. ,כמקובל בין צדדים התוכנה מוגנת בחוקי זכויות יוצרים של ארצות הברית וחוקי סחר בינלאומיים. לכן, עליך להתייחס לתוכנה כאל כל חומר אחר המוגן בזכויות...
- Page 43 2 ................... מילוי דף ההגדרה הראשונה 3 ................פריקה והתקנה של רכיבי החומרה 4 ..........Polycom שלDMA קביעת התצורה של שרת(י) מערכת ללא שימושPolycom שלDMA הליך חלופי: קביעת התצורה של שרת(י) מערכת 8 ...................... USB-במקל ה 11 ..Polycom ...
- Page 44 Polycom DMA System מדריך התחלה עבור © Polycom ,Inc.
- Page 45 ™ אם אתה מתקין שרת חדש כדי להרחיב מערכת חד-צומתית לאשכול דו-צומתי, עיין בפרק ) Polycom שלDMA (מדריך תפעולPolycom DMA Operations Guide-"הוספת שרת שני" ב .או בעזרה המקוונת Polycom שלDMA בסיומו של תהליך זה, תמצא את עצמך מחובר בהצלחה למערכת...
- Page 46 מידע על תצורת המערכת )שם המארח המקומי של השרת הראשון (או היחיד 1 שם מערכת של צומת . ערך זה חייב להיות שםPolycom שלDMA במערכת a - z מארח תקף: מותר להשתמש באותיות .(לא תלוי-רישיות), בספרות 0 - 9, ובמקפים פנימיים...
- Page 47 .) שלישי (אופציונליNTP של שרת זמןIP-כתובת ה 3 ’ מסNTP שרת פריקה והתקנה של רכיבי החומרה אחד או שניים עם סימון מסחרי שלDell משתמשת בשרתPolycom שלDMA מערכת . Polycom כדי לפרוק ולהתקין את החומרה ) MCU (יחידותPolycom שלRMX 2000 אם רכשת פלטפורמות לניהול ועידה מסוג...
- Page 48 Polycom DMA System מדריך התחלה עבור Polycom DMA USB Configuration , המכיל אתUSB — מקל זיכרון אחד בחיבור ) USB בחיבורPolycom שלDMA (כלי השירות לקביעת תצורתUtility מוצלבים, אחד קצר ואחד ארוך (לא רלוונטי למערכת עםEthernet — שני כבלי...
- Page 49 Polycom DMA System מדריך התחלה עבור (כלי השירות לקביעתConfiguration Utility-כאשר תידרש לכך, בחר להפעיל את ה .)התצורה באמצעותUSB אם ההפעלה האוטומטית אינה עובדת או שהיא כבויה, נווט למקל הזיכרון מסוג . ), או מנהל קבצים אחרWindows (סיירWindows Explorer ,) (המחשב שליMy Computer ...
- Page 50 בבטחה). כאשר מופיעה הודעה שבטוח לעשות זאת, נתקMass Storage Device . מהמחשבUSB את מקל הזיכרון מסוג כבר מותקנת בשרת(ים), כך שאין צורך בדיסק התקנתPolycom שלDMA תוכנת מערכת המערכת כדי להגדיר מערכת חדשה. שימוש בו ישכתב את התוכנה הקיימת כבר בשרת ויאריך...
- Page 51 מתקין מערכת חד-צומתית, דלג לשלב 61 אם אתה מתקין אשכול דו-צומתי, הפעל את השרת השני (צומת מס’ 2). אם אתה Polycom שלDMA מחליף את תוכנת המערכת, הכנס את דיסק התקנת מערכת . , כבה את השרת והפעל אותו מחדשDVD-לכונן ה...
- Page 52 שלDMA הליך חלופי: קביעת התצורה של שרת(י) מערכת USB- ללא שימוש במקל הPolycom Polycom שברשותך אינו מכיל את כלי השירותUSB אם מסיבה כלשהי מקל הזיכרון מסוג Polycom שלDMA (כלי השירות לקביעת תצורתDMA USB Configuration Utility , ההליך הבאUSB- ) או שאינך מצליח להשתמש בכלי השירות מתוך מקל הUSB בחיבור...
- Page 53 של הלוחLCD-תהליך האתחול מחדש נמשך כשלוש דקות. בסיום התהליך, מסך ה .) מוכןDMA( DMA Ready הקדמי מציג את ההודעה , כוון את הדפדפן שלךPolycom שלDMA מתוך מחשב שיש לו גישת רשת למערכת והיכנס עם מזהה המשתמשIP-לשם המארח הווירטואלי של המערכת או לכתובת ה...
- Page 54 Polycom DMA System מדריך התחלה עבור © Polycom ,Inc.
- Page 55 8 , עם דירוג של ליבה יחידה, כפולה או מרובעתGB או יחידCPU 1 עםGB מינימליRAM זיכרון UDIMM 42 (עם רכיביGB 8 ) אוGB שלRDIMM 69 (עם רכיביGB מקסימליRAM זיכרון ) 2 GB של © Polycom ,Inc.
- Page 56 Polycom DMA System מדריך התחלה עבור תיאור פריט כוננים ’ קשיחים פנימיים בגודל 5.2 אינץSATA אוSAS עד שישה כונני כוננים קשיחים הניתנים להחלפה חמה עם תמיכה בלוח אם 1.44-MB חיצוני אופציונלי שלUSB כונן כונן תקליטונים פנימי דק אופציונליSATA DVD-ROM or DVD+RW כונן...
- Page 57 Polycom DMA System מדריך התחלה עבור תיאור פריט צריכת חשמל ) (לכל יחידהAC ספק כוח )717 וואט (פלט גבוה הספק חשמלי בוואטים )205 וואט (חיסכון באנרגיה , טווח אוטומטי, 36-74 הרץAC 462–09 וולט מתח חשמלי בוולטים ) 5.644,2 לכל היותר (פלט גבוהBTU/hr בזבוז...
- Page 58 Polycom DMA System מדריך התחלה עבור תיאור פריט תנודה מרבית 62.0 מ- 5 עד 053 הרץ ל- 5 דקות בסביבת הפעלהGms בפעולה 45.1 מ- 01 עד 052 הרץ ל- 01 דקות בכל הסביבותGms באחסון הלם מרבי 13 ועוד %5 יותר אוG הלם של חצי סינוס בכל סביבות ההפעלה של...
Need help?
Do you have a question about the DMA 7000 and is the answer not in the manual?
Questions and answers