Honeywell ScanPal EDA51 Series User Manual
Hide thumbs
Also See for ScanPal EDA51 Series:
- User manual (65 pages) ,
- Quick start manual (20 pages) ,
- User manual (96 pages)
Table of Contents
Advertisement
Quick Links
Advertisement
Table of Contents

Related Manuals for Honeywell ScanPal EDA51 Series


Summary of Contents for Honeywell ScanPal EDA51 Series
- Page 1 ScanPal™ EDA51 Series Mobile Computer powered by Android™ User Guide...
- Page 2 Disclaimer Honeywell International Inc. (“HII”) reserves the right to make changes in specifications and other information contained in this document without prior notice, and the reader should in all cases consult HII to determine whether any such changes have been made. HII makes no representation or warranties regarding the information provided in this publication.
-
Page 3: Table Of Contents
TABLE OF CONTENTS Customer Support ........................ix Technical Assistance ......................ix Product Service and Repair ....................ix Limited Warranty ........................ix Chapter 1 - About the Computer Features........... 1 About the Mobile Computer....................... 1 EDA51 Model Overview......................2 Features of the EDA51......................3 About the Battery ........................... - Page 4 About Screen Gestures .......................25 Set the Time Zone........................25 About Honeywell Applications....................26 Applications You Can Download to the Mobile Computer ..........27 About Honeywell Enterprise Browser................28 About Terminal Emulators....................28 About Honeywell Launcher....................28 Unlock Developer Options .......................29 Chapter 3 - Use the Image Engine .............. 31 About the Image Engine ......................31...
- Page 5 Change the Scanner Settings ....................32 Change the Bluetooth Scanner Settings ..............32 Restore Default Scan Settings ..................33 Default Scan Settings ......................33 Add a Scan Setting Profile....................37 Delete a Scan Setting Profile ....................38 About ScanHandle Settings.....................38 About the Optional Digital Scan Button ................38 Enable and Configure the Digital Scan Button ............38 Scan Barcodes..........................39 About Scanning Configuration Barcodes..............40...
- Page 6 Chapter 7 - Manage and Maintain the Computer........71 About Software Updates ......................71 Software Downloads ......................71 About Transferring Files via USB Connection ............72 Install Software Updates with AutoInstall .................72 Optional microSD Card Method..................73 About the Honeywell Upgrader ....................73 How to view the Installed OTA Version................73 EDA51 User Guide...
- Page 7 Install OTA Updates ......................74 Reboot (Restart) the Computer ....................75 About an Enterprise Data Reset .....................76 Before You Begin........................76 Enterprise Data Reset the Computer................76 About Full Factory Reset ......................77 Before You Begin........................77 Full Factory Reset the Computer..................77 Repairs..............................78 Maintenance ..........................78 Clean the computer ......................78 About Disinfectant-ready Models...................78 Appendix A - Specifications ................81 Computer Agency Information ....................81...
- Page 8 viii EDA51 User Guide...
-
Page 9: Customer Support
Technical Support portal. For our latest contact information, see honeywell.com/PSSlocations. Product Service and Repair Honeywell International Inc. provides service for all of its products through service centers throughout the world. Go to sps.honeywell.com and select Support to find a service center near you or to get a Return Material Authorization number (RMA #) before returning a product. - Page 10 EDA51 User Guide...
-
Page 11: Chapter 1 - About The Computer Features
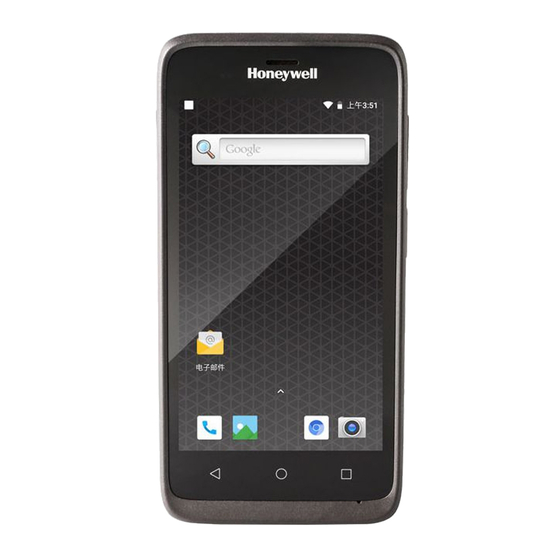
CHAPTER ABOUT THE COMPUTER FEATURES This chapter introduces the ScanPal™ EDA51 mobile computer. Use this chapter to learn about the basic computer features, functions, and accessories. Note: Device applications and settings vary by computer model and OS version. Your computer may not include all the features shown in the manual. About the Mobile Computer ScanPal EDA51 mobile computers deliver real-time connectivity, advanced data capture, and future-proof investment protection. -
Page 12: Eda51 Model Overview
3GB DDR4 RAM, 32 GB flash memory • 4GB DDR4 RAM, 64 GB flash memory Choice of Honeywell high performance 2D imager with ergonomic Scan buttons WLAN IEEE 802.11 a/b/g/n/ac radio; Wi-Fi certified Bluetooth™ V4.2 and Bluetooth Low Energy (BLE) technology... -
Page 13: Features Of The Eda51
Features of the EDA51 Scan Status LED Receiver Power Indicator Volume Up Button Volume Down Button Scan Button Touch Panel Recent Apps Home Button Button Back Button Microphone USB Cover I/O Connector EDA51 User Guide... -
Page 14: About The Battery
The computer uses a rechargeable Li-ion battery as its main power source. Several factors determine the life of the battery, such as display brightness, display timeout, input device, extreme temperature, and battery usage. Honeywell recommends that you keep the battery charged at all times to prevent data loss. -
Page 15: Battery Part Numbers
For a list of compatible accessories for the EDA51 mobile computer series and their part numbers, see the ScanPal EDA50/EDA51 Accessory Guide, available for download from the EDA51 product page at sps.honeywell.com. Contact your local sales representative for replacement battery ordering information. -
Page 16: Replace The Battery
Replace the Battery Caution: Improper battery replacement or incompatible device usage may result in risk of burns, fire, explosion, or other hazard. Dispose of lithium-ion batteries according to local regulations. Risk of fire and burns if improperly handled. Do not open, crush, heat above 60°C (140°F), or incinerate. - Page 17 6. Lift the battery from the connector side and then remove the battery. Install the Battery Note: For battery replacement, refer to Battery Part Numbers (see page 5). 1. Insert the battery. Slide non-connector side first and then press the battery down.
-
Page 18: About The Battery Status
3. Slide the lock to the left of the computer into the locked position. 4. Attach the hand strap, if removed. 5. Press and hold Power button for approximately 3 seconds, and then release the button. About the Battery Status Use the battery icon in the Status bar at the top of the screen to see the charge level of your battery. -
Page 19: About The Battery Status Led Setting
• Default Battery LED (optional Android OS configuration) • Honeywell Battery LED (Factory default settings) • No Battery LED Honeywell Battery LED Behavior (Factory Default/Out-of-Box Configuration) Connected to Power LED State Description Blinking amber Battery level is below 15% Battery level is more than 15%... -
Page 20: Check The Battery Level And Usage
Use the reference table below to learn about how to conserve battery power. To learn more about proper battery care, refer to the Battery Maintenance for Portable Devices white paper available at sps.honeywell.com. When You Want to: Do this to Save Battery Power:... -
Page 21: Battery Recommendations And Safety Protections
Use of this battery in other devices could result in damage to the device or battery. • Avoid dropping the battery or computer. If you suspect that the battery or computer is damaged, send it to Honeywell service center for inspection. • Replace the battery only with another BAT-EDA50 model battery (Battery Part Numbers on page 5). -
Page 22: Power On The Computer
3. Tap the toggle button next to Airplane mode. An airplane icon appears in the status bar to indicate Airplane mode is turned On. Power on the Computer After you have fully charged and installed a battery, power on the computer for the first time: •... -
Page 23: Change The Screen Lock To Protect The Computer
Change the Screen Lock to Protect the Computer After you start using the computer, you should change the screen lock to prevent unauthorized people from accessing the computer after the screen lock activates unless they input the correct password, pin, or pattern. The recommended setting for the Screen lock is to enable a Password lock. -
Page 24: About The Scan Status Led
About the Scan Status LED The Scan Status LED indicates the read status of the imager when scanning a barcode. When active, the LED illuminates below the front speaker. To learn more about how to use and configure the imager engine for scanning, see Chapter Use the Image Engine beginning on page 31. -
Page 25: Enable Vibrate Mode Or Do Not Disturb
• Press the bottom of the Volume button (-) to lower the volume of the active speaker. To access the volume quick set menu: 1. Press the center of the Volume button. 2. Adjust the volume level using the on-screen menu. •... -
Page 26: Insert A Microsd Card
Insert a microSD Card You can use a microSD card to increase file storage capacity or to install software. Honeywell recommends the use of Single Level Cell (SLC) industrial grade microSD or microSDHC memory cards with the computer for maximum performance and durability. -
Page 27: How To Transfer Files
For a complete list of compatible accessories for your mobile computer and their part numbers see the EDA50/EDA51 Series Accessory Guide available for download at sps.honeywell.com. Contact your local sales representative for ordering information. Accessory Description... - Page 28 Accessory Description Single Charging Dock Charging cradle for charging ScanPal EDA51 mobile computer (EDA51-HB) and battery (Compatible with EDA51 scan handle). Quad battery charger Quad battery charger for charging ScanPal EDA51 batteries. Kit (EDA50-QBC) contains power supply and power cord. Quad Bay charging base Quad bay charging base for ScanPal EDA51.
-
Page 29: Chapter 2 - About The User Interface And Applications
ABOUT THE USER INTERFACE AND APPLICATIONS Use this chapter to learn about the user interface and how to interact with the screen. You can also use this chapter to learn about the Honeywell applications on the computer. About the User Interface The Android operating system provides a touch-friendly and easy- to-navigate user interface. -
Page 30: Navigation And Function Buttons
Home Screen Features Item Description Notifications Panel/ Status icons to the left tell you when an app has sent notifications, such Status Bar as an arriving message. System icons to the right display the current WWAN and network connection state and battery level. Search Bar Search the Internet or the computer using Google™. -
Page 31: About Status Bar Icons
Scan, Volume up and Volume down). 1. Swipe up from the bottom of the Home screen to access all apps. 2. Tap Settings > Honeywell Settings > Keyremap. 3. Tap the plus sign (+). 4. Press the button you want to remap. -
Page 32: Restore Default Button Action
To restore the default button action: 1. Swipe up from the bottom of the Home screen to access all apps. 2. Tap Settings > Honeywell Settings > Keyremap. 3. Tap the clean icon 4. Choose the remapped button(s) you want restored to the default setting(s). -
Page 33: Key Wakeup
1. Swipe up from the bottom of the Home screen to access all apps. 2. Tap Settings > Honeywell Settings > Key WakeUp. 3. Turn keys on or off depending on your preference. 4. Tap Apply to save your settings. -
Page 34: Customize The Home Screen
Customize the Home Screen You can add application icons to any Home screen for easier access. 1. Swipe up from the bottom of the Home screen to access all apps. 2. Tap and hold the app you want to add, and then slide the icon slightly out of position. -
Page 35: About Screen Gestures
About Screen Gestures Use your fingers or the stylus to manipulate icons, buttons, menus, the on-screen keyboard, and other items on the screen. • Tap to select something, toggle a setting On or Off, or activate a field for text entry. -
Page 36: About Honeywell Applications
Honeywell applications help you troubleshoot and connect your mobile computer to other devices and networks. Some of the applications in this table are located in the Power Tools app. To learn more about Honeywell Power Tools, go to sps.honeywell.com to download the Scanpal Power Tools User Guide. -
Page 37: Applications You Can Download To The Mobile Computer
Applications You Can Download to the Mobile Computer You can download Honeywell applications to extend the capabilities of the computer. You may need to purchase a license to run some applications. To learn more about the applications described in this section and other Honeywell software solutions, go to sps.honeywell.com... -
Page 38: About Honeywell Enterprise Browser
For more information about Enterprise Browser, visit sps.honeywell.com. About Terminal Emulators Honeywell offers several terminal emulator solutions that allow users to manage their mobile devices by providing reliable data transfer between the host mobile device and terminal. Terminal emulators can be used for remote management and configuration of devices, data collection and analysis, and session management. -
Page 39: Unlock Developer Options
Unlock Developer Options Developer options only appear in the Settings app if you unlock the feature. If you are a developer working with the computer, you can easily unlock the additional settings to use for testing and debugging applications under development for the computer. - Page 40 EDA51 User Guide...
-
Page 41: Chapter 3 - Use The Image Engine
By default, the scanner feature is enabled and uses the default scan profile. You can modify the Default Profile or create new profiles for custom applications from the Settings > Honeywell Settings > Scanning. Use the imager as a camera to capture black and white images, such as signatures or pictures of damaged inventory. -
Page 42: Change The Scanner Settings
You can find information on how to create custom applications for the computer in the Software Development Kit (SDK) available for download from the Technical Support Downloads Portal at https://hsmftp.honeywell.com. Once you create an account and enter the portal, navigate to Software > Software and Tools >... -
Page 43: Restore Default Scan Settings
Restore Default Scan Settings You can easily discard all changes you made to the Default profile and restore the default values. Note: When you choose the Restore all defaults option from any of the settings screens in a profile, all the settings in that profile return to their default values. 1. - Page 44 ‘//’ ACTION '$' extra-data Where: ACTION and extra-data are any string of characters. Launches an application listening for the intent. Intent action: “com.honeywell.scantointent.intent.action.” + ACTION Intent extra: “com.honeywell.scantointent.intent.extra.DATA” contains the remainder of the barcode data after the first ‘$’ character.
- Page 45 • Tap the check box to toggle the feature On or Off. • Select Center Decode to adjust the Window dimensions. Honeywell recommends leaving the settings at 50 (default) to define the “center” area for the barcode. Configurable parameters: •...
- Page 46 Setting Description Default Video Mode Use this setting to specify whether normal or inverse decoding Normal for linear symbologies is enabled during the execution of Decode. By default normal video is enabled. Options include: • Normal • Inverse • Normal and Inverse DPM Mode use this setting when scanning Direct Part Marking (DPM) No DPM...
-
Page 47: Add A Scan Setting Profile
To create a scan setting profile for a custom app on the computer: 1. Swipe up from the bottom of the Home screen to access all apps. 2. Tap Settings > Honeywell Settings > Scanning > Internal Scanner. 3. Tap in the upper right corner of the app screen. -
Page 48: Delete A Scan Setting Profile
1. Swipe up from the bottom of the Home screen to access all apps. 2. Tap Settings > Honeywell Settings > Scanning > Internal Scanner. 3. Tap and hold the profile you want to delete. 4. Select Delete, then select OK. -
Page 49: Scan Barcodes
(360°) barcode scanning and an aiming beam is provided to help assist with targeting barcodes. Before you start scanning barcodes, go into Settings > Honeywell Settings > Scanning > Internal Scanner and modify the scan profile to enable only the barcode symbologies that you need. -
Page 50: About Scanning Configuration Barcodes
3. Center the aiming beam over the barcode. Make sure the entire barcode is inside of the illumination frame. 4. Release the Scan button when the computer beeps, and the Scan Status LED briefly turns on. The barcode information is entered into the application in use. Note: Not all barcode symbologies are enabled by default. -
Page 51: Change The Scan Demo Symbology Settings
7. Release the Scan button when the computer beeps, and the Scan Status LED briefly turns On. barcode information appears on the screen. Note: In the Scan Demo app, not all barcode symbologies are enabled by default. If a barcode does not scan, the correct symbology may not be enabled. Change the Scan Demo Symbology Settings 1. - Page 52 EDA51 User Guide...
-
Page 53: Chapter 4 - Use The Phone
CHAPTER USE THE PHONE You can use the phone feature to make and receive phone calls as well as transmit data through wireless wide-area networks (WWANs). Note: Phone features are only supported on EDA51 WWAN models (EDA51-1). About the Phone Phone features on the computer include a speaker and two microphones. -
Page 54: Make A Phone Call
Card Cover Nano SIM Card 5. Insert the battery, see on page Make a Phone Call Once the phone is activated, you can make a phone call. 1. Tap in the favorites tray. 2. Use one of the methods below to enter the telephone number you want to call. •... -
Page 55: Answer The Phone
3. Tap call 4. To end the call, tap Answer the Phone When you receive a phone call, the Incoming Call screen opens. If the caller telephone number is available, it appears on the screen. Depending on your calling plan, you may also see a Caller ID information. All incoming calls are recorded in the Recent call log. -
Page 56: Configure Phone Settings
Configure Phone Settings You can customize settings for the phone, including the ringtone, voicemail options, keypad tones, Internet call settings, and other options. 1. Open the phone app 2. Tap next to the microphone icon at the top of the screen. 3. -
Page 57: Chapter 5 - Use The Camera
CHAPTER USE THE CAMERA Use this chapter to learn how to take pictures and record videos with the color camera. Note: Due to model and software version differences, screen images and features included in this chapter may vary from what you see on your device. About the Color Camera The EDA51 comes equipped with a 13-megapixel color camera, 1080P video with image stabilization, and advanced software features for enhanced exposure... -
Page 58: Record A Video
3. The camera automatically adjusts the focus, but you can tap the screen to modify the focal point. By default, the camera senses the lighting in the environment and turns the flash on, if needed. 4. Tap or the Volume button to take a photo. •... -
Page 59: Use The Camera As A Flashlight
Flash Settings Color Filters More Settings • More Settings Select to access Automatic Mode, HDR Mode and Advanced settings. Advanced Settings Select the gear to access settings that allow you to modify the camera setting defaults and to configure how the camera app functions (i.e., General, Still camera, Video camera, and System. - Page 60 EDA51 User Guide...
-
Page 61: Chapter 6 - Configure The Computer
CHAPTER CONFIGURE THE COMPUTER Use this chapter to learn about the available methods for configuring your mobile computer. You can also use this chapter to learn how to configure network communications and wireless security. How to Configure the Computer You can configure many parameters on the computer such as the barcode symbologies the network settings. - Page 62 • Tap Wi-Fi preferences to access advanced Wi-Fi options, view MAC, IP address information, import and export Wi-Fi configuration, Wi-Fi Direct, WPS push Button, WPS pin entry, Wi-Fi Logger, Honeywell Proprietary Settings, Open network notification and Install Certificates. Mobile Network...
- Page 63 Connected Device In the Settings app, select Connected devices to access the following settings. Setting Description Pair new device • Connect to a Bluetooth Device. • Lists Bluetooth enabled devices in range. • View and rename the computer. • View the computer Bluetooth address. Previously View previously connected devices.
- Page 64 Apps & Notifications In the Settings app, select Apps & notifications to access the following settings. Setting Description Apps To view a list of all apps installed on the computer and system services running, select “SEE ALL xx APPS” where xx = number of apps installed. Notifications Select to manage notifications.
- Page 65 Display In the Settings app, select Display to access the following settings. Setting Description Brightness level Set the Brightness level manually if the Adaptive brightness feature is turned Off. Night light Activate the Night light feature to adjust the screen tint to a light amber for easier viewing and reading in dim light or for the hours you use the device before going to sleep.
- Page 66 Privacy In the Settings app, select Privacy manage permissions, account activity and personal data. Setting Description Permissions Manage personal data sharing privileges. manager Show passwords Enable or disable showing characters briefly as you type. Lock Screen Choose to show or not show notifications content on the Lock screen. Location In the Settings app, select Location to access the settings below.
- Page 67 Setting Description Screen pinning Enable or disable the screen pinning feature. When enabled you can pin the device screen to a recently used app where it stays until you unpin the app via the security method chosen. Accounts In the Settings app, select Accounts to access the following settings. Setting Description Add account...
- Page 68 Set Caption preferences. High contrast text Turn High contrast text on or off. Honeywell Settings In the Settings app, select Honeywell Settings to access the settings below. Setting Description Battery LED Configures the battery LED behavior. To learn more, see...
- Page 69 Setting Description Battery Optimizer View battery status and app usage information. Select Status to choose a preset profile or create a custom battery optimization profile that implements a group of settings to conserve power. Options include: • None When selected, no battery optimization profile is active. •...
- Page 70 Options include: Keep awake on motion, Wake on motion, Face down suspend. Staging Hub Use this agent and settings to connect the computer to the Honeywell Agent Staging Hub Foundation software platform; a centralized software platform IT integrators and administrators can use as a solution for managing, monitoring and deploying Honeywell devices in a connected workspace environment.
-
Page 71: About Network Communications
Setting Description Reset Option Select from the following reset options: • Reset Wi-Fi, Mobile & Bluetooth. Use to reset all network settings, including Wi-Fi, Mobile data and Bluetooth. • Reset app preferences. Use reset app preference back to defaults. This apps you disabled, notification changes, default app actions set, background data restrictions for apps and permission restrictions. -
Page 72: Connect To A Wi-Fi Network
3. Using the mobile computer transfer data through local carrier’s network. Connect to a Wi-Fi Network The computer contains an 802.11 a/b/g/n/ac radio to transfer data using WWAN communications. Before you connect to a Wi-Fi network, you need to know about your network security protocol and its required credentials. -
Page 73: How To Connect To Virtual Private Networks
Configure Proxy Settings for a Wi-Fi Network If you need to connect to network resources through a proxy server, you can configure settings for the proxy server for each Wi-Fi network you add. By default, the Wi-Fi networks you add are not configured to connect through a proxy server. Note: Proxy settings apply only to the Wi-Fi network you modify. -
Page 74: About Wwan Security
Add a VPN Before you can connect to a VPN, you must create a VPN profile. 1. Swipe up from the bottom of the Home screen to access all apps. 2. Tap Settings > Network & internet > Advanced > VPN. 3. -
Page 75: About Certificates
• LEAP • Honeywell recommends WPA2 security with PSK (Personal) or 802.1x (Enterprise) key management. Before you set security, you need to enable the radio, set the date, and set the SSID on your computer. To use 802.1x security, you need to load a root certificate on your computer. -
Page 76: About Bluetooth Communications
7. Enter a name for the certificate and tap OK. Disable or Remove Certificates If a user or system certificate is compromised, or your organization chooses not to trust it, you can disable or remove the certificate. 1. Swipe up from the bottom of the Home screen to access all apps. 2. -
Page 77: Rename The Computer And View File History
4. Tap Pair a new device . A list of available Bluetooth devices in range appears. 5. Select a device on the list to initiate a pairing request. 6. When the pairing request message appears: • Verify the pairing PIN is the same on both device, and then tap Pair. •... -
Page 78: About Usb Communications
USB Troubleshooting • If you have a problem with your workstation computer recognizing the USB device, try downloading and installing the Honeywell-aidc-usb-driver. The driver is part of the Honeywell_Mobility SDK_Android software.zip file. To learn where to get the software, see Developer Information on page 70. -
Page 79: Minimum Requirements For Bluetooth Tethering
6. Select USB tethering to initiate the shared data connection. Note: To stop sharing the connection, tap USB tethering again to turn Off the feature or disconnect the USB accessory. Minimum requirements for Bluetooth Tethering • All devices must support Bluetooth communication. Set up and Connection 1. -
Page 80: Developer Information
Configuration barcodes do not scan and process. • \honeywell\autoinstall folders are inaccessible. Note: To learn more about network and security for Honeywell mobile computers with Android operating systems, go to sps.honeywell.com. Enable or Disable Provisioning Mode 1. Swipe up from the bottom of the Home screen to access all apps. -
Page 81: Chapter 7 - Manage And Maintain The Computer
1. Go to https://hsmftp.honeywell.com. 2. Create a login account if you have not already created one. 3. Install the Honeywell Download Manager tool. See “Note” on the portal page. This tool is required for downloads. 4. Locate the app or upgrade you want to download in the Software directory. -
Page 82: About Transferring Files Via Usb Connection
1. Swipe up from the bottom of the Home screen to access all apps. 2. Tap Settings > Provisioning mode under Honeywell Settings. 3. Tap the toggle button to turn Provisioning mode On. 4. Save the upgrade file (*.zip or *.apk) in one of the following folders on the EDA51 mobile computer: •... -
Page 83: Optional Microsd Card Method
9. Once installation is complete, turn Provisioning mode Off. About the Honeywell Upgrader Use the Honeywell Upgrader app (HUpgrader) to check for and install OTA updates or view the current OTA version installed on the computer. How to view the Installed OTA Version 1. -
Page 84: Install Ota Updates
1. Swipe up from the bottom of the Home screen to access all apps. 2. Tap Settings > Provisioning mode under Honeywell Settings. 3. Tap the toggle button to turn Provisioning mode On. 4. Save the OTA file (*.zip) in the following folder on the EDA51 computer: •... -
Page 85: Reboot (Restart) The Computer
8. Tap the OTA update file. The computer examines the file, and then starts the installation. 9. Once the installation is complete (100%), select OK when prompted to Reboot the computer. The computer reboots and finishes the update. Reboot (Restart) the Computer You may need to restart the computer to correct conditions where an application stops responding to the system. -
Page 86: About An Enterprise Data Reset
About an Enterprise Data Reset You can perform an Enterprise data reset if a Reboot did not improve the condition and all other troubleshooting methods have not resolved the issue. This method provides a clean configuration for troubleshooting by erasing all data from the Internal shared storage location on the computer. -
Page 87: About Full Factory Reset
About Full Factory Reset A Full Factory Reset should only be performed if you have exhausted all other troubleshooting options. This method reverts the computer back to the factory state by erasing all data in Internal shared storage and the IPSM Card storage locations on the computer. -
Page 88: Repairs
(DRH) for the healthcare and general-purpose markets. Please refer to the Honeywell Safety and Productivity Solutions website for specific details on how to clean EDA51 computer with disinfectant-ready housings. Helpful information on the care of these specialty products can be found in the following articles: •... - Page 89 EDA51 User Guide...
- Page 90 EDA51 User Guide...
-
Page 91: Appendix A - Specifications
Read all guidelines before using your computer. Product documentation is available for download from sps.honeywell.com. Public certificates are available for download from honeywell.com/PSStechnicalsupport. -
Page 92: Imager Specifications
Imager Specifications The EDA51 series offers three Honeywell high-performance imagers: • N3601 Imager Engine • N6603 Slim Imager Engine • N6703 Ultra-Slim Imager Engine Barcode Symbologies Supported The computer supports the following barcode symbologies: 1D Symbologies 2D Symbologies Postal Codes... -
Page 93: N6703 Ultra-Slim Imager Engine Reading Distances
N6703 Ultra-Slim Imager Engine Reading Distances The depth of field measurements were taken using these parameters: • Distances are measured from the front of the engine to the barcode • 23 °C (+73 °F), 0 lux for guaranteed and 200 lux for typical •... -
Page 94: N6703 Ultra-Slim Imager Engine Field Of View/Resolution
Focus Standard Range Symbology Near Distance Far Distance 5 mils Code 39 30.1 2.75 11.85 10 mils Code 39 51.7 1.57 20.35 20 mils Code 39 1.73 31.50 13 mils 100% UPC-A 57.3 1.73 22.56 13 mils 20% UPC-A 22.8 3.11 8.98 15 mils Code 128... -
Page 95: N6603 Slim Imager Engine Reading Distances
N6603 Slim Imager Engine Reading Distances The depth of field measurements were taken using these parameters: • Distances are measured from the top of the engine to the barcode • 23 °C (+73 °F), 10K lux • Clear, High quality barcodes Note: Time to Read and Depth of Field are impacted if the barcode symbol is at the edge of the image. -
Page 96: N6603 Slim Imager Engine Field Of View/Resolution
N6603 Slim Imager Engine Field of View/Resolution Focus Standard Range (SR) Horizontal Field Angle (degrees) ±21.2 ±3.5° Vertical Field Angle (degrees) ±16.5 ±3.5° Note: DPI can be calculated based on the following formula: Horizontal DPI = 832 pixels/width of horizontal field of view (inches) Vertical DPI = 640 pixels/width of vertical field of view (inches) N3601 Imager Engine Reading Distances The depth of field measurements were taken using these parameters:... -
Page 97: N3601 Imager Engine Field Of View/Resolution
Typical Specs Focus Standard Range (SR) Symbology Near Distance Far Distance 100% UPC-A 52.0 20.5 5 mil Code 39 18.9 10 mil Code 39 45.5 17.9 20 mil Code 39 63.0 25.8 15 mil Code 128 60.0 23.6 6.7 mil PDF 417 19.0 15 mil QR 28.0... - Page 98 EDA51 User Guide...
- Page 100 Honeywell 855 S. Mint Street Charlotte, NC 28202 sps.honeywell.com ™ EDA51-A-EN-UG-01 Rev D 1/22...
Need help?
Do you have a question about the ScanPal EDA51 Series and is the answer not in the manual?
Questions and answers