Honeywell ScanPal EDA51 User Manual
Enterprise hybrid device
with android 8.1 operating system
Hide thumbs
Also See for ScanPal EDA51:
- Quick start manual (20 pages) ,
- User manual (96 pages) ,
- User manual (100 pages)
Table of Contents
Advertisement
Advertisement
Table of Contents

Related Manuals for Honeywell ScanPal EDA51


Summary of Contents for Honeywell ScanPal EDA51
- Page 2 Disclaimer Honeywell International Inc. (abbr. HII) reserves the rights to modify the specifications and other information mentioned in this User Guide without prior notification. In any case, users should confirm with HII whether any changes were made. This publication does not represent any commitments of HII.
-
Page 3: Table Of Contents
Contents Chapter I - Features of ScanPal EDA51-X Enterprise Terminal ..............6 About EDA51-X Terminal ........................6 Battery ..............................10 Charging ............................... 10 Replacing batteries ..........................11 Battery icon ............................14 Checking the remaining battery capacity ..................... 17 Battery life and maintenance ........................ 17 Battery maintenance recommendations and safety protection measures ........... - Page 4 Structure of the Application Settings ..................... 51 Networks& Internet ..........................52 Connected devices ..........................52 Devices and Google settings ........................ 53 Honeywell Setting ..........................54 System ..............................54 Network communication ........................55 Connect to Mobile network ........................55 Connecting to Wi-Fi networks ....................... 55 Add VPN ...............................
- Page 5 For the latest contacts, please visit our website. Product Service and Maintenance Honeywell International Inc. provide services for all of its products all over the world via its service centers. For information about the site of service centers, please visit www.honeywellaidc.com and select English as preferred language, then select Support >...
-
Page 6: Chapter I - Features Of Scanpal Eda51-X Enterprise Terminal
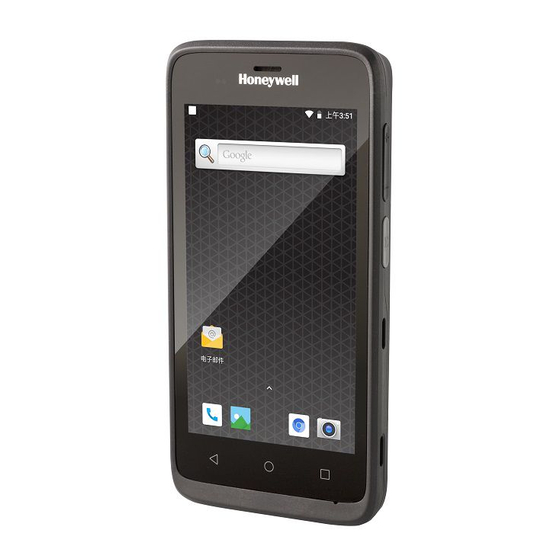
Chapter I - Features of ScanPal EDA51-X Enterprise Terminal ScanPal EDA51-X (X refers to 0 and 1, as in all other cases below) (hereinafter called “EDA51-X” or “terminal”) with Android 8.1 operating system will be introduced in this chapter. Users can learn something about the main features, functions and accessories of this terminal from this chanpter. - Page 7 EDA51-X front view...
- Page 8 EDA51-X side and bottom views...
- Page 9 EDA51-X rear view...
-
Page 10: Battery
Honeywell suggests you to keep the battery charged to avoid data loss. Change battery only after switching off the device as per normal. Switch on the device after completing change of battery. -
Page 11: Replacing Batteries
Replacing batteries When the battery power is low, you can charge it together with the terminal, or replace it with a fully-charged battery. Save all the files and close all running Apps. Long press the power button. Until the follow interface pop up: Tap Power off. - Page 12 After it's powered off, do as the following instructions manually: 1) Press down the battery cover safety button to move the lock to the unlock position at right; 2) Open the battery cover with the battery cover buckle handle;...
- Page 13 3) Insert the battery (Insert the non-connector side first, then press the battery down to establish connection between the battery and the phone); 4) Press down the battery cover;...
-
Page 14: Battery Icon
Battery power is too low. Replacing the battery right now. The terminal has been connected to external power supply for charging. Power indicator Battery failure occurs. Please replace the battery. If the failure still exists, please contact LED flashing red Honeywell technical support. - Page 15 Power indicator on the upper left corner of the terminal shows the battery charging status. It can also be used as system message indicator. For detailed setting methods, please refer to http://developer.android.com/guide/topics/ui/notifiers/notifications.html. Default power indicator description Connect to power supply Indicator status Description Flashing amber (Orange)
- Page 16 Battery power is between 15% to Stable amber 90% full Stable green Battery power is over 90% full Tap Settings> Honeywell Settings>Battery LED Select from the following options: a. Default Battery LED b. Honeywell Battery LED (Factory default settings) c. No Battery LED...
-
Page 17: Checking The Remaining Battery Capacity
Battery life and maintenance The battery will discharge slowly if it's placed outside of the terminal. Honeywell technical support recommends you store battery in a charger to maintain battery performance. -
Page 18: Battery Maintenance Recommendations And Safety Protection Measures
Refer to the chapter "charging" to get the right process for battery charging. Using the battery for other devices may cause damages on the device or the battery. • Avoid battery or terminal drops. If you suspect that a battery or terminal fails, send it to Honeywell service center for verification. •... -
Page 19: Enabling Airplane Mode
Enabling Airplane mode If you don't need to connect to any wireless network, you can enable the airplane mode to turn off all wireless receivers to save power. Tap Settings. Tap Network & Internet. Open Switch control of Airplane Mode to enable airplane mode. -
Page 20: Switch On
Switch on After the battery is fully charged and installed into EDA51-X, switch on it for the first time: Press down and then release the power button. Please note: after complete the installation instructions, the welcome interface will not appear again. The interface appears as locked screen interface after each time you switch on the terminal. -
Page 21: Scanning Indicator
Scanning Indicator The scanning indicator indicates the status of the scanner. For barcode scanning method, please refer to the chapter "Scanning barcodes". Scanning indicator definition Light of the indicator Meanings Green Good read for the barcodes Barcodes reading failed... -
Page 22: Setting Screen Backlight
Setting screen backlight The terminal's screen is equipped with background light sensor which can automatically adjust backlight intensity to save power and ensure the display readability. You may set the backlight intensity based on the environment. Tap Settings. Tap Display>Brightness level Tap Adaptive brightness to automatically adjust the backlight intensity, or slide adjustment bar to set the backlight intensity. - Page 23 Press the key on the right side of the terminal (+ or-). Volume bar will show on the screen. Adjust the volume by pressing volume key or slide volume bar. Hold down the volume down (-) button or pull the volume indicator to the extreme left to activate vibration mode.
-
Page 24: Enabling Vibration Mode
Enabling vibration mode You can set the terminal to vibration/silence mode in the office. Hold down the volume down (-) button or pull the volume indicator to the extreme left to activate vibration mode. -
Page 25: Audio Settings
Audio settings This chapter will describe about audio and sound settings. To change audio setting, go to Settings > Sound. Audio and sound settings Settings Description Use the volume adjustment bar to set the volume for: Media Volume Music, videos, games and other medias. Use the volume adjustment bar to set the volume for: Alarm Volume Alarm and alert tones... -
Page 26: Inserting Sd Card
Inserting SD card You can use a SD card to expand the memory or to install softwares. Honeywell recommend the using of Single Level Cell (SLC) graded SD memory card or SDHC memory card in order to achieve optimum performance and durability. -
Page 27: File Transfer
File transfer Files can be transferred between the terminal and a computer by using a USB adapter or standard USB cable. By connecting the terminal to a computer with a USB cable, you can view the files in the terminal, or transfer the files to the computer, or transfer files from the computer to the terminal. -
Page 28: Eda51-X Accessories
EDA51-X Accessories EDA51-X terminal is equipped with original battery. All other accessories require separate order and shipment. If necessary, please contact your local sales representatives. For EDA 51-X accessories and description, please see below table: Item Description EDA51 home base Charging one EDA51 terminal and EDA51 battery simultaneously EDA51 single cradle Charging one EDA51 terminal... -
Page 29: Chapter Ii - User Interface And Application
Chapter II - User interface and application This chapter introduces the Android system user interface, and how to interact with the screen. Users can also learn about a variety of Honeywell applications on the terminal through this chapter. -
Page 30: User Interface
User interface Android 8.1 operating system user interface provides users with a perfect touch and easy navigation experience. Main page After switch on the terminal and setting up your preferred language, the main page will be displayed on the screen first. -
Page 31: Navigation And Function Keys
Navigation and function keys There are navigation and function keys below the common applications in the main interface of EDA51-X; other function keys are on the two sides of the terminal. Navigation and function keys Keys Description Functions Return Return to the previous screen Show the applications that have Function Key been visited recently... -
Page 32: Key Remap
Key Remap Tap Settings > Honeywell Settings>Key Remap. Touch the + Click keys you want to redefine. Tap KEYS or APPs to view options. Select the required functions for the key. The new functions selected will be displayed under the name of... -
Page 33: Viewing System Messages
Viewing system messages Users can view EDA51-X's system messages in the notification page. • Open the notification page: swipe down from the top of the screen. • Close the notification page: swipe up from the bottom of the screen or tap Return key or Home key. Manage system messages When the applications send system messages to EDA51-X, users can manage them quickly. -
Page 34: Personalizing The Main Interface
Personalizing the main interface You can add application icons to either one of the main interface to open these applications more quickly. Tap or pull upward . To display All applications. To move the application icon to the main interface: long press the icons to be added to the main interface, then slide your finger to place it on either one of the main interface. -
Page 35: Touch Screen Gestures
Touch screen gestures Use your finger can operate applications, menus, on-screen keyboard and other functions on the interface. • Tap a function or application to select or start it. • To enter a name or password, touch the place to enter and on-screen keyboard will appear for input. Other touch screen gestures include: •... -
Page 36: Honeywell Applications
Honeywell applications Honeywell helps users troubleshoot and connect the terminals to other devices and networks. Tap or pull upward show applications below. more details, please visit: www.honeywellaidc.com. Honeywell software applications available on EDA51-X Icons Applications Descriptions Demos Scan Demo, NFC Demo and more included, allows testing and using functions like Scan Demo and NFC. -
Page 37: Gms
Download Enterprise Application Lock (Applock) Honeywell Applock is an Android application which allows you to configure the apps that may or may not be allowed. User Guide installation procedure Applock downloaded via: www.honeywellaidc.com Unlocking developer options If you are a developer for EDA51-X, you can easily unlock developer options. Developer options can help you test and troubleshoot during the process of developing EDA51-X. -
Page 38: Chapter Iii - Scan Function
SDK at: www.honeywellaidc.com. Changing scan settings Changes made to the default file apply for all non-document applications. Tap Settings. Tap Honeywell settings Tap Scan Settings. Tap Internal Scanner Tap Default profile. Select Data Processing Settings, Symbology Settings, Decode Settings, Imager Settings, Trigger Settings or Notification Settings. -
Page 39: Data Processing Settings
Specify a Symbology prefix to decode the barcode data Symbology prefix • None • Honeywell • To open or close URL barcode, if the barcode Launch Browser Enable start with http:// or https://, the browser will open the respective URL... - Page 40 ‘//’ intent-suffix ‘$’ extra-data Where: Additional operations and data include the following characters, to enable Intent or respective applications Intent action: “com.honeywell.scantointent.intent.action.”+ ACTION Intent extra “com.honeywell.scantointent.intent.extra.DATA ” contains the remainder of the bar code data after the first ‘$’ character.
-
Page 41: Symbology Settings
Symbology settings Enable or disable a barcode symbology with Symbology Settings. Tap on a symbol to view and modify the configuration parameters of the symbol. Symbology settings Settings Default Settings Default Enabled Code 128 GS1 Databar Disabled GS1-128 Enabled Han Xin Disabled Code 39 Enabled... -
Page 42: Imager Settings
Imager settings There should be no need for users to change image color rendering. Override Recommended Values is disabled by default. Recommended image settings can be applied in many environments; only the users who have more in-depth understanding on the image can change the settings. Trigger settings Trigger settings can set up the using patterns for scan key. -
Page 43: Notification Settings
Notification settings You can set up the responses during scanning process for EDA51-X in the notification settings. Notification settings Settings Description Default Enable or disable Good Read Notification. Notification includes Good Read Notification Enabled green indicator, short beep and optional short vibration Enable or disable Fail to Read notification. -
Page 44: Scanning Barcodes
Note: Before scanning a barcode, you need to enable the desired barcode Symbology in the settings. Scan Engine EDA51-X equips Honeywell N6603 scan engine. The N6603 series integrates Honeywell’s Adaptus 6.0 technology for unparalleled 1D and 2D scanning performance. Items... -
Page 45: Chapter Iv - Using Camera
Chapter IV - Using Camera This chapter describes how to use the camera to take photos and videos. Camera EDA51-X is equipped with a 13 MP color camera which can be used to take photos and videos. The camera and flash light are located on the back of the terminal. -
Page 46: Changing Video Settings
to start video shooting. To adjust the focus, you can knead two fingers on the screen; to capture images, you can tap on the screen for instant capturing during video shooting process. To stop video shooting, tap Changing video settings In order to obtain the best results when shooting videos, users can change the camera settings beforehand. -
Page 47: Chapter V - Using Telecommunication Function
Chapter V - Using Telecommunication Function You can use the phone function of the terminal (Only for EDA51-1 WWAN version) to make and receive calls, and to transmit data via wireless network as well. Telecommunication Function The phone function of the terminal is realized with a speaker and a microphone. The phone function also supports a Bluetooth headset or hands-free device. -
Page 49: Making A Call
Making a call • After the phone is successfully activated, you can make calls. • Click on the main screen or display screen. • If the screen shows numbers list and not telephone keyboard, lightly press to return to the keyboard; •... -
Page 50: Making An Emergency Call
Making an emergency call If SIM card has been misplaced, or if the user does not have valid SIM card, the user can still make emergency calls. Under both circumstances the device will show no service access, but calls to emergency numbers (e.g. 112, 110, 911, 118, 119, 120, 122 or 999) will still be connected. -
Page 51: Chapter Vi - Configuring Terminal
Chapter VI - Configuring Terminal This Chapter deals with configuration of EDA51-X. The user can also learn how to configure network communication and wireless security. Terminal configurations Users can configure many parameters for the terminal, such as barcode symbologies to be decoded or network settings. -
Page 52: Networks& Internet
Suggestions Automatically recommend quick access through intelligent pre-judgment of user’s needs. Networks& Internet Settings Introductions To enable or disable Wi-Fi radios. When Wi-Fi is enabled, available Wi-Fi networks can be Wi-Fi viewed by taping this bar. Mobile network (This menu will be displayed after inserting SIM card) Enable or disable mobile data. (only supported by When it is enabled, tap the bar to view available mobile network). -
Page 53: Devices And Google Settings
Devices and Google settings Below list regular function and google settings. Settings Introductions Set whether the app allows notifications to be sent, and Shows applications downloaded Apps& Notifications and on the run. Battery Shows battery usage data and the current battery status. Display Set screen brightness, wallpaper, screen timeout, font size and screen rotation. -
Page 54: Honeywell Setting
Display the battery using stage, health and internal temperature. HXLogger Activates Android Logcat and Linux Kernel log services to facilitate identification of problems during the device’s operation Honeywell Bug Reporter Enable or disable auto Send bug reports to Honeywell server Web Applications Configure the Web application. System Settings Introductions Languages &... -
Page 55: Network Communication
Network communication Users can connect the terminal to wireless and wired networks. Users can get the terminal connected via the following ways: • Mobile network • 802.11 radios • Bluetooth • Connect to Mobile network Mobile network only supported on EDA51 WWAN version, like EDA51-1. Before using mobile network, need insert activated local carrier’s Nano-SIM card. - Page 56 Configuring Wi-Fi network proxy servers If users need to connect to network resources through a proxy server, they need to configure a proxy server for each Wi-Fi network added. By default, none of the Wi-Fi networks added by users has done proxy server settings. Enter Application Settings screen, tap Wi-Fi to show available Wi-Fi networks.
-
Page 57: Add Vpn
Connecting to a virtual private network The terminal supports connection to virtual private networks (VPNs). This section describes how to add and connect to VPNs. To configure a VPN, users must consult your network administrator. Users can view and change VPN settings in the Application Settings. -
Page 58: Wireless Security
Wireless Security The terminal provides the following security solutions for users' wireless network. • WPA2™ • WPA • 802.1x • LEAP • WEP Before setting up security program, you must first enable the radio and set the date and SSID on the terminal. To use 802.1x program, users must download a root certificate to the terminal. -
Page 59: Chapter Vii - Management And Maintenance
Website. Website: https://hsmftp.honeywell.com/ Upgrading AutoInstall application Copy the upgrade file "EDA51_OTA_xxxxx_Update.zip " to the following EDA51-X's system folder: o File Explorer\External Memory Card\Honeywell\Autoinstall o IPSM\Honeywell\Autoinstall Tap All Applications > AutoInstall Settings. Choose Packages update, and EDA51-X will restart and install the upgrade file. -
Page 60: Restarting The Terminal
Restarting the Terminal If the terminal or an application is locked or doesn't respond when pressing the power button, you need to restart the terminal. When restarting, the terminal will use the current configuration saved in the flash memory. Try the following ways to restart the terminal: •... -
Page 61: Restore Factory Settings
Restore factory settings If the terminal appears to be locked, try a cold boot. If resetting is invalid, try to restore factory settings, restart the terminal to make it work again and do troubleshooting later. Tap Settings. Tap system. Tap Reset options. Tap Erase all data (Factory Reset). -
Page 62: Chapter Viii - Specifications
Chapter VIII - Specifications Mechanical and environmental specifications This Chapter provids the mechanical and environment specifications of EDA51-X Product dimensions Length 157mm Width 78.2 mm Physical dimension Thickness 16.9 mm Weight (with battery) 272 g (with battery) Tumble 300 tumbles within 0.5m Multiple drops form 1.2 m to concrete at room Tumble and Drop Drop... -
Page 63: Display Specifications
Display specifications 5.0-inch color LCD/1280x720 pixel HD/full-perspective/capacitive touch screen Language Support Language Supports and not limited to WW English, French, German, Italian, Spanish, Simplified Chinese, Traditional Chinese. Symbolgies Support The following symbologies are supported: 1D codes: Codabar Code 3 of 9 ... - Page 64 Micro PDF 417 MicroQr PDF 417 QR Code TLC39 OCR-A OCR-B Postal codes: Australian Postcode Canadian Postcode KIX (Dutch) Postcode Japanese Postcode UK Postcode Planet Code Postnet ...
-
Page 65: Scan Depth Of Field (Dof)
Scan Depth of Field (DOF) DOF performance of the product was measured under the following conditions: • DOF is the distance from the top of scan engine to the barcode • 23 ° C (73 ° F), 0 ~ 10K lux •...
Need help?
Do you have a question about the ScanPal EDA51 and is the answer not in the manual?
Questions and answers