Pantum M6200 Series User Manual
Hide thumbs
Also See for M6200 Series:
- User manual (156 pages) ,
- Maintenance manual (108 pages) ,
- User manual (158 pages)

Related Manuals for Pantum M6200 Series


Summary of Contents for Pantum M6200 Series
- Page 1 Pantum M6200/M6500/M6550 Series Pantum M6600 Series Monochrome Laser MFP It is recommended to carefully read this Guide before using the printer...
- Page 2 Version: V1.6 Disclaimer For a better user experience, Zhuhai Pantum Electronics Co., Ltd. reserves the right to make changes to the User Guide. The information contained herein is subject to change without notice. Users are responsible for any damages arising from failing to follow this User Guide. Meanwhile, except the express warranty made in the product maintenance manual or service commitment, Zhuhai Pantum Electronics Co., Ltd.
- Page 3 The following label is attached to the laser components inside the printer: Reclamation and recycling To protect the environment, our corporation has already established the system of reclamation and recycling for waste products. Please refer to the Pantum official website for product recovery at www.pantum.com.
- Page 4 Safety Warning Please note the following safety warnings before using the printer: Warning There is high-voltage electrode inside the printer. Before cleaning the printer, make sure the power is turned off! Plugging and unplugging the power cord plug with a wet hand can result in an electric shock. The fuser unit is hot when and after printing.
- Page 5 Precautions Precautions before Using the Printer: 1. Read and understand all instructions; 2. Familiarize yourself with the basic principles associated with operating electrical appliances; 3. Comply with all warnings and instructions marked on the equipment or specified in the manual supplied with the equipment;...
- Page 6 23. This product is sold as a complete machine. The consumers can go to Pantum Aftersales Service Centre to purchase parts they need. If the product sold is inconsistent with the package list, please go to the specified Aftersales Service Centre to solve the problem;...
- Page 7 31. Shielded cables must be used with this unit to ensure compliance with the Class B FCC limits. 32. This Class B digital apparatus complies with Canadian ICES-003. 33. This equipment complies with Part 68 of the FCC rules and the requirements adopted by the ACTA.
- Page 8 Radio Equipment directive 2014/53/EU only for models ending with suffix “W”. The manufacturer of this product is: Zhuhai Pantum Electronics Co., Ltd., Building 02,06 and 08,No.888 Shengping Avenue, Pingsha Town, Zhuhai City, Guangdong Province, 519000 PR China.
-
Page 9: Table Of Contents
Table of Contents 1. Before Using the Printer ......................1 1.1. Introduction of Models ....................1 1.2. Supplied Accessories ....................2 1.3. Product View ......................... 3 1.4. Laser Toner Cartridge ....................6 1.5. Easily-Refilled Laser Toner Cartridge ................7 1.5.1 Structure of Easily-Refilled Laser Cartridge ............7 1.5.2. - Page 10 6.1.1. Operating systems supported ................57 6.1.2. How to download Pantum APP ................. 57 6.1.3. How to use this "Pantum" APP ................57 6.2. Mopria mobile print ...................... 58 6.2.1. The operating systems and applications which support Mopria mobile printing . 58 6.2.2.
- Page 11 10.1.4. Merge Scan ....................88 10.1.5. Other Scan Functions ..................90 10.2. Pull Scan ........................94 10.2.1. Pantum Scan Application ................94 10.2.2. TWAIN Scan Driver ..................95 10.2.3. WIA Scan Driver ..................... 97 10.2.4. Cancel Scan Job ................... 100 10.3.
- Page 12 14. Menu Structure ......................... 140 15. Product Specifications ....................... 141 15.1.Overview of the Specifications.................. 141 15.2.Print Specifications ....................142 15.3.Copy Specifications ....................142 15.4.Scan Specifications ....................142 15.5. Fax Specifications (For M6600 Series models only) ..........143...
-
Page 13: Before Using The Printer
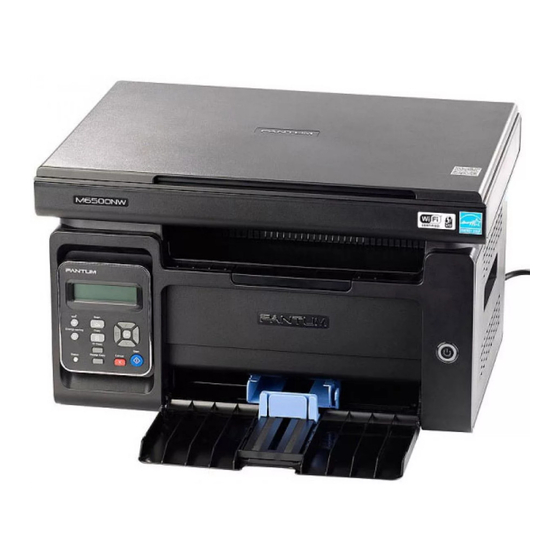
1. Before Using the Printer 1.1. Introduction of Models This product have the following configurations: Series Name M6200/M6500 Series Picture Basic Functions Print, Copy, Scan Basic Models USB Model, NET Model, Wi-Fi Model • The maximum print speed of A4 paper is 20/22ppm, and that of letter paper is 21/23ppm. -
Page 14: Supplied Accessories
Phone Phone Cord Spiral Cable • The Pantum Warranty may not be attached in some regions. Note: • M6600 Series come with phone, phone cord and spiral cable in some countries. • Volume control is not available with the phone. -
Page 15: Product View
1.3. Product View | Side view (1) No. M6200/M6500 Series Cover Output Bin Control Panel No. M6550/M6600 Series Automatic document feeder Cover Output Bin Control Panel... - Page 16 | Side view (2) M6200/M6500 Series Glass Platen Scanning Platform Output Tray Automatic Feed Paper Deflector Paper Stop Feeder Tray Automatic Feeder Tray Power switch M6550/M6600 Series Glass Platen Scanning Platform Output Tray Automatic Feed Paper Deflector...
- Page 17 Paper Stop Feeder Tray Automatic Feeder Tray Power switch • The power switch of the printer is divided into two types: “touch type” and Note: “self-locking type”. The actual appearance of the purchased printer will prevail. • The “touch type” power switch of the printer only has one mode, and can be reset by short-pressing.
-
Page 18: Laser Toner Cartridge
• The model is subject to increase without notice. Note: • Consumables capacity may vary with different using types. • It's not recommend using consumables other than the original Pantum consumables. • Any damages caused by using non-Pantum original consumables are not covered by the Warranty. -
Page 19: Easily-Refilled Laser Toner Cartridge
1.5. Easily-Refilled Laser Toner Cartridge 1.5.1 Structure of Easily-Refilled Laser Cartridge Name Waste Toner Port Toner Refilling Port Waste Toner Box Toner Box 1.5.2. Steps of Filling the Easily-Refilled Laser Cartridge Steps Diagram Description Hold the laser toner cartridge with the toner port side down and shake it vertically around 5-6 times. - Page 20 Align the mouth of the toner bottle to the toner refilling port. Pour the toner into the toner box. Close the cover of the toner refilling port. The toner refilling is completed.
-
Page 21: Control Panel
1.6. Control Panel M6200/M6500/M6550 Series Short press Wi-Fi button to turn on direct Wi-Fi connection of the printer and automatically print out "Mobile Device Wi-Fi Connection Wizard" page (for models with Wi-Fi function only). Wi-Fi button Long press Wi-Fi button for over 2s to start WPS when Wi-Fi is not connected or to disconnect Wi-Fi when it has already been connected (for models with Wi-Fi function only). - Page 22 Press this button to start the corresponding operation after the operation 11 Start Button setting 12 OK Button Press this button to save the setting 13 “▲” and “▼” Press these two buttons to browse each menu and its options M6600 Series Press this button, enter the number to dial, and then press the Start button Speaker...
- Page 23 Scan Button Press this button to enter into the scan mode Copy Button Press this button to enter into the copy mode ID Card Copy Press this button to enter into the ID card copy mode Button 11 Bill Copy Button Press this button to enter into the bill copy mode You can use these buttons to dial a phone or Fax number, or use them as a 12 Number Buttons...
-
Page 24: Paper And Print Media
3. Some print media may meet all the use guidelines contained herein, but they still can not bring satisfactory effect. This may be due to incorrect operation, inappropriate temperature and humidity, or other factors beyond the control of Pantum. Before purchasing large quantities of print media, make sure that the print media meets the specifications specified in this User Guide. -
Page 25: Special Paper
2.2. Special Paper This printer supports using the special paper for printing. Special paper includes: label paper, envelope, transparent film, thick paper, thin paper, etc. • When using special paper or print media, be sure to select matched print type and Note: size in the print settings so as to get the best print effect. -
Page 26: Non-Printing Area And Non-Scanning Area
2.3. Non-printing Area and Non-scanning Area The shaded part indicates the non-printing area and non-scanning area. Usage Paper Size Top and Bottom Margins (A) Left and Right Margins (B) 5 mm (0.197 inch) 5 mm (0.197 inch) Print Letter 5 mm (0.197 inch) 5 mm (0.197 inch) 5 mm (0.197 inch) 5 mm (0.197 inch) -
Page 27: Load The Paper
2.4. Load the Paper Steps are as follows: a) Open the feeder tray. M6200/M6500/M6550 Series M6600 Series b) Slide the automatic feed guides to match both sides of the paper. M6200/M6500/M6550 Series M6600 Series c) Raise the output tray to avoid the paper from slipping and falling. M6200/M6500/M6550 Series M6600 Series d) Load the paper into the automatic feeder tray with the print-side up. - Page 28 e) Adjust the paper stop to match the paper size. M6200/M6500/M6550 Series M6600 Series • If the paper loaded into the automatic feeder tray at one time exceeds 150 pages, Note: paper will jam or cannot be fed in. • When using the printed paper, please make the side to be printed (the blank side) up. •...
-
Page 29: Paper And Manuscript Use Process
2.5. Paper and Manuscript Use Process Manuscript requirements: Type Size Plain paper, thick paper, transparent film, carton paper, label paper, A4, A5, B5, Letter, Custom envelope, thin paper 2.5.1. Scanning With Tablet Steps of Use: 1). Raise the cover. M6200/M6500 Series M6550/M6600 Series 2). -
Page 30: Scanning With Tablet
4). Gently put down the cover. M6200/M6500 Series M6550/M6600 Series • Please put the paper or document on the scanner glass aft er the glue, ink or correction Note: fluid are completely dried. • Paper or manuscript with rough texture, concave and convex, oil stain and good smoothness has poor printing performance. -
Page 31: Driver Installation And Uninstallation
3. Driver installation and uninstallation 3.1. How to install Windows printer driver Windows driver installation software provides two installing methods: one-click installation and manual installation.We recommend one-click installation, which can help to install driver automatically in a faster and more convenient way.If you have any difficulty in using one-click installation, please try manual installation. - Page 32 4. Click on the "One-click installation" button in Method I and enter into the installation process. The process may need some time, and the duration is related to your computer configuration, please wait patiently. 5. After the installation, click "Print &Test Page" button. If your printer prints the test page successfully, it means that you have installed the driver correctly.
- Page 33 3.1.1.2. Method II: Connect the printer via wired network 1. Turn the power of printer and computer on. 2. Connect the computer to wired network. 3. Connect network cable to the network interface of printer, to make sure the printer is connected to computer network (please refer to Chapter 4 for network setup).
- Page 34 • Click on the "One-click installation" button to enter installation process if your software has searched only one printer. The process may need some time, and the duration is related to your computer configuration. Please wait patiently.
- Page 35 • If your software has searched several printers, click on the"One-click intallation" button, and the printer list interface will pop up. Please select the printer that you need according to your printer wired network IP address or host ID. • If the printer you need is not shown in the list, please click "Refresh" button to search Note: again.
- Page 36 3.1.1.3. Method III: Connect the printer via wireless network Please check if the printer is connected with wireless network when installing the printer driver software. If disconnected, please install it with reference to Chapter 3.1.1.3.1. If connected, please install it with reference to Chapter 3.1.1.3.2.
- Page 37 • Click "One-click installation" button if your software has searched only one printer, and enter into installation process to complete automatic network configuration and driver installation.
- Page 38 • If your software has searched several printers, click "One-click intallation" button, and the printer list interface will pop up. Please select "Configure printer with Wi-Fi via USB and install" and select USB printer, click "Confirm" button and enter into installation process to complete automatic network configuration and driver installation.
- Page 39 II.Connect computer to router via network cable 1. Connect computer to router via network cable. 2. Connect the printer to computer via USB cable, then power the printer on. 3. Place the attached installation CD in the computer CD-ROM: • Windows XP system: automatically run the installation procedure. •...
- Page 40 • Click on the "One-click installation" button if your software has only searched only one printe, and the wireless network configuration interface will pop up, input the SSID and password that you need, then click "Confirm" button, and enter into installation process. The process may need some time, and the duration is related to your computer configuration, please wait patiently.
- Page 41 • If your software has searched more than one printers, the printer list interface will pop up.You need to configure the current printer which is connected via USB cable to wireless network and install driver. Please select "Configure the print via USB and install" on the printer list interface and check the USB printer option.
- Page 42 • When the printer IP address changes under printer driver installed with host ID , you Note: can also directly print without re-installing the driver. If you need to install the printer driver with the host ID, please check the option "Install the printer in the list with host ID". 6.
- Page 43 4. Read and agree to the terms contained in the End User License Agreement and the Privacy Policy, click the “Next” button in the lower right corner of the interface to enter the driver installation interface. 5. Click on the "One-click installation" button in Method III, and enter into installation process. The process may need some time, and the duration is related to your computer configuration, please wait patiently.
- Page 44 3.1.1.3.2. The printer is already connected to wireless network 1. The printer is already connected to wireless network, you can print the "Network configuration page" to check.(See Chapter 7.4 to for how to print). 2. Connect the computer to printer network. 3.
- Page 45 • Click on the "One-click installation" button to enter installation process if your software has searched only one printer. The process may need some time, and the duration is related to your computer configuration. Please wait patiently.
- Page 46 • If the software has searched several printers, the printer list interface will pop up. Please select the printer you need according to your printer wired network IP address or host ID . • If the printer you need is not shown in the list, please click "Refresh" button to search Note: again.
-
Page 47: Manual Installation
3.1.2. Manual installation • Before installing the drive, you need to learn about printer model by printing printer information page out and check the product name (please refer to Chapter 7.4 for printing methods). 3.1.2.1. Installation via USB connection 1. Connect the printer to computer via USB cable, power the printer and computer on. 2. - Page 48 8. After the installation, click "Print &Test Page" button. If your printer prints the test page successfully, it means that you have installed the driver correctly. 3.1.2.2. Installation via wired network connection 1. Turn the power of printer and computer on. 2.
- Page 49 9. The installation software will search the printer automatically and the searching process may need some time. 10. After finishing searching, select the printer that needs to be connected and click “Next”. • If the printer you need to connect is not in the list of printers searched, please click Note: “Refresh”...
- Page 50 • Windows 8 system: When the " DVD RW driver" window pops up from the right top corner of computer desktop, click anywhere in the pop-up window, then click "Autorun.exe" to run the installation procedure. • Windows 10 system: When the "DVD RW driver" window pops up from the right top corner of computer desktop, click anywhere in the window, then click "Autorun.exe"...
- Page 51 8. Select “Yes, I want to configurate the printer's wireless network” on the wireless setup window popped out, and operate according to the prompts to set up the printer to wireless network (please refer to Chapter 5.1.1 for setup method). 9.
- Page 52 11. The software installs the driver automatically and the installation process may need some time. The duration is related to your computer configuration, please wait patiently. 12. After the installation, click "Print &Test Page" button. If your printer prints the test page successfully, it means that you have installed the driver correctly.
- Page 53 8. Select “No, the printer has been connected to wireless network” on the wireless setup window popping out, and then click “Next”. 9. The installation software will search the printer automatically and the searching process may need some time. 10. Select the printer needs to be connected and click “Next”. •...
-
Page 54: Method Of Driver Unistallation
1. Turn the power of printer and computer on. 2. Insert the CD companying with printer in the CD driver of your computer, and double click Pantum XXX Series installation package. (XXX in Pantum XXX Series represents product model.) - Page 55 3. Click “Continue”. 4. Read licensing agreement and then click “Continue”. 5. Click “Agree” on the prompt window popping out to accept the licensing agreement. 6. Read the Privacy Policy and press "Continue". 7. In the popped-up prompt window, press "Agree" to accept the Privacy Policy. 8.
- Page 56 9. Input computer password and click “Install Software”. 10. Click “Continue Installation” on the prompt window popping out. 11. The system will finish driver installation automatically. • If using a USB cable to connect a computer with a Wi-Fi model printer, a wireless network configuration prompt window will pop up during driver installation, as shown in following picture.
-
Page 57: Add Printer To Macos System
3.3. Add printer to macOS system 3.3.1. Add up the printer via USB 1. Connect the printer to computer with USB cable and then turn power on. 2. Enter the “System Preferences” – “Printers & Scanners” of computer. button to select “Add Printer or Scanner”. 3. -
Page 58: Add Airprint Printer
3.3.4. Add AirPrint printer 1. Turn the power of printer and computer on. 2. Make sure the connection between printer and computer is set up (USB connection or network connection). 3. Enter the “System Preferences” – “Printers & Scanners” of computer. button to select “Add Printer or Scanner”. -
Page 59: Wired Network Settings (For Printer Models That Support Wired Network Printing)
• Due to printer upgrades, some functions may be different, depending on the model Note: you purchased. If you have any questions, please contact Pantum Customer Service. 4.1. Install the Printer to Network Please refer to Chapter 3.1... -
Page 60: Set Or Change Web Server Login Password
4.2.2. Set or Change Web Server Login Password You can manage the printer through User Management. Steps: 1) After opening the built-in WEB server, log in (default user name is admin, default password is 000000). 2) Click "User Management" to execute proper actions. -
Page 61: Wireless Network Setup (Applicable To Wi-Fi Models)
5. Wireless network setup (applicable to Wi-Fi models) Depending on model, the printer with Wi-Fi printing function supports the two types of wireless network connection of both infrastructure connection and Wi-Fi hotspot connection, while there is usually only one connection between computer and printer at a time. If you have problems during wireless network setup, please refer to Chapter 5.3 Wireless Network Setup Frequently Asked... -
Page 62: Wireless Network Setup Tools
5.1.1.2. Setup methods of wireless network setup tools 1. Take the wireless network setup tool in computer. 1) Windows system: Click the “Start menu” – “All programs” - “Pantum”- Product name – “Wireless network setup tool”. 2) Mac system: click "Go" - "Applications" - "Pantum" - "Utilities" - "Wireless Network Configuration Tool"... - Page 63 2.1 The computer has been connected to wireless network. 1) The currently wireless network currently connected to computer is selected as wireless network configuration tool by default. Complete configuration according to interface prompt. • The SSID you selected should be consistent with the SSID of access point (wireless Note:...
- Page 64 • Encryption method: Note: 1) None: There is no encryption method used. 2) WPA/WPA2: it is the pre-shared key (PSK) of Wi-Fi protected access which connects wireless device and access point via TKIP or AES encryption (WPS-Personal). The working length of WPA/WPA2 is within the PSK of 8-63 characters.
- Page 65 3. Use WPS connection . Select “No, I don't have a USB cable” in the interface below and then click “Next”. 1) Use WPS method to perform steps below to start wireless network on printer. (Please refer to Chapter 5.1.2 for detailed WPS configuration)
-
Page 66: Wi-Fi Protected Setup (Wps) Setup
2) Judge if the printer is successfully connected according to the status of Wi-Fi indicator on printer. If configuration failed, please click “Previous” to configure again; if configuration succeeded, please click “Done” to complete configuration. • If the printer cannot be used normally after wireless network setup is finished, please Note:... -
Page 67: How To Disable The Wi-Fi Network Connected
If the connection is not established after more than 2min, the printer will return to its ready state, the Wi-Fi indicator will be off and Wi-Fi Protected Setup (WPS) connection will fail. If it is needed to connect again, please repeat steps 3-4 above. •... - Page 68 • Every time when the setup of access point (wireless router) is changed, you must set up the wireless network of printer again. 3. Connection failure • Please inspect if the safe mode and password of access point (wireless router) and printer is correct.
-
Page 69: Mobile Print/Scan/Fax (For Models With Wi-Fi Function Only)
6.1.3.1.2. Operation steps 1. Turn on printer power. 2. For an Android mobile device, tap the “PANTUM” icon on the main screen to enter the first interface of “PANTUM”. 3. Select the connection method according to your habit to connect the printer. -
Page 70: Mopria Mobile Print
6.1.3.2.2. Operation steps 1. Turn on printer power. 2. For an iOS mobile device, tap the “PANTUM” icon on the main screen to enter the first interface of “PANTUM”. 3. Select the connection method according to your habit to connect the printer. -
Page 71: How To Use Mopria Mobile Printing
3. Open the files you need to print with Adobe Reader on the Android device. 4. Click 5.Tap "print". 6.Please make sure the Pantum printer is selected. If you selected other printer (or failed to select any printer), please tap the pull-down menu of printer, and select your Pantum printer. - Page 72 4. Click 5.Tap "print". 6.Please make sure the Pantum printer is selected. If you select other printers (or no printer), please click printer option and then select your Pantum printer. 7. Set printing parameters such as number of copies to print.
-
Page 73: General Settings
7. General Settings This chapter mainly introduces some general settings of the menu on the control panel. 7.1. System Settings 7.1.1. Toner Save Setting Users can select Toner Save Setting to lower the cost of printing. When the Toner Save mode is "On", the output color of the copy will be lighter. -
Page 74: Language Setting
7.1.2. Language Setting "Language Setting" is used to select the language to be displayed on the control panel. 1) Press "Menu" button to enter the menu interface. 2) Press direction pad "▲" or "▼" to select "System Setting" and press OK button. 3) Press "▲"... -
Page 75: Restore To Factory Settings
7.1.3. Restore to Factory Settings "Restore Factory Settings" is used to restore the default settings of the printer. 1) Press "Menu" button to enter the menu interface. 2) Press direction pad "▲" or "▼" to select "System Setting" and press OK button. 3) Select "Restore set"... -
Page 76: Sleep Time Setting
7.1.4. Sleep Time Setting Set the Sleep Mode to lower the power consumption. Sleep Time Setting allows you to select the idle time before the device enter into Sleep Mode. The default idle time is 1 minute. 1) Press "Menu" button to enter the menu interface. 2) Press direction pad "▲"... -
Page 77: Auto Shut-Off Setting
7.1.5. Auto shut-off setting "Auto shut-off setting" to set off condition and off delay of printer. 1) Press "Menu" button to enter the menu interface. 2) Press direction pad "▲" or "▼" to select "System Setting" and press OK button. 3) Press direction key "▲"or "▼"... -
Page 78: Network Settings
7.2. Network Settings You can view or set the network status through Network Settings. 1) Press "Menu" button to enter the menu interface. 2) Navigate to "Network Set" option and press "OK" to configure the network. M6200/M6500/M6550 Series M6600 Series... -
Page 79: Network Information
7.3. Network Information Users can check the network status through Network Information. 1) Press "Menu" button to enter the menu interface. 2) Navigate to "Network Info" option to check the relevant information on the network. M6200/M6500/M6550 Series M6600 Series... -
Page 80: Information Report
7.4. Information report You can print information report by operating control panel. These pages can help you to learn about product information, and diagnose and solve product failures. 1) Press "Menu" button to enter the menu interface. 2) Press "▲" or "▼" to select "Info.report". 3) Press “OK”... -
Page 81: Print
8. Print 8.1. Print Function You can set the print function through "Start"-"Device and Printer"- select corresponding printer- right click – set print function in "Print Preferences". Some functions are as follows: Functions Diagram Manual Duplex Collate Print Reverse Print N-in-1 Poster Print (for Windows Operation System only) -
Page 82: Open Help Document
8.2. Open Help Document You can open the "Printing Preferences" and click "Help" button (for Windows Operation System only). The help document contains the user guide where you can find the information on print settings. -
Page 83: Duplex Print
8.3. Duplex Print 1) The printer driver supports manual duplex. • If the paper is thin, it may wrinkle. Note: • If the paper is curled, make it flat and put it back into the manual feeder tray. • If the manual duplex function causes a paper jam, see Chapter 13.1 for handling it. - Page 84 Select Pantum printer Click "Preferences" to set printing. c) Set options in "Manual Duplex" of the "Basic" tab and click "OK" after completing the settings.
- Page 85 d) Click "Print". • It is recommended to raise the output tray to prevent the paper from sliding out of it. If Note: you choose not to raise the output tray, we recommend that you immediately remove the printed paper output from the printer. e) Send the print task after choosing Manual Duplex, then the following prompt window will appear, telling you the next specific operations.
-
Page 86: Cancel Print Job
f) After turning over the paper according to the prompt, press "OK" button of the printer to go on printing the other side. g) You can click "Close" button to close this prompt window, and it will not appear until the next Manual Duplex job comes in. -
Page 87: Mac System Print
8.5. Mac System Print Operation Steps: 1. After installing the printer’s driver, click on "System Preferences" on the bottom left corner. 2. After the window pops up, click on "Print and Scan". - Page 88 3. After the window pops up, select "Print". 4. Select printer 1) For USB Model printer: plug the USB cable, the corresponding printer will automatically show in the left list. 2) For NET Model printer: plug the network cable, click on symbol "+" at the bottom of the left list to add printer.
- Page 89 3) For Wi-Fi Model printer: select the Wi-Fi icon on the top right corner of the page, click on "Open Network Preferences" in the list. After the window pops up, click on SSID.
- Page 90 Select the corresponding SSID. 5.Open the document to be printed, click on "Document" – "Print".
- Page 91 After the window pops up, set the printing parameters, and press the "Print" button on the top right corner.
-
Page 92: Copying
9. Copying 9.1. Copying function M6200/M6500/ Copying function M6550/M6600 Series MS6000 Series ● ● Image quality ● ● Intensity ● ● Resizing ● ● Multipage ● ● Clone Common copying ● ● Poster ○ ● Collated copy ○ ● Manual dual-side ●... -
Page 93: Common Copying Setting
9.4. Common copying setting Change relevant setting with “copying setting menu” for better copying effect. 1. Press “copying key” on control panel and then press “OK key” to enter “copying setting” interface. 2. Press “direction key” to select options and then press “OK key” to enter setting interface. 3. -
Page 94: Multipage
2.“Manual adjustment” applies to copying with glass platform only, the adjustment scope of which is 25%-400% and 5% can be adjusted each time after “direction key” is pressed once. 9.4.4.Multipage 2 or 4 pages of texts can be copied on one piece of paper with multipage setting. The multipage includes 3 modes: Two-in-one: Horizontal four-in-one:... -
Page 95: Poster
9.4.6.Poster Poster setting enables the printing of one piece of original document on several pieces of paper. The poster copying includes 3 modes: 2x2: 3x3: 4X4: • The “poster” and “resizing function” cannot be set at the same time. Note: 9.4.7.Collated copy The “collated copy”... -
Page 96: Manual Dual-Side
9.4.8.Manual dual-side If the original document is copied on both sides manually, please select ADF feeding mode. The manual dual-side includes 2 modes: Closed: supporting single side copying. Open: 9.4.9.Paper setting By paper setting, you can set suitable paper dimension and type. Paper dimension: A4, Letter, B5, A5, A6, Executive, Legal and Folio. -
Page 97: Arrangement Mode
9.5.1.Arrangement mode There are 4 arrange modes for ID card copying totally: Whole page up-down Half page up-down Half page left-right A5 left and right Position: Half page up-down: default mode; put ID card at “orange left half area” of glass platform. Half-page up-down, half page left-right or long side of A5 paper: put ID card at “blue area”... -
Page 98: Receipt Setting
9.6. Receipt setting Change relevant setting with “copying setting menu” for better copying effect. 1. Press “receipt copying key” on control panel and then press “OK key” to enter “copying setting “interface. 2. Press “direction key” to select options and then press “OK key” to enter setting interface. 3. -
Page 99: Scan
10. Scan This printer provides two types of scan: "Push Scan", which means scanning through the printer’s Control Panel operations; "Pull Scan" which means scanning through PC terminal scanning the application. 10.1. Push Scan 10.1.1. Steps for Push Scan with Tablet This section introduces how to scan documents to the PC (only through USB cable connection) with control panel of the printer. -
Page 100: Steps For Push Scan With Automatic Document Feeder(Adf)
10.1.2. Steps for Push Scan with Automatic Document Feeder(ADF) (For M6550/M6600 Series models only) 1) For information about Manuscript Loading Procedures, see 2.5. 2) Press Scan on the Control Panel and press direction pad "▲" or "▼" to select Single Page Scan or Merge Scan to enter into the Scan mode. - Page 101 2. Press "▲" or "▼" button to select and enter "Merge Scan" mode. M6200/M6500/M6550 Series M6600 Series 3. Press "Start" button and the Scan Process Bar Interface will pop up on the computer. 4. After completing scanning the first page, the contents as shown below will appear on the control panel: Press "Start"...
-
Page 102: Other Scan Functions
10.1.5. Other Scan Functions 1. Scan to E-mail Users can scan monochrome or color documents as attachments to E-mail application. Operation steps as follows: ① Type the IP address in the Web browser's address bar to access the embedded Web server of the printer. - Page 103 ④ Click on "New" and the following window will pops up, edit the name of contacts ,input the E-mail address and then click on "Submit". ⑤ Put the document on the platen. M6200/M6500 Series M6550/M6600 Series ⑥ Press "Scan" button on the control panel, and press “▲” or “▼" to select "1. Single Page Scan"...
- Page 104 2. Scan to FTP Scanning to FTP requires a network environment. Users can scan comparatively large files online. Users need to log in FTP server with user name and password and install IIS Component on the computer. 1) Operation Steps: ①...
- Page 105 FTP Server: IP Address of the server (such as 10.10.145.100 ) Port Number: Default port number is 21 Login Name: For example, anonymous Password: such as (anonymous login needs no password) Confirm Password: For example (anonymous login needs no password) Server Name: For example, Pantum...
-
Page 106: Pull Scan
10.2.1. Pantum Scan Application Operation Steps: 1) Double click on "Pantum Scan Application" on the computer, the icon is shown as below: 2) The prompt window is shown as below: 3) Set Scan in the right list. Click "Scan" on the bottom right corner and start scan. -
Page 107: Twain Scan Driver
10.2.2. TWAIN Scan Driver 10.2.2.1. Office Software (Word and Excel) Operation Steps: 1) Keyboard shortcuts: Alt+I+P+S to open the application’s window. 2) Click on "Device" option and select TWAIN Scan, click the “Custom Insert” button below. 3) After the window pops up, set the scan information in the right list of "Basic Setting" and "Advanced Setting". - Page 108 If you desire to change a scanning port, please click "Port" at the lower part of above picture to select a scanning port, as shown below: 10.2.2.2. Photoshop Operation Steps: 1) Launch Photoshop, click on "File" – "Import" on the top left corner, select TWAIN Scan, as is shown below: 2) After the window pops up, please refer to Step 3 of 10.2.2.1...
-
Page 109: Wia Scan Driver
10.2.3. WIA Scan Driver 10.2.3.1. WIA1.0 Scan (Windows XP / Windows Server 2003) 1. Office Software (Word and Excel) Operation Steps: 1) Keyboard shortcuts: Alt+I+P+S to open the application’s window. 2) Click on "Device" and select WIA Scan,click the “Custom Insert” below. 3) The prompt window as is shown below, set the scan information. - Page 110 4) Click on "Adjust the Scanned Image Quality" on the bottom left corner of the above picture, the advanced properties interface will pop up, then users can set the scan; After finishing the settings, click on the "OK" button, then "Scan" button to start scan. 2.Photoshop Operation Steps: 1) Launch Photoshop, click "File"- "Import"...
- Page 111 2) After the window pops up, please refer to Step 3 and Step 4 of 10.2.3.1 to see the specific operation steps. 10.2.3.2. WIA 2.0 Scan (Windows Vista / Windows Server 2008 and later versions) Operation Steps: 1) Click on "Start"- "All Programs"- "Device and Printer" on the left bottom of the desktop. 2) When the pop-up window appears, select the printer you want to use, and right click the mouse.
-
Page 112: Cancel Scan Job
3) Click on "Start Scan" in the above option bar. 4) After the window pops up, set the scan and click "Scan" on the bottom right corner and start scan. 10.2.4. Cancel Scan Job During the scanning, two ways are available to cancel the job: 1) Press "Cancel"... -
Page 113: Macos System Scan
10.3. macOS System Scan 10.3.1. ICA Scan 10.3.1.1. Open ICA via "Print and Scan" Operation Steps: 1. After installing the printer driver, click "System Preferences" icon on the bottom left corner of the computer desktop. 2. After the window pops up, click on "Print and Scan". - Page 114 3. After the window pops up, click on "Scan". 4. Click on "Open Scanner" and the scan window will pop up.
- Page 115 5. Click on "Show Details" on the bottom right corner to set the scan parameters. 6. Click on "Scan" on the bottom right corner and start scan.
- Page 116 10.3.1.2. Call CIA through applications Operation Steps: 1) Click on "Finder" icon on the bottom left corner of the computer desktop, or use keyboard shortcuts command+shift+C to open the window. Find "Image Capture" in "Applications" (or conduct keyboard shortcuts command+shift+A to directly switch to "Applications") and click to launch the application.
-
Page 117: Twain Scan
10.3.2. TWAIN Scan Take Photoshop as an example. Operation Steps: 1) Launch Photoshop, click on "File" – "Import" on the top left corner and select TWAIN Scan, as is shown below: 2) After the window pops up, please refer to Step 3 of 10.2.2.1 to see the specific operation steps. -
Page 118: Fax
11. Fax 11.1. Connect Devices Connect the Fax accessories to the phone line This product includes two Fax ports: • Connect this product to the " " port of the telephone jack on the wall. • Connect the auxiliary devices to the "; "... - Page 119 2) Choose the Fax option you want to set by pressing the page up and down keys. 3) Nine settings are available here. The following is the instruction on these settings: No. Options Description You can select the image quality of the Fax. The available options are Resolution Normal, Fine and Super fine, and the default is Normal.
- Page 120 Another way is to specify the Fax Settings in the Menu Settings 1) When the machine is ready, press the menu button and press the up button "▲" or the down button "▼" to select Fax settings; 2) Press the OK button to enter the Fax setting options and press the up button "▲" or the down button "▼"...
-
Page 121: Fax Functions
3) Three categories of Fax setting options are available here. The following is the instruction on these settings: No. Options Description You can use the options in Send Settings to set the parameters for sending Send Settings Fax. Receive You can use the options in Receive Settings to set the parameters for receiving Settings Fax. - Page 122 3) Press the Start button to start scanning the document. 4) Press the OK button to initiate the Fax job.
- Page 123 Send a Fax from the automatic document feeder (ADF) 1) Put the document face up into the automatic document feeder. • Automatic document feeder can accommodate up to 35 sheets of medium measuring Note: 75 g/m2 or 20 pounds. • In order to prevent damage to this product, do not use a manuscript with correction tape, correction fluid, paper clips or staples on it.
-
Page 124: Receive Fax
4) Press the Start button to start scanning the document with the automatic document feeder. 11.3.2. Receive Fax You have two ways to receive Fax, and the default for the printer is Fax mode. Fax mode, which is the automatic receiving mode, sends Faxes to the printer, and the printer receives the Fax automatically when the ring reaches the specified number of times;... -
Page 125: Other Scan Functions
In the phone mode, you have 3 ways to receive a Fax: 1) Press the Start button on the Control Panel and the machine starts to receive the Fax; 2) Take the phone handle or press the Speaker button on the Control Panel and press the Start button for the machine to start receiving the Fax;... - Page 126 3) You can press the OK button and enter each Fax number to which you want to send Fax. 4) When the input is complete, press the Start button to start scanning documents.
- Page 127 5) When the scan is complete, press the OK button to begin the group sending Fax job. Delay Sending You can enable Delay sending of Fax through the Control Panel. When this process is complete, the printer will scan the document to the memory, and get back to Ready state. The specific operations are as follows: 1) On the Control Panel, click on the Fax button to enter the Fax mode.
- Page 128 3) Set the Fax number, job name, and delay period as prompted. 4) When the input is complete, press the OK button to scan the Fax document to the memory and get back to Ready state. Fax Forwarding You can forward the Fax you receive. When you receive a Fax job, it will be stored in memory at first.
- Page 129 The Fax Forwarding feature of this printer is available in two modes: One mode is Forward to Fax: When you receive a Fax, the printer will send the Fax to the specified Fax number rather than printing it. The other mode is Forward and Print: With the Forward to Fax enabled, if you enable Forward and Print when you receive a Fax, the printer will print the Fax and also forward one copy of the Fax to the forwarded number you have set.
- Page 130 4) When the input is complete, press the OK button and the received Fax will be automatically forwarded to the specified Fax number. Automatic Redial If the number you have dialed is busy or is not responding when you send a Fax, the machine will automatically redial the number.
-
Page 131: Contacts
Auto Shrink operations are as follows: 1) On the Control Panel, press Menu > Fax Settings > Receive Settings > Auto Shrink. 2) Set it to Turn On or Turn Off the auto shrink function and set the shrink size. 3) When you complete the setup, press the OK button to save the settings. -
Page 132: Cancel Fax
4)Press OK key to confirm work to be cancelled. 11.6. Pantum PC-Fax Software Pantum PC-Fax function allows you to send a document from your computer as a Fax. 11.6.1. Open With 1) Open a Fax file that you want to send... -
Page 133: Sending Fax With Pc-Fax
3) Select Pantum M6600NW Series Fax as the printer, click Print and the "Pantum will send Fax" interface appears. 11.6.2. Sending Fax with PC-Fax The operation steps for sending Fax with PC-Fax are as follows: 1) Open the PC-Fax software and the "Pantum will send Fax" interface appears. -
Page 134: Basic Settings For Pc-Fax
You can use the Fax Settings to set the Paper and Quality of the Fax that is sent with the PC-Fax. The specific operations are as follows 1) Open the PC-Fax software. 2) Select Pantum M6600NW Series Fax as the printer, click Printing Preferences and the Fax Settings interface appears. 3) Select the Paper, Orientation and Resolution as you want. -
Page 135: Other Functions For Sending Fax With Pc-Fax
The specific operations are as follows: Edit the Contacts in PC-Fax 1) Open the PC-Fax software and the "Pantum will send Fax" interface appears. 2) Click Show Contacts and the Contacts interface pops up on the right. Click Read to read the local Contacts list on the printer. - Page 136 If you want to use a Fax cover page, you can use the following steps to set the Cover Settings. 1) Open the PC-Fax software and the ”Pantum will send Fax" interface appears. 2) Check Use Cover at the bottom left corner and click Cover Settings to enter the Cover Settings interface.
-
Page 137: Routine Maintenance
12. Routine Maintenance 12.1. Cleaning the Printer • Please use mild detergents. Note: Please clean the printer in accordance with the following steps: 1. Turn off the main power switch and unplug the power cord, USB cable, phone cord and the network cable. - Page 138 4. Raise the scanning platform until it is locked. M6200/M6500 Series M6550/M6600 Series 5. Open the output bin by the upper right ridge of the concave section. M6200/M6500 Series M6550/M6600 Series 6. Remove the laser toner cartridge along the guides. M6200/M6500 Series M6550/M6600 Series...
- Page 139 Warning Some parts of the printer are still hot within a short time after use. When opening the front cover or rear cover to clean the parts inside the printer, please do not touch the parts in the shaded area as shown in the following picture, so as to avoid burns. •...
-
Page 140: Maintenance Of Laser Toner Cartridge
12.2. Maintenance of Laser Toner Cartridge 12.2.1. Use and Maintenance of Laser Toner Cartridge For better print quality, please use the original Pantum laser toner cartridge. Note: when using the laser toner cartridge, please pay attention to the following: •... -
Page 141: Replace Laser Toner Cartridge
12.2.3. Replace Laser Toner Cartridge Note: Before replacing the laser toner cartridge, please pay attention to the following: • The laser toner cartridge surface may contain toner. Please remove it carefully to avoid spilling. • Put the removed laser toner cartridge on a piece of paper to avoid the toner from accidentally spilling. - Page 142 3. Remove the exhausted cartridge along the guides. M6200/M6500 Series M6550/M6600 Series 4. Open the package of a new laser toner cartridge, hold the handle of the cartridge and gently shake around 5 to 6 times, so as to make the toner evenly distributed inside the cartridge. 5.
- Page 143 • Check whether there is any seal before installing the laser toner cartridge into the Note: printer; if there is any, please tear off the seal and then install the cartridge. 6. Cover the output bin and close the scanning platform. M6200/M6500 Series M6550/M6600 Series 7.
-
Page 144: Troubleshooting
If the printer still does not start printing, please check whether all the jammed paper inside the printer are cleared. If you can not remove the jammed paper yourself, please contact your local Pantum Authorized Repair Center or send the printer to the nearest Pantum Authorized Service Center for repair. - Page 145 2) Open the output bin by the upper right ridge of the concave section. M6200/M6500 Series M6550/M6600 Series 3) Remove the laser toner cartridge along the guides. M6200/M6500 Series M6550/M6600 Series 4) Gently draw the jammed paper out along the paper output direction. M6200/M6500 Series M6550/M6600 Series...
-
Page 146: Error Message
5) Neatly put the paper in the tray , and do not carry out the next print until the indicator light resumes print-ready status. 7) If you can not remove the jammed paper yourself, please contact your local Pantum Authorized Repair Center or send the printer to the nearest Pantum Authorized Service Center for repair. -
Page 147: Common Troubleshooting
No paper in ADF this message appears when you start a copy or paper. scan job without loading paper in the ADF. • If the problem remains, please contact Pantum Customer Service. Note: 13.3. Common Troubleshooting 13.3.1. Common Trouble Trouble Type Trouble... - Page 148 • Re-separate the print • Internal parts failure. media or use new print media. • If the trouble still can not be shooted after the above operations, please contact Pantum Note: Customer Service.
-
Page 149: Image Defects
13.3.2. Image Defects Trouble Cause Solution • Toner is low. • Please properly use the print • The print media does not meet usage media within the specification specification, such as the media is damp or range. • Set the print resolution, too rough. - Page 150 • The laser toner cartridge is dirty. • Clean the laser toner cartridge • The internal part of the laser toner cartridge or replace it with a new one. • Please contact Pantum is damaged. • The fuser component is damaged. Customer Service to repair and replace the fuser component.
- Page 151 • The laser toner cartridge might be damaged. • The internal part of the printer is damaged. Horizontal stripes • The above troubles can be handled by cleaning or replacing the laser toner cartridge. Note: If the problem remains, please contact Pantum Customer Service.
-
Page 152: Menu Structure
14. Menu Structure With the help of menu structure of this printer on the panel menu, you may know and set various functions. The steps of printing are as follows: 1. Press "Menu" to enter the menu setting interface. 2. Press "▲" or "▼" to select "Info. report". 3. -
Page 153: Product Specifications
• Specification values vary slightly from printers with different models with different Note: functions ,and product specifications vary from different countries and regions. • These values are based on the initial data. For more information about the latest specifications, please visit: www.pantum.com. 15.1.Overview of the Specifications M6200/M6500 Series: 417mm*305mm*244mm Product Size... -
Page 154: Print Specifications
Hi-speed USB 2.0 Communication 100Base-Tx Ethernet (Applicable for network model) interface Wi-Fi 802.11b/g/n (Applicable for Wi-Fi model only) Processor 600MHz Memory 128MB/256MB 15.2.Print Specifications M6200/M6500 Series: (A4 20/22ppm)/(Letter 21/23ppm) Print Speed M6550/M6600 Series: (A4 22ppm)/(Letter 23ppm) Print Time of First Page <7.8sec Print Language 15.3.Copy Specifications... -
Page 155: Fax Specifications (For M6600 Series Models Only)
15.5. Fax Specifications (For M6600 Series models only) Fax Type Black-and-white Modem Speed 33.6Kbps Fax Memory 650 pages Encoding MH/MR/MMR Compatibility ITU-T SG3/ECM Other Fax PC-FAX (Send), Fax Filtering, Group Sending, Fax Forwarding, Speed Dial, Functions Group Dial, Delay Sending, Auto Redial, Auto Receive, Auto Shrink, Mobile Fax Environment Not supported in the following environment: ADSL, ISDN •...
Need help?
Do you have a question about the M6200 Series and is the answer not in the manual?
Questions and answers
Printer Error 07 service call