Pantum M6200 User Manual
Monochrome laser mfp
Hide thumbs
Also See for M6200:
- User manual (156 pages) ,
- Maintenance manual (108 pages) ,
- User manual (158 pages)

Related Manuals for Pantum M6200


Summary of Contents for Pantum M6200
- Page 1 User Guide Pantum M6200/M6500/M6550 Series Pantum M6600 Series Monochrome Laser MFP It is recommended to carefully read this Guide before using the printer...
-
Page 2: Legal Notice
Zhuhai Pantum Electronics Co.,Ltd. Version: V1.0 Disclaimer For a better user experience, Zhuhai Pantum Electronics Co.,Ltd. reserves the right to make changes to the User Guide. The information contained herein is subject to change without notice. -
Page 3: Safety Precautions
Safety Precautions Laser Safety The laser radiation is harmful to the human body. Since laser components are completely sealed in the printer, laser radiation will not leak. To avoid laser radiation, please do not randomly disassemble the printer! The printer follows the provisions of Class 1 laser products under CFR standard. The printer has a Class III b laser diode, which has no laser radiation leakage among laser components. - Page 4 Pantum Aftersales Service Centre, if the toner comes off the printed contents, or the equipment starts slowly; 23. This product is sold as a complete machine. The consumers can go to Pantum Aftersales Service Centre to purchase parts they need. If the product sold is inconsistent with the package list, please go to the specified Aftersales Service Centre to solve the problem;...
- Page 5 installed and used in accordance with the instructions, may cause harmful interference to radio communications. However, there is no guarantee that interference will not occur in a particular installation. If this equipment does cause harmful interference to radio or television reception, which can be determined by turning the equipment off and on, the user is encouraged to try to correct the interference by one or more of the following measures: • Reorient or relocate the receiving antenna.
-
Page 6: Legal Information
This product complies with the protection requirements of EC directives 2004/108/EC and 2006/95/EC on the approximation and harmonization of the laws of the Member States relating to electromagnetic compatibility and safety of electrical equipment designed for use within certain voltage limits. The manufacturer of this product is: Zhuhai Pantum Electronics Co.,Ltd., No.3883, Zhuhai Avenue, Zhuhai, Guangdong, China 519060. A declaration of conformity to the requirements of the Directives is available upon request from the Authorized Representative. -
Page 7: Table Of Contents
5.4. Turn off the Wireless Connection .....................5-5 6. Pantum Mobile Print, Mobile Scan and Mobile Fax ................6-2 6.1. Introduction to Pantum Mobile Print, Mobile Scan and Mobile Fax .........6-2 6.1.1. What’s Pantum Mobile Print, Mobile Scan and Mobile Fax? ..........6-2 6.1.2. - Page 8 11.3.3. Other Scan Functions ....................11-8 11.4. Contacts ..........................11-12 11.5. Cancel Fax ......................... 11-13 11.6. Pantum PC-Fax Software ....................11-14 11.6.1. Open With ........................11-14 11.6.2. Sending Fax with PC-Fax .................... 11-14 11.6.3. Basic Settings for PC-Fax ................... 11-15 11.6.4.
- Page 9 12.2. Maintenance of Laser Toner Cartridge ................12-5 12.2.1. Use and Maintenance of Laser Toner Cartridge ............12-5 12.2.2. Service Life of the Laser Toner Cartridge ..............12-5 12.2.3. Replace Laser Toner Cartridge ..................12-5 13. Troubleshooting ..........................13-2 13.1. Clearing Jammed Paper ......................13-2 13.2. Error Message ........................13-4 13.3.
-
Page 10: Before Using The Printer
Before Using the Printer Chapter 1. Before Using the Printer ........................2 1.1. Introduction of Models ........................2 1.2. Supplied Accessories ........................3 1.3. Product View ..........................4 1.4. Laser Toner Cartridge .........................8 1.5. Easily-Refilled Laser Toner Cartridge ..................8 1.5.1. Structure of Easily-Refilled Laser Cartridge .................8 1.5.2. -
Page 11: Introduction Of Models
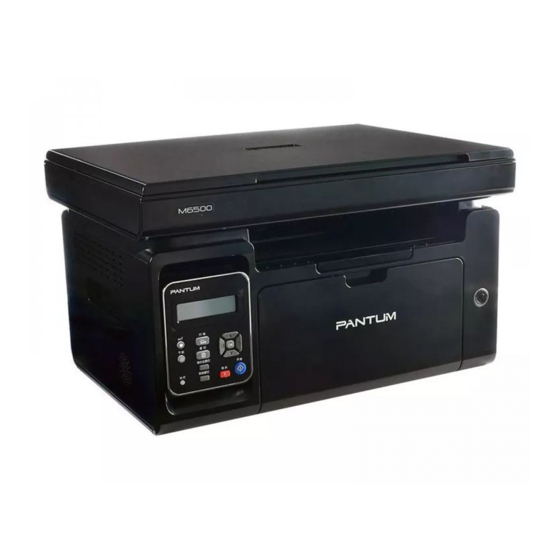
1. Before Using the Printer 1.1. Introduction of Models This product have the following configurations: Series Name M6200/M6500 Series Picture Basic Functions Print, Copy, Scan Basic Models USB Model, NET Model, WiFi Model • The maximum print speed of A4 paper is 20/22ppm, and that of letter paper is 21/23ppm. -
Page 12: Supplied Accessories
Phone Phone Cord Spiral Cable Note: • The Pantum Warranty may not be attached in some regions. • M6600 Series come with phone, phone cord and spiral cable in some countries. • Volume control is not available with the phone. -
Page 13: Product View
1.3. Product View | Side view (1) M6200/M6500 Series Cover Output Bin Control Panel M6550/M6600 Series Automatic document feeder Cover Output Bin Control Panel... - Page 14 | Side view (2) M6200/M6500 Series Glass Platen Scanning Platform Output Tray Automatic Feed Paper Deflector Paper Stop Feeder Tray Automatic Feeder Tray...
- Page 15 | Side view (2) M6550/M6600 Series Glass Platen Scanning Platform Output Tray Automatic Feed Paper Deflector Paper Stop Feeder Tray Automatic Feeder Tray...
- Page 16 | Rear View M6200/M6500 Series Diagram USB Interface Network Interface Power Interface Rear Cover M6550/M6600 Series Diagram USB Interface Network Interface Extension Interface (For M6600 Series only) Phone Cord Interface (For M6600 Series only) Rear Cover Power Interface Note: • The diagram may vary slightly with different models and functions.
-
Page 17: Laser Toner Cartridge
• Consumables capacity may vary with different using types. • It's not recommend using consumables other than the original Pantum consumables. • Any damages caused by using non-Pantum original consumables are not covered by the Warranty. 1.5. Easily-Refilled Laser Toner Cartridge 1.5.1. - Page 18 Open the cover of the waste toner port. Pour out the waste toner from the waste toner box. Close the cover of the waste toner port. Open the cover of the toner refilling port. Align the mouth of the toner bottle to the toner refilling port.
-
Page 19: Control Panel
1.6. Control Panel M6200/M6500/M6550 Series This button indicates the WiFi connection status (only WiFi button applicable to WiFi Model).For Non-WiFi Model,this button is for toner saving. Power Saving/ Press this button to switch to power saving status or wake the... - Page 20 M6600 Series Press this button, enter the number to dial, and then press the Speaker Start button to fax. This button allows you to redial the last number you dialed or Redial/Pause insert pause when you set up speed dial or dial manually. Contacts This button allows you to dial the speed dial number directly.
- Page 21 Press this button to access the menu options to make the Menu Button settings. Back Button Press this button to go back to the upper-level page "▲" and " ▼ " Press this button to browse through each menu and its options OK Button Press this button to save the settings This light indicates the ready, alarm or other statuses of the...
-
Page 22: Paper And Print Media
Paper and Print Media Chapter 2. Paper and Print Media ........................2 2.1. Paper Specification ........................2 2.2. Special Paper ..........................3 2.3. Non-printing Area and Non-scanning Area ................. 4 2.4. Load the Paper ...........................5 2.5. Paper and Manuscript Use Process ...................6 2.5.1. Scanning With Tablet ......................6 2.5.2. -
Page 23: Paper Specification
This may be due to incorrect operation, inappropriate temperature and humidity, or other factors beyond the control of Pantum. Before purchasing large quantities of print media, make sure that the print media meets the specifications specified in this User Guide. -
Page 24: Special Paper
2.2. Special Paper This printer supports using the special paper for printing. Special paper includes: label paper, envelope, transparent film, thick paper, thin paper, etc. Note: • When using special paper or print media, be sure to select matched print type and size in the print settings so as to get the best print effect. -
Page 25: Non-Printing Area And Non-Scanning Area
2.3. Non-printing Area and Non-scanning Area The shaded part indicates the non-printing area and non-scanning area. Usage Paper Size Top and Bottom Margins (A) Left and Right Margins (B) 5 mm (0.197 inch) 5 mm (0.197 inch) Print Letter 5 mm (0.197 inch) 5 mm (0.197 inch) 5 mm (0.197 inch) 5 mm (0.197 inch) -
Page 26: Load The Paper
2.4. Load the Paper Steps are as follows: a) Open the feeder tray. M6200/M6500/M6550 Series M6600 Series b) Slide the automatic feed guides to match both sides of the paper. M6200/M6500/M6550 Series M6600 Series c) Raise the output tray to avoid the paper from slipping and falling. -
Page 27: Paper And Manuscript Use Process
Adjust the paper stop to match the paper size. M6200/M6500/M6550 Series M6600 Series Note: • If the paper loaded into the automatic feeder tray at one time exceeds 150 pages, paper will jam or cannot be fed in. • When using the printed paper, please make the side to be printed (the blank side) up. - Page 28 2). Load the manuscript face down. M6200/M6500 Series M6550/M6600 Series 3). Align the manuscript to match the appropriate paper size. ID COPY Note: •If the manuscript does not match with any size marker, please align the upper-left corner of the manuscript with the arrow.
- Page 29 2.5.2. Scanning With Tablet (For M6550/M6600 series only) 1) Open the manuscript support flap of the automatic document feeder. 2) Load the manuscript into the automatic document feeder with the front-side up and the top of the manuscript entering into the feeder first. Note: •...
-
Page 30: Installation And Uninstallation Of The Driver Software
Installation and Uninstallation of the Driver Software Chapter 3. Installation and Uninstallation of the Driver Software ...............2 3.1. Windows-based Driver ........................2 3.1.1. Introduction .......................... 2 3.1.2. Installation Steps ........................2 3.1.3. Uninstallation ........................10 3.2. Mac-based Driver ........................12... -
Page 31: Windows-Based Driver
3.1.2.1 USB Model Installation (One Click Installation) 1) Running Interface After inserting the installation CD, the Pantum interface will pop up and the installation CD will run automatically. See the figure below: User authentication will be performed before the program runs. If the user is an administrator, this interface will be displayed. - Page 32 2) Language Interface When the running completes, the language interface appears where you can choose different languages as you like. Note: • you can click to see the user guide and the content of the License Agreement. 3) Installation Process Interface Click Install to enter into the Installation Process interface.
- Page 33 3.1.2.2. NET Model ( Wired and Wireless Networks) 1) Running Interface After inserting the installation CD, the Pantum interface will pop up and the installation CD will run automatically. See the figure below: User authentication will be performed before the program runs. If the user is an administrator, this interface will be displayed.
- Page 34 2) Installation Configuration After the running interface ends, it will enter into Installation Configuration interface. Users will select the corresponding series, language and model according to the purchased printer model. Installation Instruction: USB Printer: applicable to USB Model offline or wired installation (the printer disconnected with the computer);...
- Page 35 3.1.2.2.1. Wired Model Installation (Net) 1) The following interface will display, if users install the Net Model: Users select Net Model through "Select Printer" and 2 installation options are available through Installation mode. 2) Search for Printer Interface: After entering Search for Printers interface, the program will automatically search for printer devices currently connected to the network.
- Page 36 3) Printer List After searching for printer, the program will automatically enter into "Detected Printer" interface. Users can select the found printer or add printer by manually adding IP or Host Name. 4) Printer Installation Interface Click on "Next" in "Printer List" interface, the program will enter into "Printer Installation interface".
- Page 37 3.1.2.2.2. WiFi Model Installation (WiFi) 1) If users install the WiFi Model, the following interface will display: Users select WiFi Model through "Select Printer", and 3 installation options are available through Installation mode. Generally, users select the third installation method at the first-time installation.
- Page 38 4) Printer List Selection After searching for printers, the program will automatically enter Select Printer interface. Users can select from the printers that have been found or add a printer by manually adding the IP or Host Name. During the driver installation, if "Windows can not verify the publisher of this driver software" pops up to ask users whether to continue installation or not, users should click on "Always install this driver software".
-
Page 39: Uninstallation
"Insufficient privileges. Please uninstall the printer with administrator privileges." If any task remains in the print queue, a warning will pop up, saying "Pantum M6600 Series laser printer is printing. Please uninstall the driver after the printing is completed."... - Page 40 4) Complete Interface After the uninstallation progress bar completes, the program will automatically switch to Uninstall Complete Interface. Click "Done" to finish the uninstallation successfully. Click "Done" button, the following window will pop up prompting you to restart the computer. Click "OK"...
-
Page 41: Mac-Based Driver
3.2. Mac-based Driver Introduction Mac driver installer is made by using the PackageMaker software that comes with the Mac System. The installation style is basically consistent with the installation of the ordinary software under Mac. The installation is divided into the following steps: introduction, license, destination select, installation type, installation, summary. - Page 42 Click "Continue", the dialog box of "To continue installing the software, you must agree to the terms of the Software License Agreement" will pop up. Click "Agree" to accept the License Agreement and continue the installation. 3. Installation Type Click "Continue" on the above figure to display the installation-related information, as shown below: Click "Install", the following prompt box will pop up.
- Page 43 4. Installation Click "Install" after filling in relevant information on the above figure, the installation progress will be displayed, as shown below: 5. Summary After successful installation is displayed. Click on "Restart" to complete the installation, as shown below: 3-14...
-
Page 44: Wired Network Settings (For Printer Models That Support Wired Network Printing)
Wired Network Setting (For printer models that support wired network printing) Chapter 4. Wired Network Settings (For printer models that support wired network printing) ......2 4.1. Install the Printer to Network .......................2 4.2. Control the Network Printer ......................2 4.2.1. View or Change Network Settings ..................2 4.2.2. -
Page 45: Wired Network Settings (For Printer Models That Support Wired Network Printing)
4. Wired Network Settings (For printer models that support wired network printing) Printers that support wired network printing can be connected to the network, thereby the printer will work under the control through a wired network. 4.1. Install the Printer to Network Please refer to Chapter 3.1. -
Page 46: Wireless Network Settings (For Models With Wifi Printing)
Wireless Network settings (for models with WiFi printing) Chapter 5. Wireless Network settings (for models with WiFi printing)..............2 5.1. Configuration via Button ......................2 5.2. Configuration via USB Connection .....................2 5.2.1. WiFi Configuration Tool ......................2 5.3. WiFi Hotspot Configuration ......................5 5.4. -
Page 47: Configuration Via Button
5. Wireless Network settings (for models with WiFi printing) Based on models, printers with WiFi printing support two types of wireless connection, Infrastructure Connection Mode and WiFi hotspots. Generally, only one type of connection can be used between the computer and the printer each time. Infrastructure Connection Mode The printer communicates with the wireless device via the access point. - Page 48 2) Wireless Network List After launching the configuration tool, the Wireless Network List interface will be displayed to provide selection function of wireless network. Users can select an item in the list, and then click on "Next" to enter the Information Input interface, or manually input the SSID on the bottom left corner.
- Page 49 4) Input Configuration Information Entering the Input Information interface, users can set relative information of the wireless network. After the configuration, click on "Next". 5) Configuration Completed After completing the above steps, the Wireless Network Configuration Result interface pops up. The configuration result will be displayed. If the configuration of the printer’s wireless network is successful, the following interface will pop up:...
-
Page 50: Wifi Hotspot Configuration
5.3. WiFi Hotspot Configuration When the wireless hotspot of printer is active, the user can connect to it directly by searching. The wireless hotspot is enabled by default, and the default password is "12345678". The printer-specific SSID and password can be obtained from WiFi Configuration Information Page, which can be printed out by selecting Print WiFi Configuration. -
Page 51: Pantum Mobile Print, Mobile Scan And Mobile Fax
Chapter 6. Pantum Mobile Print, Mobile Scan and Mobile Fax ................2 6.1. Introduction to Pantum Mobile Print, Mobile Scan and Mobile Fax ..........2 6.1.1. What’s Pantum Mobile Print, Mobile Scan and Mobile Fax? ..........2 6.1.2. Download Pantum Mobile Print, Mobile Scan and Mobile Fax ..........2 6.2. -
Page 52: Introduction To Pantum Mobile Print, Mobile Scan And Mobile Fax
PDF, Word, Excel, PPT, etc. 1. Turn on the printer. 2. Launch the WiFi in the mobile device, connect it with the WiFi hotspot of Pantum printer (For example, the WiFi hotspot may display as Pantum-AP-XXXXXX). If there are several Pantum WiFi printers, when you select the printer hotspot, please tap Menu Button on the printer to be used, select Information Report and select Print WiFi Configuration. - Page 53 3. Launch Pantum Print App to enter into home page and select Mobile Print button. 4. Select any item from the Menu, such as “Print from Album”, select pictures you need to print, click on “Print Setting” on the top right corner.
-
Page 54: Operation Steps For Mobile Scan
6.3.1. For Android Devices 1. Turn on the printer. 2. Launch the WiFi in the mobile device, connect it with the WiFi hotspot of Pantum printer (for example, the WiFi hotspot displays Pantum-AP-XXXXXX). 3. Launch Pantum Print App to enter into home page. - Page 55 Note: Click on the document in the list to enter into the Operation interface, select “Print” or “Share” and the specific operations are as follows: 1) Click on “Print” to print document: 2) Click on “Share” to share the application:...
- Page 56 5. Click on “Scan” on the top right corner, enter into Scan interface. 6. Click on “Click to select scanner” at the top of the interface, select a scanner, the following interface pops up: 7. Click on “Search”, and the page displays “Searching scanner”. Click on “OK” after completing searching.
-
Page 57: For Apple Ios Devices (Ipad, Iphone, Etc)
6.3.2. For Apple IOS Devices (iPad, iPhone, etc) 1. Turn on the printer. 2. Launch the WiFi in the mobile device, connect it with the WiFi hotspot of Pantum printer (for example, the WiFi hotspot displays Pantum-AP-XXXXXX). 3. Launch the Pantum Scan APP icon (as is shown below), enter into the following interface:... - Page 58 4. In the main menu interface, click Mobile Scan to enter the following interface. 5. Click on “Scan” on the top right corner, enter into Scan interface: 6. Click on “Select scanner”, the following window pops up:...
- Page 59 7. Click on “Search”, the page displays “Searching scanner”, the interface is as shown below and click on “OK” after completing searching. 8. Click on “Add IP Address” in the middle of the navigation bar, the following interface pops 9. Click on Scan Parameters at the bottom of the page, the following parameters setting panel pops up:...
- Page 60 1�. Click on “Start” on the top right corner, start scanning. 11. After the scan is finished, if you still need to scan, click on “Resume” on the top right corner; if not, click “Done” button on the top left corner. The following interface pops up to prompt you to input the title of the folder.
-
Page 61: Operation Steps For Mobile Fax
6.4.1. For Android Devices 1. Turn on the printer. 2. Turn on the WiFi on the mobile device, connect it with the WiFi hotspot of Pantum printer (For example, the WiFi hotspot may display as Pantum-AP-XXXXXX) 3. Launch Pantum Print App to enter into home page. - Page 62 6. Alternatively, click Add IP Address to enter the following interface, input the IP address manually, then click OK 7. Set the fax number at the bottom left of the interface to enter the number input interface. When you complete the input, click on “√” at the top right corner. 8.
-
Page 63: For Apple Ios Devices (Ipad, Iphone, Etc)
6.4.2. For Apple IOS Devices (iPad, iPhone, etc) 1. Turn on the printer 2. Turn on the WiFi on the mobile device, connect it with the WiFi hotspot of Pantum printer (for example, the WiFi hotspot may display as Pantum-AP-XXXXXX). - Page 64 7. Click on Search for fax machine, and the following window pops up: 8. Click Search and the page displays Search for fax machine. When the searching completes, Click OK; or click Add IP Address button to enter the IP address manually. 9.
-
Page 65: General Settings
General Settings Chapter 7. General Settings ..........................2 7.1. System Settings ..........................2 7.1.1. Toner Save Setting ....................... 2 7.1.2. Language Setting ........................ 4 7.1.3. Restore to Factory Settings ....................4 7.1.4. Sleep Time Setting ....................... 5 7.1.5. Network Settings ........................5 7.1.6. -
Page 66: System Settings
"On", the output color of the copy will be lighter. Default Setting is "Off". 1) Press "Menu" button to enter the menu interface. M6200/M6500/N6550 Series M6600 Series 2) Press direction pad "▲ " or "▼ " to select "3. System Settings" and press "OK" button. - Page 67 "▲ " or "▼ " to select "2. Open" and press "OK" button. When symbol "*" appears after "2. Open", it indicates that the toner save setting is on. M6200/M6500/N6550 Series M6600 Series 5) Press the “menu” button to enter the menu settings interface. Press the “back” button to return to the previous menu, or press OK to go to the next level of settings or save the settings.
-
Page 68: Language Setting
1) Press "Menu" button to enter the menu interface. 2) Press direction pad "▲ " or "▼" to select System Settings and press OK button. 3) Press direction pad "▲ " or "▼ " to select "2.Language Setting" and press "OK" button. M6200/M6500/N6550 Series M6600 Series Note: •... -
Page 69: Sleep Time Setting
3) Press direction pad "▲ " or "▼ " to select "4. Sleep Time Setting" and press OK button. 4) The direction pad "▲ " or "▼ " can be used to select "1 Minute", "5 Minutes", "15 Minutes", "30 Minutes", and "60 Minutes". M6200/M6500/N6550 Series M6600 Series Note: •... -
Page 70: Network Information
4) Press direction pad "▲ " or "▼ " to select "1. Wired config." and press "OK" button; Press direction pad "▲ " or "▼ " to select "1. IPv4" or "2. IPv6". M6200/M6500/N6550 Series M6600 Series 5) Press direction pad "▲ " or "▼ " to select "2. Wireless Network Settings" and press "OK"... - Page 71 5) Select "1. TCP/IP" option and press "OK" button, press direction pad "▲ " or "▼ " to select "1. IP Address", "2. Subnet mask" and "3. Gateway". M6200/M6500/N6550 Series M6600 Series 6) Select "2. WiFi Information" option and press "OK" button, press direction pad "▲ " or "▼ " to select "1.
- Page 72 Print Chapter 8. Print ..............................2 8.1. Print Function ..........................2 8.2. Open Help Document .........................3 8.3. Duplex Print ..........................4 8.4. Cancel Print Job .........................7 8.5. Mac System Print ........................7...
-
Page 73: Print
8. Print 8.1. Print Function You can set the print function through "Start"-"Device and Printer"- select corresponding printer- right click – set print function in "Print Preferences". Some functions are as follows: Functions Diagram Manual Duplex Collate Print Reverse Print N-in-1 Poster Print (for Windows... -
Page 74: Open Help Document
Note: • You can select the 2 x 2 Poster printing from Layout options in the settings interface to use the poster printing function. • You can open the Printing Preferences and click Help button to check the specific function explanation. For information about how to open the help document, see Chapter 8.2. -
Page 75: Duplex Print
8.3. Duplex Print 1) The printer driver supports manual duplex. Note: • If the paper is thin, it may wrinkle. • If the paper is curled, make it flat and put it back into the manual feeder tray. • If the manual duplex function causes a paper jam, see Chapter 13.1 for handling it. 2) Ensure that certain amount of paper is loaded into the automatic feeder tray before printing. - Page 76 Select Pantum printer Click "Preferences" to set printing. c) Set options in "Manual Duplex" of the "Basic" tab and click "OK" after completing the settings.
- Page 77 d) Click "Print". Note: • It is recommended to raise the output tray to prevent the paper from sliding out of it. If you choose not to raise the output tray, we recommend that you immediately remove the printed paper output from the printer. e) Send the print task after choosing Manual Duplex, then the following prompt window will appear, telling you the next specific operations.
-
Page 78: Cancel Print Job
g) You can click "Close" button to close this prompt window, and it will not appear until the next Manual Duplex job comes in. 8.4. Cancel Print Job You can press the Cancel button on the control panel to cancel the print job you want to cancel during the printing process, or cancel the print job in the printing pool. - Page 79 3. After the window pops up, select "Print". 4. Select printer 1) For USB Model printer: plug the USB cable, the corresponding printer will automatically show in the left list. 2) For NET Model printer: plug the network cable, click on symbol "+" at the bottom of the left list to add printer.
- Page 80 3) For WiFi Model printer: select the WiFi icon on the top right corner of the page, click on "Open Network Preferences" in the list. After the window pops up, click on SSID.
- Page 81 Select the corresponding SSID. 5. Open the document to be printed, click on "Document" – "Print". 8-10...
- Page 82 After the window pops up, set the printing parameters, and press the "Print" button on the top right corner. 8-11 11...
- Page 83 Copy Chapter 9. Copy ..............................2 9.1. Basic Operations ........................2 9.1.1. Copying With Tablet ......................2 9.1.2. Copying With Automatic Document Feeder (ADF) .............. 3 9.2. Special Copy Function ........................3 9.2.1. Bill Copy ..........................3 9.2.2. ID Copy ..........................3 9.2.3. Cancel Copy Operation ......................5 9.3.
-
Page 84: Copy
The basic procedure for copying with tablet is as follows: 1. Put the manuscript face down into the glass platen. M6200/M6500 Series M6550/M6600 Series Note: • During copying, please do not open the cover to avoid any adverse impact on the image quality. -
Page 85: Copying With Automatic Document Feeder (Adf)
2. Press Copy button on the control panel to enter the copy mode interface. 3. Press Start to start copying. 9.2. Special Copy Function 9.2.1. Bill Copy M6200/M6500/M6550 Series M6600 Series Press this button to enter "Bill Copy" mode,which is used to output high-sharpness bill copy. Steps of Bill Copy: 1. - Page 86 Steps of ID Copy: 1. Press ID Copy button to enter the ID Card Copy mode. The printer of this model supports four types of ID Card copy, namely full page top to bottom, half page top to bottom, half page left to right, A5 length, examples are as follows: 2.
-
Page 87: Cancel Copy Operation
9.2.3. Cancel Copy Operation If you want to cancel the copy operation, please press "Cancel" button. The LCD Screen will prompt "Canceling..". M6200/M6500/M6550 Series M6600 Series 9.3. Copy Settings M6200/M6500/M6550 Series M6600 Series Press Menu button to enter the menu interface. See section "7. General Settings" for the... - Page 88 10.1.3. Single Page Scan ......................3 10.1.4. Merge Scan ........................3 10.1.5. Other Scan Functions ......................4 10.2. Pull Scan ...........................8 10.2.1. Pantum Scan Application ....................8 10.2.2. TWAIN Scan Driver ......................9 10.2.3. WIA Scan Driver ....................... 11 10.2.4. Cancel Scan Job ......................14 10.3.
-
Page 89: Scan
This section introduces how to scan documents to the PC (only through USB cable connection) with control panel of the printer. The specific operation steps are as follows: 1) Put the document face down on the glass platen. M6200/M6500 Series M6550/M6600 Series Note: •... -
Page 90: Single
The specific operations are as follows: 1. Press "Scan" button to enter scan status. The default scan mode of control panel is Single Page. M6200/M6500/M6550 Series M6600 Series 2. Press "▲ " or "▼ " button to select and enter "Merge Scan" mode. -
Page 91: Other Scan Functions
3. Press "Start" button and the Scan Process Bar Interface will pop up on the computer. 4. After completing scanning the first page, the contents as shown below will appear on the control panel: Press "Start" button - scan the next page Press "OK"... - Page 92 ④ Click on "New" and the following window will pops up, edit the name of contacts ,input the E-mail address and then click on "Submit". ⑤ Put the document on the platen. M6200/M6500 Series M6550/M6600 Series 10-5...
- Page 93 ⑥ Press "Scan" button on the control panel, and press "▲ " or "▼ " to select "1. Single Page Scan" or "2. Merge Scan", then press "OK" button. ⑦ In the "1. Scan To" interface, press "OK" button. ⑧ Press "▲ " or "▼ " to select "Scan to E-mail" and press "OK" button. ⑨...
- Page 94 FTP Server: IP Address of the server (such as 10.10.145.100 ) Port Number: Default port number is 21 Login Name: For example, anonymous Password: such as (anonymous login needs no password) Confirm Password: For example (anonymous login needs no password) Server Name: For example, PANTUM 10-7...
-
Page 95: Pull Scan
10.2.1. Pantum Scan Application Operation Steps: 1) Double click on "Pantum Scan Application" on the computer, the icon is shown as below: 2) The prompt window is shown as below: 3) Set Scan in the right list. Click "Scan" on the bottom right corner and start scan. -
Page 96: Twain Scan Driver
10.2.2. TWAIN Scan Driver 10.2.2.1. Office Software (Word and Excel) Operation Steps: 1) Keyboard shortcuts: Alt+I+P+S to open the application’s window. 2) Click on "Device" option and select TWAIN Scan, click the "Custom Insert" button below. 3) After the window pops up, set the scan information in the right list of "Basic Setting" and "Advanced Setting". - Page 97 Note: Click on the "Port" below to select the scan port, which is shown as below: 10.2.2.2. Photoshop Operation Steps: 1) Launch Photoshop, click on "File" – "Import" on the top left corner, select TWAIN Scan, as is shown below: 2) After the window pops up, please refer to Step 3 of 10.2.2.1.
-
Page 98: Wia Scan Driver
10.2.3. WIA Scan Driver 10.2.3.1. WIA1.0 Scan (Windows XP / Windows Server 2003) 1. Office Software (Word and Excel) Operation Steps: 1) Keyboard shortcuts: Alt+I+P+S to open the application’s window. 2) Click on "Device" and select WIA Scan,click the "Custom Insert" below. 3) The prompt window as is shown below, set the scan information. - Page 99 4) Click on "Adjust the Scanned Image Quality" on the bottom left corner of the above picture, the advanced properties interface will pop up, then users can set the scan; After finishing the settings, click on the "OK" button, then "Scan" button to start scan. 2.Photoshop Operation Steps: 1) Launch Photoshop, click "File"- "Import"...
- Page 100 10.2.3.2. WIA 2.0 Scan (Windows Vista / Windows Server 2008 and later versions) Operation Steps: 1) Click on "Start"- "All Programs"- "Device and Printer" on the left bottom of the desktop. 2) When the pop-up window appears, select the printer you want to use, and right click the mouse.
-
Page 101: Cancel Scan Job
3) Click on "Start Scan" in the above option bar. 4) After the window pops up, set the scan and click "Scan" on the bottom right corner and start scan. 10.2.4. Cancel Scan Job During the scanning, two ways are available to cancel the job: 1) Press "Cancel"... -
Page 102: Mac System Scan
10.3. Mac System Scan 10.3.1. ICA Scan 10.3.1.1. Open ICA via "Print and Scan" Operation Steps: 1. After installing the printer driver, click "System Preferences" icon on the bottom left corner of the computer desktop. 2. After the window pops up, click on "Print and Scan". 3. - Page 103 4. Click on "Open Scanner" and the scan window will pop up. 5. Click on "Show Details" on the bottom right corner to set the scan parameters. 6. Click on "Scan" on the bottom right corner and start scan. 10-16...
- Page 104 10.3.1.2. Call CIA through applications Operation Steps: 1) Click on "Finder" icon on the bottom left corner of the computer desktop, or use keyboard shortcuts command+shift+C to open the window. Find "Image Capture" in "Applications" (or conduct keyboard shortcuts command+shift+A to directly switch to "Applications") and click to launch the application.
-
Page 105: Twain Scan
10.3.2. TWAIN Scan Take Photoshop as an example. Operation Steps: 1) Launch Photoshop, click on "File" – "Import" on the top left corner and select TWAIN Scan, as is shown below: 2) After the window pops up, please refer to Step 3 of 10.2.2.1. to see the specific operation steps. - Page 106 11.3.2. Receive Fax ........................7 11.3.3. Other Scan Functions ......................8 11.4. Contacts ..........................12 11.5. Cancel Fax ..........................13 11.6. Pantum PC-Fax Software ......................14 11.6.1. Open With ........................14 11.6.2. Sending Fax with PC-Fax ....................14 11.6.3. Basic Settings for PC-Fax ....................15 11.6.4. Other Functions for Sending Fax with PC-Fax ..............16...
-
Page 107: Fax
11. Fax 11.1. Connect Devices Connect the fax accessories to the phone line This product includes two fax ports: Connect this product to the " " port of the telephone jack on the wall. ● Connect the auxiliary devices to the " "... -
Page 108: Fax Settings
11.2. Fax Settings This product supports two ways to make the fax settings for users' different fax requirements. One way is to complete the fax settings under the Fax Mode, and the steps are as follows: 1) When the machine is ready, press Fax button, then press OK button to enter the fax settings interface. - Page 109 Forward the Received option has two suboptions. If you select the Forward to Fax suboption and enter the number to which you want to Forward the forward the fax, the printer will send the fax to the forwarded number Received rather than printing it when you receive a fax;...
-
Page 110: Fax Functions
You can use the options in Fax Report to print the fax report as you need. Report 11.3. Fax Functions 11.3.1. Send Fax Send a fax from a flatbed scanner 1) Put the document face down on the scanner's glass platen and close the scanner. 2) Press the Fax button and use the number buttons to enter the fax number. - Page 111 4) Press the OK button to initiate the fax job. Send a fax from the automatic document feeder (ADF) 1) Put the document face up into the automatic document feeder. Note: • Automatic document feeder can accommodate up to 35 sheets of medium measuring 75 g/m2 or 20 pounds.
-
Page 112: Receive Fax
4) Press the Start button to start scanning the document with the automatic document feeder. 11.3.2. Receive Fax You have two ways to receive fax, and the default for the printer is fax mode. Fax mode, which is the automatic receiving mode, sends faxes to the printer, and the printer receives the fax automatically when the ring reaches the specified number of times;... -
Page 113: Other Scan Functions
11.3.2.2 Phone Mode Operation Steps: 1) Press Menu button to enter the menu interface. 2) Press direction pad "▲ " or "▼ " to select "3. Fax Settings" and press "OK" button. 3) Press direction pad "▲ " or "▼ " to select "2. Receive Settings" and press "OK" button. 4) Press direction pad "▲... - Page 114 3) You can press the OK button and enter each fax number to which you want to send fax. 4) When the input is complete, press the Start button to start scanning documents. 5) When the scan is complete, press the OK button to begin the group sending fax job. Delay Sending You can enable Delay sending of fax through the Control Panel.
-
Page 115: Fax Forwarding
2) Press the OK button to enter the Fax Settings interface, and press "▲ " or "▼ " button to select Delay Sending 3) Set the fax number, job name, and delay period as prompted. 4) When the input is complete, press the OK button to scan the fax document to the memory and get back to Ready state. - Page 116 The specific operations are as follows: 1) On the Control Panel, click on the Fax button to enter the fax mode. 2) Press the OK button to enter the Fax Settings interface, and press "▲ " or "▼ " button to select Forward the Received 3) Set the forwarding mode and the number as prompted.
-
Page 117: Contacts
Auto Shrink When the paper size of the received fax does not match the size specified in the printer, the received fax will be shrinked according to the user-defined paper size to match the paper size in the printer. If you disable the Auto Shrink option, the fax will be printed at full size across multiple pages. Auto Shrink is turned on by default. -
Page 118: Cancel Fax
Delete Contacts You can delete all the Contacts you edited in the printer. Note: • Contacts cannot be restored once it has been deleted. 11.5. Cancel Fax Please follow the instructions below to cancel a current fax that is dialing, or cancel a fax that is in the process of being transmitted or received. -
Page 119: Pantum Pc-Fax Software
1) Open a fax file that you want to send 2) Click File, click Print and the Print dialog pops up. 3) Select Pantum M6600NW Series Fax as the printer, click Print and the "Pantum will send fax" interface appears. -
Page 120: Basic Settings For Pc-Fax
You can use the Fax Settings to set the Paper and Quality of the fax that is sent with the PC- Fax. The specific operations are as follows 1) Open the PC-Fax software. 2) Select Pantum M6600NW Series Fax as the printer, click Printing Preferences and the Fax Settings interface appears. 11-15... -
Page 121: Other Functions For Sending Fax With Pc-Fax
The specific operations are as follows: Edit the Contacts in PC-Fax 1) Open the PC-Fax software and the "Pantum will send fax" interface appears. 2) Click Show Contacts and the Contacts interface pops up on the right. Click Read to read the local Contacts list on the printer. - Page 122 Use the Contacts in PC-Fax 1) Open the PC-Fax software and the "Pantum will send fax" interface appears. 2) Click Show Contacts and the Contacts interface pops up on the right. Connect the printer to the computer and click Read to read the local Contacts list on the printer.
- Page 123 3) You can set the cover Style and the Basic information on right of the Cover Settings interface, and preview the cover on the left. 4) When you complete the setup, click the OK button to save the cover. 11-18...
-
Page 124: Routine Maintenance
Routine Maintenance Chapter 12. Routine Maintenance........................2 12.1. Cleaning the Printer ........................2 12.2. Maintenance of Laser Toner Cartridge ..................5 12.2.1. Use and Maintenance of Laser Toner Cartridge ..............5 12.2.2. Service Life of the Laser Toner Cartridge ................5 12.2.3. Replace Laser Toner Cartridge ..................5 12-1... -
Page 125: Routine Maintenance
1. Turn off the main power switch and unplug the power cord, USB cable, phone cord and the network cable. M6200/M6500 Series M6550/M6600 Series 2. Use a soft cloth to wipe the outside of the printer and remove the dust . - Page 126 4. Raise the scanning platform until it is locked. M6200/M6500 Series M6550/M6600 Series 5. Open the output bin by the upper right ridge of the concave section. M6200/M6500 Series M6550/M6600 Series 6. Remove the laser toner cartridge along the guides.
- Page 127 7. Gently wipe the dustproof mirror of laser scanning surface with a cotton swab or a dry and lint-free soft cloth with a little alcohol. M6200/M6500 Series M6550/M6600 Series 8. Clean the inside of the printer by using a dry and lint-free cloth to gently wipe the shaded area as shown in the picture below.
-
Page 128: Maintenance Of Laser Toner Cartridge
12.2. Maintenance of Laser Toner Cartridge 12.2.1. Use and Maintenance of Laser Toner Cartridge For better print quality, please use the original Pantum laser toner cartridge. Note: when using the laser toner cartridge, please pay attention to the following: •... - Page 129 Replacement steps are as follows: 1. Turn off the printer and raise the scanning platform until it is locked. M6200/M6500 Series M6550/M6600 Series 2. Open the output bin by the upper right ridge of the concave section. M6200/M6500 Series M6550/M6600 Series 3.
- Page 130 5. Remove the cartridge protector (blister cover), insert the cartridge along the guides into the printer, then push it firmly along the direction of the arrow until you hear a "click" assuring you that the cartridge is fully inserted. M6200/M6500 Series M6550/M6600 Series Note: •...
-
Page 131: Troubleshooting
Troubleshooting Chapter 13. Troubleshooting ..........................2 13.1. Clearing Jammed Paper ......................2 13.2. Error Message ..........................4 13.3. Common Troubleshooting ......................5 13.3.1. Common Trouble ....................... 5 13.3.2. Image Defects ........................6 13-1... -
Page 132: Clearing Jammed Paper
13. Troubleshooting Please read this section carefully. It can help you solve common malfunctions in the printing process. If the problems appeared cannot be solved, please timely contact Pantum Aftersales Service Center. Prior to handling common trouble, first check that: •... - Page 133 2) Open the output bin by the upper right ridge of the concave section. M6200/M6500 Series M6550/M6600 Series 3) Remove the laser toner cartridge along the guides. M6200/M6500 Series M6550/M6600 Series 4) Gently draw the jammed paper out along the paper output direction.
-
Page 134: Error Message
6) Neatly put the paper in the tray , and do not carry out the next print until the indicator light resumes print-ready status. 7) If you can not remove the jammed paper yourself, please contact your local Pantum Authorized Repair Center or send the printer to the nearest Pantum Authorized Service Center for repair. -
Page 135: Common Troubleshooting
No paper in ADF when you start a copy or scan job paper. without loading paper in the ADF. Note: • If the problem remains, please contact Pantum Customer Service. 13.3. Common Troubleshooting 13.3.1. Common Trouble Trouble Type Trouble Cause... -
Page 136: Image Defects
• Re-separate the print • Internal parts failure. media or use new print media. Note: • If the trouble still can not be shooted after the above operations, please contact Pantum Customer Service. 13.3.2. Image Defects Trouble Cause Solution • Toner is low. - Page 137 • The laser toner cartridge is dirty • Please use the print media or leaks toner. within the specification range. • The laser toner cartridge is • Clean the feed channel. damaged. • Clean the platen glass. • The print media that does not meet usage specification is used.
- Page 138 • Clean the laser toner cartridge • The internal part of the laser toner or replace it with a new one. cartridge is damaged. • Please contact Pantum • The fuser component is damaged. Customer Service to repair and replace the fuser component.
- Page 139 • The laser toner cartridge might be damaged. • The internal part of the printer is damaged. Horizontal stripes Note: • The above troubles can be handled by cleaning or replacing the laser toner cartridge. If the problem remains, please contact Pantum Customer Service. 13-9...
-
Page 140: Menu Structure
Menu Structure Chapter 14. Menu Structure ..........................2 14.1. Copy Settings ...........................2 14.2. Scan Settings ..........................4 14.3. Fax Settings ..........................5 14.4. System Settings ........................7 14.5. Information Report ........................10 14.6. Version Information .........................10 14.7. Fax Menu Structure ........................ 11 14-1... -
Page 141: Menu Structure
14. Menu Structure This chapter mainly introduces the overall menu structure of control panel. The user can know the menu options which can be set by checking the menu structure. Note: The menu structure in this chapter is the most complete menu structure. Differences might be exsited between the menu structure of the mode you actually use with the following menu structure. - Page 142 First-level Second-level Third-level Fourth-level Sixth-level Fifth-level Menu Menu Menu Menu Menu Menu 1. Close 2. 2X2 6. Poster 3. 3X3 4. 4X4 1. Close 7. Collate 2. Open 1. Close 8. Manual Duplex 2. Open 1. A4* 2. Letter 3. B5 4.
-
Page 143: Scan Settings
First-level Second-level Third-level Fourth-level Fifth-level Sixth-level Menu Menu Menu Menu Menu Menu 1. Manual adjustment* 1. Luminosity 2. Automatic adjustment 1. A4* 3. Bill Copy 2. Letter 3. B5 2. Paper 1. Paper Size Setting 4. A5 5. A6 6. Executive 14.2. -
Page 144: Fax Settings
14.3. Fax Settings General Menu Structure First-level Second-level Fourth-level Fifth-level Sixth-level Third-level Menu Menu Menu Menu Menu Menu 1. Redial [0-10] Attempts: 2* Attempts 2. Redial Interval [1-15] Minutes: 3* Turn Off* 3. Dial Prefix Turn On Turn Off* 4. Fax Header Turn On 5. - Page 145 General Menu Structure First-level Second-level Fourth-level Fifth-level Sixth-level Third-level Menu Menu Menu Menu Menu Menu Turn Off 7. Remote Code Turn On* 1. Turn Off* 8. Continue under low toner 2. Turn On 1.Auto* 3.Compatibility 2.VOIP 1.China 2.Taiwan 3.USA 4.Canada 5.Australia 6.South Africa 7.UK...
-
Page 146: System Settings
14.4. System Settings General Menu Structure First-level Second-level Third-level Fourth-level Fifth-level Sixth-level Menu Menu Menu Menu Menu Menu 1. Close* 1. Toner Save Setting 2. Open 1. 中文 * 2. English 3. Italiano 4. русский 5. Français 2. Language Setting 6. - Page 147 First-level Second- Third-level Fourth-level Sixth-level Fifth-level Menu Menu level Menu Menu Menu Menu 1. Turn Off 2. Low 4. Alert tone 3. Medium * 4. High 1. Turn Off 5. Main Volume 2. Turn On * 1. Date xxxx-xx-xx 2. Time xx-xx-xx UTC +8:00 * 3.
- Page 148 First-level Second- Third-level Fourth-level Sixth-level Fifth-level Menu Menu level Menu Menu Menu Menu 1. IP Address 000.000.000.000 1. TCP/IPP 2. Subnet Mask 000.000.000.000 3. Gateway 000.000.000.000 1. MAC Address xx-xx-xx-xx-xx-xx Connected/ 2. WiFi Status No WiFi Signal xx/No WiFi 2. WiFi 3.
-
Page 149: Information Report
14.5. Information Report General Menu Structure First-level Third-level Fourth-level Fifth-level Sixth-level Second-level Menu Menu Menu Menu Menu Menu 1. Print Demo Page 2. Print Information Page 3. Print Menu Structure 4. Print Menu Setting 5. Print Network Settings 4. Information 6. -
Page 150: Fax Menu Structure
14.7. Fax Menu Structure Press the Fax button, press the OK button, and the Fax Settings display. Fax Menu Structure First- Eighth- Ninth- Tenth- Second- Third-level Fourth-level Fifth-level Sixth-level Seventh-level level level level level level Menu Menu Menu Menu Menu Menu Menu Menu... - Page 151 Fax Menu Structure First- Second- Third- Fourth- Ninth- Tenth- Fifth-level Sixth-level Seventh-level Eighth-level level level level level level level Menu Menu Menu Menu Menu Menu Menu Menu Menu Menu Enter index Group Dial 1. Speed 1-10 [xxx] Dial ID:aaaa Group Dial [01] All Group 01 xxxx...
-
Page 152: Product Specifications
Product Specifications Chapter 15. Product Specifications ........................2 15-1... - Page 153 15. Product Specifications Note: • Specification values vary slightly from printers with different models with different functions ,and product specifications vary from different countries and regions. • These values are based on the initial data. For more information about the latest specifications, please visit: www.pantum.com. Overview of the Specifications M6200/M6500 Series: 417mm*305mm*244mm Product Size (W*D*H) M6550/M6600 Series: 417mm*305mm*301mm M6200/M6500 Series: about 7.5Kg (No wrappage, with random cartridges) Product Weight M6550/M6600 Series: 8.5Kg (No wrappage, with random cartridges) Preferred Temperature Range for Printing: 10-32°C (50°F-90°F) Print Environment Preferred Moisture Range for Printing: 20% - 80% 110V Model: AC100~127V (±10%); 50Hz/60Hz; 6A Power Voltage 220V Model: AC220~240V (-15%,+10%), 50Hz/60Hz; 3A Print: ≤54dB Noise Standby: ≤30dB Print: Average 370W, Maximum750W Power Standby: ≤45W Consumption Networked standby: ≤3.5W Microsoft Windows Server2003/Server2008/Server2012/XP/Vista/Win7/Win8/ Win8.1 /Win10 (32/64 Bit) Mac OS 10.6/10.7/10.8/10.9/10.10...
-
Page 154: Print Specifications
Print Specifications M6200/M6500 Series: (A4 20/22ppm)/(Letter 21/23ppm) Print Speed M6550/M6600 Series: (A4 22ppm)/(Letter 23ppm) Print Time of First Page <7.8sec Monthly Maximum 20,000 pages Print Copies Print Language Copy Specifications Copy Speed 22cpm (A4)/23cpm (Letter) Flatbed <10 seconds FCOT ADF <12 seconds... - Page 155 Company Name: Magnell Associate, Inc. (DBA NEWEGG.COM ) Office address:16839 E. Gale Ave. ,City of Industry,CA 91745 TEL: (626)271-9700...
Need help?
Do you have a question about the M6200 and is the answer not in the manual?
Questions and answers