Pantum M6550 Series User Manual
Monochrome laser mfp
Hide thumbs
Also See for M6550 Series:
- Maintenance manual (124 pages) ,
- User manual (158 pages) ,
- Faq (126 pages)

Related Manuals for Pantum M6550 Series


Summary of Contents for Pantum M6550 Series
- Page 1 User Guide Pantum M6550 Series Monochrome Laser MFP It is recommended to carefully read this Guide before using the printer...
-
Page 2: Legal Notice
We heartily appreciate your using of Pantum series products! To protect your vital interests, please carefully read the following statements. Legal Notice Trademark Pantum and Pantum logos are registered trademarks of Zhuhai Seine Technology Co., Ltd. ® ® ® ®... -
Page 3: Safety Precautions
The following label is attached to the laser components inside the printer: Reclamation and recycling To protect the environment, our corporation has already established the system of reclamation recovery at www.pantum.com. Safety Warning Please note the following safety warnings before using the printer: Warning There is high-voltage electrode inside the printer. -
Page 5: Legal Information
26. This device complies with Industry Canada licence-exempt RSS standard(s). Operation is subject to the following two conditions: (1) this device may not cause interference, and (2) this device must accept any interference, including interference that may cause undesired operation of the device. 27. -
Page 9: Before Using The Printer
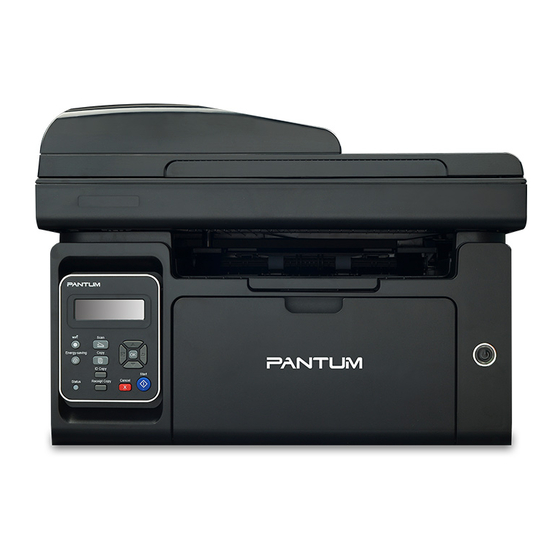
1. Before Using the Printer 1.1. Introduction of Models Series Name M6550 Series Picture asic Function Print, Copy, Scan asic Models US Model, T Model, Wi-Fi Model... - Page 11 Product ie Side view (1) Series Cover utput Bin Control Panel Side view ( ) Series lass Platen Scanning Platform utput Tray Paper Stop Feeder Tray utomatic Feeder Tray...
- Page 12 Rear iew Series iagram SB Interface etwork Interface Power Interface Rear Cover ote: Laser oner artridge Type verage Print olume bout 1 Pages Standard Capacity ote: consumables.
-
Page 15: Paper And Print Media
2. Paper and Print Media Media Type A4, A5, A6, JIS B5, ISO B5, B6, Letter, Legal, Executive, Media size M6550 Series Media weight Output tray... - Page 18 Load t e Pa er Steps are as follows: pen the feeder tray. b) Slide the automatic feed guides to match both sides of the paper. c) Raise the output tray to avoid the paper from slipping and falling. d) oad the paper into the automatic feeder tray with the print-side up. e) d ust the paper stop to match the paper si e.
- Page 19 ote: paper will am or cannot be fed in. Warning am or the paper curling. Pa er and anuscri t se Process anuscript re uirements: Si e Steps of se: ). oad the manuscript face down.
- Page 20 ). lign the manuscript to match the appropriate paper si e. ID COPY ote: corner of the manuscript with the arrow. ently put down the cover. ote: correction fluid are completely dried. smoothness has poor printing performance.
- Page 23 ) anguage Interface fter the running interface ends, if the printer is connected to the computer through SB cord, then the language interface pops up. sers select the language depending on different needs. ote: ) Installation Process Interface the installation of driver softwares.
- Page 24 ) Installation Complete odel Wired and Wireless et or s 1) Running Interface fter inserting the installation C , the Pantum interface will pop up and the installation C will...
- Page 25 will select the corresponding series, language and model according to the purchased printer model. Installation Instruction:...
- Page 26 Wired odel nstallation through Installation mode. ) Search for Printer Interface: appropriate printer devices are connected to the computer.
- Page 27 ) Printer ist ame. ) Printer Installation Interface...
- Page 28 Wi i odel nstallation Wi i installation.
- Page 29 ) Installation Complete Interface...
- Page 30 ninstallation ninstallation re uires administrator privileges. If a non-administrator runs the uninstaller, ) ninstallation Interface interface. -1 1...
- Page 31 ) Complete Interface ote: reinstalling the driver. -11 11...
- Page 32 ac ased ri er ntroduction nstallation Ste s 1. Introduction . icense greement -1 1...
- Page 33 -1 1...
- Page 34 . Installation -1 1...
- Page 39 ireless etwork ist...
- Page 41 hen the wireless hotspot of printer is active, the user can connect to it directly by searching. The wireless hotspot is enabled by default, and the default password is 1 . The device in the printer. control panel for over seconds.
- Page 43 It connects your mobile device with wireless printer through i-Fi access points. ou ust it will automatically detect compatible Pantum printer to print, which is very convenient and o nload Pantum o ile Print and o ile Scan...
- Page 44 . Select printer, number of copies and paper si e, click on Print on the top right corner to start printing. ote: Install obile Print pp (Select from R Code, oogle Play Store, Pantum obile Print pp from oogle Play Store and install the application in the mobile device.
- Page 45 6.2.2. For Apple IOS Devices (iPad, iPhone, etc) 1. Turn on the printer. 2. Launch the Wi-Fi in the mobile device, connect it with the Wi-Fi hotspot of Pantum printer (for example, the Wi-Fi hotspot displays Pantum-AP-XXXXXX). If there are several Pantum WiFi printers, when you select the printer hotspot, please tap Menu Button on the printer to be used, select Information Report and select Print WiFi hotspot with your mobile phone.
- Page 46 . Click on Print on the bottom left corner, the following interface pops up: . Click on Select Printer to select the corresponding printer. . Select the number of copies. 1 . Click on Print to start printing.
- Page 51 4. Click on “Menu” on the left side, Sidebar interface pops up, you can enter into the Pantum Mall, and check the version and copyright of the Pantum Mobile Scan. 5. Click on “Pantum scanning”, the Scan List displays: 6. Click on “Scan” on the top right corner, enter into Scan interface: 7.
- Page 52 . Click on Search , the page displays Searching scanner , the interface is as shown below and click on after completing searching. . Click on dd IP ddress in the middle of the navigation bar, the following interface pops 1 .
- Page 63 ote: en el ocument...
- Page 64 u le Print ote: ote:...
- Page 66 ote:...
- Page 67 ancel Print o ac System Print eration Ste s...
- Page 73 9. Copy 9.1. Plain Copy 1. Put the manuscript face down into the glass platen. Note: During copying, please do not open the cover to avoid any adverse impact on the image quality. For the information on "Steps of Using Paper and Manuscript", please refer to Chapter 2.5.
- Page 78 10. Scan This printer provides two types of scan: "Push Scan", which means scanning through the printer’s Control Panel operations; "Pull Scan" which means scanning through PC terminal scanning the application. 10.1. Push Scan This section introduces how to scan documents to the PC (only through USB cable 1) Put the document face down on the glass platen.
- Page 81 Click on "New" and the following window will pops up, edit the name of contacts ,input the E-mail address and then click on "Submit". Put the document on the platen. Press "Scan" button on the control panel, and press “ ” or “ " to select "1. Single Page Scan"...
- Page 82 peration Steps: Type the IP address in the eb browser s address bar to access the embedded server of the printer. Click on Setting FTP to enter into FTP Setting interface. Click ew , the following window will pop up. Set the relative parameters of the FTP Protocol.
- Page 83 FTP Server: IP Address of the server (such as 10.10.145.100 ) Port Number: Default port number is 21 Login Name: For example, anonymous Password: such as (anonymous login needs no password) Confirm Password: For example (anonymous login needs no password) Server Name: For example, PANTUM 10-7...
- Page 84 10.2.1. Pantum Scan Application Operation Steps: 1) Double click on "Pantum Scan Application" on the computer, the icon is shown as below: 2) The prompt window is shown as below: 3) Set Scan in the right list. Click "Scan" on the bottom right corner and start scan.
- Page 85 10.2.2. TWAIN Scan Driver Operation Steps: 1) Keyboard shortcuts: Alt+I+P+S to open the application’s window. 2) Click on "Device" option and select TWAIN Scan, click the “Custom Insert” button below. 3) After the window pops up, set the scan information in the right list of "Basic Setting" and "Advanced Setting".
- Page 86 ote: Click on the Port below to select the scan port, which is shown as below: P otos o peration Steps: 1) aunch Photoshop, click on File Import on the top left corner, select T I Scan, as is shown below: steps.
- Page 87 Scan ri er peration Steps: 1) eyboard shortcuts: lt I P S to open the application s window. ) Click on evice and select I Scan,click the Custom Insert below. ) The prompt window as is shown below, set the scan information. 1 -11 11...
- Page 88 ) Click on d ust the Scanned Image uality on the bottom left corner of the above picture, settings, click on the button, then Scan button to start scan. .Photoshop peration Steps: 1) aunch Photoshop, click File - Import on the top left conrner and select I Scan, as is shown below: operation steps.
- Page 89 10.2.3.2. WIA 2.0 Scan (Windows Vista / Windows Server 2008 and later versions) Operation Steps: 1) Click on "Start"- "All Programs"- "Device and Printer" on the left bottom of the desktop. 2) After the window pops up, select the needed printer, and right-click . 10-13...
- Page 90 ) Click on Start Scan in the above option bar. ) fter the window pops up, set the scan and click Scan on the bottom right corner and start scan. ancel Scan o uring the scanning, two ways are available to cancel the ob: 1) Press Cancel button on the control panel to cancel the ob.
- Page 91 ac System Scan Scan peration Steps: 1. fter installing the printer driver, click System Preferences icon on the bottom left corner of the computer desktop. . fter the window pops up, click on Print and Scan . . fter the window pops up, click on Scan . 1 -1 1...
- Page 92 . Click on pen Scanner and the scan window will pop up. . Click on Show etails on the bottom right corner to set the scan parameters. . Click on Scan on the bottom right corner and start scan. 1 -1 1...
- Page 93 t roug a lications peration Steps: 1) Click on Finder icon on the bottom left corner of the computer desktop, or use keyboard shortcuts command shift C to open the window. Find Image Capture in pplications (or conduct keyboard shortcuts command shift to directly switch to pplications ) and click to launch the application.
- Page 94 Scan Take Photoshop as an e ample. peration Steps: 1) aunch Photoshop, click on File Import on the top left corner and select T I Scan, as is shown below: steps. 1 -1 1...
- Page 96 Routine aintenance leaning t e Printer ote: Please use mild detergents. Please clean the printer in accordance with the following steps: 1. Turn off the main power switch and unplug the power cord and SB cable. Series . se a soft cloth to wipe the outside of the printer and remove the dust . Series .
- Page 97 . Raise the scanning platform until it is locked. Series pen the output bin by the upper right ridge of the concave section. Series . Remove the laser toner cartridge along the guides. Series...
- Page 98 Warning Some parts of the printer are still hot within a short time after use. hen opening the front cover or rear cover to clean the parts inside the printer, please do not touch the parts in the shaded area as shown in the following picture, so as to avoid burns.
- Page 99 Laser oner artridge se and aintenance of Laser oner artridge For better print uality, please use the original Pantum laser toner cartridge. ote: when using the laser toner cartridge, please pay attention to the following: the package. resulting damage is not included in the printer warranty.
- Page 100 Replacement steps are as follows: 1. Turn off the printer and raise the scanning platform until it is locked. Series pen the output bin by the upper right ridge of the concave section. Series Series...
- Page 101 . pen the package of a new laser toner cartridge, hold the handle of the cartridge and gently shake around times, so as to make the toner evenly distributed inside the cartridge. . Remove the cartridge protector (blister cover), insert the cartridge along the guides into the that the cartridge is fully inserted.
- Page 104 Please follow the following steps to clear the ammed paper if you are prompted of a paper am by the C . 1) Raise the scanning platform until it is locked. Series pen the output bin by the upper right ridge of the concave section. Series...
- Page 105 ) Remove the laser toner cartridge along the guides. Series ently draw the ammed paper out along the paper output direction. Series ) fter removing the ammed paper, insert the laser toner cartridge into the printer along the guides until you hear a click assuring you that the cartridge is fully inserted. Series...
- Page 106 ) eatly put the paper in the tray , and do not carry out the ne t print until the indicator light resumes print-ready status. ) If you can not remove the ammed paper yourself, please contact your local Pantum uthori ed Repair Center or send the printer to the nearest Pantum uthori ed Service Center for repair. rror...
- Page 114 First-level Second-level Third-level Fourth-level Sixth-level Fifth-level Menu Menu Menu Menu Menu Menu 1. Close* 2. 2X2 5. Clone 3. 3X3 4. 4X4 1. A4* 2. Letter 3. B5 1. Paper Size 4. A5 5. A6 6. Executive 6. Paper 1. Plain Paper* Setting 2.
- Page 115 First-level Second-level Third-level Fourth-level Fifth-level Sixth-level Menu Menu Menu Menu Menu Menu 1. Manual adjustment* 1. Luminosity 2. Automatic adjustment 1. A4* 3.Bill Copy 2. Letter 3. B5 2. Paper 1. Paper Size Setting 4. A5 5. A6 6. Executive 13.2.
- Page 116 13.3. System Settings General Menu Structure First-level Second-level Third-level Fourth-level Fifth-level Sixth-level Menu Menu Menu Menu Menu Menu 1. Close* 1. Toner Save Setting 2. Open 2. English 3. Italiano 2. Language Setting 5.Français 6. Español 7. 繁體中文 8. 日本語 3.
- Page 118 13.4. Information Report General Menu Structure First-level Third-level Fourth-level Fifth-level Sixth-level Second-level Menu Menu Menu Menu Menu Menu 1. Print Demo Page 2. Print Information Page 3. Print Menu Structure 4. Print Menu Setting 5. Print Network 4. Information 6. Print Network Service Report 7.
- Page 120 Product S ecifications ote:...
- Page 121 1-99 Pages Successive Print Zoom Ratio 25%~400% Other Copy Functions ID copy, Receipt copy, N-up copy, Clone copy Scan Type Flatbed+ADF(M6550 Series) Flatbed: 216×297mm Maximum Scan Size ADF: 216 x 356 mm Chromoscan Scan Output Function Scan to E-mail, PC, FTP...
Need help?
Do you have a question about the M6550 Series and is the answer not in the manual?
Questions and answers