Table of Contents
Advertisement
Quick Links
Advertisement
Table of Contents

Subscribe to Our Youtube Channel
Related Manuals for Insportline inCondi T5000+


Summary of Contents for Insportline inCondi T5000+
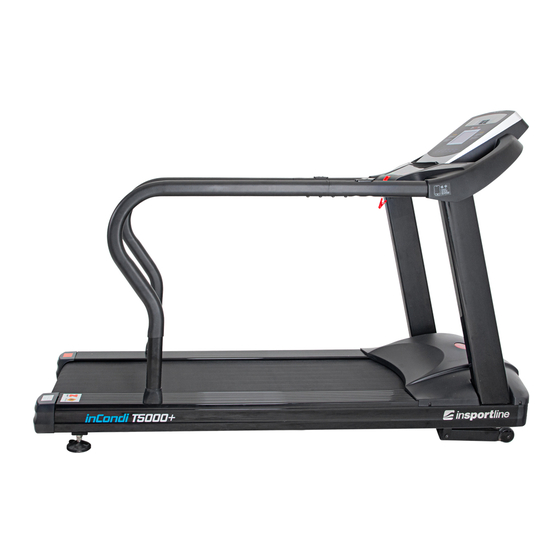
- Page 1 USER MANUAL – EN IN 23234 Treadmill inSPORTline inCondi T5000+...
-
Page 2: Table Of Contents
CONTENTS SAFETY INSTRUCTIONS ........................3 DIAGRAM ..............................5 PARTS LIST ............................6 PRODUCT DESCRIPTION ........................7 ASSEMBLY ............................. 7 USE ................................. 9 CONSOLE ............................. 10 BLUETOOTH CONNECTION ......................13 KINOMAP APP ............................17 ZWIFT APP ............................18 GENERAL TRAINING RECOMMENDATIONS ..................18 GETTING STARTED .......................... -
Page 3: Safety Instructions
SAFETY INSTRUCTIONS • Read the manual before assembly and first use and keep it for future reference. • Make sure you have a safety key attached to your clothes. • Never insert any foreign objects into the openings. • Place the belt on a flat and clean surface. Do not place the belt on carpets or surfaces that could affect ventilation. - Page 4 PACKAGE CONTENTS Read the manual before assembly. Pull all parts out to a clean surface. Dispose of packaging material in accordance with laws and regulations. Make sure that no part of the treadmill is missing. Main frame Left/right post Console Assembly material Sleeves for handlebar Handlebar bottom...
-
Page 5: Diagram
DIAGRAM... -
Page 6: Parts List
PARTS LIST No. Name No. Name 1 Main frame 30 Right post cover 2 Incline frame 31 Holes for side covers 3L Left post 32 Top console cover 3R Right post 33 Bottom console cover 4 Console and handlebars holder 34 Console 5L Left handlebar 35 Buttons... -
Page 7: Product Description
PRODUCT DESCRIPTION Console Incline frame Control buttons Motor cover Side handles Posts Rear cover Safety key Running belt ASSEMBLY STEP 1 Remove the motor cover by removing marked bolts. - Page 8 STEP 2 Attach the posts. The communication cable must pass through the right post, be careful not to pinch the cable between the post and the frame. Attach the posts to the frame with 8x bolts M10x20, 8x washers, 4x bolts M8x20 and 4x washers. STEP 3 Connect the communication cables, being careful not to pinch the cables between the post and the frame.
-
Page 9: Use
STEP 4 Attach the engine cover with the bolts you removed in the first step. Insert the covers on the underside of the handles. Then fasten the handles to the console and handles holder with 8x bolts M10x20 and 8x washers. Then fasten the handles to the main frame with 4x bolts M8x50, 4x washers and 4x sleeves. -
Page 10: Console
CONSOLE Display Time 00:00-99:59 min 0.5 – 8.0 km/h Speed Incline 0-22% Distance 0.00-99.9 km Calorie 0-999 KCAL Heart rate 40-250 / Min Preset program P1-P12 User programs U1, U2, U3 Program Panel Keys and Function:... - Page 11 START button: Press "Start" key, there will be 3 seconds countdown displayed on the window. After countdown, the machine will run at the speed of 0.5 km/h. STOP button: Under running condition, press “Stop” button, it will slow down then stop. RESET: Press "Stop"...
- Page 12 Direct INCLINE buttons Press the button to set incline to 3%, 6%, 9%, 12%. Use this button to turn on or turn off the fan. SCREEN PACE: Display the pace CALORIES: Display burned calories TIME: Display time DISTANCE: Display distance PULSE: Display heart rate;...
-
Page 13: Bluetooth Connection
BLUETOOTH CONNECTION Turn on Bluetooth and search on your phone or tablet “Fs-xxxx-A” (x are unique numbers). Pair the device. After you pair the device, you can play and control your favorite music from your device. PROGRAMS Quick start (for manual mode) •... - Page 14 up the next segment. After finishing setting up all 9 segments, press “Start” to start the treadmill. User programs will be saved in the treadmill unless you reset them. These data can’t be lost even during an outage. Explanation: Every program has 9 segments. You can only press “START” key to start the treadmill after finishing all segments setting and total exercise time.
- Page 15 WARNING! The heart rate monitoring system may not be accurate. Overextending during training can cause serious injury or death. If you feel nauseous, stop the exercise immediately! Power save mode The treadmill has power save function. When you turn on power switch for 10 minutes and do not press any key, the treadmill will enter power save mode and the backlight of the display will turn off.
- Page 16 PRESET PROGRAMS WORKOUT CHART TIME PROGRAME 1 2 3 4 5 6 7 8 2 3 3 4 5 3 4 5 SPEED 0 7 7 6 6 5 5 4 INCLINE 2 4 4 5 6 4 6 6 SPEED 0 3 3 5 5 7 7 9 INCLINE...
-
Page 17: Kinomap App
KINOMAP APP • Download KINOMAP app from Google store or Apple store. • Open the app and choose MORE on bottom left corner. • Choose Equipment management. • Choose Treadmill icon. • Choose FitShow brand. • Pair the treadmill: „Fs-xxxx“ (x is random treadmill number) and pair with your smart device. •... -
Page 18: Zwift App
Save exercises and history. Optimized for external displays such as Apple TV or HDMI. View or create music playlists. Warm-up or interval training. Ability to share results on Facebook and other social networks. *Android devices currently do not support interval training for treadmills. ZWIFT APP •... -
Page 19: Getting Started
Regularly measure your heart rate. If your device is not equipped with a heart rate monitor, talk to your doctor about how you can measure the heart rate yourself. Determine the interval in which your heart rate will move, so training will be more effective. Consider your age and physical condition. The following table is used to determine the optimal heart rate interval: Heart rate frequency 50-75% (from maximum heart rate) –... -
Page 20: Safe Exercise
It is best to exercise for 15-20 minutes. The warm up phase should take about 2 minutes at 4.8 km / h, then increase the speed to 5.3 and 5.8 km / h, each phase should take about 2 minutes. Then add speed every 2 minutes at 0.3 km / h and accelerate until your breathing frequency increase. -
Page 21: Getting Started
Touching your toes Slowly bend your back from hips. Keep your back and arms relaxed while stretching downwards to your toes. Do it as far as you are able and hold the position for 15 seconds. Bend your knees slightly. Shoulder lifts Raise your right shoulder up towards your ear and hold for 2 seconds. -
Page 22: Safe Exercise
The optimal frequency is 3-5 times per week after 15-60 minutes. We recommend first making a schedule and sticking to it. It is not recommended to increase incline during the initial exercise phase. Increase the slope only when increasing the exercise load. HOW TO EXPERIENCE It is best to exercise for 15-20 minutes. -
Page 23: The Adjustment Steps For Poly V-Belt
b) Turn the speed to be around 3km/h, step on the running belt by pressure and try your best to make the running belt stop. If running belt stops, together with the front roll, but the motor still runs, under this condition, it means the poly V-belt needs to be adjusted. -
Page 24: Librication
Frequency: • Frequent use (more than 5 hours per week) – every 2 months • Always use silicon oil inSPORTline. How to lubricate: • Please unplug power supply for the treadmill and loosen the belt (Belt tension screw located at the end of the treadmill). -
Page 25: Guides For Malfunction
• This treadmill is not suitable as a professional or medical purpose. It can also not be used for healing purposes. • The heart rate monitor is not a medical device. It provides only approximate information about your average heart rate, and any suggested pulse rate is not medically binding. Accumulated data may not always be accurate regarding uncontrollable human and environmental factors. -
Page 26: Environment Protection
the screen connection cable The incline motor wires are not Displayed Incline error connected properly, or the incline the screen motor is broken Displayed E0P on Wrong set parameter or broken Speed error the screen sensor wire Displayed E0C on Short-circuit protection PCB MOS or motor are broken the screen... - Page 27 The Seller provides the Buyer a 24 months Warranty for Goods Quality, unless otherwise specified in the Certificate of Warranty, Invoice, Bill of Delivery or other documents related to the Goods. The legal warranty period provided to the Consumer is not affected. By the Warranty for Goods Quality, the Seller guarantees that the delivered Goods shall be, for a certain period of time, suitable for regular or contracted use, and that the Goods shall maintain its regular or contracted features.
- Page 28 26847264 VAT ID: CZ26847264 Phone: +420 556 300 970 E-mail: eshop@insportline.cz reklamace@insportline.cz servis@insportline.cz Web: www.inSPORTline.cz inSPORTline s.r.o. Headquaters, warranty & service center: Električná 6471, Trenčín 911 01, SK CRN: 36311723 VAT ID: SK2020177082 Phone: +421(0)326 526 701 E-mail: objednavky@insportline.sk reklamacie@insportline.sk servis@insportline.sk...
Need help?
Do you have a question about the inCondi T5000+ and is the answer not in the manual?
Questions and answers