Table of Contents
Advertisement
Quick Links
Advertisement
Table of Contents

Related Manuals for Insportline inCondi T40i


Summary of Contents for Insportline inCondi T40i
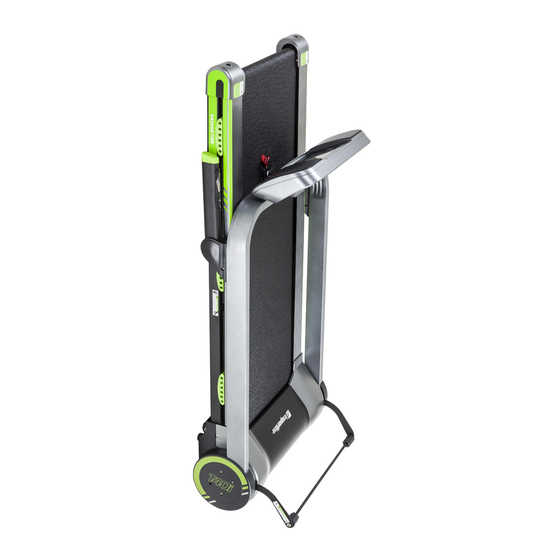
- Page 1 USER MANUAL – EN IN 13000 Treadmill inSPORTline inCondi T40i...
-
Page 2: Table Of Contents
CONTENTS IMPORTANT SAFETY PRECAUTIONS ....................3 ASSEMBLY INSTRUCTIONS ......................... 4 ASSEMBLY STEPS ..........................4 TECHNICAL PARAMETER ......................... 7 OPERATION GUIDE ..........................8 WINDOW DISPLAY ..........................8 SOFTWARE INSTRUCTION ....................... 9 BUTTON FUNCTION ........................... 9 QUICK START MODE ........................10 OPERATION DURING EXERCISE ....................10 MANUAL MODE .......................... -
Page 3: Important Safety Precautions
IMPORTANT SAFETY PRECAUTIONS 1. Plug the power cord of the treadmill directly into a dedicated grounded circuit. This product must be grounded well. If it breaks down, grounding provides a path of least resistance for electric current to reduce the risk of electric shock. 2. -
Page 4: Assembly Instructions
ASSEMBLY INSTRUCTIONS When you open the carton, you will find the below spare parts: Spare parts list: Q’TY Q’TY NO. DESCRIPTION SPEC. DESCRIPTION SPEC. Main Frame 5# Allen Wrench Safety Key Bolt M8*42 Assembly tools: Q’TY DESCRIPTION SPEC. 5# Allen Wrench ASSEMBLY STEPS Notice: Do not turn power on before assembly is done Step 1:... - Page 5 Step 2: Pull up the console as the direction of the arrow. Please make sure the connect wires of console is not pressed. Lock the (#32) screw with #5 wrench. Step 3: Pull up the part (A-1) as the direction of the arrow.
- Page 6 Step 5: Press down the part (A-1) and then pull up the Left & Right part (A-2) as the direction of the arrow. Step 6: Turn the handle bars (B & C) down with clockwise rotation. FOLDING INSTRUCTION Pulling up: Turn the handle bars up and put them on the position shown on the picture.
-
Page 7: Technical Parameter
Pulling down: Put the Main Frame A on the ground and press down the part A-1, then pull up the part A-2 till you hear the sound “KA”. At the end, turn the Handle Bars (B & C) down with clockwise rotation. -
Page 8: Operation Guide
OPERATION GUIDE WINDOW DISPLAY 1. “SPEED” window: In standby or operation state, the LED backlight will be on and display the current speed. The range of speed is 1.0-16.0 km/h. When the treadmill starts, it displays “3”, “2”, “1”. 2. “DIS., TIME, CAL.” Window: When the “TIME” LED is on, it will display the exercise time the range is 00:00 - 99:59. -
Page 9: Software Instruction
for reference and cannot be used as medical data). When the “INCLINE” LED is on, it will display the current incline level and the range is 0-12%. SOFTWARE INSTRUCTION 1. Software version requirements: The device needs to meet with the below requirements to connect to and control the treadmill: Android Version: Android 4.3 or above version Table PC Version: Blue Tooth BLE4.0 or above... -
Page 10: Quick Start Mode
4. Speed “+”/ “-” buttons: When the treadmill is in standby mode, use them to adjust the set value. When start the treadmill, press the “+”, “-” buttons to adjust the speed by 0.1km each time. Pressing the buttons for more than 0.5 second, the speed will be increase or decrease continuously. 5. -
Page 11: Program Description
sections for internal program, and exercise time for each section is setting time/16. It will buzzer Bi-Bi- Bi sounds to enter next section, and the speed and incline will also be different when the programs are changed. The runner can still change the speed and incline by pressing “INCLINE+”, “INCLINE -”, “SPEED+”, “SPEED -”... -
Page 12: User-Defined Programs
USER-DEFINED PROGRAMS Except 12 internal programs, there are still 3 programs for user to define by themselves (U01, U02, and U03). 1. Setting of user-defined programs: When the treadmill is in standby mode, press the "PROG" button continuously until it will enter user- defined programs (U01, U02, and U03). -
Page 14: Fat Test
1. When the treadmill is in standby mode, press the "PROG" button continuously and the window will display HP1, HP2, or HP3. Mark: Press the START button under the display of HP1 or HP2 or HP3, the system will recommend a heart rate data for user automatically (The data is shown as below). -
Page 15: Range Of Program
proportions. FAT is appropriate for any male and female and provides the basis for weight adjustment together with other health indicators. The ideal FAT should be between 20 and 24. Less than 19 is underweight. Between 25 and 29 is overweight, and if more than 30 is obese. (The data is for reference only and cannot be used as medical data.) Gender 01 Male... -
Page 16: Exercise Instructions
Remote-Control Unit: Joystick Finger Ring Incline Up Button Battery Cover Indicate Light Incline Down Button Battery Bolt & Rubber Speed Up Button Battery Case Speed Down Button Battery Lock Clip START / STOP TURNING OFF: Turn off the power to stop the treadmill at any time, which won’t damage the treadmill. CAUTION: 1. -
Page 17: Maintenance Instructions
This stage should last for a minimum of 12 minutes. 3. The Cool Down Phase This stage is to let your cardio-vascular system and muscles wind down. This is a repeat of the warm up exercise e.g. reduce your tempo, continue for approximately 5 minutes. The stretching exercises should now be repeated, again remember that not to force or jerk your muscles into the stretch. -
Page 18: Cleaning
PIC B PIC A Picture A: If the belt has drifted to the RIGHT Picture B: If the belt has drifted to the LEFT WARNING: ALWAYS UNPLUG THE TREADMILL FROM THE ELECTRICAL OUTLET BEFORE CLEANING OR SERVICING THE UNIT. CLEANING General cleaning or the unit will greatly prolong the treadmill. - Page 19 EXPLODED DRAWING...
-
Page 20: Parts List
PARTS LIST Q’TY Q’TY DESC. SPEC. DESC. SPEC. Incline Main Frame Bolt M6*55 Main Frame Bolt M6*35 Upright Post Frame Bolt M6*30 Turn Axis Left Fixing Board Bolt M8*12 Enhance Tube Frame Bolt M8*16 Left Handle Bar Frame Bolt M8*65 Right Handle Bar Frame Bolt M6**16... -
Page 21: Trouble Shooting Guide
Right Upright Decoration Right Wheel Frame Cover-R Driving Belt J170-6 Safety Switch EVA Pad Moving Wheel Pulse Up Wire Cushion Pad Incline Key-Press Up Wire Flat Foot Pad Bolt M8*35 Left Handle Bar Decoration Power Wire Clip Cover Right Handle Bar Decoration Running Belt Cover Left Upright Decoration... - Page 22 A. The safety key is not Re-put the safety key on the attached well. console. ---or----(or E00/E07) C. Magnetron is not The magnetron is mounted to the attracted. correct position. A. The signal of the console Reconnect the lines. E01-communication line is not good.
-
Page 23: Terms And Conditions Of Warranty, Warranty Claims
A. Drive torque is too big. Adjust torque potentiometer to E10-Usually for proper position. abnormal motor B. Motor internal is short Replace motor. transient peak circuited. current, over-current C. The driving part is Adjust the transmission parts or add protection jammed. - Page 24 Borivojova 35/878, 130 00 Praha 3, Czech Republic Headquarters: Delnicka 957, 749 01 Vitkov, Czech Republic Warranty & Service Centre: Cermenska 486, 749 01 Vitkov, Czech Republic CRN: 26847264 VAT ID: CZ26847264 Phone: +420 556 300 970 E-mail: eshop@insportline.cz reklamace@insportline.cz servis@insportline.cz Web: www.insportline.cz...
- Page 25 INSPORTLINE s.r.o. Headquarters, Warranty & Service centre: Elektricna 6471, 911 01 Trencin, Slovakia CRN: 36311723 VAT ID: SK2020177082 Phone: +421(0)326 526 701 E-mail: objednavky@insportline.sk reklamacie@insportline.sk servis@insportline.sk Web: www.insportline.sk Date of Sale: Stamp and Signature of Seller:...
Need help?
Do you have a question about the inCondi T40i and is the answer not in the manual?
Questions and answers