Table of Contents
Advertisement
Advertisement
Table of Contents

Related Manuals for Insportline inCondi T40i


Summary of Contents for Insportline inCondi T40i
- Page 1 USER MANUAL – EN IN 13000 Treadmill inSPORTline inCondi T40i...
-
Page 2: Table Of Contents
CONTENTS IMPORTANT SAFETY PRECAUTIONS ....................3 ASSEMBLY INSTRUCTIONS ......................... 4 ASSEMBLY STEPS ..........................4 TECHNICAL PARAMETER ......................... 7 OPERATION GUIDE ..........................8 WINDOW DISPLAY ..........................8 SOFTWARE INSTRUCTION ....................... 8 BUTTON FUNCTION ..........................9 QUICK START MODE (MANUAL)..................... 10 MANUAL MODE ..........................11 PRE-SET PROGRAMS ........................ -
Page 3: Important Safety Precautions
IMPORTANT SAFETY PRECAUTIONS 1. Plug the power cord of the treadmill directly into a dedicated grounded circuit. This product must be grounded well. If it breaks down, grounding provides a path of least resistance for electric current to reduce the risk of electric shock. 2. -
Page 4: Assembly Instructions
ASSEMBLY INSTRUCTIONS When you open the carton, you will find the below spare parts: Spare parts list: Q’TY Q’TY NO. DESCRIPTION SPEC. DESCRIPTION SPEC. Main Frame 5# Allen Wrench Safety Key Bolt M8*42 Assembly tools: Q’TY DESCRIPTION SPEC. 5# Allen Wrench ASSEMBLY STEPS Notice: Do not turn power on before assembly is done Step 1:... - Page 5 Step 2: Pull up the console as the direction of the arrow. Please make sure the connect wires of console is not pressed. Lock the (#32) screw with #5 wrench. Step 3: Pull up the part (A-1) as the direction of the arrow.
-
Page 6: Folding Instruction
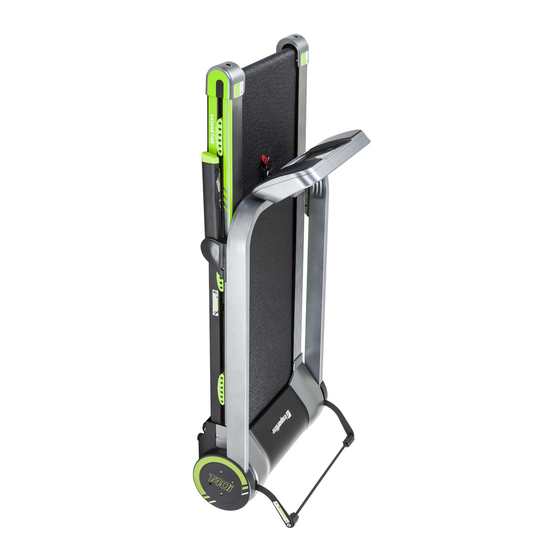
Step 5: Press down the part (A-1) and then pull up the Left & Right part (A-2) as the direction of the arrow. Step 6: Turn the handle bars (B & C) down with clockwise rotation. FOLDING INSTRUCTION Pulling up: Turn the handle bars up and put them on the position shown on the picture. -
Page 7: Technical Parameter
Pulling down: Put the Main Frame A on the ground and press down the part A-1, then pull up the part A-2 till you hear the sound “KA”. At the end, turn the Handle Bars (B & C) down with clockwise rotation. -
Page 8: Operation Guide
OPERATION GUIDE WINDOW DISPLAY 1. “SPEED” window: Under standby or operation state, the LED light will be on and display the current speed, and the range of the speed is 1.0-16.0 KM/H. 2. “DIS., TIME, CAL.” Window: When the “DISTANCE” LED light is on, it will display the exercise distance, and the range is 0.0 -- 99.0 KM. -
Page 9: Button Function
Apple IPAD Table PC: IOS operation system IOS 7 or above IPAD model: I PAD mini, I PAD mini2, I PAD mini3, I PAD Air, I PAD Air2. 2. Software download & Install: Android System: (1). Scan the below QR CODE to get the download link. to down load the file name “C2-Treadmill”... -
Page 10: Quick Start Mode (Manual)
5. APP Operation: Please press the “ ” Button to get the operation help. 6. After you finish install the APP software, the system will create an icon “ “ on your system desk and clip the icon to run the software. 7. -
Page 11: Manual Mode
5. Pull out the safety pulling rope, and then the treadmill will stop immediately. All the windows display “―――”,the buzzer will make 4 sound “Bi-Bi-Bi”, and the treadmill will become stopped. MANUAL MODE 1. When the treadmill is under the standby state, press START/STOP button, the treadmill will start to run from the speed of 1.0km/h and the inline of “0”... -
Page 12: Bluetooth & Mp3 (Option)
BLUETOOTH & MP3 (Option) 1. If the Mobile phone, Table PC is ever connected to the treadmill, they will find out the Bluetooth “C2-AUDIO-BT” and connect to it automatic when there is no LINE-IN signal, USB or SD card to insert in. You can play the music through the APP software of your Mobile phone, Table PC. 2. -
Page 13: Maintenance Instructions
This stage should last for a minimum of 12 minutes. 3. The Cool Down Phase This stage is to let your cardio-vascular system and muscles wind down. This is a repeat of the warm up exercise e.g. reduce your tempo, continue for approximately 5 minutes. The stretching exercises should now be repeated, again remember that not to force or jerk your muscles into the stretch. -
Page 14: Cleaning
WARNING: ALWAYS UNPLUG THE TREADMILL FROM THE ELECTRICAL OUTLET BEFORE CLEANING OR SERVICING THE UNIT. CLEANING General cleaning or the unit will greatly prolong the treadmill. Keep treadmill clean by dusting regularly. Be sure to clean the exposed part of the deck on either side of the walking belt and also the side rails. - Page 15 EXPLODED DRAWING...
-
Page 16: Parts List
PARTS LIST Q’TY Q’TY DESC. SPEC. DESC. SPEC. Incline Main Frame Bolt M6*55 Main Frame Bolt M6*35 Upright Post Frame Bolt M6*30 Turn Axis Left Fixing Board Bolt M8*12 Enhance Tube Frame Bolt M8*16 Left Handle Bar Frame Bolt M8*65 Right Handle Bar Frame Bolt M6**16... -
Page 17: Trouble Shooting Guide
Right Upright Decoration Right Wheel Frame Cover-R Driving Belt J170-6 Safety Switch EVA Pad Moving Wheel Pulse Up Wire Cushion Pad Incline Key-Press Up Wire Flat Foot Pad Bolt M8*35 Left Handle Bar Decoration Power Wire Clip Cover Right Handle Bar Decoration Running Belt Cover Left Upright Decoration... -
Page 18: Terms And Conditions Of Warranty, Warranty Claims
“- - -” Safety off The probable reason is the safety key is not attached well or safety key switch board is broken or the terminal comes off. Re-put the safety key onto the console. Connect the terminals well or change the safety key switch board. - Page 19 VAT ID: CZ26847264 Phone: +420 556 300 970 E-mail: eshop@insportline.cz reklamace@insportline.cz servis@insportline.cz Web: www.insportline.cz INSPORTLINE s.r.o. Headquarters, Warranty & Service centre: Elektricna 6471, 911 01 Trencin, Slovakia CRN: 36311723 VAT ID: SK2020177082 Phone: +421(0)326 526 701 E-mail: objednavky@insportline.sk reklamacie@insportline.sk servis@insportline.sk Web: www.insportline.sk...
Need help?
Do you have a question about the inCondi T40i and is the answer not in the manual?
Questions and answers