Table of Contents
Advertisement
Quick Links
Advertisement
Table of Contents

Subscribe to Our Youtube Channel
Summary of Contents for Insportline inCondi T420i
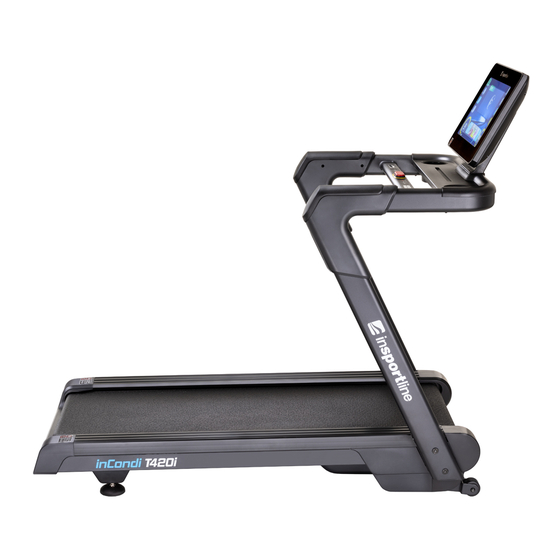
- Page 1 USER MANUAL – EN IN 21321 Treadmill inSPORTline inCondi T420i...
-
Page 2: Table Of Contents
CONTENTS SAFETY INSTRUCTIONS ........................3 PACKAGE ............................... 4 ASSEMBLY ............................5 MOVING ..............................10 CONSOLE ............................. 11 MAINTENANCE GUIDE ........................13 ADJUSTING THE RUNNING BELT....................13 LUBRICATING THE TREADMILL ..................... 14 DIAGRAM .............................. 15 PARTS LIST ............................17 SPARE PARTS (NOT INCLUDED) ....................18 ENVIRONMENT PROTECTION ...................... -
Page 3: Safety Instructions
SAFETY INSTRUCTIONS • Read the manual carefully and keep it for future reference. • Always clip the safety key to your clothes or belt before starting exercising. • Move naturally, forward. Do not look on your feet. Only for one person can use the product on the same time. -
Page 4: Package
• Do not expose to direct sunlight. • Do not place in areas with high humidity (pools, sauna etc.) • Continuous use cannot be longer than 2 hours. • If the treadmill is not in use, remove the safety key. •... -
Page 5: Assembly
Connection material: B03: S=13,14,15 (1x) B04: S5 (1x) B05: S6 (1x) D04: ST4.2x12 (10x) D09: M8x15 (6x) D22: Ø8 (7x) D23: Ø8 (7x) D13: M8x55 (3x) D17: M10x50 (4x) ASSEMBLY Step 1 Pull out treadmill with all parts and connection material. Check that all parts are present. - Page 6 Step 2 Connect the cable (E09) from the main frame (A) to the cable (E08) from the post (C) and then connect the main frame (A) to the post (C) with 2x bolts (D17). Attach the second post (B) to the main frame (A) with 2x bolts (D17).
- Page 7 Step 3 Attach the console bracket with handles (D) to the posts (B, C). Connect the cables (E07 and E08) leading from the console bracket (D) and the post (C). Attach the console holder (D) to the posts (B, C) with 3x bolts (D09), 2x washers (22) and 2x washers (23) on each side.
- Page 8 Step 4 Attach the covers (D05, C07) to the right post / handle using 5x screws (D04). Attach the covers (C04, C06) to the left post / handle using 5x screws (D04).
- Page 9 Step 5 Attach the console (E) to the console bracket (D). Connect the cables and fasten the bracket with 3x bolts (D13), 3x washers (D22) and 3x washers (D23).
-
Page 10: Moving
MOVING Grasp the back of the treadmill and move the treadmill on the wheels. -
Page 11: Console
CONSOLE Funkce tlačítek: 1. INCLINE +: Press to increase incilne. 2. INCLINE -: Press to decrease incline. 3. START: Press to turn on the treadmill. 4. STOP/PAUSE: Press to stop / pause the treadmill. 5. SPEED +: Press to increase speed. 6. - Page 12 3. MOVIE: Display videos in USB connected device. 4. SETTING: Setup of WI-Fi, language, backlight and administrator settings (for service only). 5. VIRTUAL ACTIVE: You can choose from several backgrounds. 6. HRC: Na výběr jsou 3 HRC programy. Pro správnou funkci musíte mít hrudní pás. 7.
-
Page 13: Maintenance Guide
MAINTENANCE GUIDE General cleaning will help to prolong the life and improve performance on your treadmill. Keep the unit clean and maintained by dusting the components on a regular basis, cleaning the two exposed sides of the running belt to prevent dust from accumulating underneath the belt. Keep your running shoes clean so that dirt from the shoes does not wear the running belt. -
Page 14: Lubricating The Treadmill
LUBRICATING THE TREADMILL Lubricating the running belt & the running board is essential as the friction affects the life span and operations of the treadmill. Therefore, we suggest you to inspect the running belt regularly. WARNING: Always unplug the treadmill from the electrical outlet before cleaning, lubricating, or repairing the unit. -
Page 15: Diagram
DIAGRAM... -
Page 17: Parts List
PARTS LIST Name Spec. Name Spec. Main frame Cushion Incline bracket Black cushion Console base bracket Nylon sleeve Console bracket Foot pad Left post Motor belt Right post Panel top cover Locking plate Panel bottom cover Screen fixing plate Cone-cushion Front roller Cushion Back roller... -
Page 18: Spare Parts (Not Included)
Screw ST2.9*8 Panel connecting wire Running board Connecting wire DC motor Connecting wire 1 Incline motor Speaker Console Bluetooth module Control board Overload protector Top signal wire Speed sensor Top signal wire 1 Power socket Middle signal wire Power wire Bottom signal wire On-off switch Hand pulse top signal wire... - Page 19 All Warranty Conditions stated here under determine Warranty Coverage and Warranty Claim Procedure. Conditions of Warranty and Warranty Claims are governed by Act No. 89/2012 Coll. Civil Code, and Act No. 634/1992 Coll., Consumer Protection, as amended, also in cases that are not specified by these Warranty rules.
- Page 20 26847264 VAT ID: CZ26847264 Phone: +420 556 300 970 E-mail: eshop@insportline.cz reklamace@insportline.cz servis@insportline.cz Web: www.inSPORTline.cz inSPORTline s.r.o. Headquaters, warranty & service center: Električná 6471, Trenčín 911 01, SK CRN: 36311723 VAT ID: SK2020177082 Phone: +421(0)326 526 701 E-mail: objednavky@insportline.sk reklamacie@insportline.sk servis@insportline.sk...


Need help?
Do you have a question about the inCondi T420i and is the answer not in the manual?
Questions and answers