Table of Contents
Advertisement
Advertisement
Table of Contents

Subscribe to Our Youtube Channel
Related Manuals for Insportline T5000i


Summary of Contents for Insportline T5000i
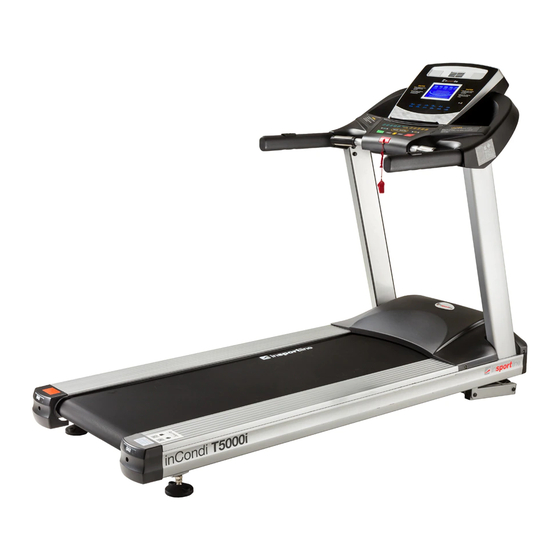
- Page 1 USER MANUAL – EN IN 8728 Motorized Treadmill inSPORTline T5000i...
-
Page 2: Table Of Contents
CONTENTS TIPS FOR SAFETY ..............................3 PACKING DETAILS ..............................4 EXPLODED VIEW ..............................5 PARTS LIST ................................5 TREADMILL STRUCTURE ............................. 7 INSTALLATION SKETCH............................7 USE ..................................9 INSTRUCTIONS FOR CONSOLE ......................... 10 MAINTENANCE ..............................14 CLEANING ................................16 CAUTIONS, DEPOSITING ............................ 16 GUIDES FOR MALFUNCTION .......................... -
Page 3: Tips For Safety
Special tips: Before installation and operation, please read this operation manual carefully and save this manual for future reference. WARRANTY We make sure that this item is made of high quality materials. In normal use, if any problem, we will take charge of maintenance. The warranty time for this item is 24 months (from the day you buy it). -
Page 4: Packing Details
1. Cardiopathy, hypertension, sugar diabetes, respiratory disease, smoking, and other chronic diseases, complication disease. 2. If you are over 35 years old and heavier than common weight. 3. Women in pregnant or in breasting period. SPECIAL TIPS FOR SAFETY Please use qualified socket. -
Page 5: Exploded View
EXPLODED VIEW These are all the components used in installation. All components are listed in the following form. PARTS LIST Component Quantity Frame Incline frame Left pillar accessory Right pillar accessory Dashboard frame Tubular shaft for incline frame Front roller... - Page 6 Back roller AC motor Incline motor Inverter Adjustable foot pad Multislot belt Running belt Running board Motor cover Footplate Left back cover Right back cover Front motor cover Side decorative cover Lifting transporting wheel Shock absorption “o” type socket Overload protector Power switch Decorative cover for left meter tube Decorative cover for right meter tube...
-
Page 7: Treadmill Structure
Green connecting line Red connecting line Red connecting line Green connecting line Yellow/Green ground line Yellow/Green ground line Speaker TREADMILL STRUCTURE INSTALLATION SKETCH Step 1: Remove the motor cover... - Page 8 Step 2: Set meter tubes on the frame a) Let the communication line pass through the meter tube. Set meter tubes on the frame, use 8 pcs of M10*20 screw and 8 pcs of washer to solid the meter tubes. (Don’t fasten screw at first).
-
Page 9: Use
Step 4: Install the motor cover Insert the power plug into the socket and switch on the machine. The switch light will be on and you will hear a voice “Di”. You will find the meter light will also be on. SAFETY KEY The machine can work only when you put safety key at the appointed position. -
Page 10: Instructions For Console
INSTRUCTIONS FOR CONSOLE TECH INFO Time 00:00-99:59 min Speed 1.0-22.0 km/h Incline 0-22% Distance 0.00-99.9 km Calorie 0-999 KCAL Heart rate 40-250 / Min Preset program P1-P99 Program User-defined program U1.U2.U3 Body Fat BODY FAT Heart rate control... - Page 11 PANEL KEYS AND FUNCTIONS START Key: Press "Start" key, there will be 3 seconds countdown displayed on the window! After countdown, the machine will run at the speed of 1.0km/h. STOP Key: Under running condition, press “Stop” key, it will slow down then stop.
- Page 12 Use this key to turn on or turn off the fan. DISPLAYED WINDOW PACE: Display the time rate; CALORIES: Display running calories TIME: Display running time DISTANCE: Display running distance PULSE: Display running heart rates; Display P1-P99, U1-U3, HRC SPEED: Display running speed INCLINE: Display running incline Display program picture Display runway and number of turns;...
- Page 13 According to your needs, you could use “SPEED+”, “SPEED-” to change speed, use “INCLINE△”, “INCLINE▽” to change incline. When you put your hands on the handlebar’s heart pulse for 5-8 seconds, it will display heart rate on the screen.
-
Page 14: Maintenance
Body Fat Test Under ready condition, press “PROG.” key continuously to come into BODYFAT. Press “MODE” key, you could find “F-1-SEX”,”F-2-AGE”,”F-3-HEIGHT”,”F-4-WEIGHT”,”P”-BODYFAT” displayed on the window. Press “SPEED+”, “SPEED-” to set. After setting, press “MODE” to come into “BODYFAT”. At this time, put your hand on the heart pulse for 5-8 seconds, there will be body fat date displayed on the window. - Page 15 Adjustment running belt a) Turn the speed to be 6km/h for running. b) Turn the both tension screws located at the end of the treadmill on the right and left sides, half a turn clockwise using the Allen key. (Diagram1 and Diagram 2) After adjustment, running belt still slips;...
-
Page 16: Cleaning
CLEANING a) Please power off and pull the plug out before cleaning. b) Wipe out the dust stuck on the surface and running board frequently. Please clean the surface of frame and running belt with a soft cloth dipped with suds, don’t use things like eradicator and naphtha. -
Page 17: Instruction Manual For Irunning
motor wire well Incline doesn’t work Open the motor cover and reconnect it connected Running belt runs faster or slower than Unadjusted Readjust it what been displayed Please read point 6.3 Adjustment steps Running belt slips Running belt is not tight enough for tightening running belt for reference Please read point 6.4 The steps for Running... - Page 18 Enter iRunning → Click to scan device → select device [iRunningXXX] (Note: Please find the device no. from the console). Then perform [Bluetooth pairing device], preset pairing password 0000 (4 zeros). Programs introduction 3.1 Quick Start Start Stop Workout information Start exercise directly.
- Page 19 Warning: During any exercise, if turn on the safety switch, treadmill will pause immediately and show the Warning page; If turn off the safety switch, system will stop current exercise and go to work-out summary page. Warning page: 3.2 Program Program selection Time setting User can select from P1 to P20 for training.
- Page 20 User can set target Time/Distance/Calories by manual. After setting, press to start. During exercise, user can adjust Speed\Incline by pressing console buttons. After exercise, user can share workout information with Facebook or Twitter or else go back to Homepage. 3.4 User Program Setting page Program cluster Time setting...
- Page 21 Warm up Reminder When exercise start, there is 2 minutes Warm up time. If no hand pulse input, system will alarm and remind user to grip handlebar. Without pulse input for 30 seconds, console will stop. Personal Setting Setting page Personal data User may set personal profile by entering [Setting] and select Metric or Imperial.
- Page 22 Select to plan training route. Set Start location by first long press and End location by second long press. After planning the route, press to start training. Start location End location Training page During exercise, user may click to choose monitor routes by Map view/Satellite view/Street view mode.
-
Page 23: Terms And Conditions Of Warranty, Warranty Claims
APP Supported Devices 7.1 Supported mobile devices: Android: 1280*752 Android 4.0 tablet (only for 10 inch above) i-OS: 5.0 or above, iPad4, iPad3, iPad2, iPad, iPad Mini 7.2 Work with machine type: SD8710 console and treadmill TERMS AND CONDITIONS OF WARRANTY, WARRANTY CLAIMS General Conditions of Warranty and Definition of Terms All Warranty Conditions stated hereunder determine Warranty Coverage and Warranty Claim Procedure. - Page 24 If the Buyer gives notice of a defect that is not covered by the Warranty (e.g. in the case that the Warranty Conditions were not fulfilled or in the case of reporting the defect by mistake etc.), the Seller is eligible to require a compensation for all the costs arising from the repair.
Need help?
Do you have a question about the T5000i and is the answer not in the manual?
Questions and answers