Table of Contents
Advertisement
Quick Links
Advertisement
Table of Contents

Related Manuals for Insportline inCondi T20i


Summary of Contents for Insportline inCondi T20i
- Page 1 USER MANUAL – EN IN 22524 Treadmill inSPORTline inCondi T20i...
-
Page 2: Table Of Contents
CONTENTS SAFETY INSTRUCTIONS ........................3 PRODUCT DESCRIPTION ........................4 ASSEMBLY ............................. 5 FOLDING ............................. 6 CONTROL PANEL ..........................7 REMOTE CONTROL ..........................9 KINOMAP APP ............................10 ZWIFT APP ............................11 MAINTENANCE GUIDE ........................11 ADJUSTING THE RUNNING BELT....................11 LUBRICATING THE TREADMILL ..................... -
Page 3: Safety Instructions
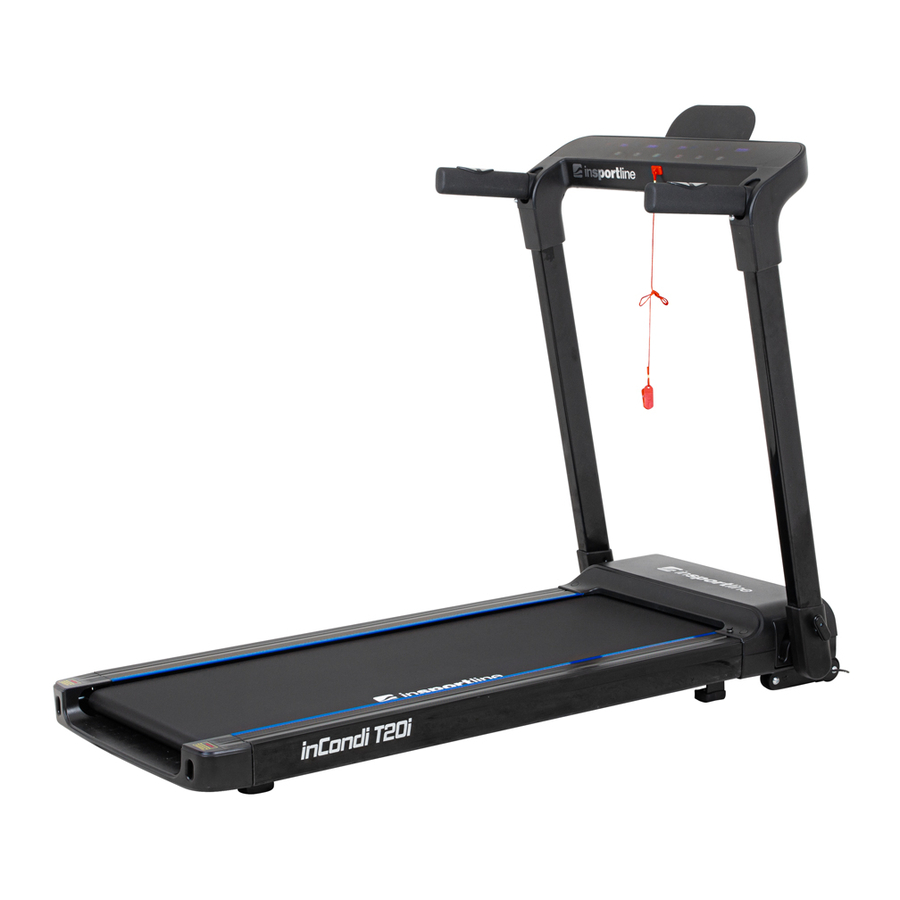
SAFETY INSTRUCTIONS • Read the manual carefully and keep it for future reference. • Always clip the safety key to your clothes or belt before starting exercising. • Move naturally, forward. Do not look on your feet. Only for one person can use the product on the same time. -
Page 4: Product Description
• Do not expose to direct sunlight. • Do not place in areas with high humidity (pools, sauna etc.) • Continuous use cannot be longer than 2 hours. • If the treadmill is not in use, remove the safety key. •... -
Page 5: Assembly
ASSEMBLY STEP 1 Remove the frame from the packing material. STEP 2 Loosen the pins on both sides of the frame. Lift the frame with the handles and then tighten the pins again. STEP 3 Move the handles down. You will hear a click. Attach the safety key. Note: The belt will run without the safety key. -
Page 6: Folding
FOLDING STEP 1 To raise the handles, push the handles and press the buttons under the handles to lift the handles. STEP 2 Loosen the pins on both sides of the frame and place the frame down. Then tighten the pins again. STEP 3 You can transport the belt using the wheels on the base. -
Page 7: Control Panel
CONTROL PANEL The control panel consists of an LED display and touch buttons. Burned calories Program Time Turn on Speed Turn off Steps/pace MODE Heart rate Increase Decrease 00:00 – 99:59 min Time 1.0 – 12.0 km/h Speed 0.00 – 99.9 km Distance 0 –... - Page 8 TURN OFF Press the button to turn off the treadmill. To restart, press the button twice. MODE SELECTION Press the MODE button to select the function (time, distance, calories). The selected function will flash. Press the button repeatedly to change the selected function. +/- BUTTONS Use the buttons to change the preset time, distance or calories in the manual program.
-
Page 9: Remote Control
BLUETOOTH To connect to Bluetooth, search for "FS-xxxx-A" on your device (phone, tablet). Pair your device with the treadmill. Control your music with your setup. POWER SAVING MODE After 10 minutes of inactivity, the treadmill switches to power save mode. Press any button to turn on the treadmill. -
Page 10: Kinomap App
KINOMAP APP • Download KINOMAP app from Google store or Apple store. • Open the app and choose MORE on bottom left corner. • Choose Equipment management. • Choose Treadmill icon. • Choose FitShow brand. • Pair the treadmill: „Fs-xxxx“ (x is random treadmill number) and pair with your smart device. •... -
Page 11: Zwift App
Save exercises and history. Optimized for external displays such as Apple TV or HDMI. View or create music playlists. Warm-up or interval training. Ability to share results on Facebook and other social networks. *Android devices currently do not support interval training for treadmills. ZWIFT APP •... -
Page 12: Lubricating The Treadmill
If the running belt (20) drifts to the right, turn the adjusting bolt on the right side ¼ turn clockwise, then turn the left adjustment bolt ¼ turn counter- clockwise. If the belt does not move, repeat this step until it centers. Refer to image A. If the running belt (20) drifts to the left, turn the adjusting bolt on the left side ¼... -
Page 13: Parts List
All moving parts must move freely and quietly. Abnormal movement may impair product safety. Check and tighten all screws regularly. Proper and regular maintenance extends the lifespan of the treadmill. PARTS LIST Name Specifications Qty. Main frame 1460*565*150 Motor base T3.0*207*90 ∮8*280 Lubricant tube... - Page 14 ∮90*20*n12*498*∮38*466 Front roller ∮38*451*n12*497 Back roller PCB board Transporting wheel ∮13*8 Oiling plug Standing bracket 559*195*40 ∮1.5*60*23*16 Torsion spring Left post 970*109*60 ∮20*M16*10 Cover of locking shaft Lock Washer T2.5*59.5*18 ∮14*87 Locking shaft Bottom outer cover 169*82*22 Bottom inner cover 169*82*21 Post casing 73.5*35*T2.0*740...
-
Page 15: Diagram
DIAGRAM ERROR CODES E01 Motherboard or communication cable error Communication cables are damaged or Check the condition and connection of the incorrectly connected cables No signal from the console motherboard Replace or repair the console motherboard No signal from the motherboard Replace or repair the system board E02 Motor and motherboard communication error The motherboard is not properly connected... -
Page 16: Environment Protection
E04 Overvoltage or overvoltage protection fault Overvoltage Use the correct voltage Engine or speed sensor error Replace the motor or speed sensor Damage to the motherboard Replace or repair the system board E05 Motherboard and motor overvoltage Treadmill overload or motor overvoltage Use the treadmill in accordance with the manual Engine blocked... - Page 17 Warranty Conditions Warranty Period The Seller provides the Buyer a 24 months Warranty for Goods Quality, unless otherwise specified in the Certificate of Warranty, Invoice, Bill of Delivery or other documents related to the Goods. The legal warranty period provided to the Consumer is not affected. By the Warranty for Goods Quality, the Seller guarantees that the delivered Goods shall be, for a certain period of time, suitable for regular or contracted use, and that the Goods shall maintain its regular or contracted features.
- Page 18 26847264 VAT ID: CZ26847264 Phone: +420 556 300 970 E-mail: eshop@insportline.cz reklamace@insportline.cz servis@insportline.cz Web: www.inSPORTline.cz inSPORTline s.r.o. Headquaters, warranty & service center: Električná 6471, Trenčín 911 01, SK CRN: 36311723 VAT ID: SK2020177082 Phone: +421(0)326 526 701 E-mail: objednavky@insportline.sk reklamacie@insportline.sk servis@insportline.sk...
Need help?
Do you have a question about the inCondi T20i and is the answer not in the manual?
Questions and answers
Don't work, totaly new...whit this mistake an then -----
If your Insportline inCondi T20i is not working, follow these steps:
1. Check the Power Supply – Ensure the treadmill is properly plugged in and the power source is working.
2. Verify the Safety Key – Make sure the safety key is correctly positioned, as the treadmill will not operate without it.
3. Inspect Error Codes – If an error code appears, refer to the manual:
- E02: Check the motor connection.
- E03: Inspect or replace the speed sensor.
- E04 & E05: Ensure correct voltage and check the motor.
- E06: Verify the power supply.
- E07: Ensure the safety key is properly placed.
4. Restart the Treadmill – Turn it off, wait a few minutes, and restart.
5. Check the Running Belt – If the belt is not moving, adjust or lubricate it.
6. Contact Support – If the issue persists, refer to the warranty and service information to contact the manufacturer.
Follow these troubleshooting steps before seeking professional repair.
This answer is automatically generated
@Mr. Anderson where can I find safety key?
The runner dont want to work
The inSPORTline inCondi T20i treadmill may not be working due to several possible reasons:
1. Safety Key Not Attached – Ensure the safety key is properly clipped to your clothes or inserted in the treadmill.
2. Power Issues – Check if the treadmill is plugged in and the power switch is turned on.
3. Error Codes – If an error code is displayed, refer to the manual for troubleshooting steps.
4. Loose or Misaligned Running Belt – Inspect and adjust the belt if necessary.
5. Lack of Lubrication – The treadmill may need lubrication for proper functioning.
6. Remote Control or Control Panel Issues – Ensure the control panel and remote are working correctly.
7. Compatibility Issues with Apps – If using apps, verify that Wi-Fi, Bluetooth, and GPS are enabled.
8. Overuse – The treadmill allows a maximum of 2 hours of continuous walking; exceeding this may cause temporary shutdown.
If none of these resolve the issue, consult the warranty or contact support.
This answer is automatically generated