
Related Manuals for Teac CR-H220


Summary of Contents for Teac CR-H220
- Page 1 9A10001600 CR-H220 CD Receiver OWNER’S MANUAL MANUEL DU PROPRIÉTAIRE MANUAL DEL USUARIO...
-
Page 2: Table Of Contents
Contents Thanks you for choosing TEAC. Read this manual carefully to get the best performance from this unit. Contents........2 Before Use . -
Page 3: Sommaire
Indice Nous vous remercions pour l’achat d’un appareil Enhorabuena por la adquisición de un TEAC. Lea TEAC. Lire ce manuel avec attention pour obtenir les detenidamente este manual a fin de obtener el mejor meilleures performances possibles de cet appareil. -
Page 4: Before Use
Before Use Read this before operation < As the unit may become warm during operation, always leave sufficient space around the unit for ventilation. < The voltage supplied to the unit should match the voltage as printed on the rear panel. If you are in any doubt regarding this matter, consult an electrician. -
Page 5: Avant Utilisation
Evite también excessive, à la chaleur, au froid ou à l'humidité. lugares expuestos a vibraciones y muy polvorientos, < Ne pas placer CR-H220 sur le dessus d’un calurosos, fríos o húmedos. amplificateur/ récepteur. < No... -
Page 6: Compact Disc
CD standard may not play back correctly in this player. If you use such discs in this unit, TEAC Corporation and its subsidiaries cannot be responsible for any consequences or guarantee the quality of reproduction. If you experience problems with such non-standard discs, you should contact the producers of the disc. -
Page 7: Disques Compacts
Disques Compacts Manipulación de discos Disques pouvant être lus avec ce lecteur: Discos que se pueden reproducir en esta unidad: • CD audio classiques, portant le logo CD-DA sur • CD-Audio convencionales con el logotipo CD-DA l’étiquette: en la etiqueta: •... - Page 8 Compact Disc < To remove a disc from its storage case, press down on the center of the case and lift the disc out, holding it carefully by the edges. How to remove the disc How to hold the disc <...
- Page 9 Disques Compacts Manipulación de discos Para extraer un disco de su estuche, presione el < Pour sortir un disque de son emballage, appuyer sur la < centro de la caja y levante con cuidado el disco partie centrale de l'étui et sortir le disque en veillant à sosteniéndolo por los bordes.
-
Page 10: Connections 1
Connections 1 CAUTION < Turn off the power of all the equipment before making connections. < Read instructions of each component you intend to use with this unit. < Be sure to insert each plug securely. To prevent hum and noise, do not bundle the connection cords with the power cord or speaker cord. -
Page 11: Connexions 1
Connexions 1 Conexión 1 ATTENTION PRECAUCIÓN < Mettre tous les éléments de votre chaîne hors < Apague todos los componentes antes de realizar tension avant de procéder au raccordement de cet las conexiones. appareil. < Lea las instrucciones de todos los componentes <... - Page 12 VCR, DVD, etc. TAPE LINE LINE LINE DIGITAL IN LINE LINE (OPTICAL) MD, CD-R, etc. Connections 2 TAPE/AUX jacks < When inserting the plug of the optical cable, the protective shutter of the terminal will open and Make sure to connect: you should hear it click into position when fully white plug q white jack (L: left channel) inserted.
- Page 13 Connexions 2 Conexión 2 Prises TAPE/AUX TAPE/AUX Veillez à brancher: Asegúrese de conectar: la fiche blanche q la prise blanche (L: voie gauche) Enchufe blanco q Enchufe blanco (L: canal izquierdo) la fiche rouge q la prise rouge (R: voie droite) Enchufe rojo q Enchufe rojo (R: canal derecho) <...
-
Page 14: Connecting Antennas (Fm)
Connecting Antennas (FM) FM Indoor Antenna Connect the lead-type FM antenna to the FM 75Ω socket, extend the lead and tune the tuner to your favorite station (see page 38). Adjust the antenna in a suitable location like a window frame or wall until the reception is best and then affix the antenna in that position using thumb tacks, push pins or any other suitable means. -
Page 15: Raccordement Des Antennes (Fm)
Raccordement des antennes (FM) Conexión (Antena de FM) Antenne FM intérieure Antena de FM interior Connectez l’antenne FM filaire à la prise FM 75Ω, Conecte la antena de FM monofilar a la toma FM déployez la et accordez vous sur votre station 75Ω, despliegue el cable y sintonice su emisora préférée (voir page 39). -
Page 16: Connecting Antennas (Am)
Connecting Antennas (AM) AM Indoor Loop Antenna The high-performance AM loop antenna provided with this unit is sufficient for good reception in most areas. To stand the loop antenna on a surface, fix the claw to the slot in the antenna base. Connect the loop antenna’s wires to the AM antenna terminals. -
Page 17: Raccordement Des Antennes (Am)
Raccordement des antennes (AM) Conexión (Antena de AM) Antenne AM intérieure à cadre. Antena de cuadro de AM interior L’antenne cadre AM à haute performance fournie En la mayoría de las zonas será suficiente con la avec l’appareil est suffisante pour une bonne antena de cuadro de AM facilitada con la unidad. -
Page 18: Remote Control Unit
Remote Control Unit The provided Remote Control Unit allows the unit to be operated from a distance. When operating the remote control unit, point it towards the REMOTE SENSOR on the front panel of the unit. < Even if the remote control unit is operated within the effective range, remote control operation may be impossible if there are any obstacles between the unit and the remote control. -
Page 19: Boîtier De Télécommande
Boîtier de télécommande Mando a distancia Le boîtier de télécommande fourni permet la La unidad de control remoto suministrada le commande à distance defourni permet la permite controlar el aparato a distancia. commande à distance de l'appareil. Pour Cuando opere con el control remoto, diríjalo hacia l'utilisation du boîtier de télécommande, le diriger el sensor remoto en el panel frontal del aparato. -
Page 21: Name Of Each Control
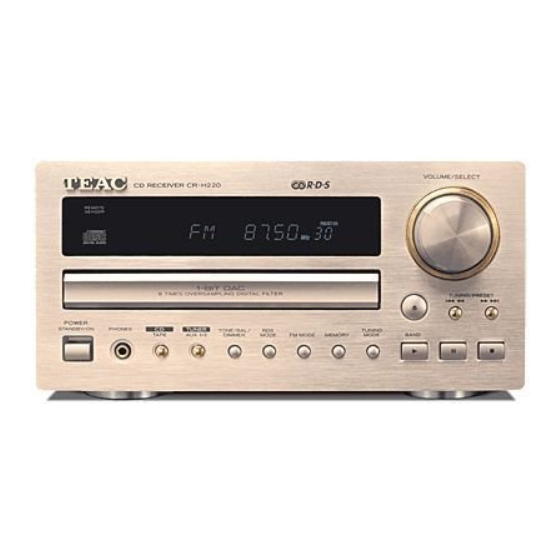
Name of Each Control / Nomenclature / Nombre de los controles Remote Sensor POWER Capteur de télécommande The equipment draws nominal non-operating Sensor remoto power from the AC outlet with its POWER switch in the STANDBY position. Display Ecran d'affichage L’appareil tire de la prise secteur une puissance faible mais non nulle lorsque l’interrupteur Pantalla... -
Page 22: Basic Operation
Basic Operation How to select CD/TAPE Every time the CD/TAPE button is pressed, the mode is changed as follows: TAPE How to select TUNER/AUX 1/2 Every time the TUNER/AUX 1/2 button is pressed, the mode is changed as follows: TUNER AUX 1 AUX 2 Or press the CD, TAPE, AUX 1/2 or TUNER button... -
Page 23: Fonctionnement De Base
Fonctionnement de base Instrucciones básicas Pour selectionner CD/TAPE Cómo seleccionar CD/TAPE A chaque pression sur la touche CD/TAPE, le mode Cada vez que se pulsa el botón CD/TAPE, la change comme indiqué ci-après: modalidad de funcionamiento cambia de la siguiente manera: TAPE TAPE Pour selectionner TUNER/AUX 1/2... -
Page 24: Sleep Timer
Basic Operation How to adjust TONE/BALANCE/DIMMER 1. Press the TONE/BAL button. Each time the TONE/BAL button is pressed, the mode is changed as follows: BASS TREBLE BALANCE DIMMER (normal display) Bass control This control is used for adjusting the level of the low frequency sound range. -
Page 25: Temporisation De Veille
Fonctionnement de base Instrucciones básicas Ajuste TONE/BAL/DIMMER Réglage des commandes TONE/BAL/DIMMER 1. Appuyez sur la touche TONE/BAL. 1. Pulse el botón TONE/BAL. Chaque pression sur la touche TONE/BAL, modifie Cada vez que se pulsa el botón TONE, el modo comme suit les indications affichées: cambia en el siguiente orden: BASS TREBLE... -
Page 26: Listening To Cds
Listening to CDs “NO DISC” will be displayed if no disc is set. Press the CD/TAPE button to select “CD”. Press the OPEN/CLOSE button (L). Place a disc on a tray with the printed surface Press the OPEN/CLOSE button (L) to close a tray. -
Page 27: Lecture Des Disques Compacts
Lecture des disques compacts Escucha de CD S’il n’y a pas de disque dans le lecteur, l’indication “NO DISC” indica que no hay ningún disco insertado “NO DISC” s’affiche. en la unidad. Appuyez sur la touche CD/TAPE pour Pulse el botón CD/TAPE para seleccionar “CD”. sélectionner le “CD”. - Page 28 Listening to CDs To stop playback Press the H (STOP) button to stop playback. To suspend playback temporarily (pause mode) Press the J (PAUSE) button. “CD” indicator blinks in the display, and playback stops at the current position. To resume playback, press the G(PLAY) button or J (PAUSE) button.
- Page 29 Lecture des disques compacts Escucha de CD Pour arrêter la lecture. Para detener la reproducción Pour arrêter la lecture, appuyez sur la touche H Pulse el botón H (STOP) para detener la (STOP). reproducción. Pour arrêter provisoirement la lecture du Para suspender temporalmente...
-
Page 30: Direct Playback
Direct Playback While in stop or playback mode, you can use the numeric buttons of the remote control unit to select a track. Press the numeric buttons to select a track. Playback starts from the selected track. For instance, to select track number 35, press “3” and “5”. -
Page 31: Lecture Directe
Lecture Directe Reproducción directa En mode Stop ou en lecture, vous pouvez utiliser les Desde parada o reproducción, puede usar los botones touches numériques de la télécommande pour choisir numéricos del mando a distancia para seleccionar una un morceau. pista. Pressez les touches numériques pour sélectionner un Utilice los botones numéricos para seleccionar una morceau. -
Page 32: Repeat Playback
Repeat Playback Every time the REPEAT 1/ALL button is pressed, the mode is changed as follows: p (REPEAT) w ALL p (REPEAT ALL) (off) Repeat one track [p Press the REPEAT 1/ALL button during playback and select “p”. The track being played will be played repeatedly. -
Page 33: Lecture Répétée
Lecture répétée Repetición de la reproducción Chaque pression sur la touche REPEAT 1/ALL Cada vez que se pulsa el botón REPEAT 1/ALL, la permet de changer de mode selon l'ordre indiqué modalidad cambia de la siguiente manera: ci-après: p (REPEAT) w ALL p (REPEAT ALL) p (REPEAT) w ALL p (REPEAT ALL) (désactivé) (desactivado) -
Page 34: Programmed Playback 1
Programmed Playback 1 < This function allows you to program up to 32 tracks for playback in any desired order. Press the PROGRAM button in the stop mode. Use the numeric buttons (0-9) to select the desired track. Or select the desired track by pressing the . or/ (SKIP) button and press the PROGRAM button to enter. -
Page 35: Lecture Programmée 1
Lecture programmée 1 Reproducción Programada 1 < Cette fonction vous permet de programmer jusqu'à < Esta función le permite programar hasta 32 pistas 32 plages dans l'ordre de votre choix. para reproducirlas siguiendo el orden que le interesa. Appuyez sur la touche PROGRAM. Pulse el botón PROGRAM hallándose en la modalidad de parada. -
Page 36: Listening To The External Sources
Programmed Playback 2 To clear the program 1. In the stop mode, press the PROGRAM button. 2. Hold down the CLEAR button for more than 2 seconds. < If the OPEN/CLOSE button is pressed, the programmed contents will also be cleared. To add a track to the program PROGRAM In the stop mode, press the PROGRAM button... -
Page 37: Ecoute À Partir D'une Source Externe
Lecture programmée 2 Reproducción Programada 2 Pour effacer la liste programmée Para borrar el programa 1. En mode stop, pressez le bouton PROGRAM. 1. Desde la posición de parada, pulse el botón 2. Maintenez appuyé le bouton CLEAR plus de deux PROGRAM. -
Page 38: Listening To The Radio
Listening to the Radio Press the TUNER/AUX 1/2 button to select “TUNER”. Press the BAND button to select FM or AM. If “PRESET" indicator is lit, press the TUNING MODE button to select the manual tuning mode. The “PRESET” indicator disappears from the display. -
Page 39: Ecoute Radio
Ecoute radio Escucha de la radio Appuyez sur la touche TURNER/AUX 1/2 pour Pulse el botón TUNER/AUX 1/2 para sélectionner le “TUNER”. seleccionar “TUNER”. Appuyez sur la touche BAND pour sélectionner Pulse el botón BAND para seleccionar FM o FM ou AM. Si le voyant “PRESET”... -
Page 40: Preset Tuning 1
TUNING/PRESET Preset Tuning 1 You can store FM and AM stations from Channel 1 to 30 respectively. Automatic Memory Presetting MEMORY BAND 1. Select AM or FM by pressing the BAND button. 2. Press the MEMORY button for 1.5 seconds. Up to 30 of the best received stations in your area will be stored automatically. -
Page 41: Préréglage Des Stations 1
Préréglage des stations 1 Cómo preajustar una emisora de radio 1 Vous pouvez mémoriser des stations FM et AM du Puede almacenar emisoras de FM y AM en los canales canal 1 à 30 respectivement. 1 a 30. Préréglage automatique des stations Presintonización automática 1. - Page 42 Preset Tuning 2 How to select preset stations Select AM or FM by pressing the BAND button. If the “PRESET” indicator isn’t lit, press the TUNING MODE button to select the preset tuning mode. < When using the remote control unit, you can skip this step.
- Page 43 Préréglage des stations 2 Cómo preajustar una emisora de radio 2 Comment sélectionner les stations Cómo seleccionar presintonías préréglées Seleccione AM o FM con el botón BAND. Sélectionnez AM ou FM en pressant le bouton BAND. Si el indicador “PRESET” no está iluminado, pulse TUNING MODE para activar el modo de presintonías.
-
Page 44: Rds (Radio Data System)
RDS (Radio Data System) RDS is a broadcasting service which allows stations to send additional information along with the regular radio program signal. RDS can be received only in FM band. Every time the RDS MODE button is pressed, the mode is changed as follows: PS (Program Service Name) When you select PS, “PS”... -
Page 45: Rds
Le RDS est un service radio qui permet aux stations El sistema RDS es un servicio de radiodifusión mediante émettrices diffuser informations el que las emisoras transmiten información adicional complémentaires parallèlement à l'émission radio elle- junto con la señal normal de radio. La información RDS même. -
Page 46: Rds (Pty Search)
RDS (PTY Search) A station can be searched by this function. Select FM by pressing the BAND button. Press the RDS MODE button for more than 1.5 seconds. “SEARCH” blinks on the display. Select the desired PTY programme using the TUNING/PRESET buttons. -
Page 47: Rds (Recherche Pty)
RDS (Recherche PTY) RDS (Búsqueda PTY) Il est possible de rechercher une station grâce à cette Esta función permite buscar emisoras por tipo de fonction. programa. Sélectionnez le mode FM en appuyant sur le Seleccione FM con el botón BAND. bouton BAND. -
Page 48: Rds (Pty)
RDS (PTY) NEWS : brief announcements, events, public opinion, reports, actual situations. AFFAIRS : a kind of suggestion including practical announcements other than news, documents, discussion, analysis and so on. INFO : daily information or reference such as weather forecast, consumer guide, medical assistance and so on. -
Page 49: Rds (Pty)
RDS (PTY) RDS (PTY) NEWS (nouvelles) : communiqués, événements, sondages, NEWS : mensajes, convocatorias, opinión pública, reportages, situations vécues. informes. AFFAIRS (informations générales) : suggestions diverses, telles AFFAIRS : temas de actualidad, documentos, que des annonces pratiques, à l'exception des debates, análisis, etc. -
Page 50: Troubleshooting 1
Troubleshooting 1 In case of trouble with the unit, please take the time to look through this chart and see if you can solve the problem yourself before you call your dealer or TEAC service center. Amplifier No power e Check the connection to the AC power supply. -
Page 51: Guide De Dépannage
TEAC. de service client TEAC. Amplificador No hay corriente Amplificateur e Revise la conexión con la fuente de CA. - Page 52 Troubleshooting 2 CD Player Cannot play. e Load a disc with label side up. e If the disc is dirty, clean the surface of the disc. e A blank disc has been loaded. Load a prerecorded disc. e Unfinalized CD-R/CD-RW disc is not playable. Finalize the disc properly.
- Page 53 Guide de dépannage Localización de averías Lecteur de disque compact Reproductor de CD Ne fonctionne pas. No reproduce e Placez un disque compact dans la platine, face e Cargue un disco con la cara etiquetada hacia arriba. imprimée vers le haut. e Si el disco está...
-
Page 54: Specifications
Specifications AMPLIFIER section Output Power ..25 W/ch (6 ohms, 0.5 %,1 kHz) Input Sensitivity... . . 300 mV/47k ohms Frequency Response. 20 Hz to 60,000 Hz (+1/-3dB) TUNER Section FM Section Frequency Range . -
Page 55: Spécifications
Spécifications Especificaciones Section AMPLIFICATEUR Sección AMPLIFICADOR Puissance de sortie ..25W/ch (6Ω, 0,5 %,1 kHz) Potencia de salida ....25 W/canal Sensibilité... - Page 56 TEAC ITALIANA S.p.A. Via C. Cantù 11, 20092 Cinisello Balsamo, Milano, Italy Phone: 02-66010500 TEAC AUSTRALIA PTY., LTD. 280 William Street, Melbourne VIC 3000, Australia Phone: (03) 9672-2400 A.B.N. 80 005 408 462 This appliance has a serial number located on the rear panel. Please record the model number and serial number and retain them for your records.
Need help?
Do you have a question about the CR-H220 and is the answer not in the manual?
Questions and answers